

Understanding Terminologies
- Patient Vitals
Patient vitals refer to essential measurements that indicate the body’s basic functions and overall health status. Common vitals include temperature, blood pressure, heart rate, respiratory rate, and other key indicators used to monitor a patient's physical condition over time.
- Quick Vitals Entry
Quick vitals entry is a feature within the EMR system that allows users to enter a patient's vital signs—such as blood pressure, heart rate, temperature, and more—directly from the Patient Information Screen or via Quick Actions on the Patient Profile, without needing to navigate to the dedicated Vitals Screen.
Part 1 of 3
Record Patient Vitals Using Quick Vitals Entry Through Patient Profile
-
The user can record a patient's vitals using Quick Vitals Entry feature through the patient profile accessible from Patients List Screen from two entry points.
-
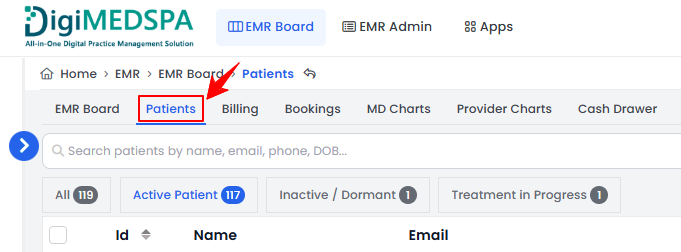
From the EMR Board Tabs, click on ‘’Patients.’’
-
From the Left Navigation, click on the “EMR Board” dropdown menu and select “Patients.’’ Alternatively, you can type “Patients” into the search bar in the Left Navigation.
-
-
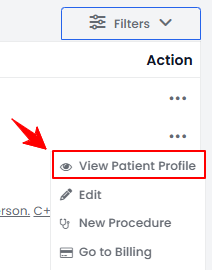
To view a specific patient from the list, click the three dots under the action column and select "View Patient Profile," or simply click anywhere on the patient’s data.
-
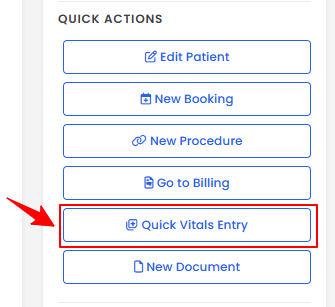
On the Patient Information Screen, users can find a detailed overview of patient information. Patient vitals can be recorded by navigating to the Quick Actions menu on the left side of the screen. Click “Quick Vitals Entry” to begin entering the data.
-
The Date/Time will be automatically filled in. Select a Booking from the dropdown menu, though this step is optional.
-
Enter the Height (cm) and Weight (kg) to automatically calculate the BMI.
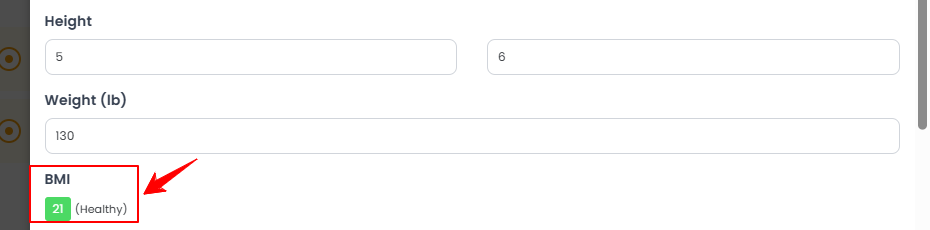 NoteOnly the vital fields enabled in the vital settings will be displayed here. For more information, refer to the “Manage Vital Settings” user guide.
 -
Enter the Body Fat (%), Systolic and Diastolic BP, Temperature, and Note in the provided fields. Once all information is filled in, click “Save Vitals” to save the data.
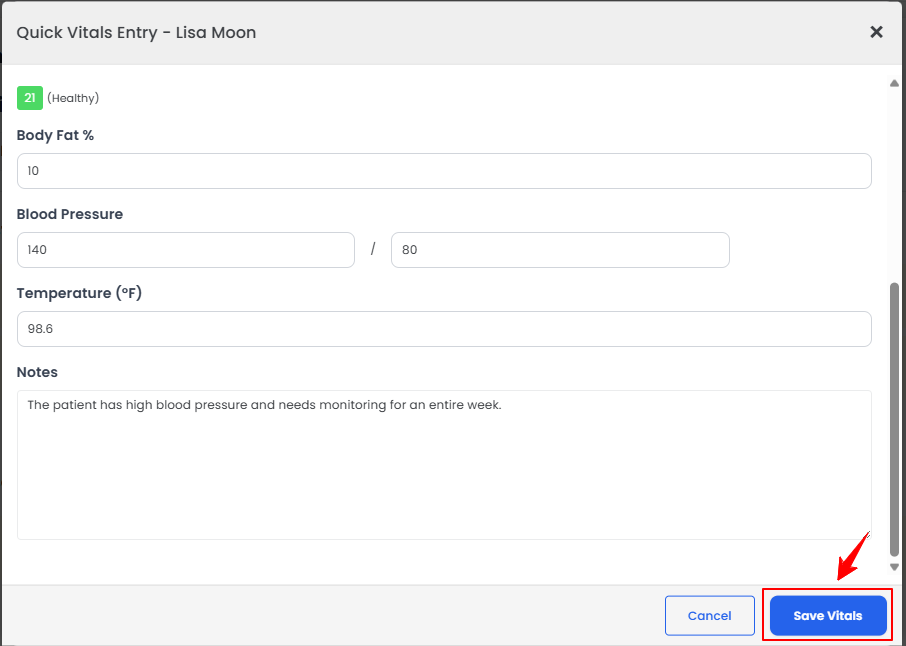 The patient vitals have been successfully recorded with quick vitals entry!
Part 2 of 3
Record Patient Vitals Using Quick Vitals Entry for a New Procedure
-
The user can record patient vitals using quick vitals entry for a new procedure through the EMR Board. From the EMR Board select a booking that is in the ‘’Checked In’’ step then press the ‘’Start Procedure’’ button to move that booking to the ‘’In Procedure’’ phase.
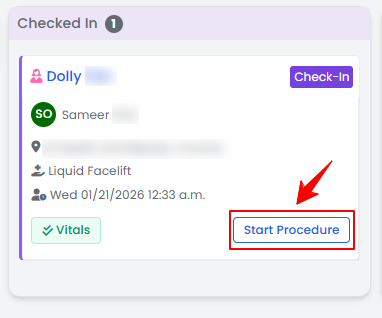
-
Choose the Body Area from the dropdown menu and click “Start Procedure.”
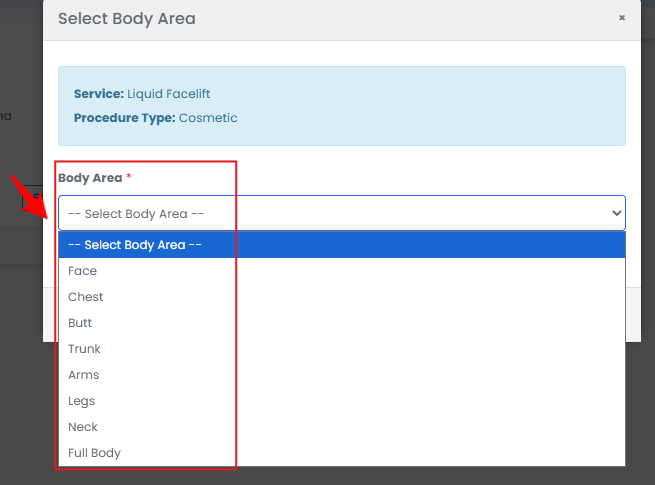 NoteFor services without a selected procedure type, you will be prompted to choose the procedure type at this step.
 -
You will be directed to the Procedure View Screen in the patient profile, where all procedure sections are displayed.
-
To add patient vitals, navigate to the Patient Vitals section and for a quicker entry, click “Quick Entry” to open a short pop-up form.
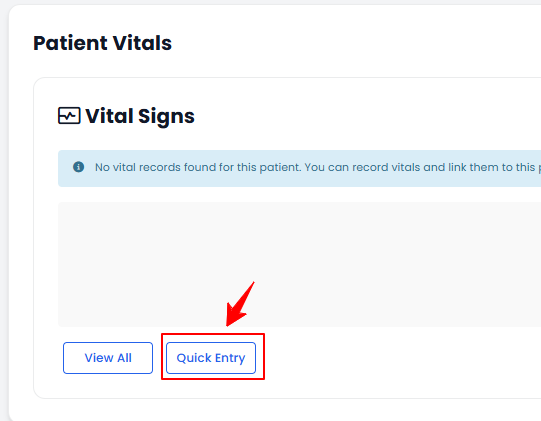
-
The Date/Time and Booking fields will be filled in automatically. Complete the remaining fields and click “Save Vitals.”
The patient vitals have been successfully recorded using quick vitals entry for a new procedure!
Part 3 of 3
Record Patient Vitals Using Quick Vitals Entry for an Existing Procedure
-
The user can record patient vitals using quick vitals entry for an existing procedure through the patient profile accessible through two entry points.
-
From the EMR Board Tabs, select “Patients.”
-
From the Left Navigation, click on the “EMR Board” dropdown menu and select “Patients.’’ Alternatively, you can type “Patients” into the search bar in the Left Navigation.
-
-
To view a specific patient from the list, click the three dots under the action column and select "View Patient Profile," or simply click anywhere on the patient’s data.
-
On the Patient Information Screen, users can access a comprehensive summary of all patient details. To view the procedures, simply click on the ‘’Procedures’’ tab.

-
Here, you will find all procedures for the patient. Click “View Procedure” next to the desired procedure to access its details.
-
On the Procedure View Screen, go to the Patient Vitals section, click “Quick Vitals Entry,” and follow the previously outlined steps to record and save the patient’s vitals.
The patient vitals have been successfully recorded using quick vitals entry for an existing procedure!
You’re all set
That’s every step of “How to Record Patient Vitals Using Quick Vitals Entry?”. Up next: How Can a Patient Send Chat?.