DigiMEDSPA EMR
 DigiMEDSPA CONNECT ™
Add / View / Edit / Delete Patient Vitals
This user guide provides step-by-step instructions on how to manage patient vital information within the system. It covers how to add new vitals, view existing records, edit details as needed, and delete outdated or incorrect data to maintain accurate patient records.
Understanding Terminologies
Patient Vitals
Patient vitals refer to essential measurements that indicate the body’s basic functions and overall health status. Common vitals include temperature, blood pressure, heart rate, respiratory rate, and other key indicators used to monitor a patient's physical condition over time.
Access this link: https://digimedspa.com/ap2/treatmentplantemplates
Add Vitals through the Patient Profile
- The user can add patient vitals through the Patient Profile by accessing Patients List Screen from two entry points.
- From the EMR Board Tabs, click on ‘’Patients.’’

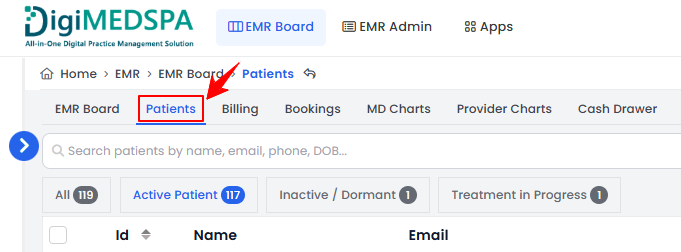
- From the Left Navigation, click on the “EMR Board” dropdown menu and select “Patients.’’ Alternatively, you can type “Patients” into the search bar in the Left Navigation.
- From the EMR Board Tabs, click on ‘’Patients.’’
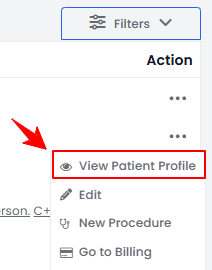
- To view a specific patient from the list, click the three dots under the action column and select "View Patient Profile," or simply click anywhere on the patient’s data.
- On the Patient Information Screen, users can find a detailed overview of the patient’s information. To add vitals, simply click on the “Vitals” tab.
 Note: From the EMR Board, go to the bookings listed under the “Checked In” step and click the “Vitals” button. You will be taken directly to the Vitals tab in the Patient Profile.
 - To record patient vitals, click “Record Vitals” button on the right side of the screen.
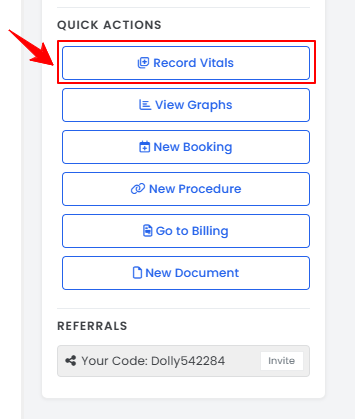
- Alternatively, patient vitals can be recorded by navigating to the Quick Actions menu on the left side of the screen. Click “Record Vitals” to begin entering the data.
- The “Recorded At” time and date will be automatically filled in. Select a Booking from the dropdown menu, though this step is optional.
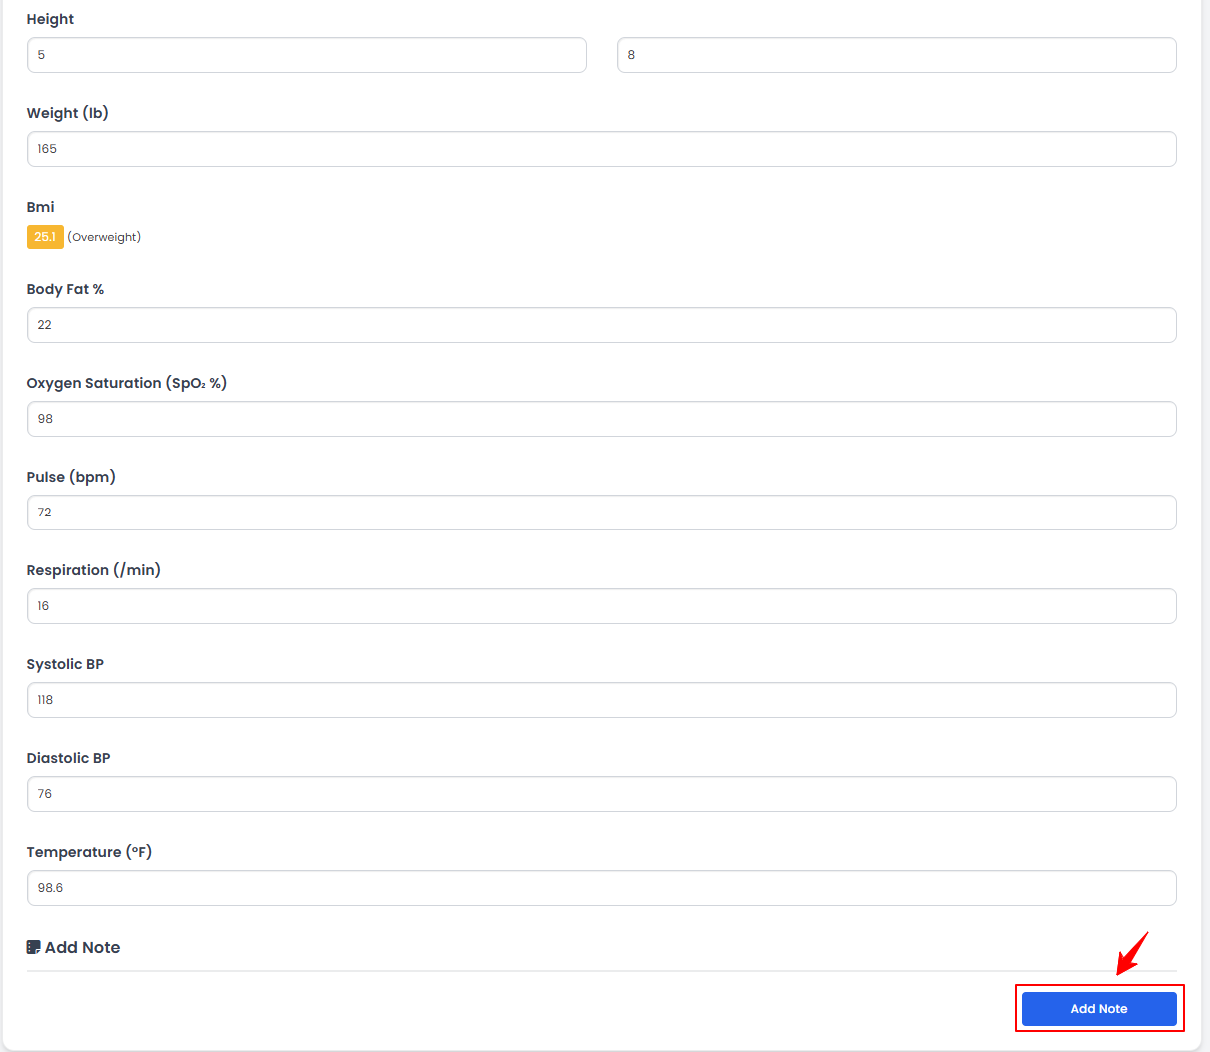
- Enter the Height, Weight, Body Fat (%), Oxygen Saturation, Pulse, Respiration, Systolic and Diastolic BP, and Temperature in the provided fields. To include a note with the vitals, click the “Add Note” button at the bottom.
 Note: Only the vital fields enabled in the vital settings will be displayed here. For more information, refer to the “Manage Vital Settings” user guide.
 - Enter the note, and once all information is filled in, click “Create Patient Vitals” to save the data.Note: Click the “Remove” button to delete the note.
The patient vitals have been successfully recorded!
Add Vitals Through Procedure View Screen
- The user can add vitals through the Procedure View Screen accessible via the patient profile.
- From the EMR Board tabs, click on “Patients.”
- To view a specific patient from the list, click the three dots under the action column and select "View Patient Profile," or simply click anywhere on the patient’s data.
- To view the procedures, simply click on the ‘’Procedures’’ tab.

- Here, you will find all procedures for the patient. Click “View Procedure” next to the desired procedure to access its details.Note: The Procedure View Screen can also be accessed through the Bookings List Screen and the EMR Board. For detailed navigation, refer to our “Create a New Procedure” article.
- On the Procedure View Screen, navigate to the Patient Vitals section. To add patient vitals, click “Record Vitals Now” to open the full patient vitals form. For a quicker entry, click “Quick Entry” to open a short pop-up form, fill in the vitals, and click “Save Vitals.”
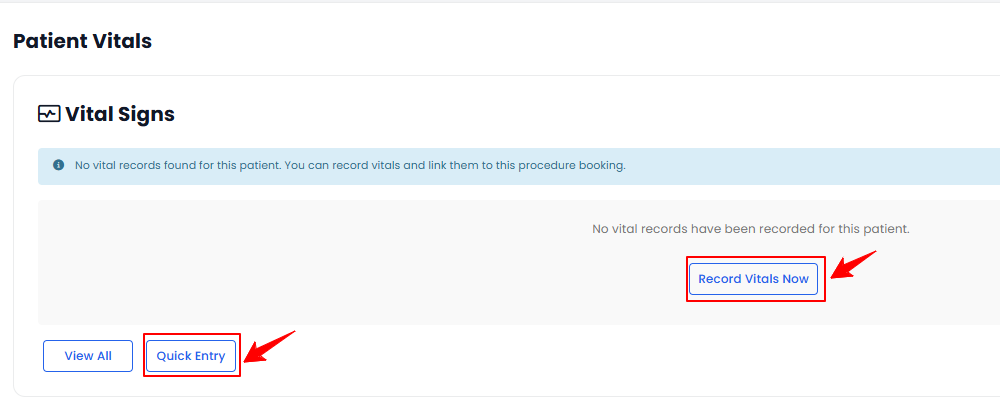 Note: All previously recorded patient vitals will be displayed here. For detailed instructions on quick vitals entry, refer to “How to Record Patient Vitals Using Quick Vitals Entry?” user guide.
The patient vitals have been successfully recorded through the Procedure View Screen!
View Patient Vitals
- To view a patient’s vitals from the list, click the three dots under the action column and select "View," or simply click anywhere on the patient’s vitals data.
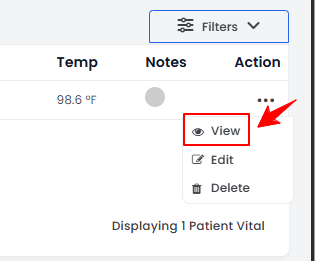
- The Patient Vitals View Screen will open, displaying all the details of the patient vitals.
Edit Patient Vitals
- There are three ways to edit an existing patient’s vitals.
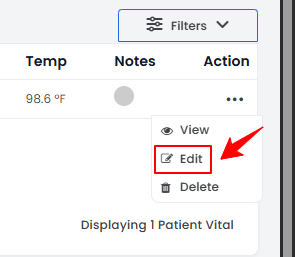
- From the patient’s vitals list, click on three dots under the action column and select "Edit" for the specific patient’s vitals.
- On the Patient Vitals View Screen, click on the ‘’Edit Vitals” button on the right corner of the screen.
- On the Patient Vitals View Screen, click on the ‘’Edit Vitals” button under the Quick Actions menu on the left side of the screen.
- From the patient’s vitals list, click on three dots under the action column and select "Edit" for the specific patient’s vitals.
- Make the necessary changes and click “Update Patient Vitals” to save your updates.
The patient vitals have been successfully edited!
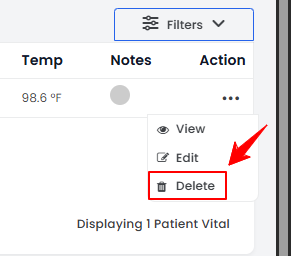
Delete Patient Vitals
- There are two ways to delete an existing patient’s vitals.
- From the patient’s vitals list, click on three dots under the action column and select "Delete" for the specific patient’s vitals.
- On the Patient Vitals View Screen, click on the ‘’Delete Patient Vitals” button under the Quick Actions menu on the left side of the screen.
- From the patient’s vitals list, click on three dots under the action column and select "Delete" for the specific patient’s vitals.
- A confirmation pop-up will appear. Click “OK” to confirm and permanently delete the vitals entry.
The patient vitals have been successfully deleted!
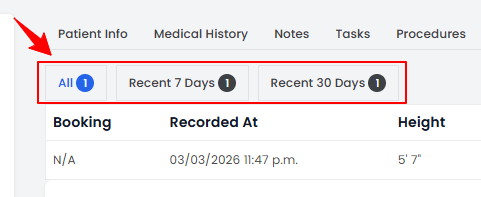
View Recent Patient Vitals
- On the Patient Vitals List screen, use the top scopes bar to filter vitals by date, select “Recent 7 Days” to view entries from the past week, “Recent 30 Days” for the past month, or “All” to display all recorded vitals without any date filter.