

Understanding Terminologies
- Medical History
Medical history is a comprehensive record of a patient's past and current health information, including previous illnesses, surgeries, allergies, medications, and family health history. For Med SPA patients, maintaining an updated medical history is necessary as it informs providers about any potential risks and contraindications related to services.
Part 1 of 2
Add Patient’s Medical History
-
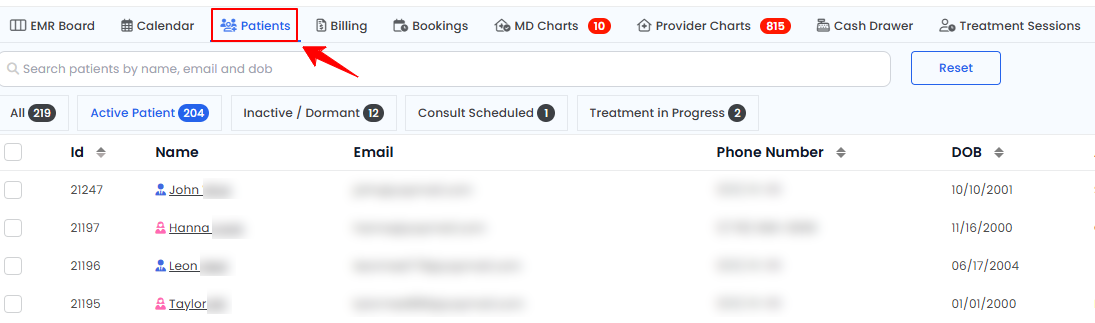
The user can add a patient's medical history by accessing the Patients List Screen. From the EMR Board Tabs, select “Patients.”
-
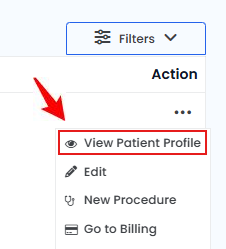
Click anywhere on the patient's data in the patient listing, or click the three dots under the action column next to the specific patient and select “View Patient Profile.”
-
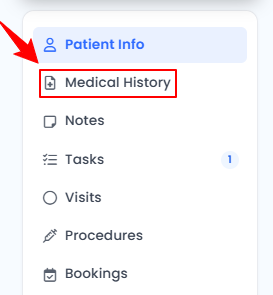
On the Patient Information Screen, users can access a comprehensive summary of all patient’s information. To access the medical history, simply click "Medical History" from the side panel.
-
The Medical History Screen will include sections for Lifestyle & Habits, Allergies, Medications, Medical Conditions, Family History, and Medical & Surgical History. Click on “Edit” next to the sections you want to fill out.NoteThe Medical History section also includes a Good Faith Exam (GFE) section and a Patient Vitals section. If a patient has completed a GFE, it will be displayed here. You can also record the patient’s vitals from this section by clicking the “Record Vitals Now” button.
-
Add Patient’s Lifestyle & Habits
-
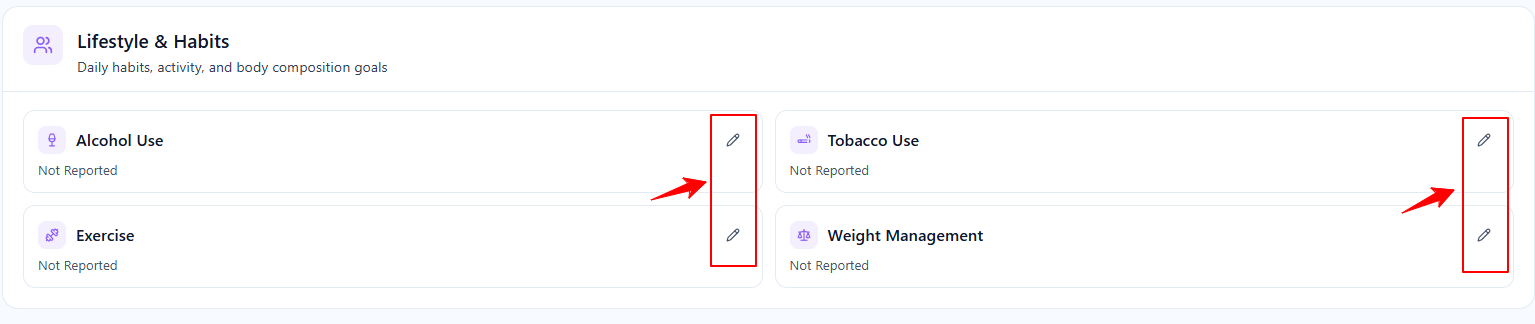
Click the “Pencil” icon next to Alcohol Use, Tobacco Use, Exercise, and Weight Management sections under Lifestyle & Habits to add details.
-
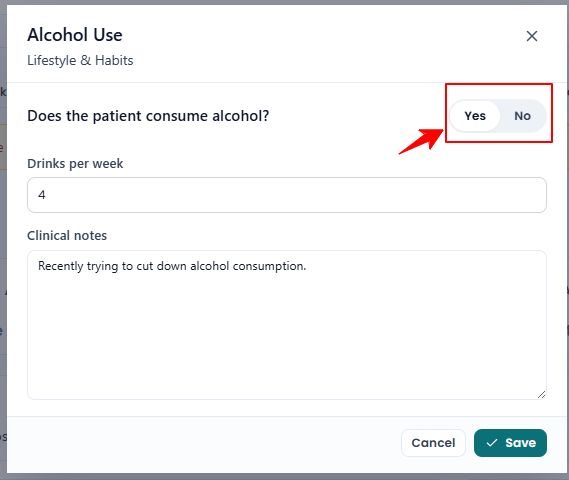
If you select “Yes” for alcohol use, enter the drinks per week and add any notes.
-
If “Yes” is selected for tobacco or exercise, enter the weekly frequency and any notes.
-
Enter Current and Target Weight, add Notes, and click “Save.”
The patient’s social history has been successfully added!
-
-
Add Patient’s Allergies Information
-
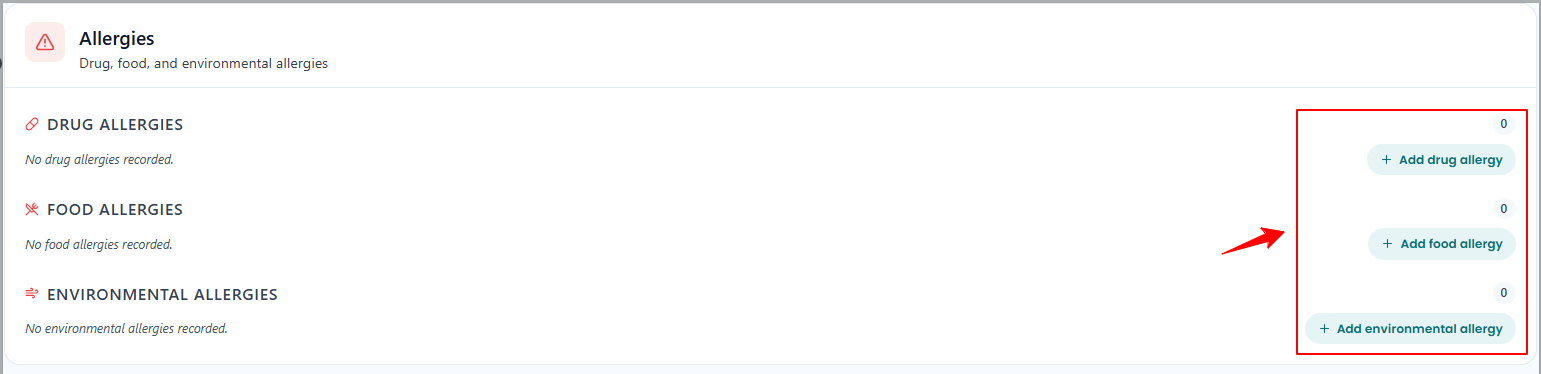
Click “Add drug allergy,” “Add food allergy,” or/and “Add environmental allergy” under the Allergies section to add details.
-
For drug allergy form, enter the Medication, then choose the Reaction and Allergy Type from the dropdown menus. Fill in the RxNorm, Status, Onset and End Dates, and Comments, then click “Save Drug Allergy."
-
For food allergy form, enter the Food, then choose the Reaction and Allergy Type from the dropdown menus. Fill in the RxNorm, Status, Onset and End Dates, and Comments, then click “Save Food Allergy."
-
For environmental allergy form, enter the Substance, then choose the Reaction and Allergy Type from the dropdown menus. Fill in the RxNorm, Status, Onset and End Dates, and Comments, then click “Save Environmental Allergy."
The patient's allergies information has been added successfully!
-
-
Add Patient’s Medications
-
Click “Edit” next to Current Medications to add details.
-
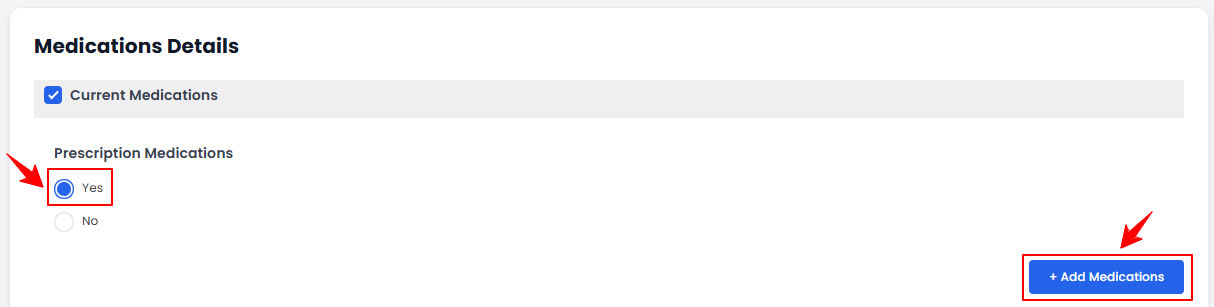
"If “Yes” is selected for prescription medications, click the “+ Add Medications” button to enter details.
-
Enter the Medication Name, Dosage, Frequency, Start and End Dates, and the NDC Code.
-
Follow the same steps to complete the Vitamins & Supplements and Over the Counter Medications, then click “Update Medications” to save your changes.
The patient’s medications have been added successfully!
-
-
Add Patient’s Medications
-
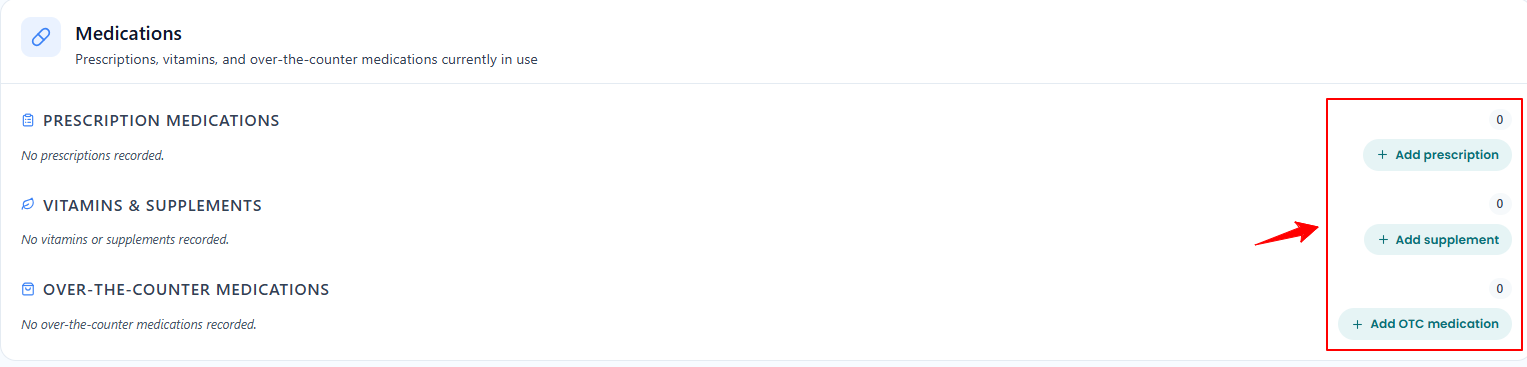
Click “Add prescription,” “Add supplement,” or/and “Add OTC medication” under the Medications section to add details.
-
For the prescription form, enter the Medication, Dose, Frequency, Start and End Dates, and the NDC Code. Then click “Add.”
-
For the supplement form, enter the Supplement, Dose, and Frequency. Then click “Add.”
-
For the OTC medication form, enter the Medication, Dose, and Frequency. Then click “Add.”
The patient’s medications have been added successfully!
-
-
Add Patient’s Family History
-
Click “Add family condition” under the Family History section to add details.

-
Enter the Diagnosis, specify the Relationship to the Patient, and add any relevant Notes if applicable. Once all information is completed, click “Add” to save the details.
The patient’s family health history has been added successfully!
-
-
Add Patient’s Medical Conditions
-
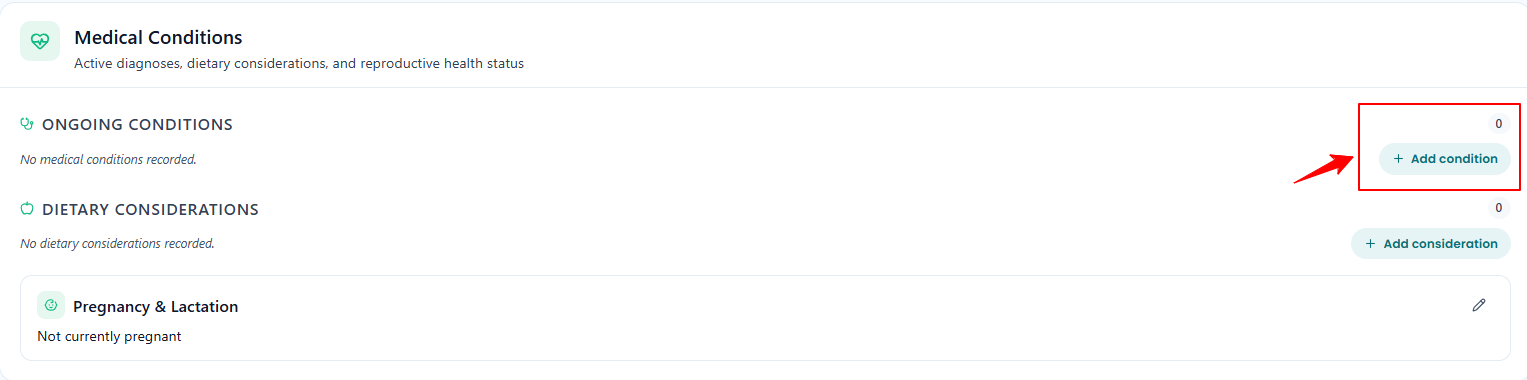
Click “Add condition” next to Ongoing Conditions, under the Medical Conditions section to add details.
-
Enter the Condition, Date of Diagnosis, name of Treating Physician, and any notes. Click “Add” to save the details.
-
Click “Add consideration” next to Dietary Considerations, under the Medical Conditions section to add details.
-
"If “Yes” is selected for implants, click the “+Add Implants” button to enter details.
-
Enter the Consideration and click “Add” to save.
-
Next, click the pencil icon next to Pregnancy & Lactation under the Medical Conditions section to add details.
-
Complete the pregnancy-related questions. If the patient is pregnant, select the Current Trimester, enter the Expected Due Date, and provide the number of previous pregnancies.
-
Enter the previous pregnancy count if any, and additional pregnancy notes, then click “Save.”
The patient’s medical conditions have been added successfully!
-
-
Add Patient’s Past Medical & Surgical History
-
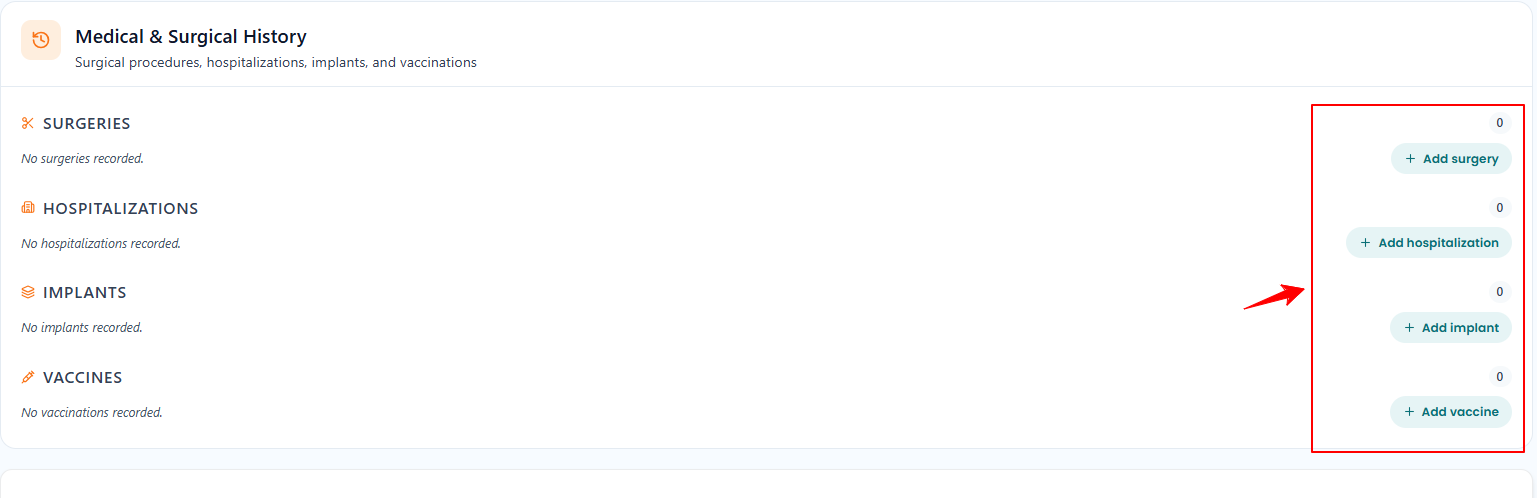
Click “Add surgery,” “Add hospitalization,” “Add implant” or/and “Add vaccine” under the Medical & Surgical History section to add details.
-
For the surgery form, enter the Surgery Type, Date of Surgery, name of Physician, City, State, and any relevant Notes.Then click “Add.”
-
For the hospitalization form, enter the Reason for Hospitalization, Date of Hospitalization, Hospital Name, and any relevant Notes.Then click “Add.”
-
For the implant form, enter the Implant Type, Placement, Date of Implant, and any relevant Notes.Then click “Add.”
-
For the vaccine form, enter the Vaccine Name, Date of Receiving Vaccination, and any relevant Notes. Once all information is complete, click “Add” to save.
The patient’s past medical & surgical history has been added successfully!NoteAny Good Faith Exams (GFE) filled by the patient will be displayed at the end of the Medical History form.
-
Part 2 of 2
Edit Patient’s Medical History
-
On the Patient Information Screen, click on "Medical History" from the side panel. The Medical History Screen will display all the information already added.
-
Click on “Edit” next to the sections you want to edit.
-
Make the desired changes and click on “Update Medical History” once you’re done.
The patient’s medical history has been edited successfully!
You’re all set
That’s every step of “Manage Patient Medical History”. Up next: Attach Documents or Files To a Patient's Profile.