

This user guide will walk you through the efficient use of the Draw Tool for clear and comprehensive charting in DigiMEDSPA's EMR Portal.
Understanding Terminologies
- Draw Tool
The draw tool is a digital feature within EMR systems that allows practitioners to visually mark, annotate, and highlight treatment areas on body templates or patient photos. It's commonly used for cosmetic procedures like injectables or laser treatments to precisely document injection points, target zones, and other relevant details. This helps ensure accuracy in charting and improves treatment consistency.
- Charting
Charting in a procedure involves documenting detailed information about the patient's treatment, including the type of procedure performed, the areas treated, products or substances used (such as injectables or fillers), dosages, and the techniques applied. It may also include visual documentation, such as photos or markings, to record treatment areas and injection points. Accurate charting is critical for monitoring results and ensuring patient safety in aesthetic procedures.
Chart Using the Draw Tool from the EMR Board
-
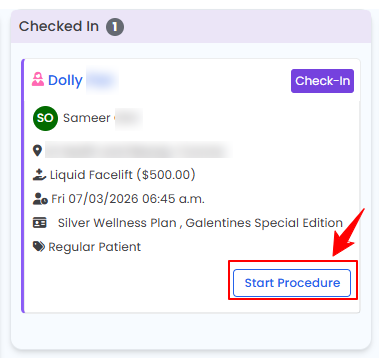
The user can chart using the draw tool through the EMR Board. From the EMR Board select a booking that is in the ‘’Checked In’’ step then press the ‘’Start Procedure’’ button to move that booking to the ‘’In Procedure’’ phase.
-
Choose the Body Area from the dropdown menu and click “Start Procedure.”NoteFor services without a selected procedure type, you will be prompted to choose the procedure type at this step.
-
You will be directed to the Procedure View Screen in the patient profile, where all procedure sections are displayed.
-
To mark images, first upload them in the Procedure Images/Videos section. Click “Upload Images” or “Upload After Images” to proceed.
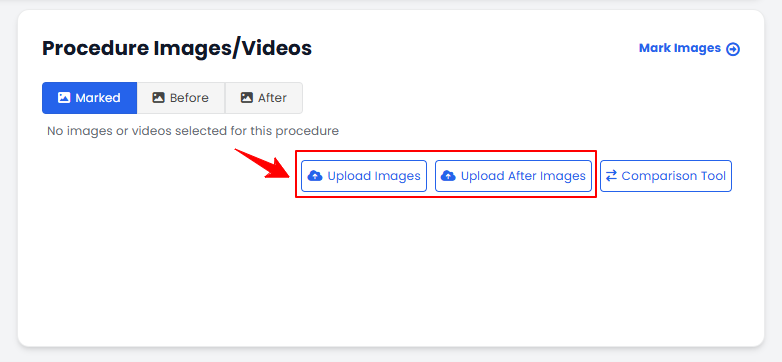 NoteTo view and compare before-and-after images of a procedure, click the “Comparison Tool” button. For step-by-step guidance on how to use this feature, refer to the article “Compare Before and After Images Using the Comparison Tool.”
 -
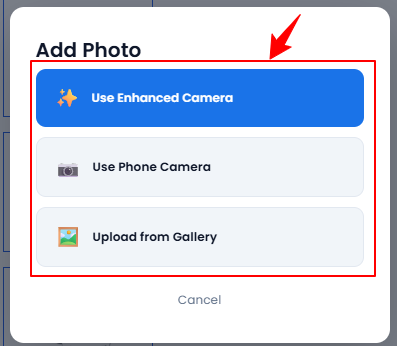
Click the “+” icon to add photos. A pop-up will appear, allowing you to choose how you want to upload the images. Select “Use Enhanced Camera,” “Use Phone Camera,” or “Upload from Gallery.”
-
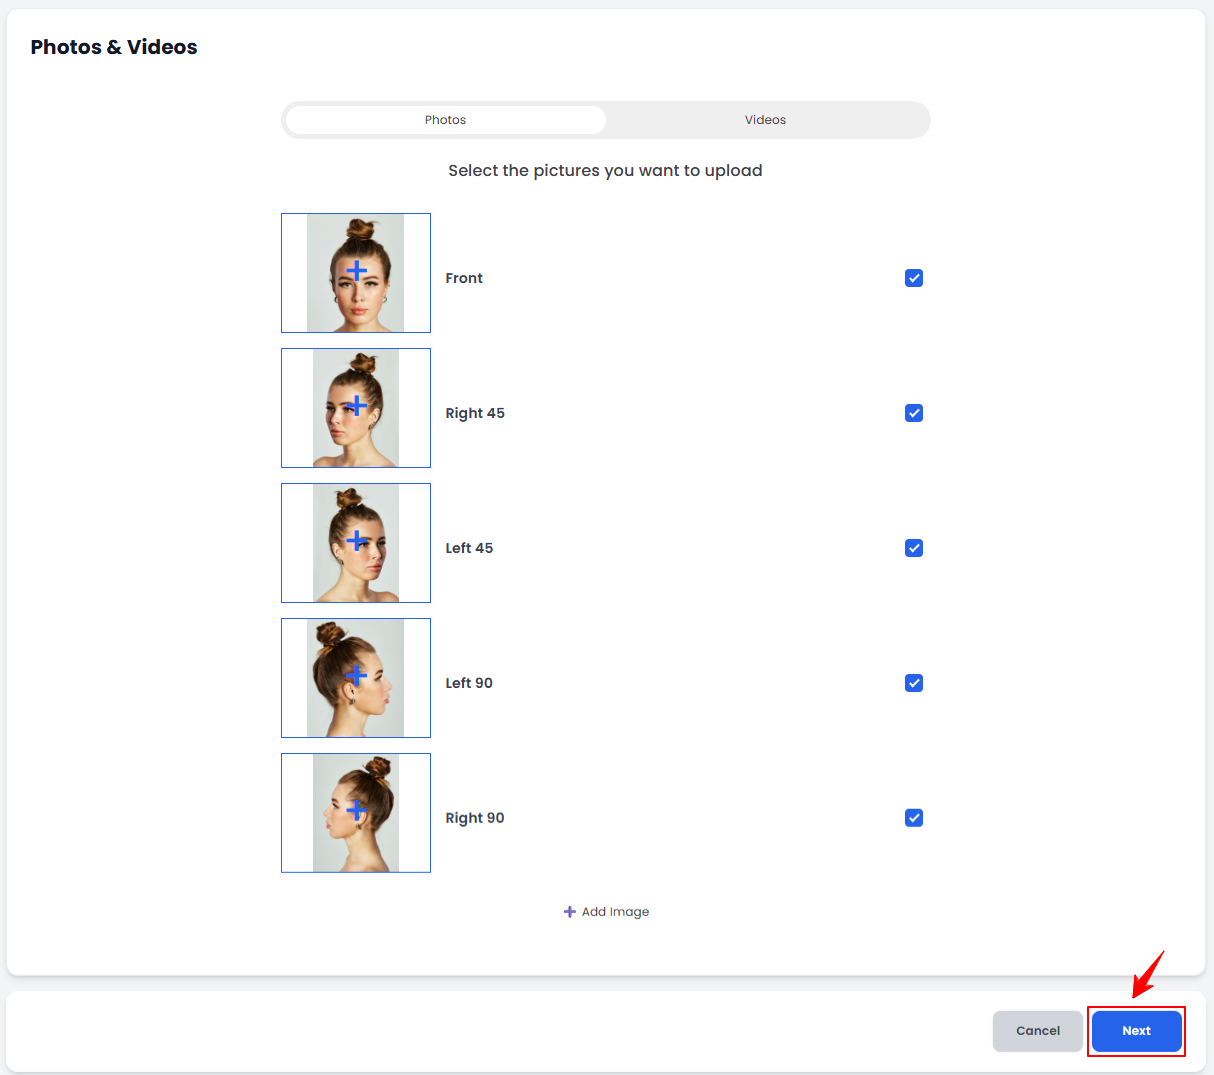
Upload images from different angles, select the desired images, and click “Save.”
-
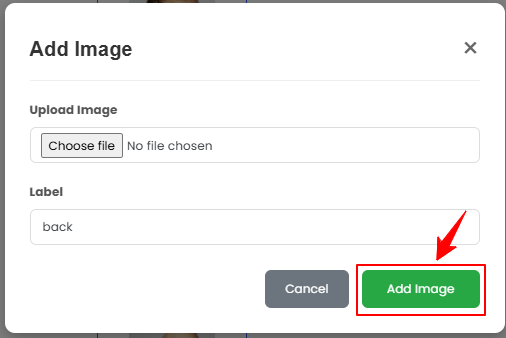
To add additional images, click the “+ Add Image” button at the bottom of the screen. A pop-up window will open where you can upload your image and enter a label. Once finished, click “Add Image” to save it.
-
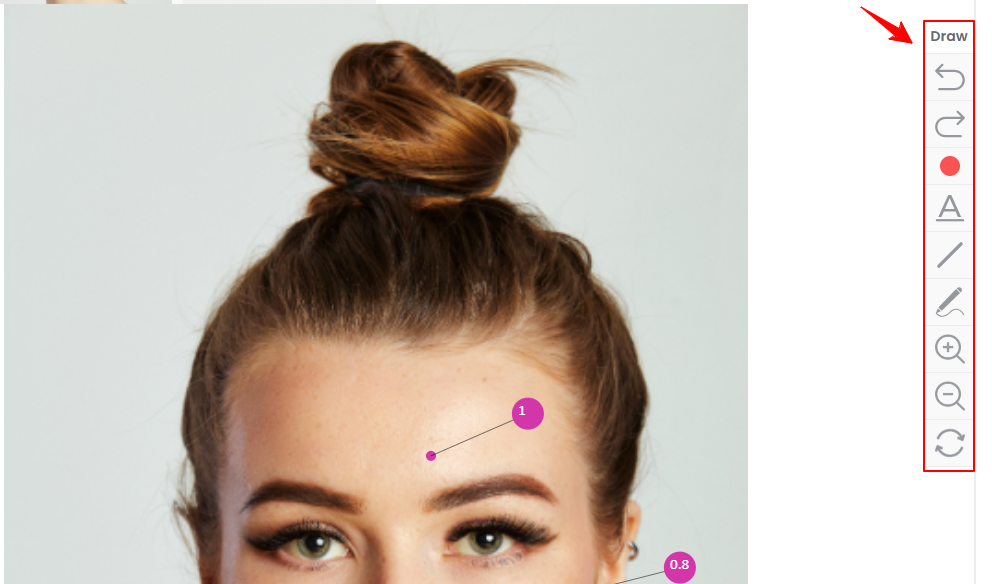
The “Marking Screen” will open, allowing the user to precisely chart drugs (products) and injection markings on the selected image for use during the procedure. Users can also utilize the drawing tools on the Marking Screen to annotate or highlight treatment areas.
-
To add a text, click the ‘’A’’ icon.
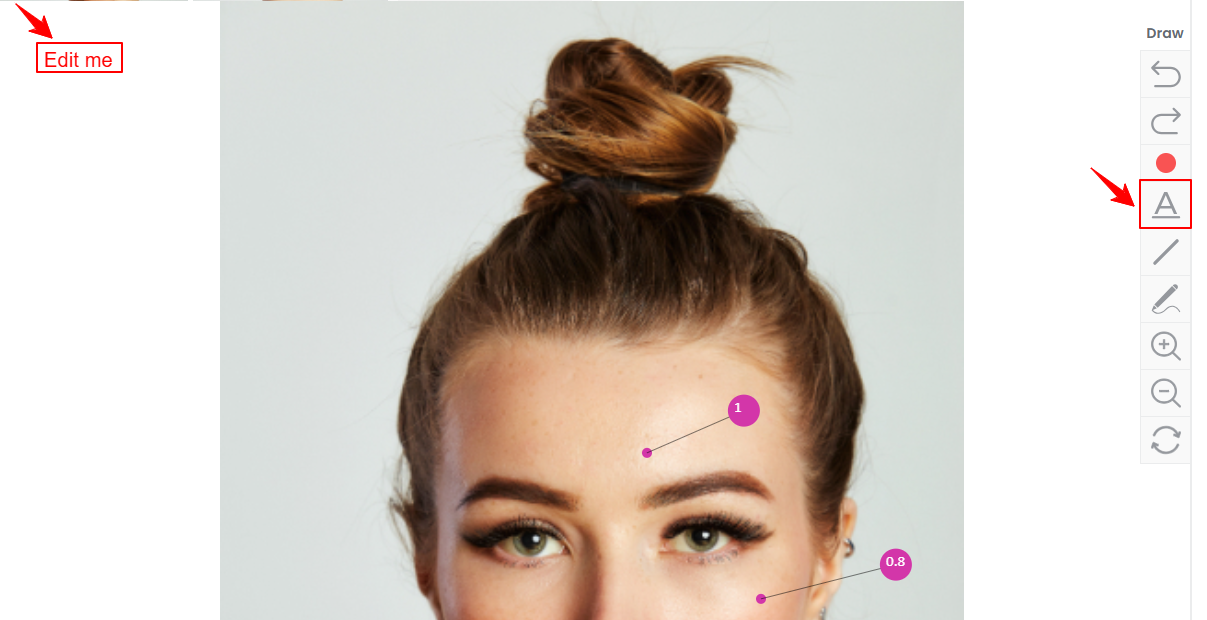 NoteThe position of text is in the top left corner by default but you can long press to drag the text and change its position.
 -
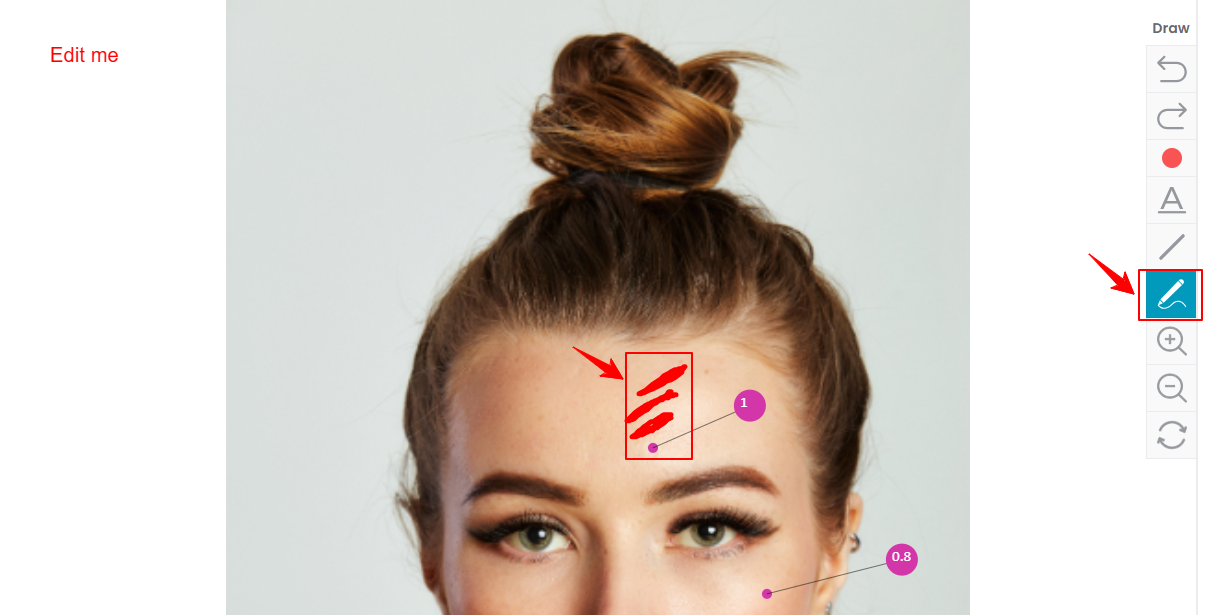
To draw something, click the ‘’pencil’’ icon to draw freely anywhere on the marking screen.
-
To draw a straight line, click the ‘’line’’ icon.
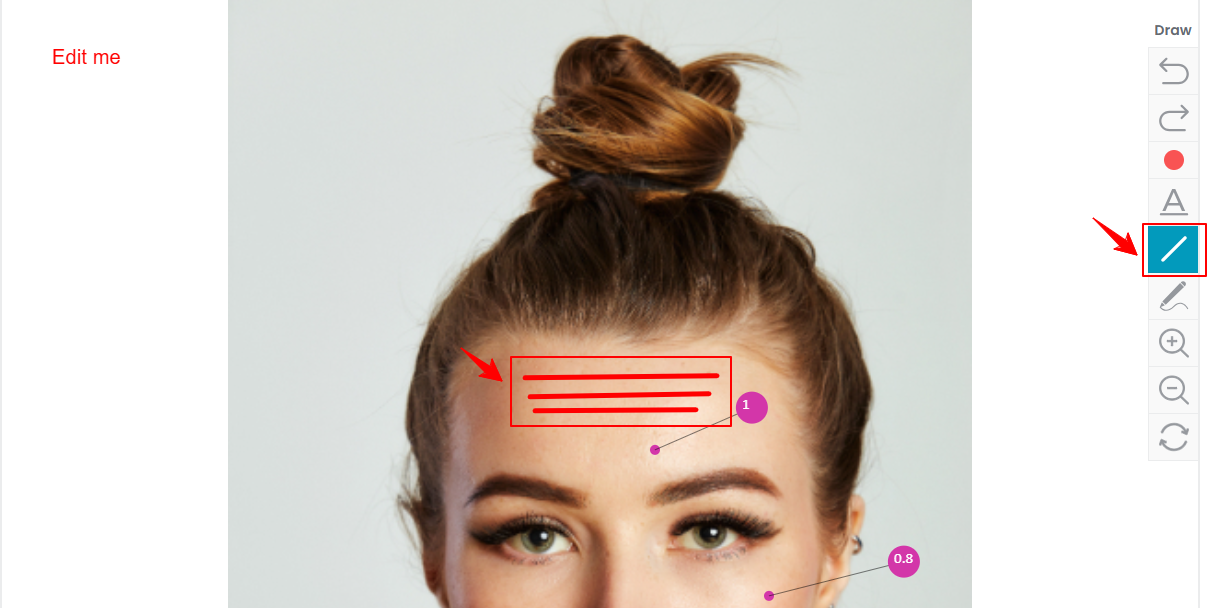
-
To change the color of the pencil, line, or text tool, click on the “red dot” icon.
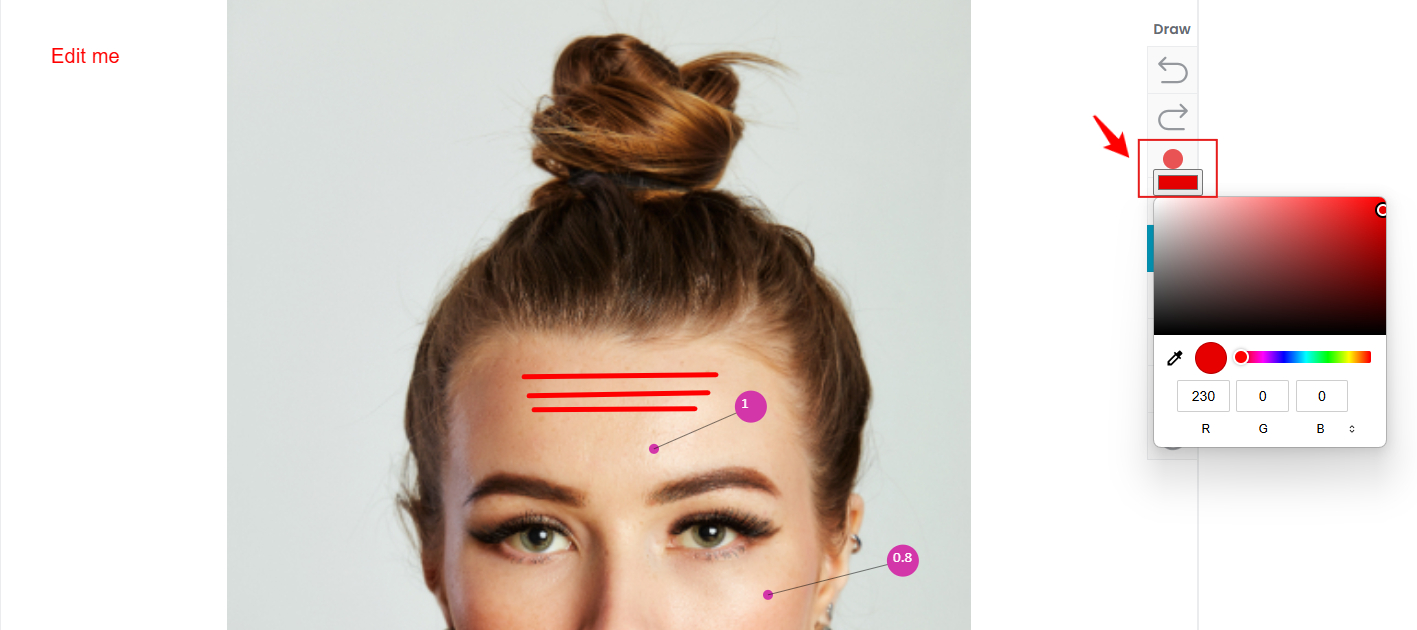
-
To zoom in the screen, click on the ‘’zoom in’’ icon and then double click at the spot where you want to zoom in.
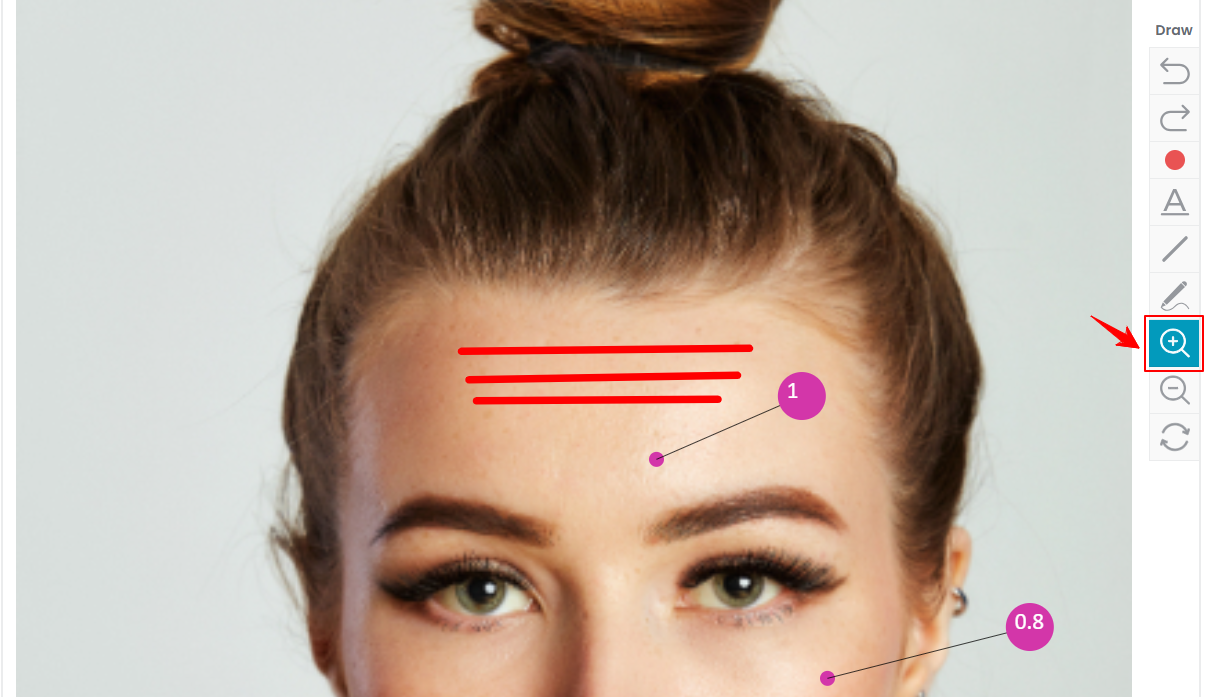
-
To zoom out the screen, click on the ‘’zoom out’’ icon.
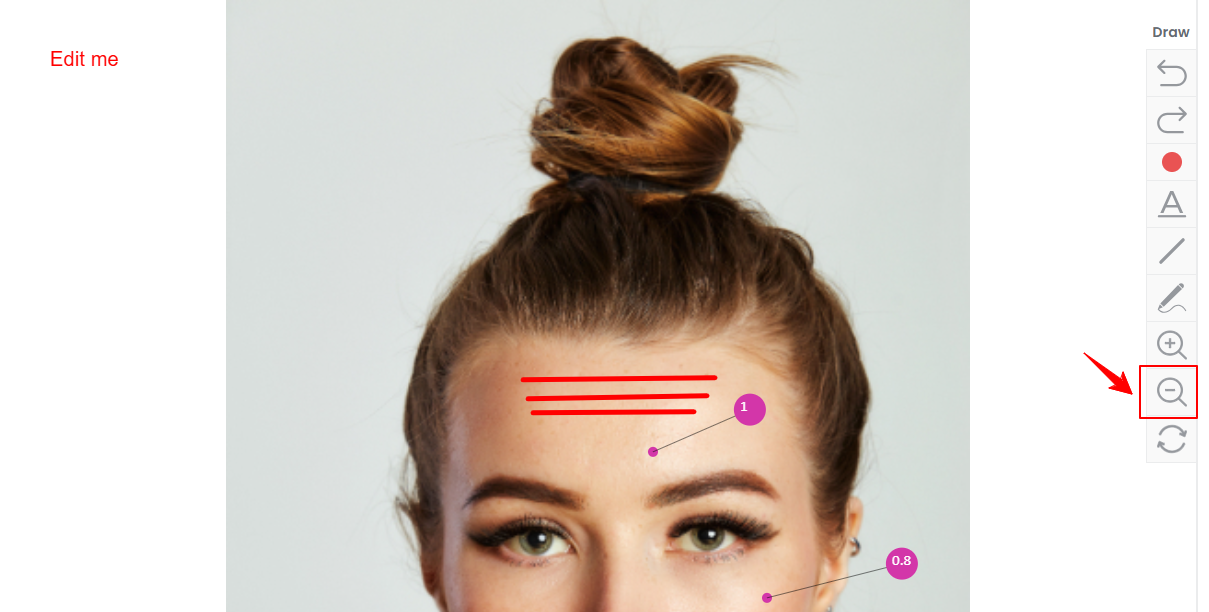
-
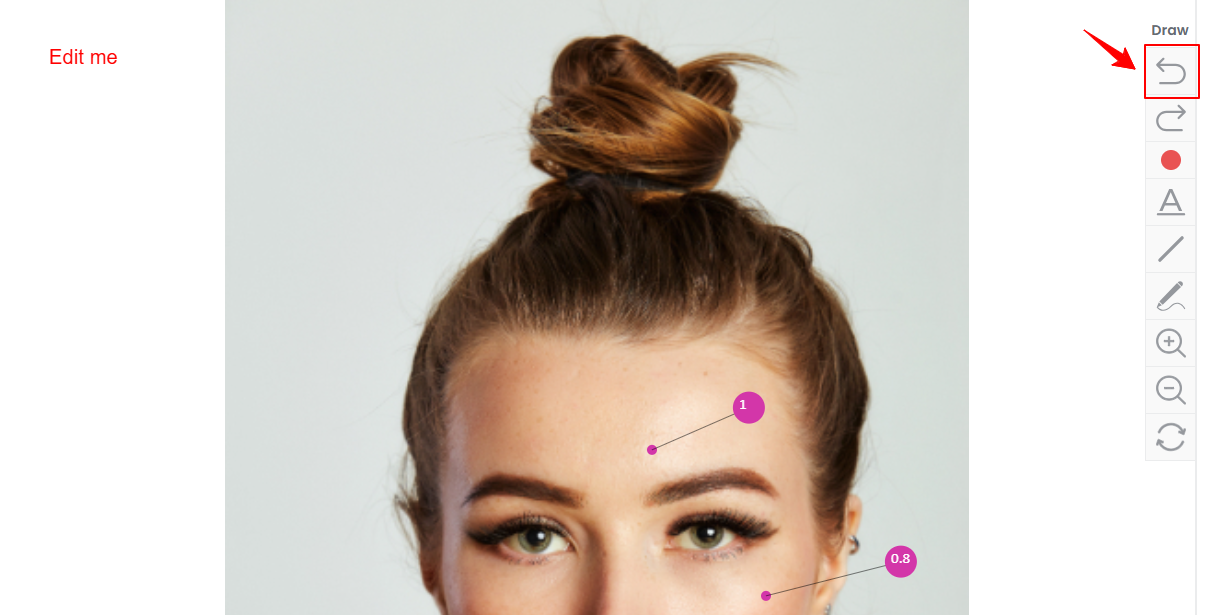
To undo an action, simply click the “undo” icon. In this example, the drawing has been undone.
-
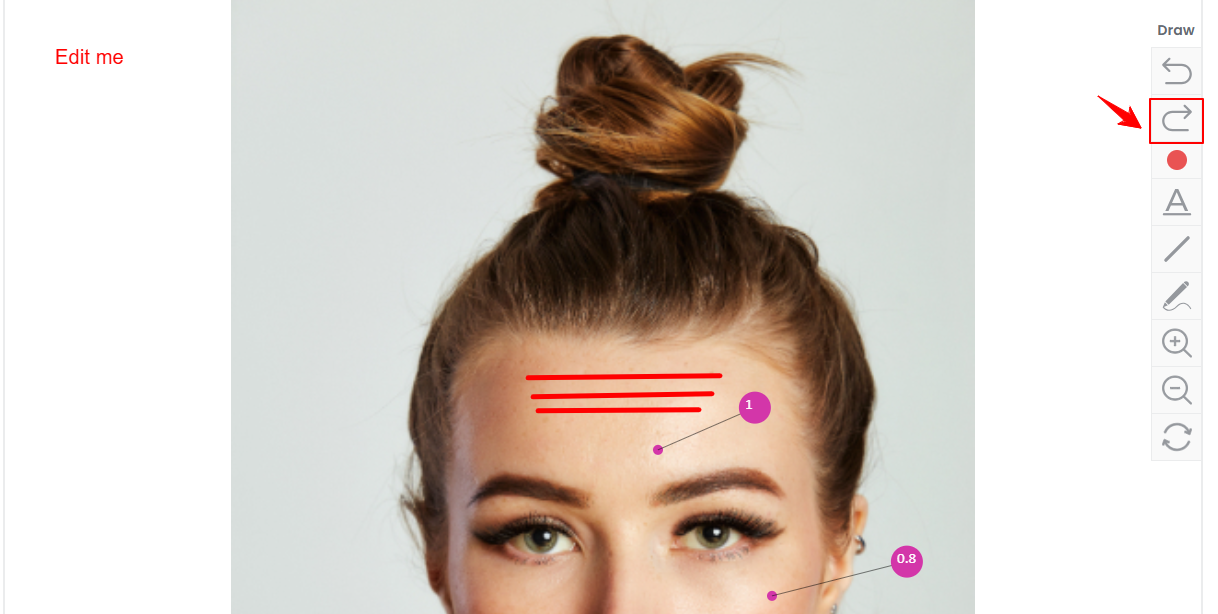
To redo an action, click the “redo” icon. In this example, the drawing reappears after clicking the redo button.
-
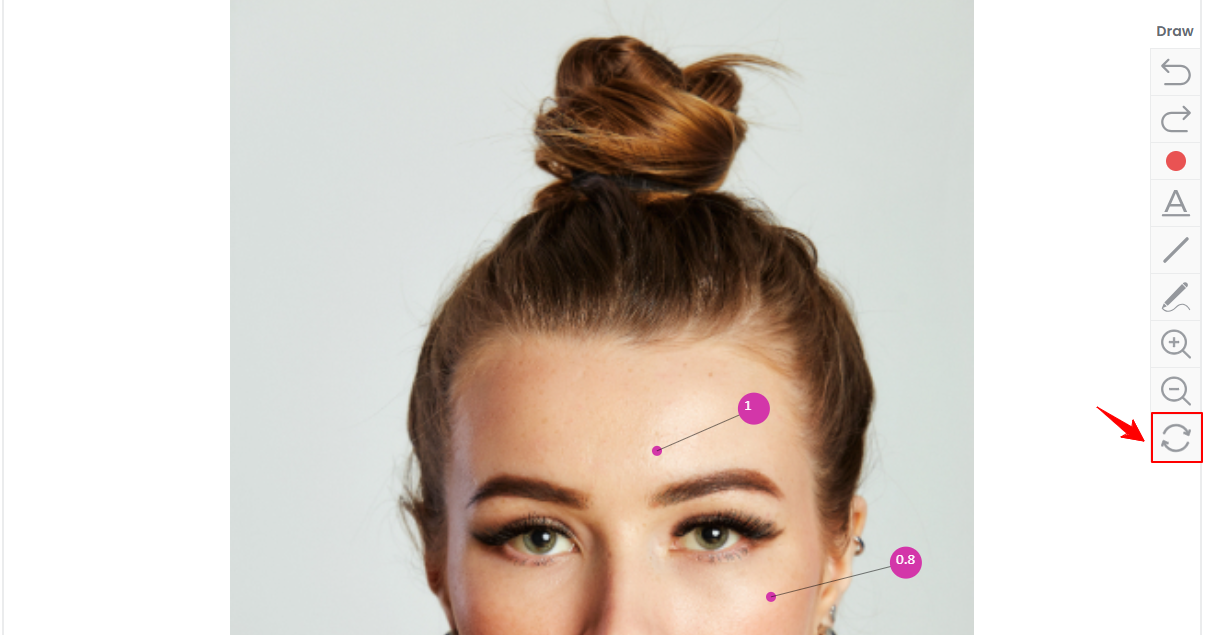
To reset the changes, click on the “reset” icon. This will restore the image to its original state and remove all text and drawings.
-
Click on the ‘’Save’’ button once you are done.NoteIn addition to using the drawing tool, users can add products such as injections and adjust injection markings as needed. Injection markings ensure precise product placement for optimal results and symmetry, while the charting feature provides detailed documentation of injection sites and dosages for accurate patient records and follow-up care. For detailed navigation on managing injection markings, refer to our "Add / Edit / Move Injection Markings" user guide.
Chart Using the Draw Tool from the Patient List Screen
-
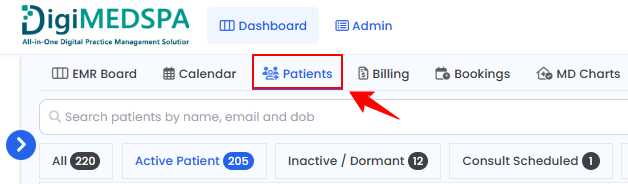
The user can chart using the draw tool from the Patient List Screen. From the EMR Board Tabs, select “Patients.”
-
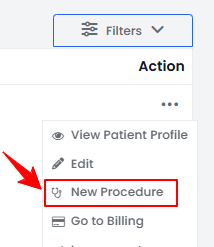
To create a procedure for a specific patient from the list, click the three dots under the action column and select "New Procedure."
-
The patient details will be auto-filled. Complete the booking and procedure details, then click “Save & Chart” to proceed with uploading images and accessing the Marking Screen.
-
Follow the same steps outlined in the section above to chart on the Marking Screen using the draw tool.
Chart Using the Draw Tool from the Bookings List Screen
-
The user can create a procedure through the Bookings List Screen. From the EMR Board Tabs, select “Bookings.”

-
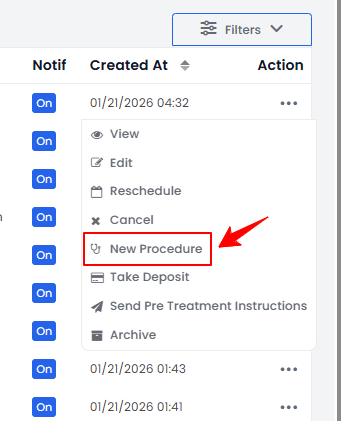
From the booking list, navigate to the desired booking. Click the three dots under Action and select “New Procedure.”
-
The patient and booking details will be automatically filled in. Complete the procedure details. Click “Save & Chart” to proceed with uploading images and accessing the Marking Screen.
-
Follow the same steps outlined in the section above to chart on the Marking Screen using the draw tool.
You’re all set
That’s every step of “Use the Draw Tool for Charting”. Up next: Naming a Procedure.