

 DigiMEDSPA EMR
 DigiMEDSPA CONNECT ™
How to Add Additional Images to a Procedure?
This user guide provides instructions on how to add and organize additional images for a procedure to ensure they display correctly.
Understanding Terminologies
Additional Images
Additional images are extra photos or visuals uploaded to supplement a procedure or record. They provide more detail, clarity, or context, helping to better illustrate the procedure, results, or related information.
Procedure
A procedure is a professionally administered health or cosmetic treatment performed under medical supervision to improve wellness, skin health, or physical appearance.
Add Additional Images to a Procedure
- The user can add additional images to a procedure through the patient profile by accessing the Patients List Screen via two entry points.
- From the EMR Board Tabs, select “Patients.’’

- From the Left Navigation, click on the “EMR Board” dropdown and select “Patients.” Alternatively, you can type “Patients” into the search bar in the Left Navigation.
- From the EMR Board Tabs, select “Patients.’’
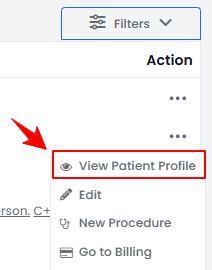
- From the patient list, click on three dots under the action column and select "View Patient Profile" for the specific patient, or simply click anywhere on the patient’s data.
- On the Patient Information Screen, users can access a comprehensive summary of all patient details. To view the procedure images, simply click on the ‘’Procedures’’ tab.

- Here, you will find all procedures for the patient. Click “View Procedure” next to the desired procedure to access its details.Note: The Procedure View Screen can also be accessed through the Bookings List Screen and the EMR Board. For detailed navigation, refer to our “Create a New Procedure” article.
- On the Procedure View Screen, navigate to the Procedure Images/Videos section and click “Upload Images” or “Upload After Images” to proceed.
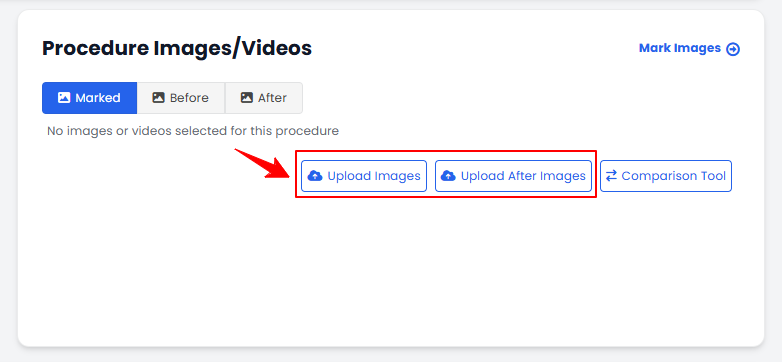 Note: For full instructions on uploading procedure images, refer to the article “How to Upload Procedure Images?”
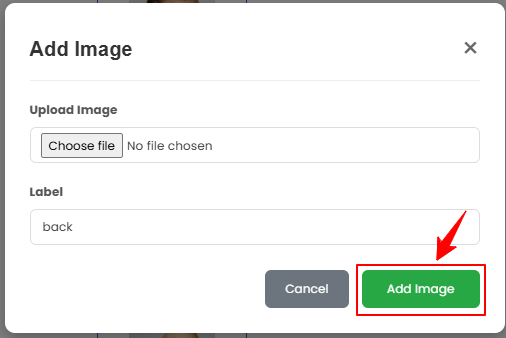
 - Upload images from different angles. To upload additional images, click the “+ Add Image” button at the bottom of the screen.
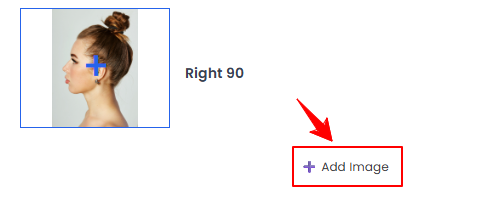
- A pop-up window will open where you can upload your image and enter a label. Once finished, click “Add Image” to save it.
- Select the desired images, and click “Next” to proceed to the Marking Screen.
The additional images have been added to the procedure successfully!