

This user guide provides step-by-step instructions on managing resources at your Med SPA, including creating, viewing, editing and attaching resources to a service in the DigiMEDSPA Portal.
Understanding Terminologies
- Resources
Resources refer to the elements required to schedule and organize Med SPA appointments. This includes the availability of procedure rooms, service providers, and equipment for specific procedures. Managing resources efficiently ensures that appointments are scheduled without conflicts and that the necessary resources are in place for each procedure.
Part 1 of 4
Add a Resource
-
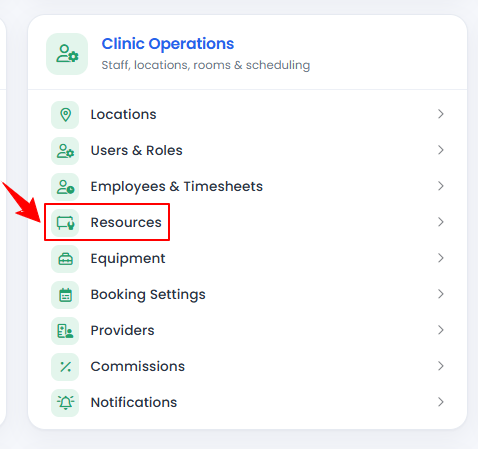
The user can add resources by accessing the Resources List Screen. From the “Admin” dashboard, click on “Resources” under “Clinic Operations,” or search resources in the top search bar.
-
To add a new resource, click on the ‘’New Resource’’ button in the top right corner of the screen.
-
Enter the Name and Resource Type, then click on ‘’Add New Location.’’
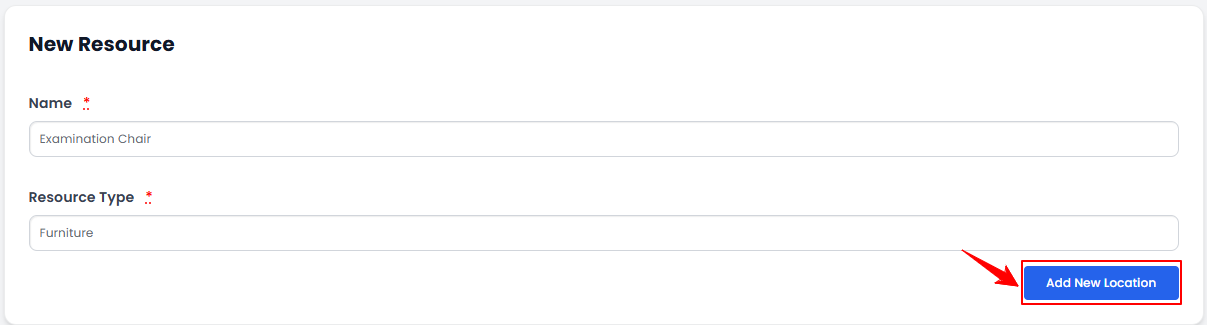 NoteThe resource “Name” refers to the specific identifier or label assigned to a resource involved in the booking process. The “Resource Type” defines the category or classification of the resource being booked. Examples include personnel (e.g., aestheticians, doctors), equipment (e.g., laser machines), or facilities (e.g., therapy rooms).
 -
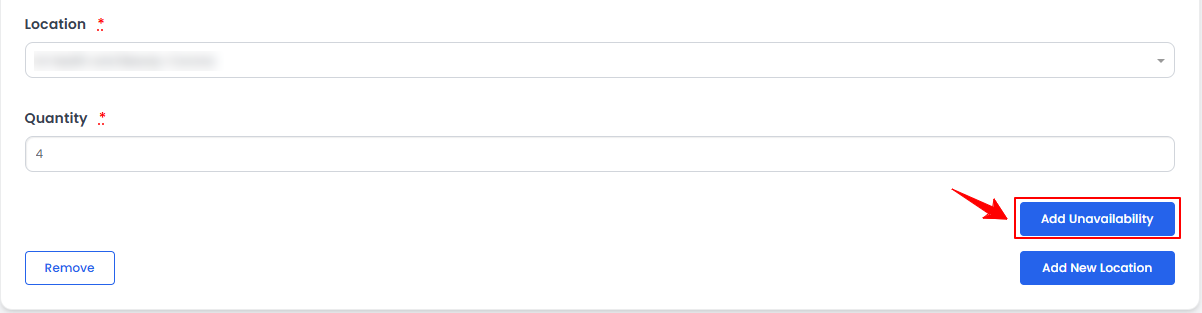
Select a Location from the dropdown menu where you want to add the resource.
-
Enter the available Quantity of the resource. To add unavailability of the resource, click on ‘’Add Unavailability.’’
-
Enter the Quantity, Start Date, End Date, Start Time, and End Time for the resources' unavailability. Once all details are entered, click '’Create Resource'’ to complete the process.
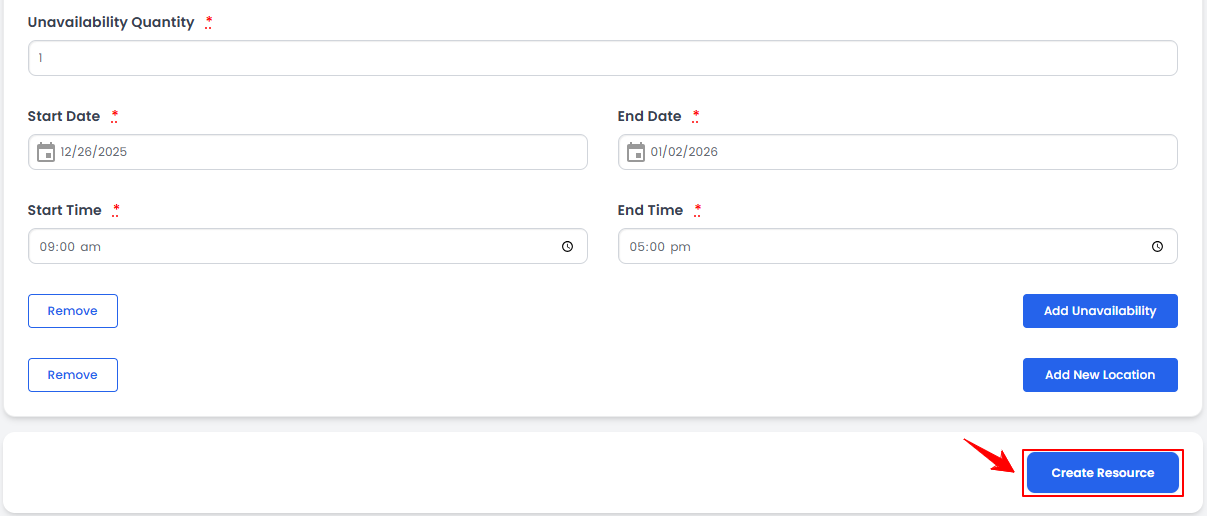 Note: Click '’Add Unavailability'’ to include more dates and times, or '’Add New Location'’ to add another location. ‘’Unavailability’’ means the resource will not be available on the selected date, time, and location.The Resource has been successfully added!
Part 2 of 4
View a Resource
-
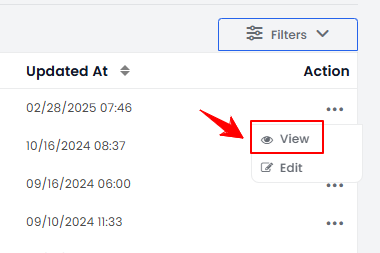
To view a specific resource from the list, click the three dots in the action column and select "View," or simply click anywhere on the resource’s data.
-
The Resource View Screen will display the complete resource details.
Part 3 of 4
Edit a Resource
-
There are two ways to edit an existing resource.
-
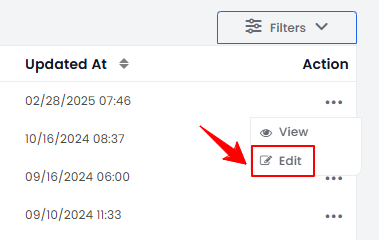
From the resource list, click on three dots under the action column and select "Edit" for the specific resource.
-
On the Resource View Screen, click on the ‘’Edit Resource’’ button on the top right corner of the screen.
-
-
Make the necessary changes and click “Update Resource” to save your updates. The resource has been successfully edited!
Part 4 of 4
Attach a Resource to a Service
-
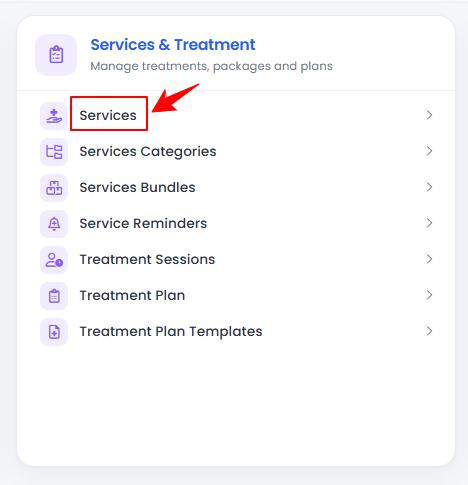
The user can attach a resource to a service by accessing the Services List Screen. From the “Admin” dashboard, click on “Services” under “Services & Treatment,” or search services in the top search bar.
-
Click the "New Service" button to add a service, or select an existing service from the list to edit.
-
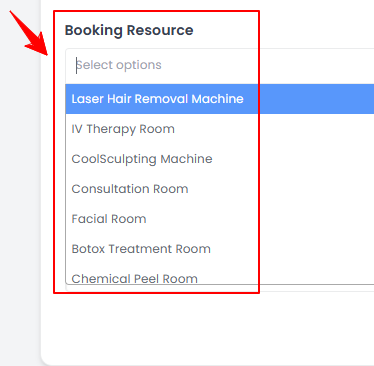
Go to Step 2 while creating or updating a service. From the Booking Resource dropdown menu, select the appropriate resource you want to attach to the service. You can choose one or multiple resources as needed.
-
After selecting the relevant resources for the service, click “Next.” At Step 3, click “Submit” to save the updates.
The Resource has been successfully attached to the service!
You’re all set
That’s every step of “Manage Resources”. Up next: Confirm a Booking and Check a Patient In.