

Understanding Terminologies
- Booking Settings
Booking settings refer to the customizable options that define how appointments are scheduled, managed, and modified. These settings typically include availability, rescheduling and cancellation policies, time limits, fees, and other preferences that control the booking process.
Part 1 of 3
Edit Booking Settings
-
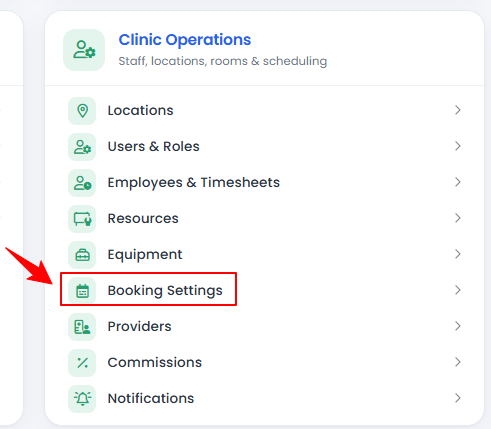
From the “Admin” dashboard, click on “Booking Settings” under “Clinic Operations,” or search booking settings in the top search bar.
-
Select “On” to enable online booking and enable waitlist for patients. Then, enter the Wallet Item Expiration value and select the desired Booking Settings Configuration from the dropdown menu.
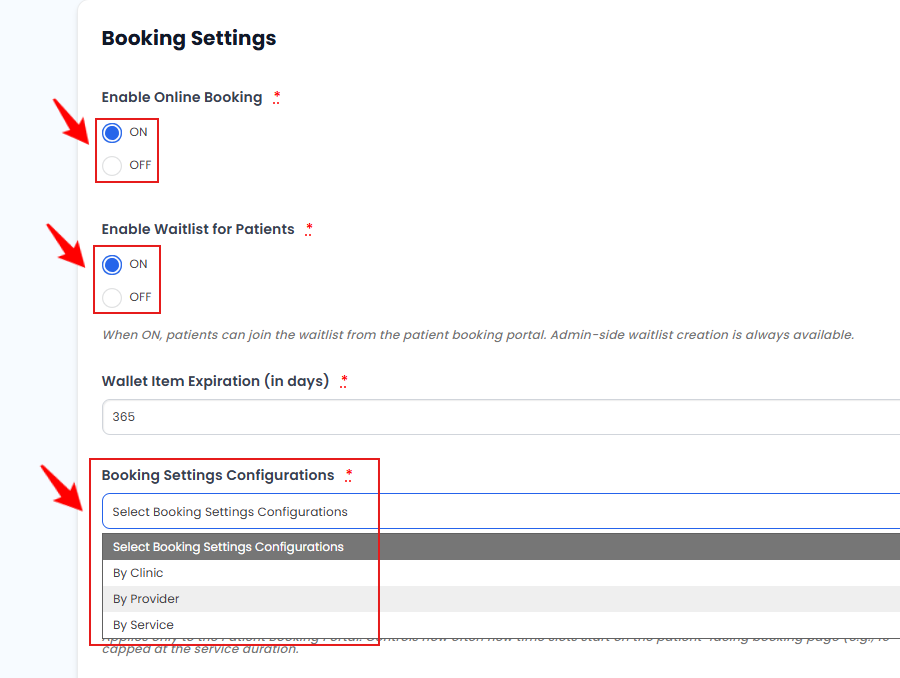 Note“Wallet Item Expiration” defines how long prepaid services, gift cards, or credits remain valid before expiring. Selecting “By Clinic” applies the booking settings to all services and providers, preventing individual customization. Selecting “By Provider” enables custom booking settings per provider. Selecting “By Service” enables custom booking settings per service.
 -
Enter the Slot Interval. To allow patients to book appointments on the same day, turn “On” the Allow Same Day Booking option. Set the Minimum Time Before a Patient Can Book (in hours), then check the box to allow rescheduling. If enabled, enter the Minimum Time Before a Patient Can Reschedule (in hours).Note“Slot Interval” controls how often new time slots start on the patient-facing booking page (e.g., 15 = every 15 minutes, 60 = hourly).
-
Next, check the box to allow cancellations. If enabled, enter the Minimum Time Before a Patient Can Cancel (without charge). Select the Cancellation Fee Type and enter the Cancellation Fee. Then, turn “On” the option to allow patients to self-cancel and self-reschedule appointments with the configured fee.
-
To edit the Email and SMS Disclaimer, click “Edit Disclaimer.” In the pop-up window, make your changes and click “Edit” to save them.
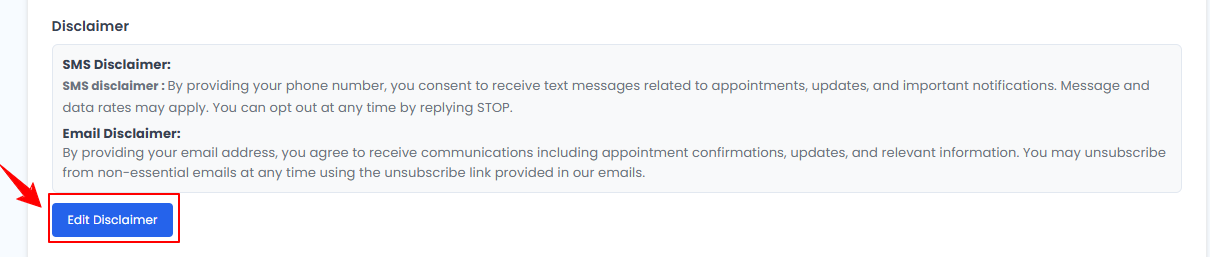 NoteThe “Email and SMS Disclaimer” is a customizable notice displayed in email and text message communications to inform patients about important terms, conditions, or legal information related to appointment notifications and other communications.
 -
To edit the Booking Details Variables, click “Configure Variables.” In the pop-up window, select the desired variables, then click “Add.”
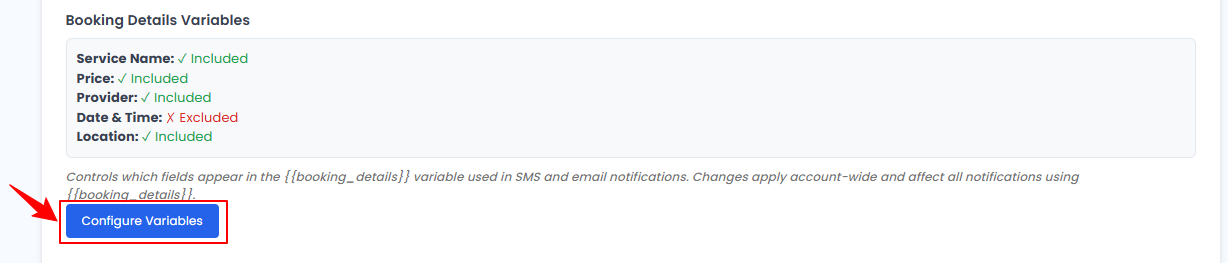 Note“Booking Details Variables” are customizable placeholders used in booking notifications, such as confirmation emails and SMS messages. These variables automatically populate appointment-specific information, such as the patient's name, appointment date and time, provider, and location, when the notification is sent.
 -
To manage Location Addresses and Map URLs, click “Manage Locations.”
-
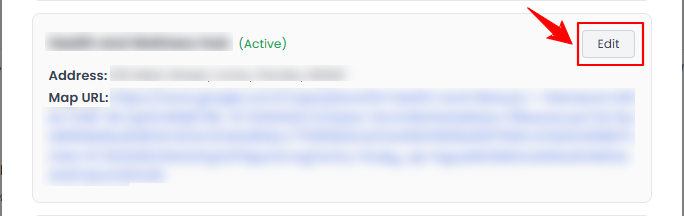
In the pop-up window, click “Edit” next to the location you want to update.
-
Make your changes and click “Save.”
-
-
Turn “On” auto no-show to automatically mark bookings as “No Show” when the appointment time passes without check-in. Then, enter the No-Show Buffer Period (in minutes).
-
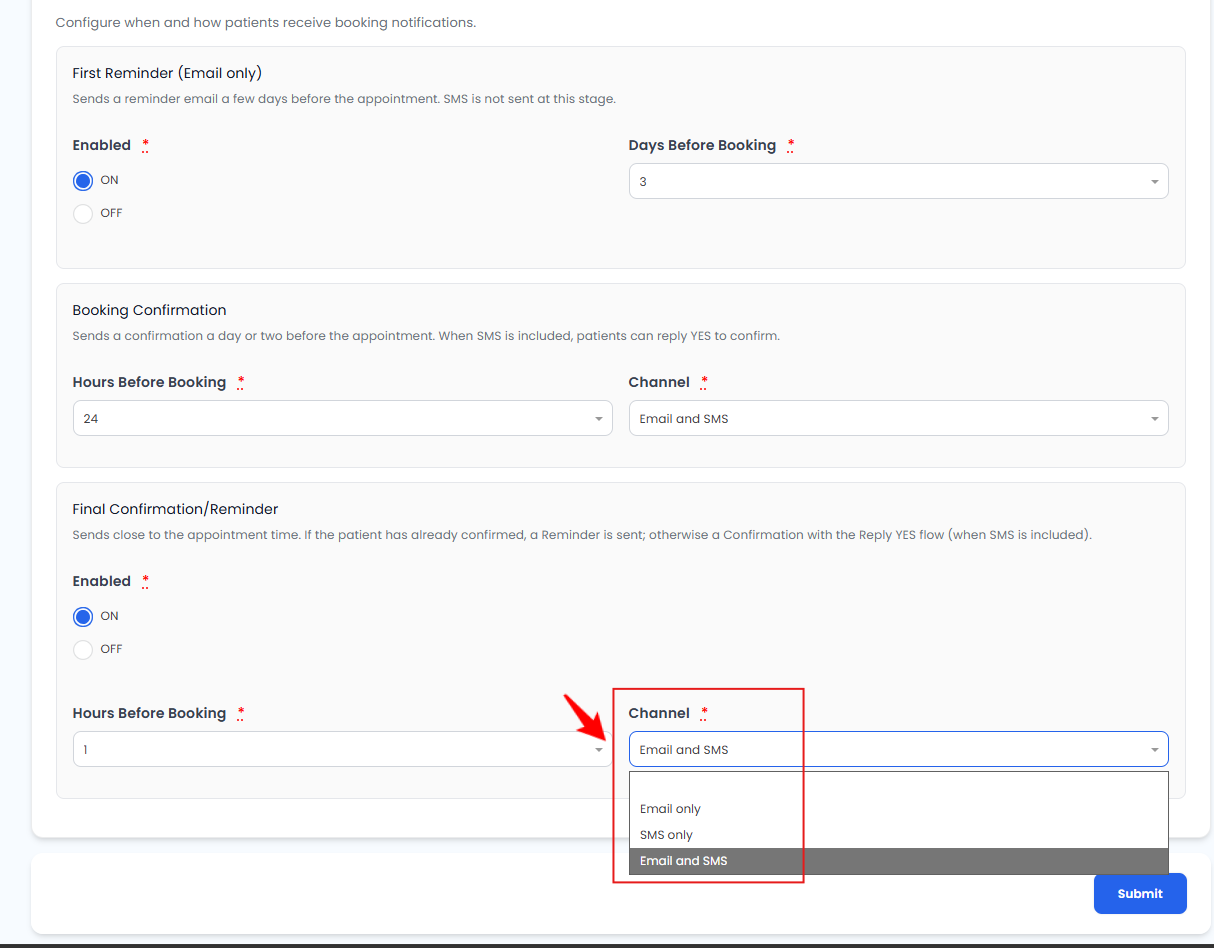
Turn “On” the First Reminder (Email Only) and specify how many Days Before the Booking the reminder should be sent. Then, set the Hours Before the Booking and Channel for the Booking Confirmation Notification. Turn “On” the Final Confirmation/Reminder, select how many Hours Before the Booking it should be sent and select the Channel from the dropdown menu, then click “Submit” to save your booking settings.
 The booking settings have been successfully saved!
Part 2 of 3
Set Booking Settings While Adding / Editing a Provider
-
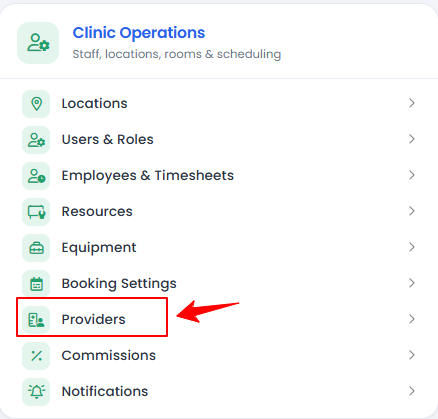
You can add or edit a provider from the Providers List Screen. From the “Admin” dashboard, click on “Providers” under “Clinic Operations,” or search providers in the top search bar.
-
To create a new provider, click the "New Provider" button in the top right corner of the screen. To edit an existing provider, click the three dots in the action column and select "Edit."
-
In Step 3 of adding or editing a provider, set up the booking settings and click "Submit" to save your changes.NoteBooking settings can be edited here only if the configuration is set to "By Provider." For detailed instructions on creating a provider, refer to the “Add / View / Edit Provider” article.
The booking settings have been successfully saved!
Part 3 of 3
Set Booking Settings While Adding / Editing a Service
-
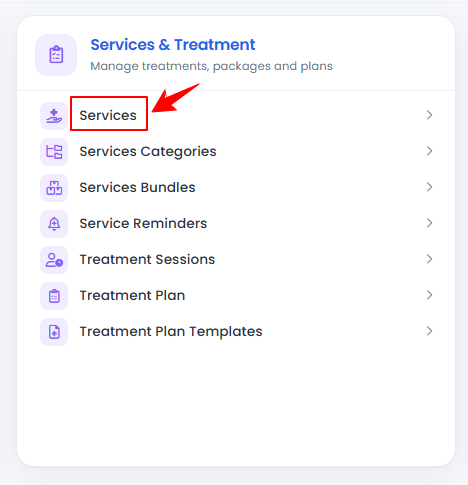
You can add or edit a service from the Services List Screen. From the “Admin” dashboard, click on “Services” under “Services & Treatment,” or search services in the top search bar.
-
To create a new service, click the "New Service" button in the top right corner of the screen. To edit an existing service, click the three dots in the action column and select "Edit."
-
In Step 3 of adding or editing a service, complete the additional details, including booking settings, and click "Submit" to save.NoteBooking settings can be edited here only if the configuration is set to "By Service." For detailed instructions on creating a service, refer to “Add / View / Edit a Service” article.
The booking settings have been successfully saved!
You’re all set
That’s every step of “Manage Booking Settings”. Up next: Reschedule a Booking.