

 DigiMEDSPA EMR
 DigiMEDSPA CONNECT ™
Send Booking Confirmation Notification
This user guide explains how to send booking confirmation notifications to patients after an appointment is successfully scheduled. It helps ensure patients receive timely confirmation messages, improving communication and reducing missed appointments.
Understanding Terminologies
Booking Confirmation Notification
Booking confirmation notification is an automated message sent to a patient after they successfully schedule an appointment or service. It confirms the booking details, such as date, time, location, and service, ensuring the patient knows their appointment has been successfully reserved.
Access this link: https://digimedspa.com/ap2/products
Send Booking Confirmation Notification Through the Bookings List Screen
- The user can send booking confirmation notification through the Bookings List Screen accessible from two entry points.
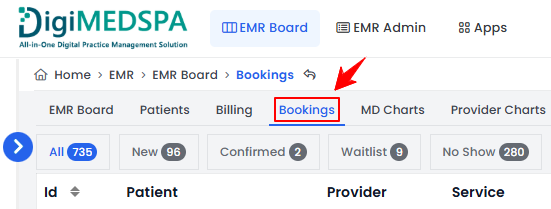
- From the EMR Board Tabs, select “Bookings.”


- From the Left Navigation, click on the “EMR Board” dropdown menu and select “Bookings.’’ Alternatively, you can type “Bookings” into the search bar in the Left Navigation.
- From the EMR Board Tabs, select “Bookings.”
- From the bookings list, click on three dots under the action column and select "Send Booking Confirmation Notification" for the specific booking.
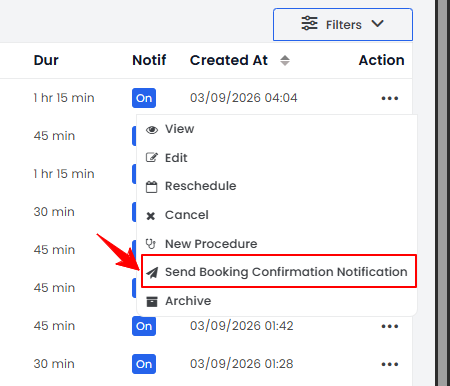 Note: Booking confirmation notifications are only sent for new bookings. They cannot be sent for bookings where the patient has already confirmed and checked in.
 - The patient will receive a booking confirmation notification via email and SMS containing all the booking details. To confirm the booking, the patient must click the “Click Here” link provided in the email or SMS.
The booking confirmation notification has been successfully sent through the Bookings List Screen!
Send Booking Confirmation Notification Through the Patient Profile
- The user can send booking confirmation notification through the patient profile accessible from two entry points.
- From the EMR Board Tabs, click on ‘’Patients.’’
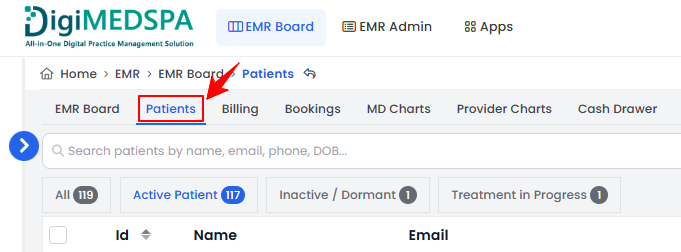
- From the Left Navigation, click on the “EMR Board” dropdown menu and select “Patients.’’ Alternatively, you can type “Patients” into the search bar in the Left Navigation.
- From the EMR Board Tabs, click on ‘’Patients.’’
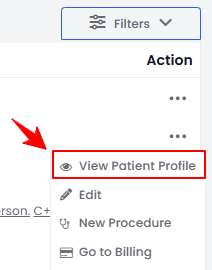
- To view a specific patient from the list, click the three dots under the action column and select "View Patient Profile," or simply click anywhere on the patient’s data.
- On the Patient Information Screen, users can view a comprehensive overview of the patient’s information. Click on the “Bookings” tab to view all the patient’s bookings.

- Click on three dots under the action column and select "Send Booking Confirmation Notification" for the specific booking.
- The patient will receive a booking confirmation notification via email and SMS containing all the booking details. To confirm the booking, the patient must click the “Click Here” link provided in the email or SMS.
The booking confirmation notification has been successfully sent through the patient profile!