

 DigiMEDSPA EMR
 DigiMEDSPA CONNECT ™
Sign the Consent Forms for a Procedure
This user guide offers step-by-step instructions on how to have patients sign the consent form for a procedure.
Understanding Terminologies
Consent Form
Consent forms are legal documents that patients sign to acknowledge their understanding of a procedure, its potential risks, benefits, and alternatives, and to grant permission for the procedure to proceed.
Procedures
Procedures are aesthetic treatments performed to enhance or improve a person’s appearance (e.g. Botox, laser treatments, facials, body contouring) . Since these procedures are elective, obtaining informed consent protects both the patient and the provider by ensuring clear communication, managing expectations, and fulfilling legal and ethical obligations. This helps prevent misunderstandings and potential legal issues.
Access this link: https://digimedspa.com/ap2/procedures
Signing the Consent Form for a Procedure Through Procedure View Screen
- The user can sign the consent form for a procedure through the patient profile accessible via two entry points:
- From the EMR Board Tabs, select “Patients.’’

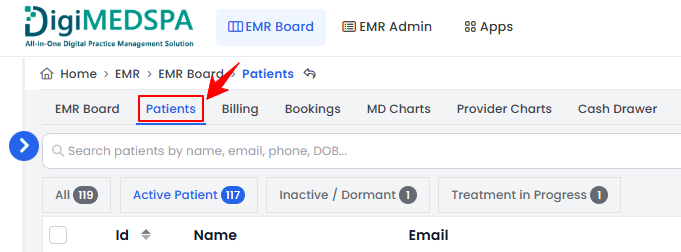
- From the Left Navigation, click on the “EMR Board” dropdown and select “Patients.” Alternatively, you can type “Patients” into the search bar in the Left Navigation.
- From the EMR Board Tabs, select “Patients.’’
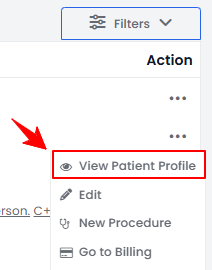
- From the patient list, click on three dots under the action column and select "View Patient Profile" for the specific patient, or simply click anywhere on the patient’s data.
- On the Patient Information Screen, users can access a comprehensive summary of all patient details. To view the procedures, simply click on the ‘’Procedures’’ tab.

- Here, you will find all procedures for the patient. Click “View Procedure” next to the desired procedure to access its details.
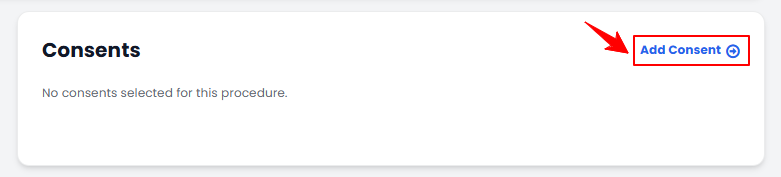
Note: The Procedure View Screen can also be accessed through the Bookings List Screen and the EMR Board. For detailed navigation, refer to our “Create a New Procedure” article. - On the Procedure View Screen, click “Add Consent” in the Consents section to add a consent to the procedure.
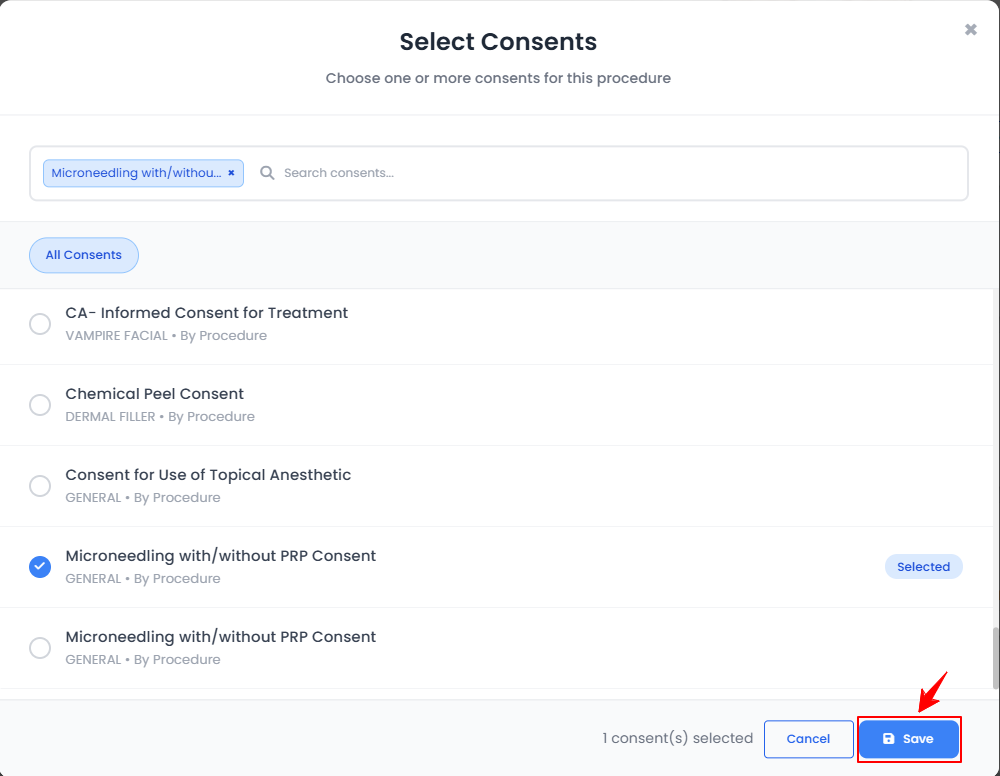
Note: Any consents already assigned to the booked service will appear in the Consents section. - Select the desired consents and click “Save.”
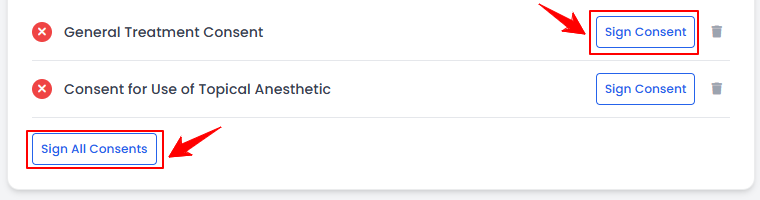
- The consent will be added. To sign, click “Sign Consent,” or choose “Sign All Consents” to sign multiple consents at once.
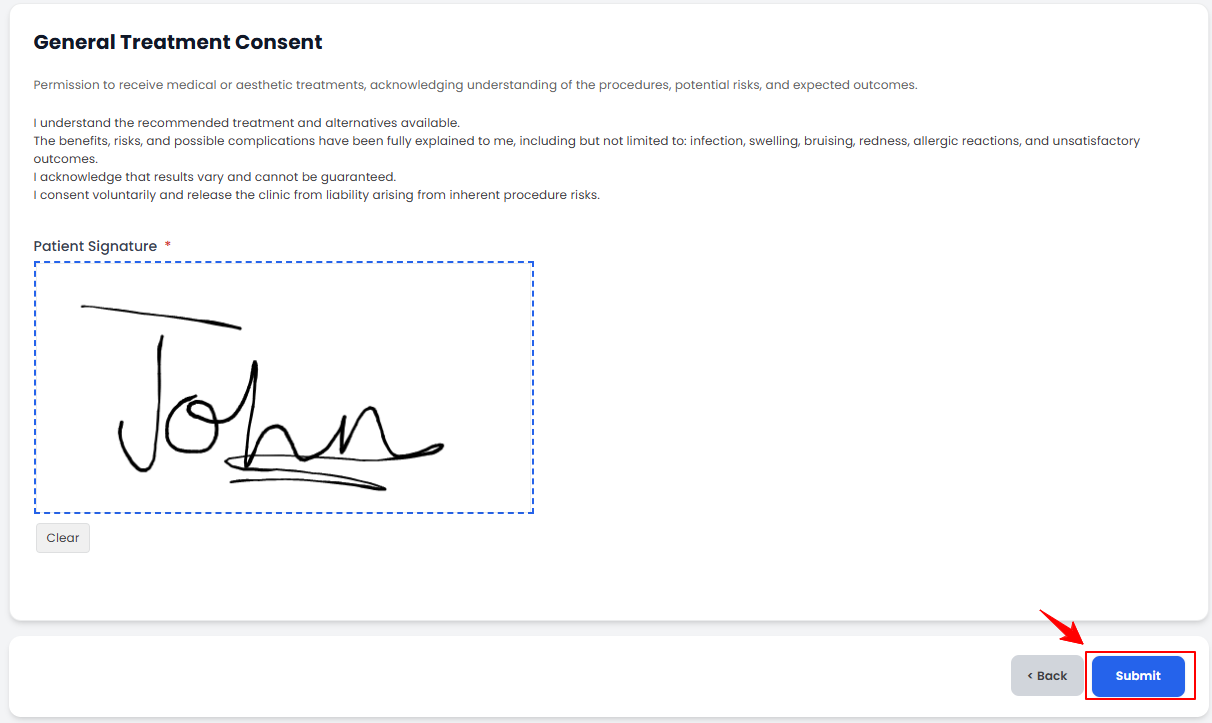
- If you choose to sign a single consent, you will be directed to the Consent Form Screen. Complete the signature and click “Submit.”
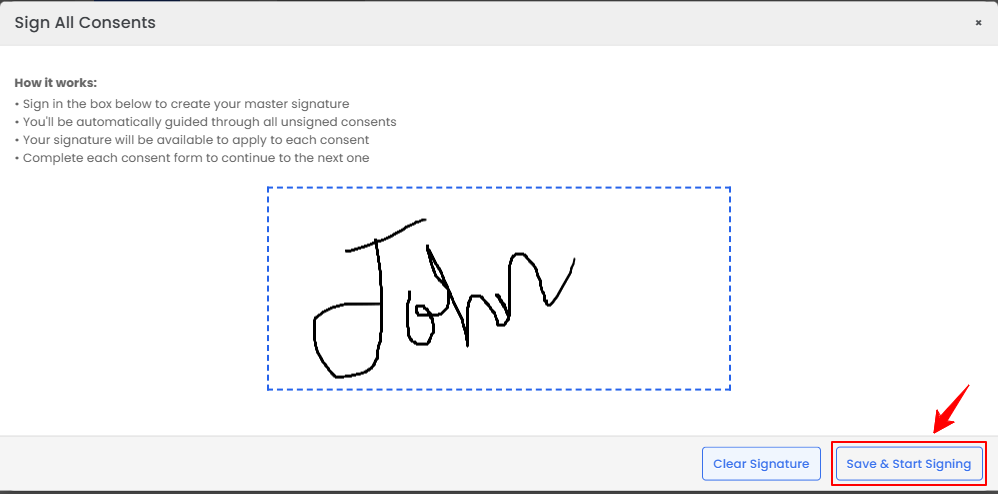
- If you choose to sign all consents, a pop-up window will appear with instructions. Enter your signature in the provided space and click “Save & Start Signing” to save it.
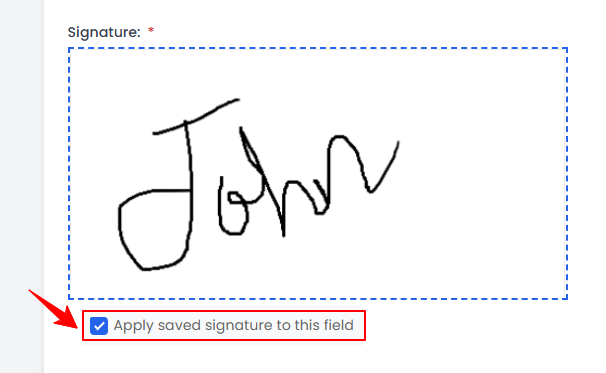
- Select “Apply Saved Signature to This Field” to automatically fill the signature in the designated space, then click “Submit” when finished.
The consents have been successfully signed!