How to Upload Procedure Images?
This user guide provides step-by-step instructions for uploading procedure images, ensuring accurate documentation and efficient patient record management.
Understanding Terminologies
Procedure Images
Procedure images are visual records captured before, during, or after a medical or aesthetic procedure to document treatment progress, ensure accuracy, and enhance patient records.
Upload Before Images While Creating a Procedure Through Multi Page View
- The user can upload before procedure images while creating a procedure through Multi Page View from three entry points:
- From the EMR Board select a booking that is in the ‘’Checked In’’ step then press the ‘’Start Procedure’’ button to move that booking to the ‘’In Procedure’’ phase.

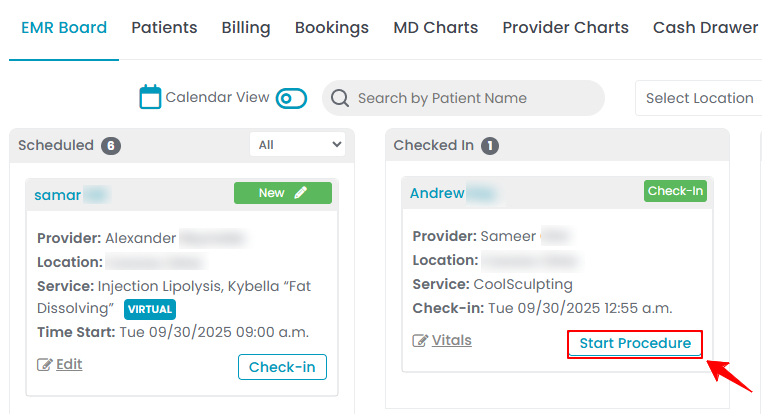
- Here, the user can choose to create either a “Multi Page View” procedure or a “Single Page View” procedure. Click on the “Multi Page View” option.
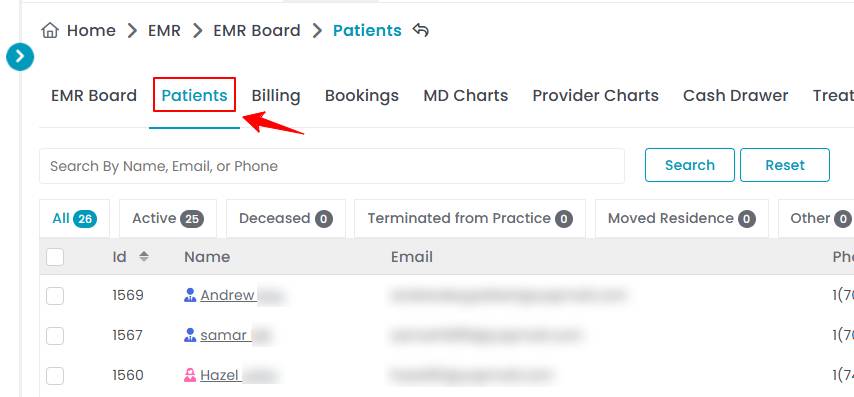
- From the EMR Board tabs, click on “Patients.”
- From the patient list, click on three dots under the action column and select "New Procedure" for the specific patient.
- Alternatively, you can click “View Patient Profile” from the three dots in the Action column. Within the patient profile, every page includes a “New Procedure” button in the Quick Actions, located at the bottom left under the patient’s information, then choose “Multi Page View.”
- From the EMR Board tabs, click on “Bookings.”
- From the list of all bookings, click on three dots under the action column and select "New Procedure" for the specific booking, then choose “Multi Page View.”Note: If patient information and booking details have already been entered, Steps 1 and 2 will be auto-filled, and you will be taken directly to Step 3 of creating a procedure.
- From the EMR Board select a booking that is in the ‘’Checked In’’ step then press the ‘’Start Procedure’’ button to move that booking to the ‘’In Procedure’’ phase.
- Complete the first 6 steps and proceed to Step 7 of creating a procedure. Select the patient’s images you want to upload from the following angles: front, right 45°, left 45°, right 90°, and left 90°. Once you have uploaded and selected the required images, click “Next” to move to the charting screen and complete the procedure.

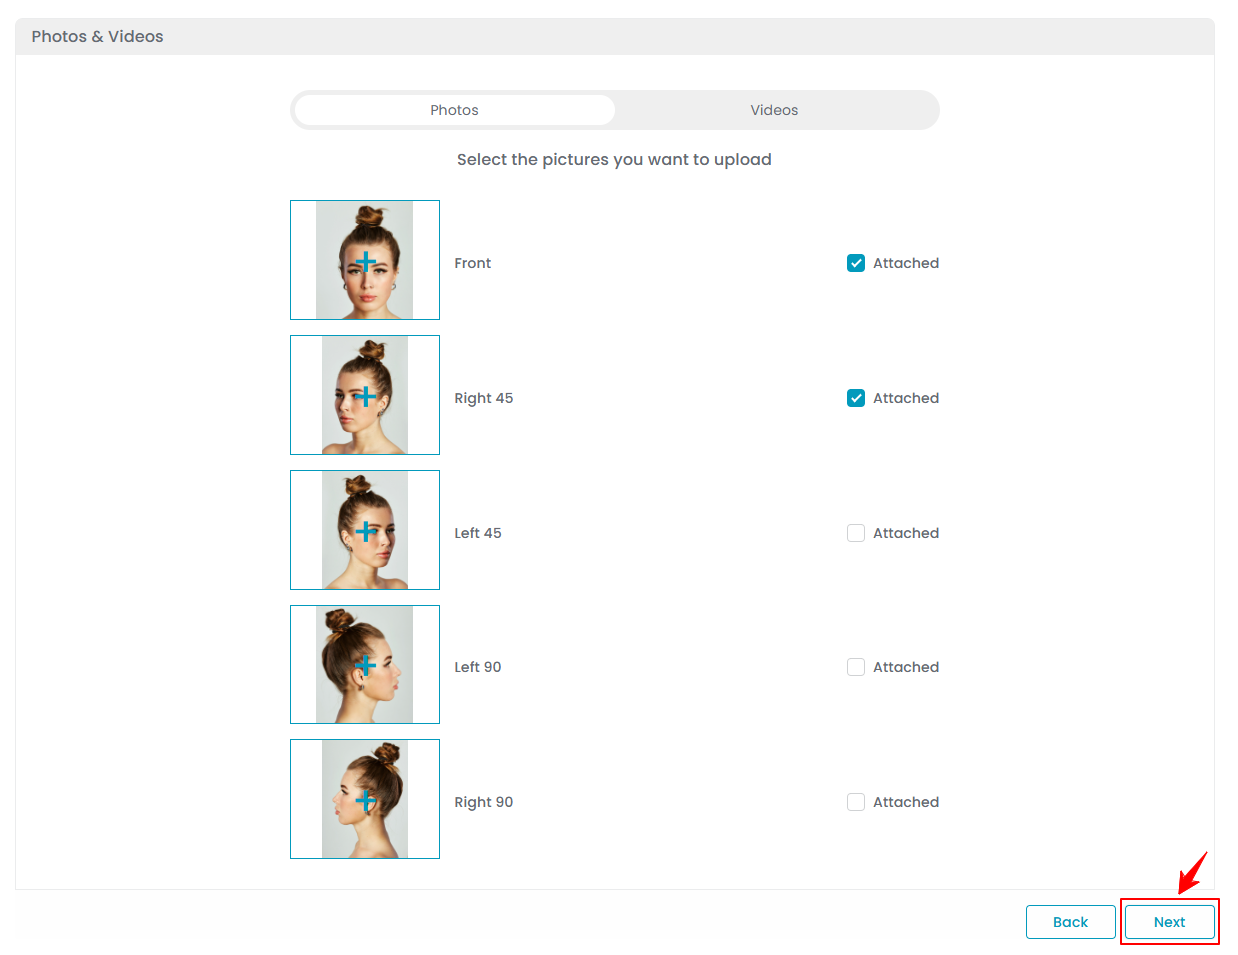 The procedure images (before images) have been successfully uploaded!
Upload Before Images While Creating a Procedure Through Single Page View
- After selecting Single Page View, complete the form details and scroll to the last section. Click “Choose File” to upload before images of the procedure area, ensuring coverage from the following angles: Front, Right 45°, Left 45°, Right 90°, and Left 90°. These images are required for treatment charting and injection markings. Once uploaded and selected, click “Save & Chart” to proceed to the Marking screen.

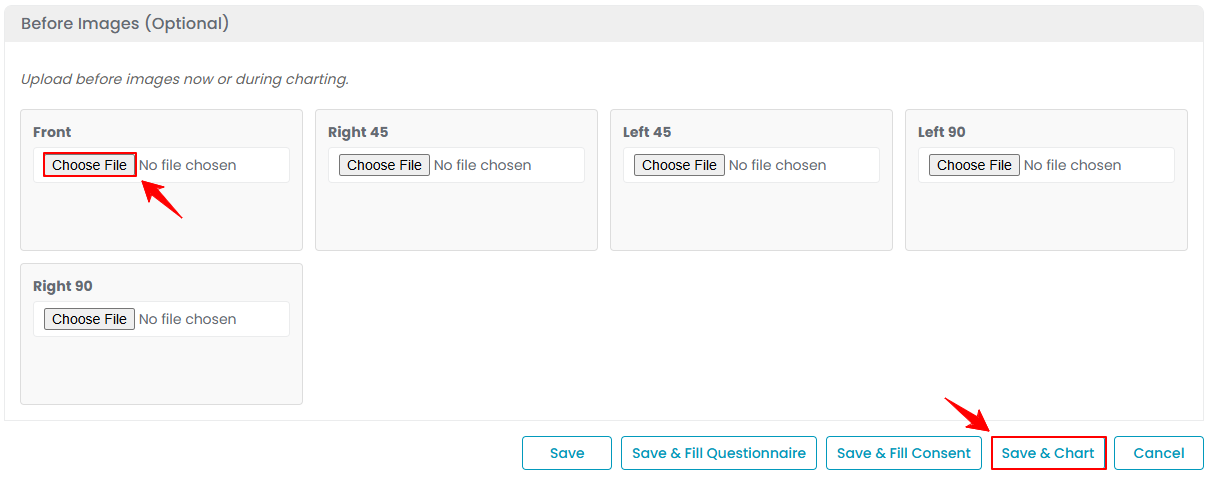 The procedure images (before images) have been successfully uploaded!
Upload After Images Through the Patient Profile
- The user can upload procedure images through the patient profile by accessing the Patients List Screen via two entry points.
- From the patient list, click on three dots under the action column and select "View Patient Profile" for the specific patient.

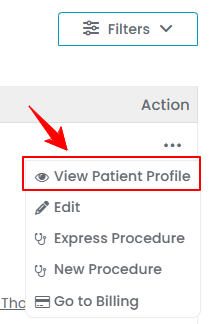
- On the patient profile, users can access a comprehensive summary of all patient details. To view the procedures, simply click on the ‘’Procedures’’ tab.


- Here, you will see all procedures for the patient, including both ‘’In Process’’ and ‘’Finished’’ procedures. To upload after images for a procedure, click “View Procedure” in the top-right corner of the screen for that specific procedure.


- The procedure details screen will open. In the right corner, click “Upload Images” to add the before images and “Upload After Images” to add the after images. To compare them side by side, click the “Comparison Tool.”

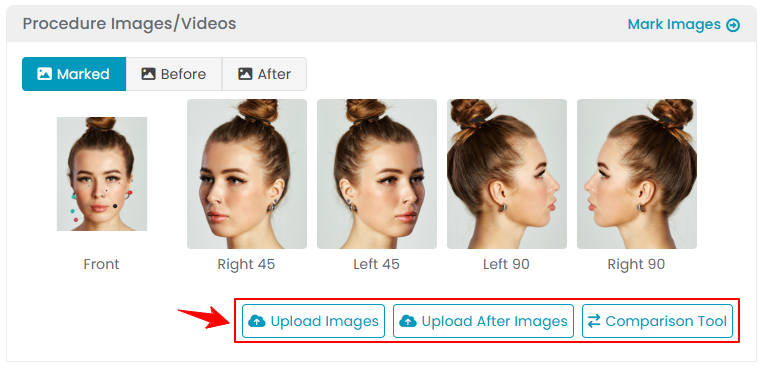 Note: “Before Images” can also be added during procedure creation, while “After Images” can only be added through the patient profile. For more information, refer to our “View Before and After Images” and “Compare Before and After Images Using the Comparison Tool” user guides.
 - To upload ‘’After Images,’’ click the “+” sign on the images and select the file to upload. Once the images are uploaded, click “Save” to complete the upload and add the after images to the procedure record.

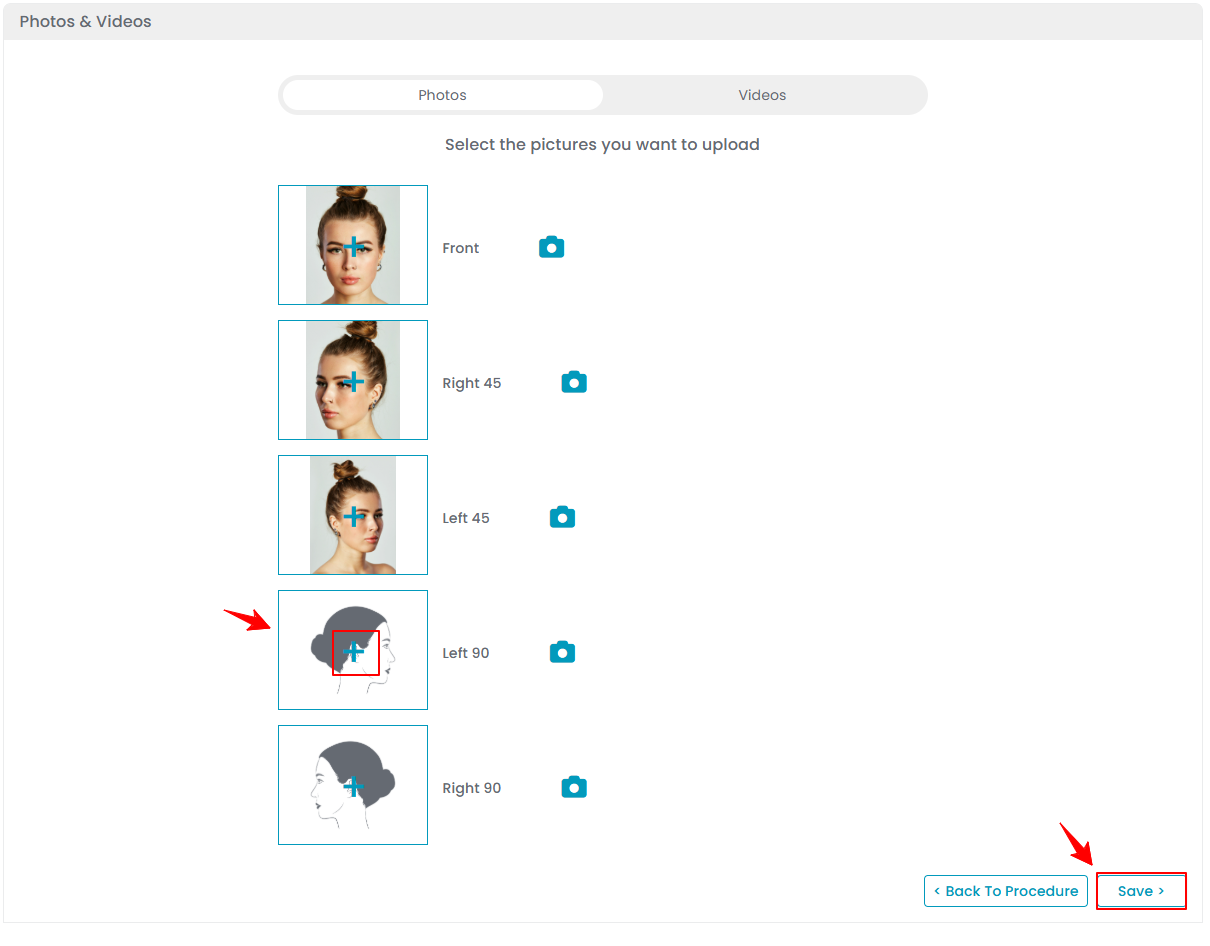 The after procedure images have been successfully uploaded!


