Sign the Consent Form for a Cosmetic Procedure
This user guide offers step-by-step instructions on how to have patients sign the consent form for a cosmetic procedure. Signing consent forms before the procedure is mandatory to ensure patient consent and legal compliance.
Understanding Terminologies
Consent Form
Consent forms are legal documents that patients sign to acknowledge their understanding of a procedure, its potential risks, benefits, and alternatives, and to grant permission for the procedure to proceed. Consent forms are particularly important for cosmetic procedures to ensure that patients are fully informed and have agreed to the procedure.
Cosmetic Procedure
Cosmetic procedures are esthetic treatments performed to enhance or improve a person’s appearance (e.g. Botox, laser treatments, facials, body contouring) . Since these procedures are elective, obtaining informed consent protects both the patient and the provider by ensuring clear communication, managing expectations, and fulfilling legal and ethical obligations. This helps prevent misunderstandings and potential legal issues.
Signing the Consent Form for a Cosmetic Procedure
- Consent forms for cosmetic procedures can be signed through the "Cosmetic Procedures" section, accessible via five different entry points.
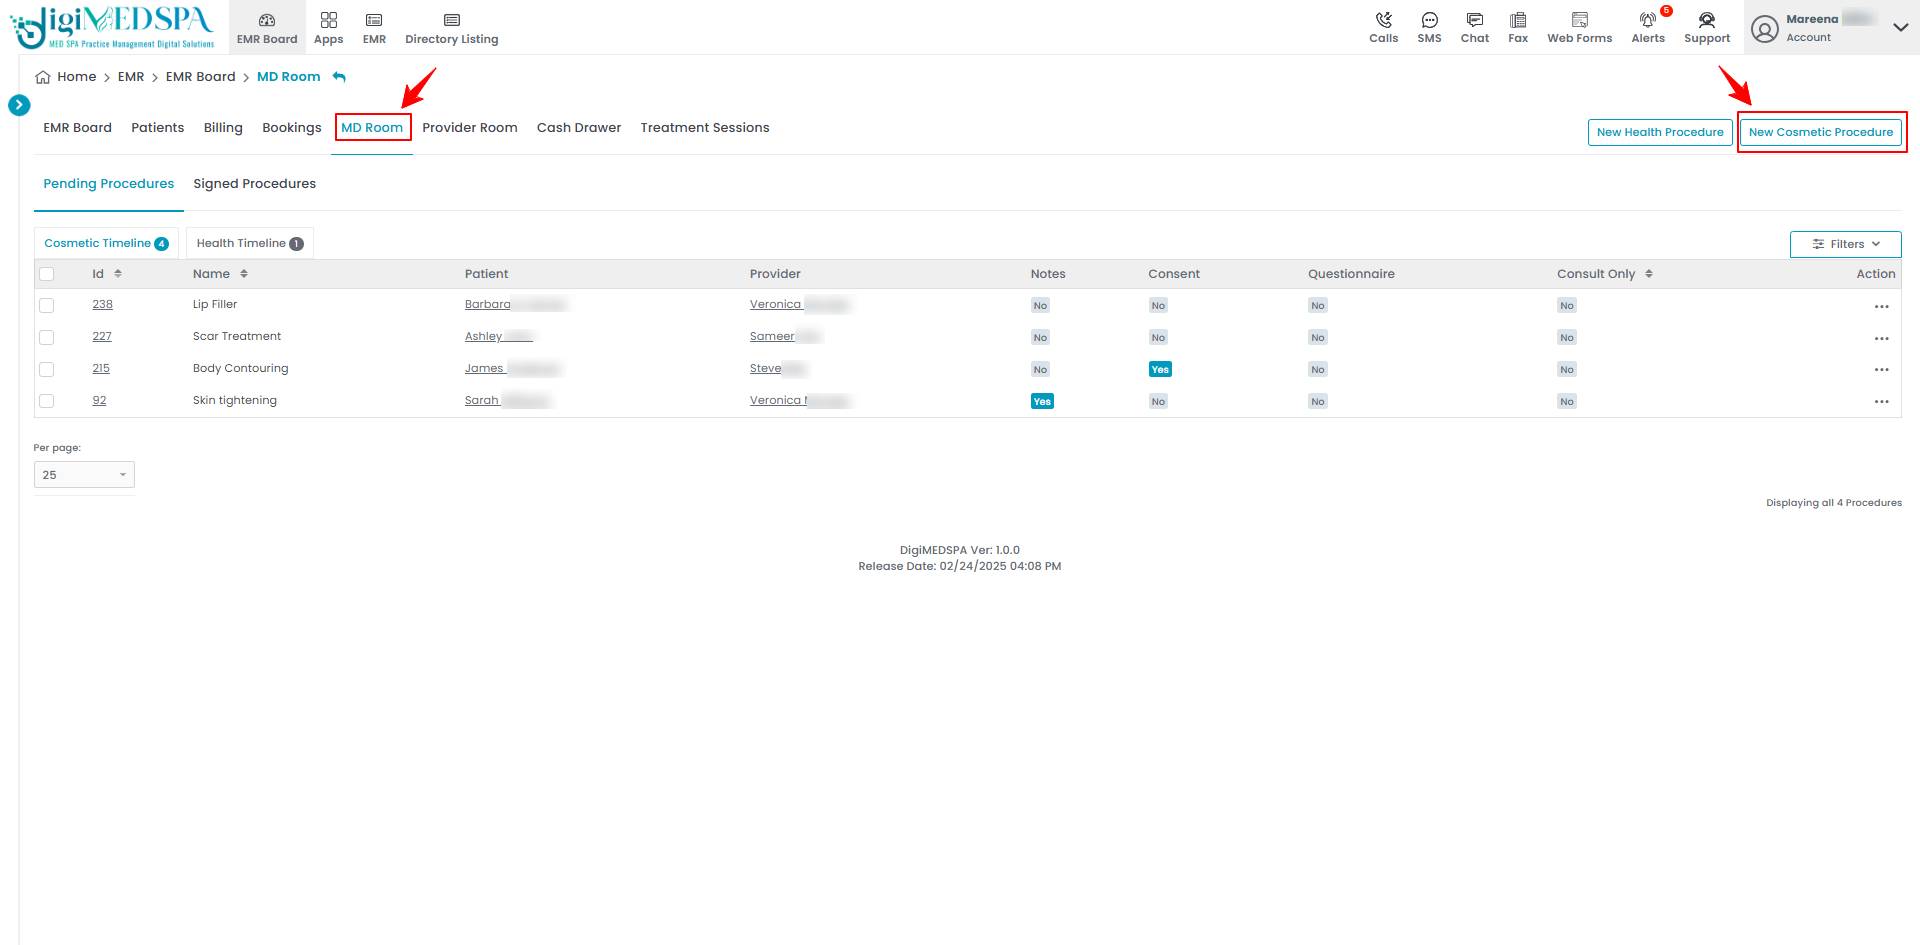
- From the EMR Board tabs, click on the “MD Room” tab and select "New Cosmetic Procedure" to create one.

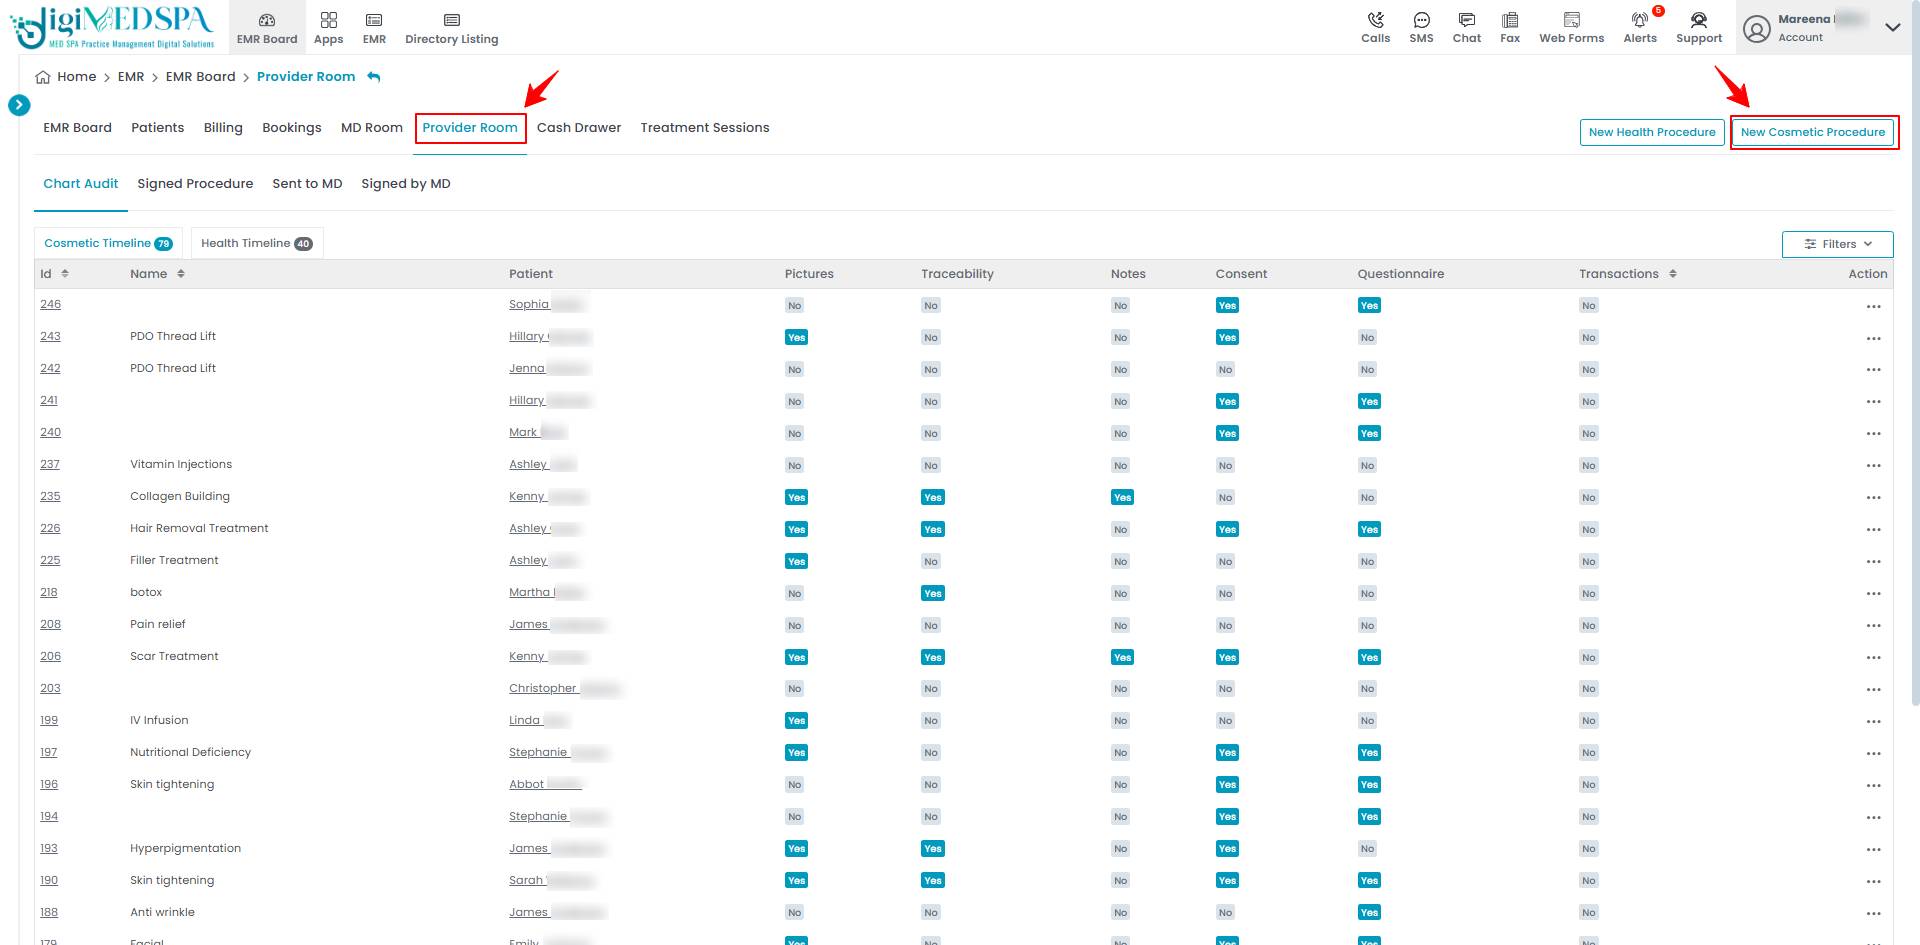
- From the EMR Board tabs, click on the “Provider Room” tab and select "New Cosmetic Procedure".

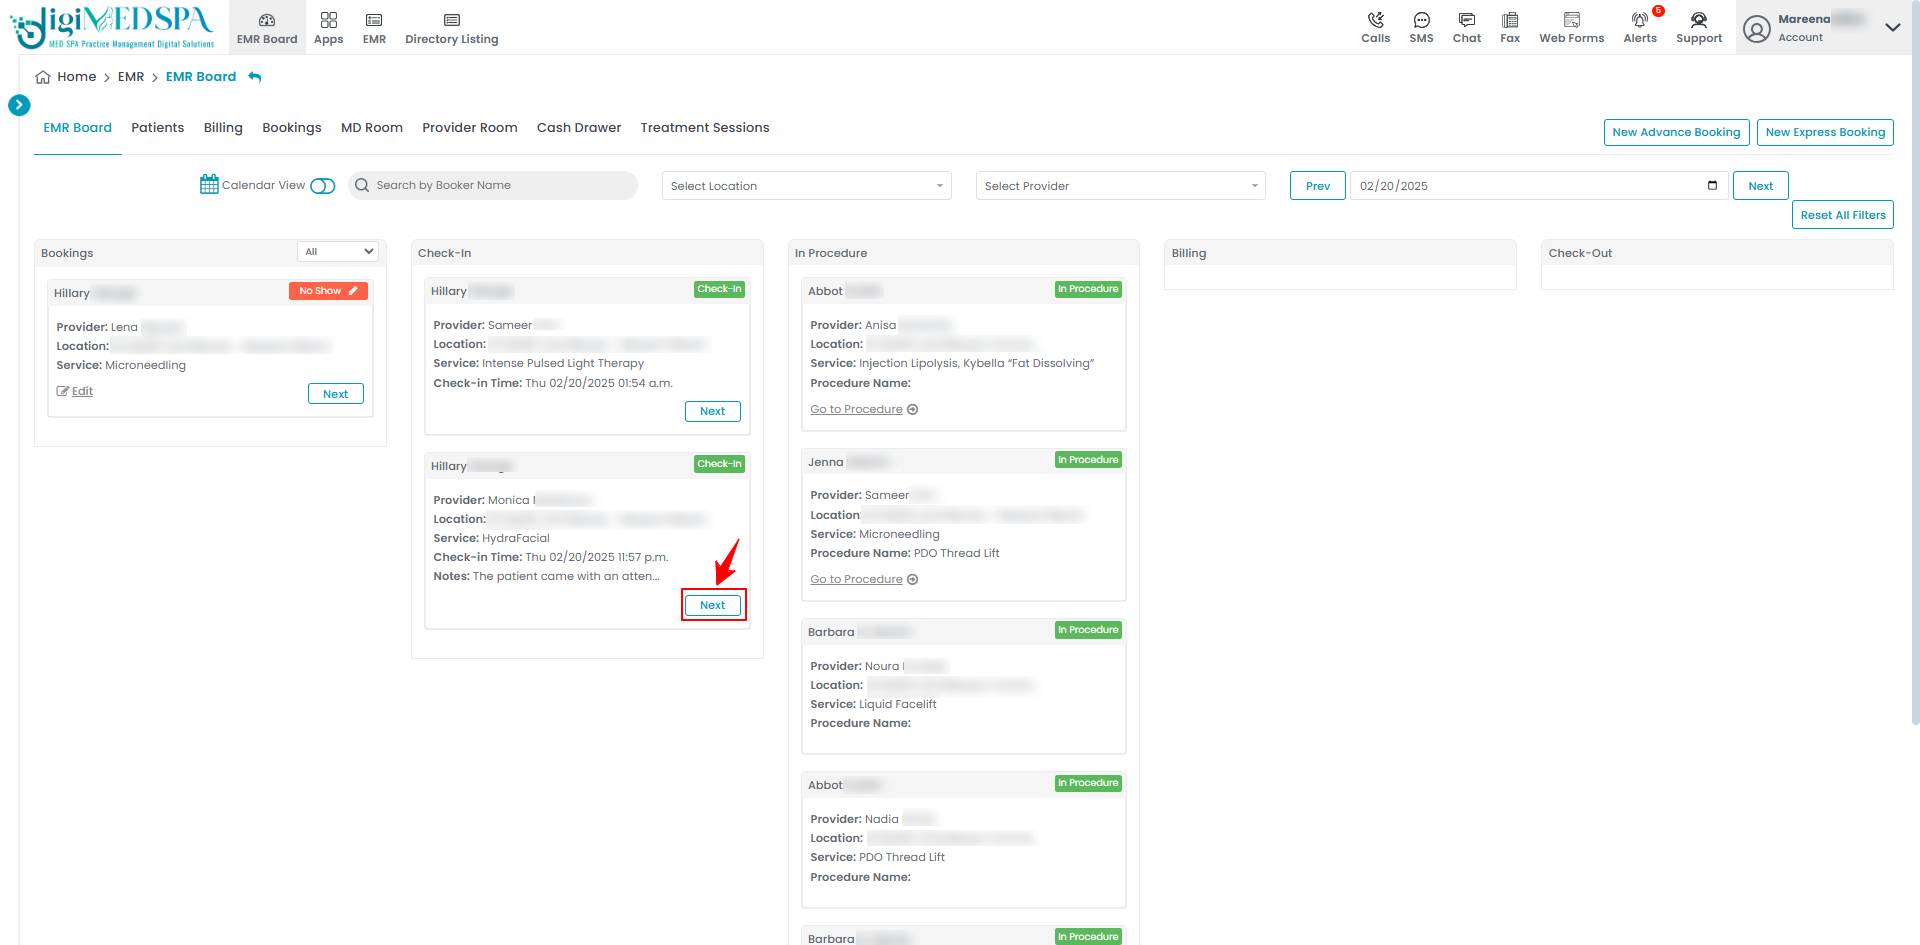
- From the EMR Board select an appointment or booking that is in the ‘’Check-in’’ step then press the ‘’Next’’ button to move that booking to the ‘’In Procedure’’ phase.

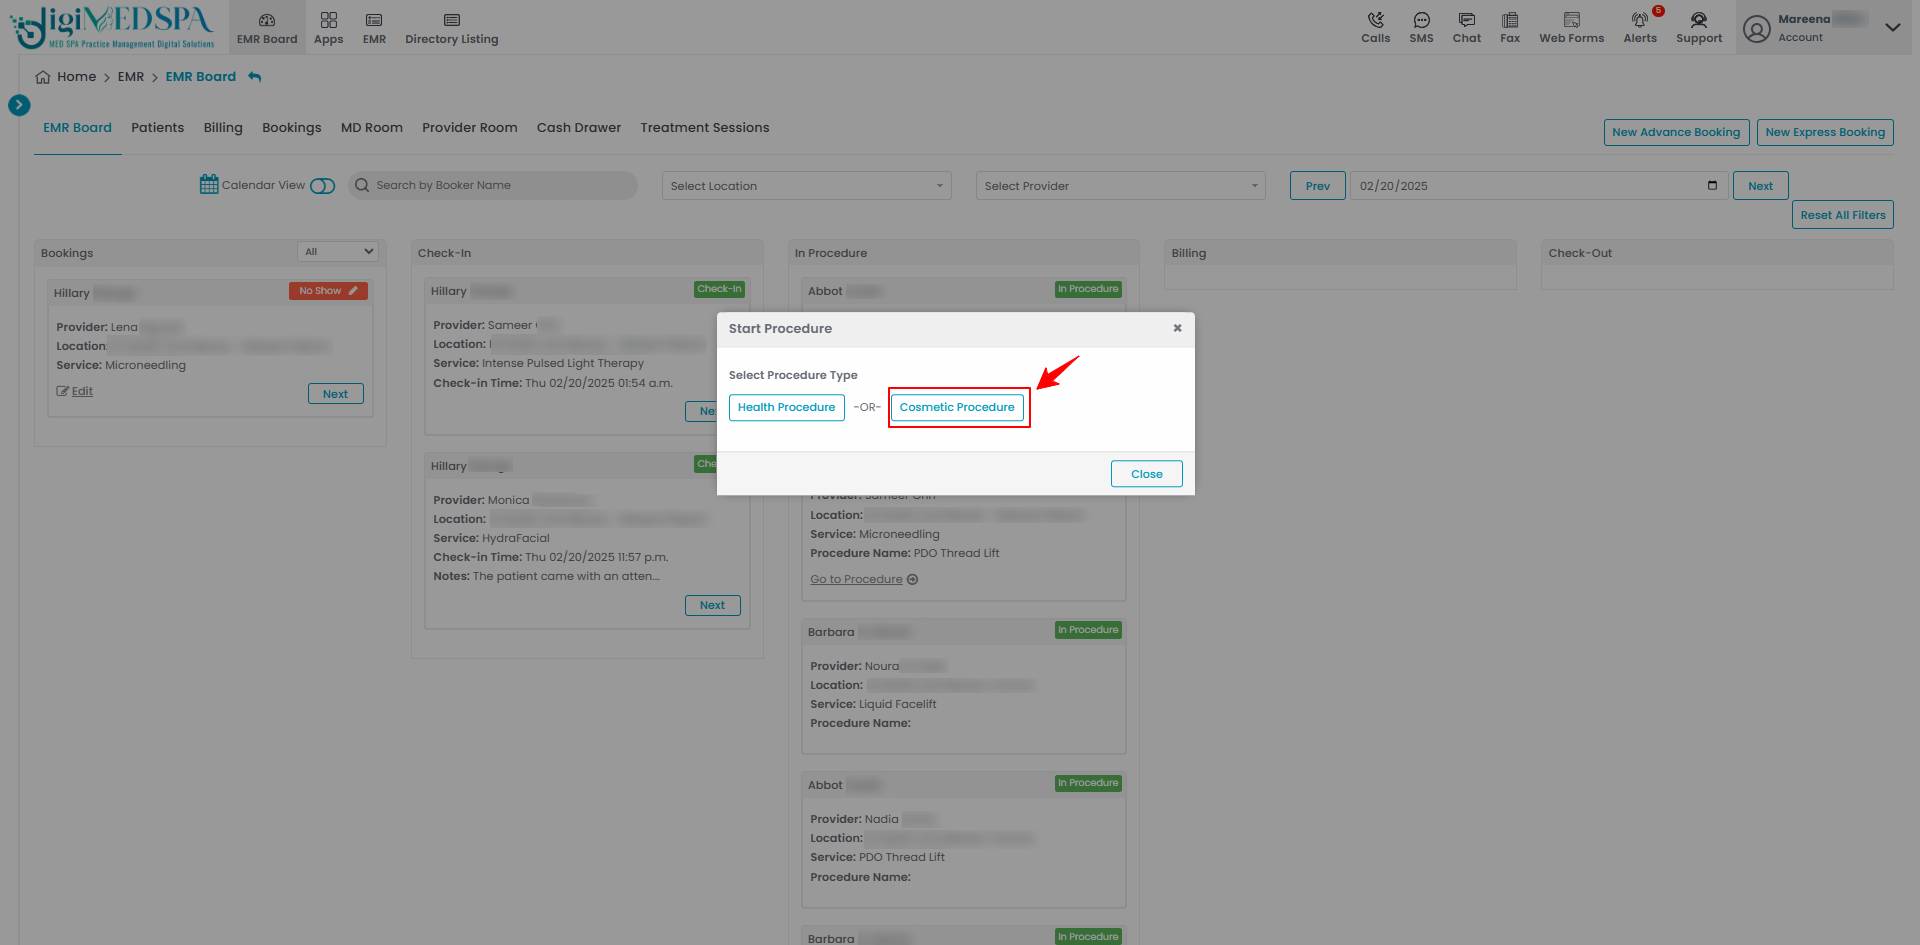
 When a booking is in progress, the user can choose to create either a health procedure or a cosmetic procedure based on the specific requirements. Selecting "Cosmetic Procedure" will take the user to the first step of creating a cosmetic procedure.
- From the EMR Board tabs, click on “Patients.”

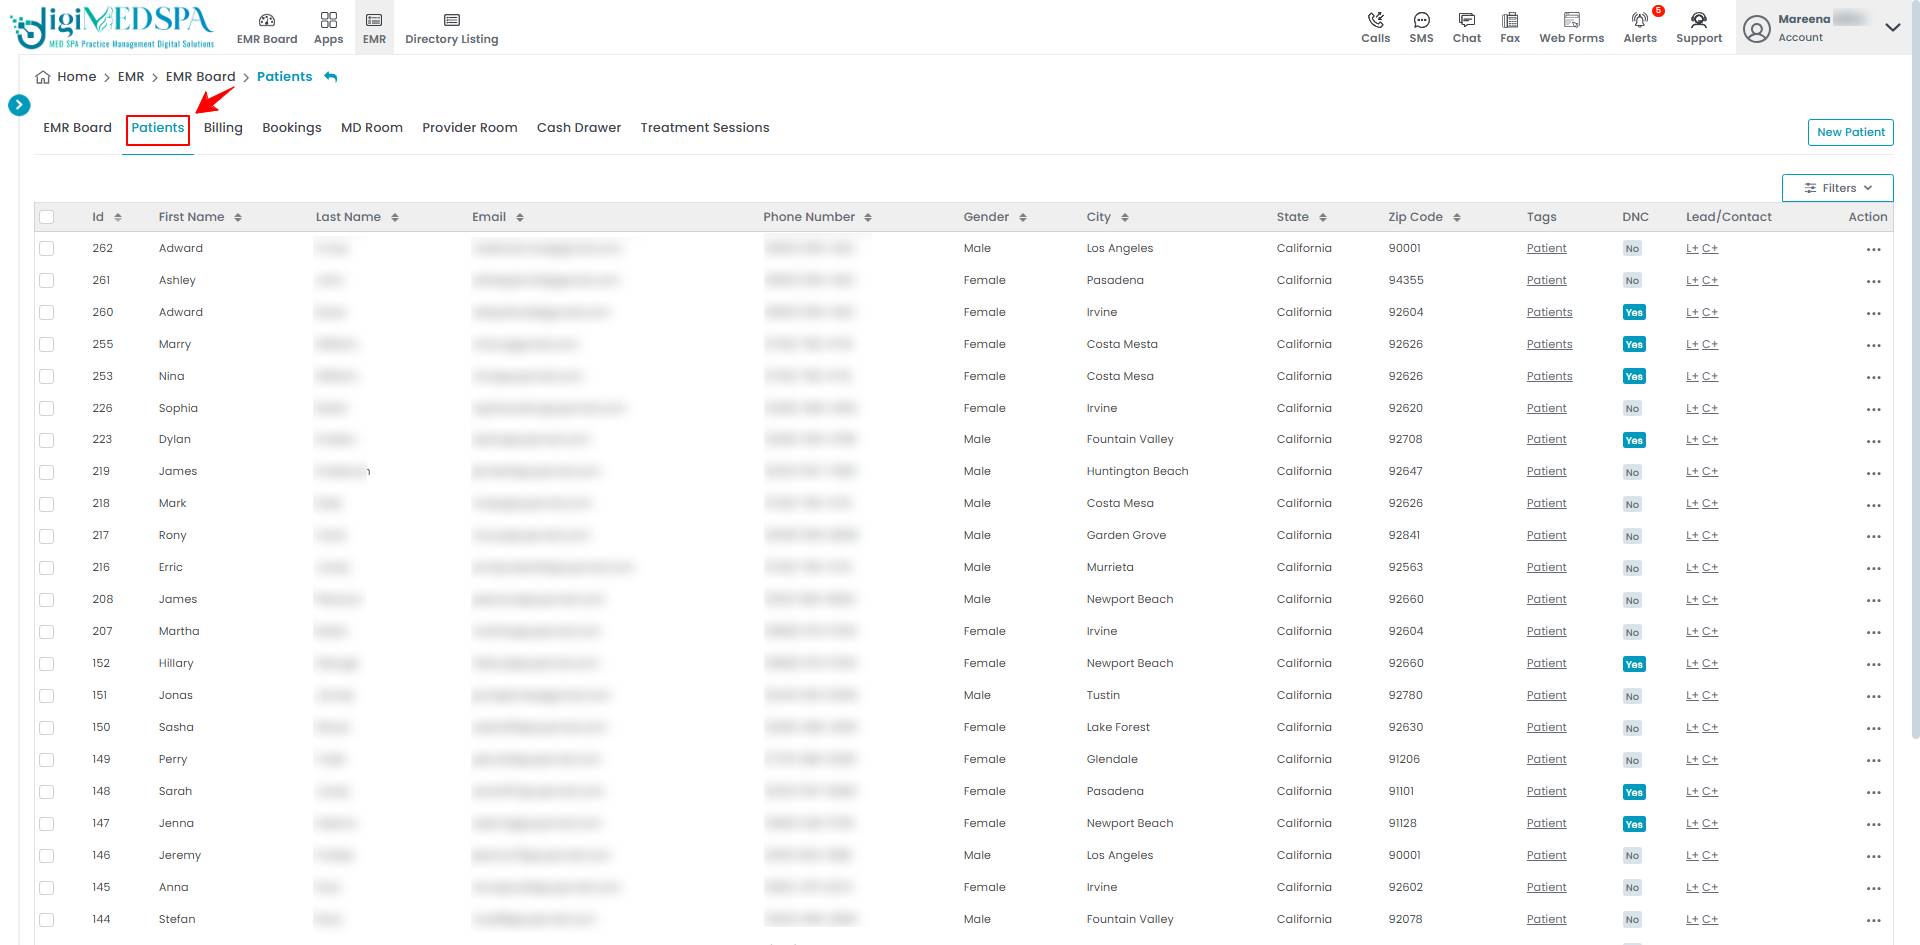 From the patient list, click on three dots under the action column and select "New Cosmetic Procedure" for the specific patient.

- From the EMR Board tabs, click on “Bookings.”

 From the list of all bookings, click on three dots under the action column and select "New Cosmetic Procedure" for the specific booking.

 Note: Clicking the "New Cosmetic Procedure" button from any entry point will take the user to step 1 of creating a cosmetic procedure. If patient information and booking details are already entered, the user will go directly to Step 3 of creating a cosmetic procedure.
- From the EMR Board tabs, click on the “MD Room” tab and select "New Cosmetic Procedure" to create one.
- Complete the first five steps of creating a cosmetic procedure and proceed to Step 6, “Consents”. Select the relevant consent forms from the dropdown menu.

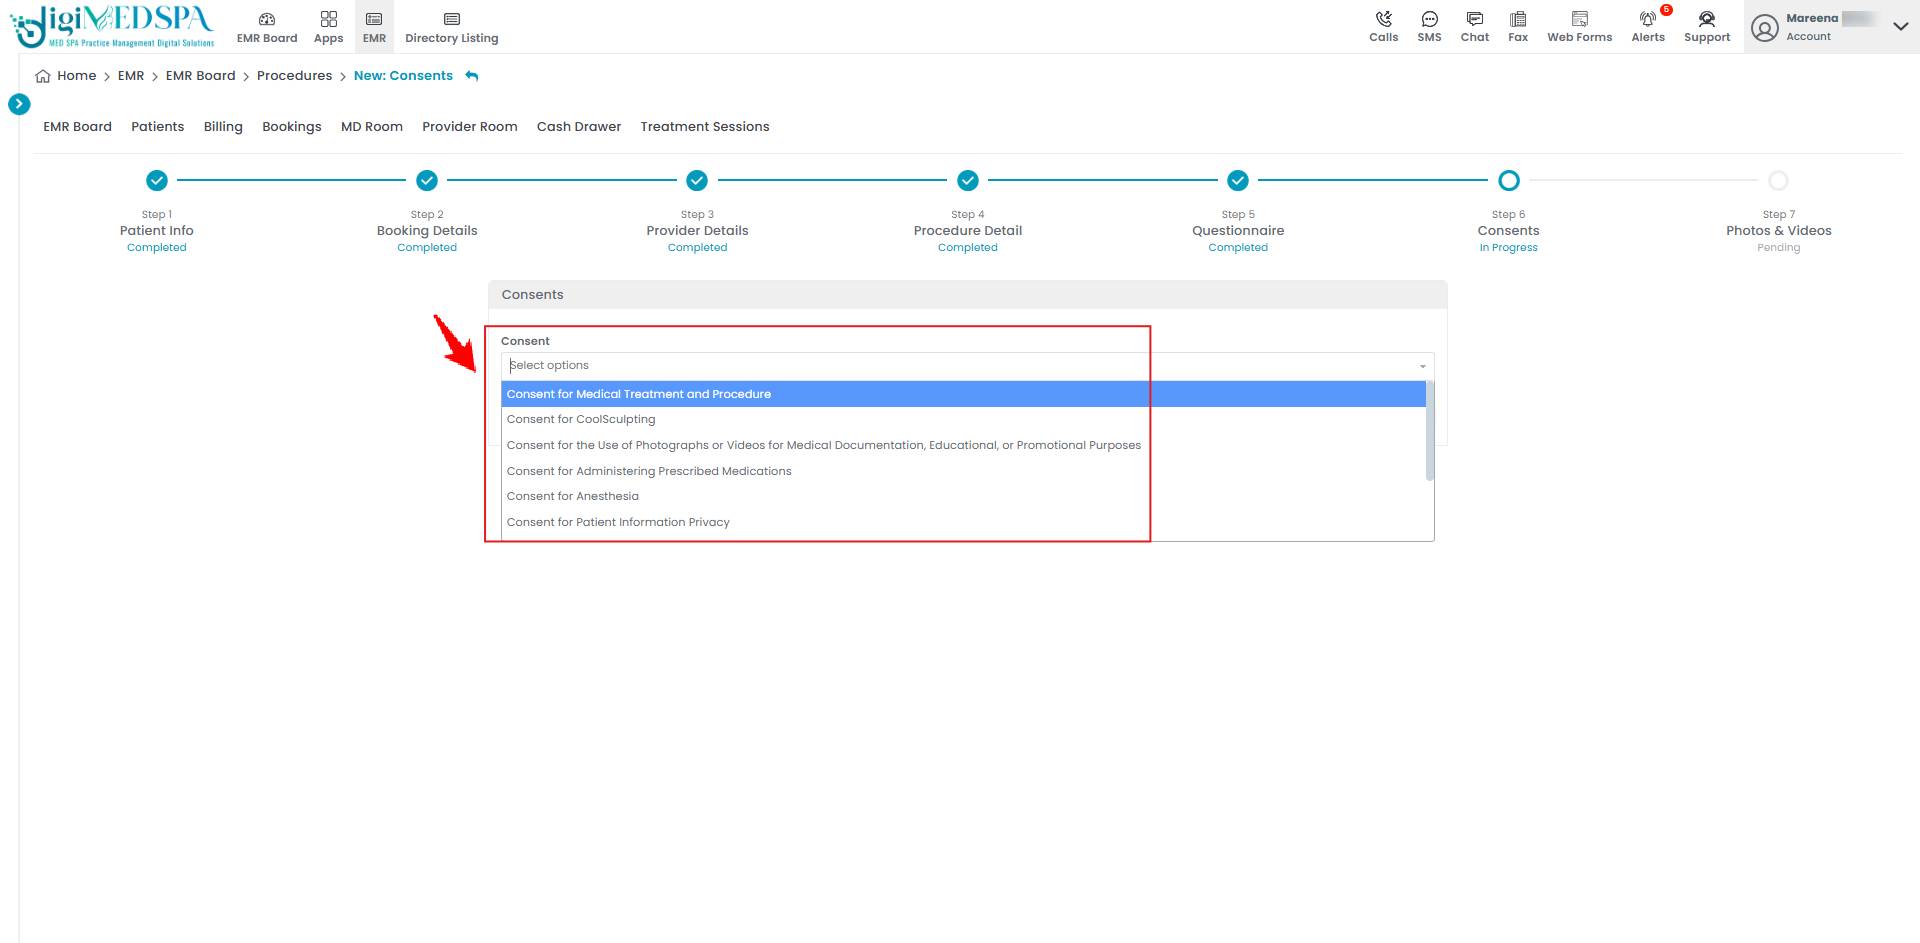 Note: For more details, refer to our "Create a Cosmetic Procedure" Article.
 - Once the relevant consent forms have been selected, click “Next” to proceed.

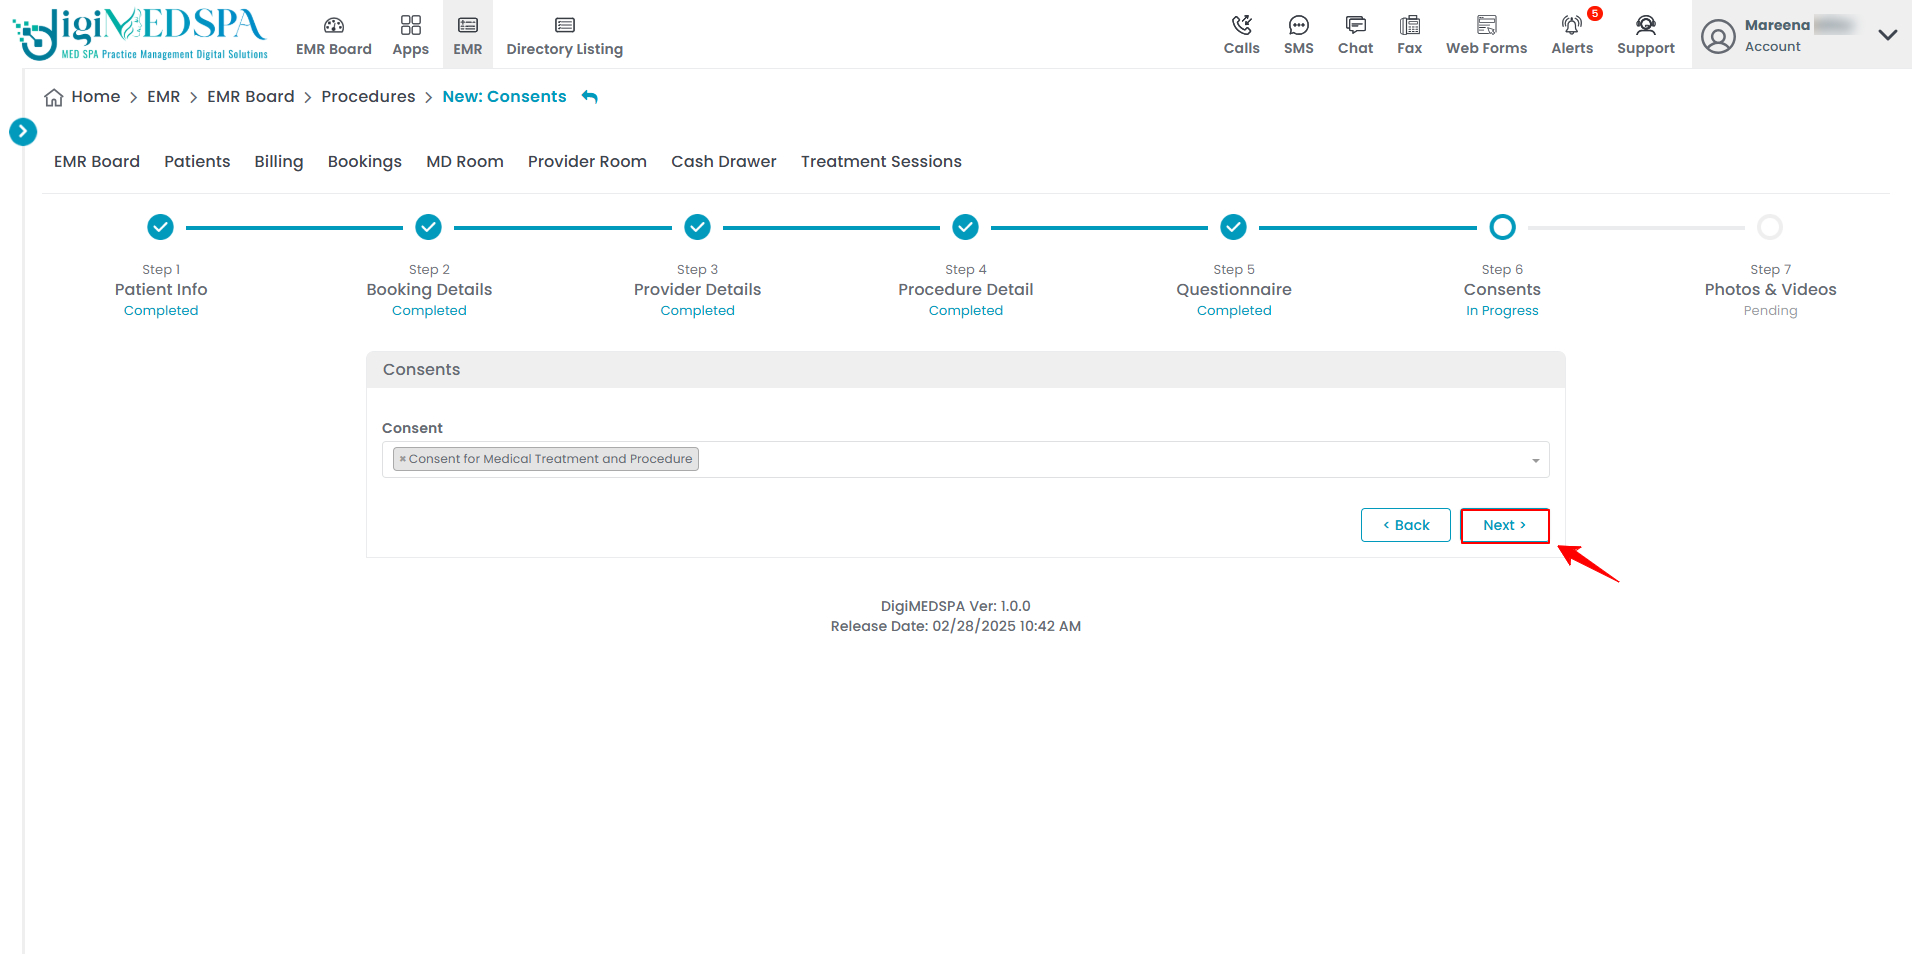 Note: The user can select multiple relevant consent forms for the cosmetic procedure as needed.
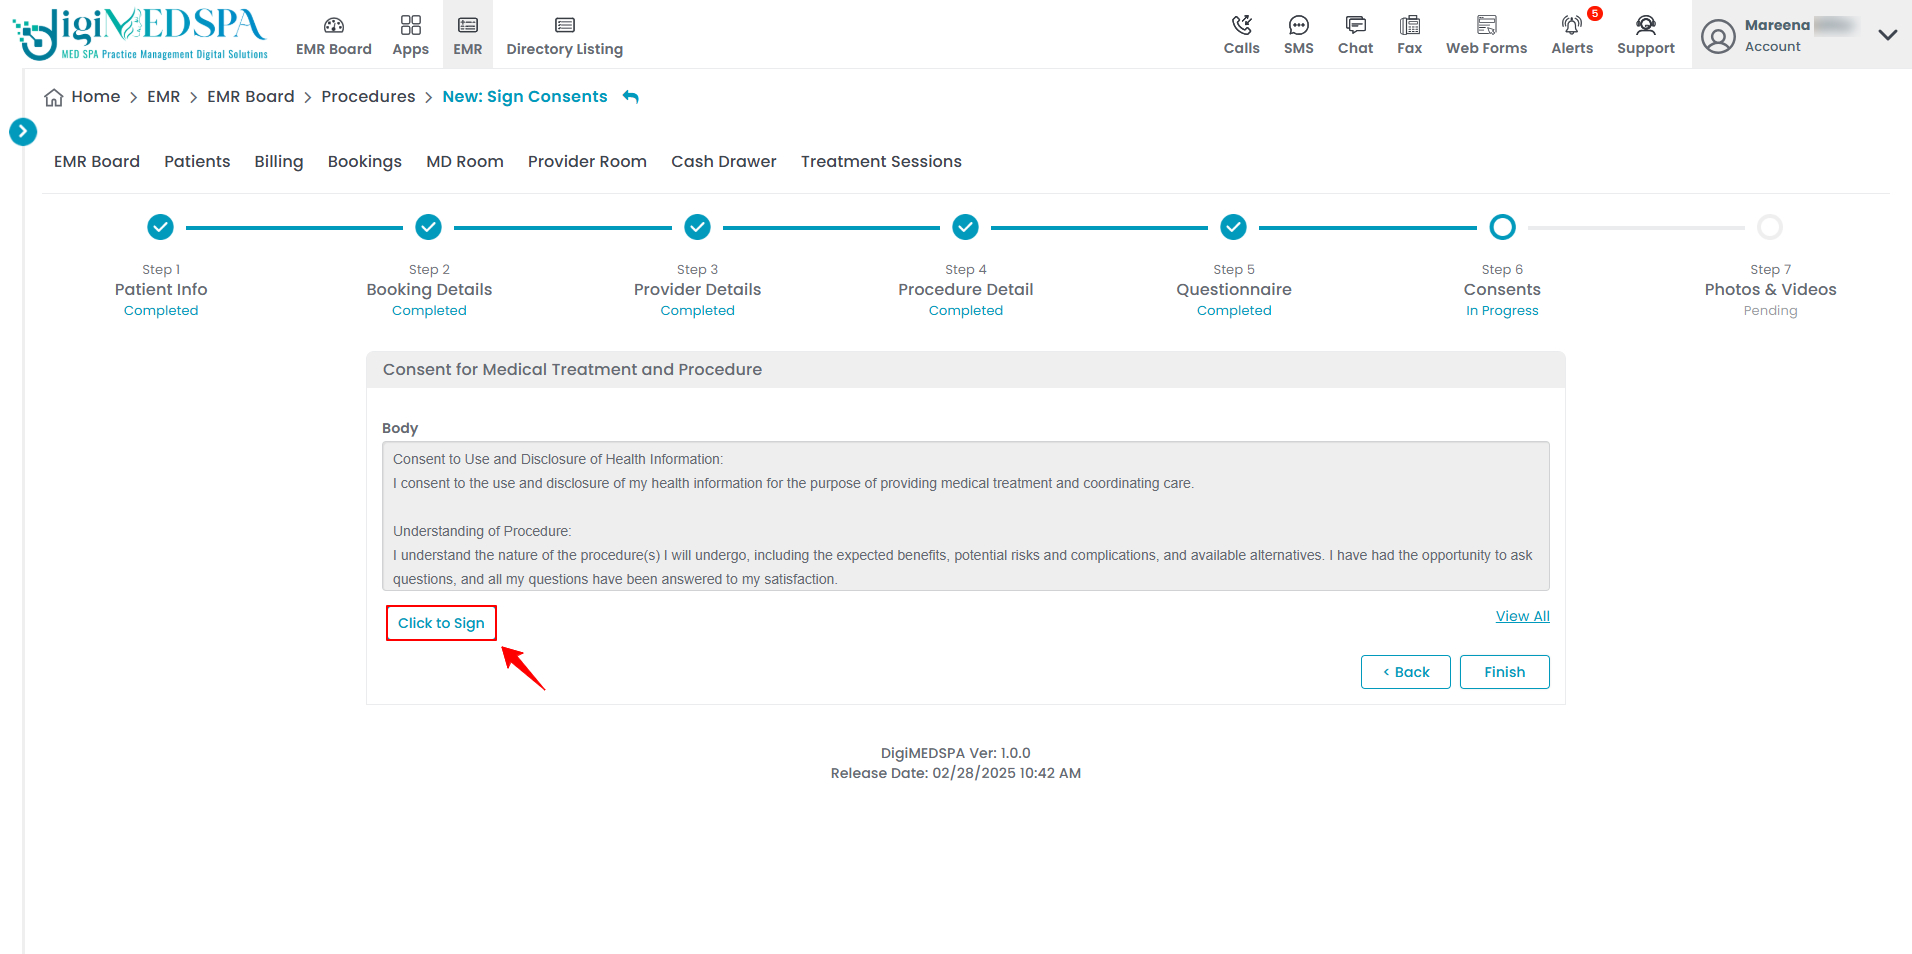
 - Click on “Sign Consents,” and a description of the selected consent form, similar to an undertaking, will open for the patient to review.

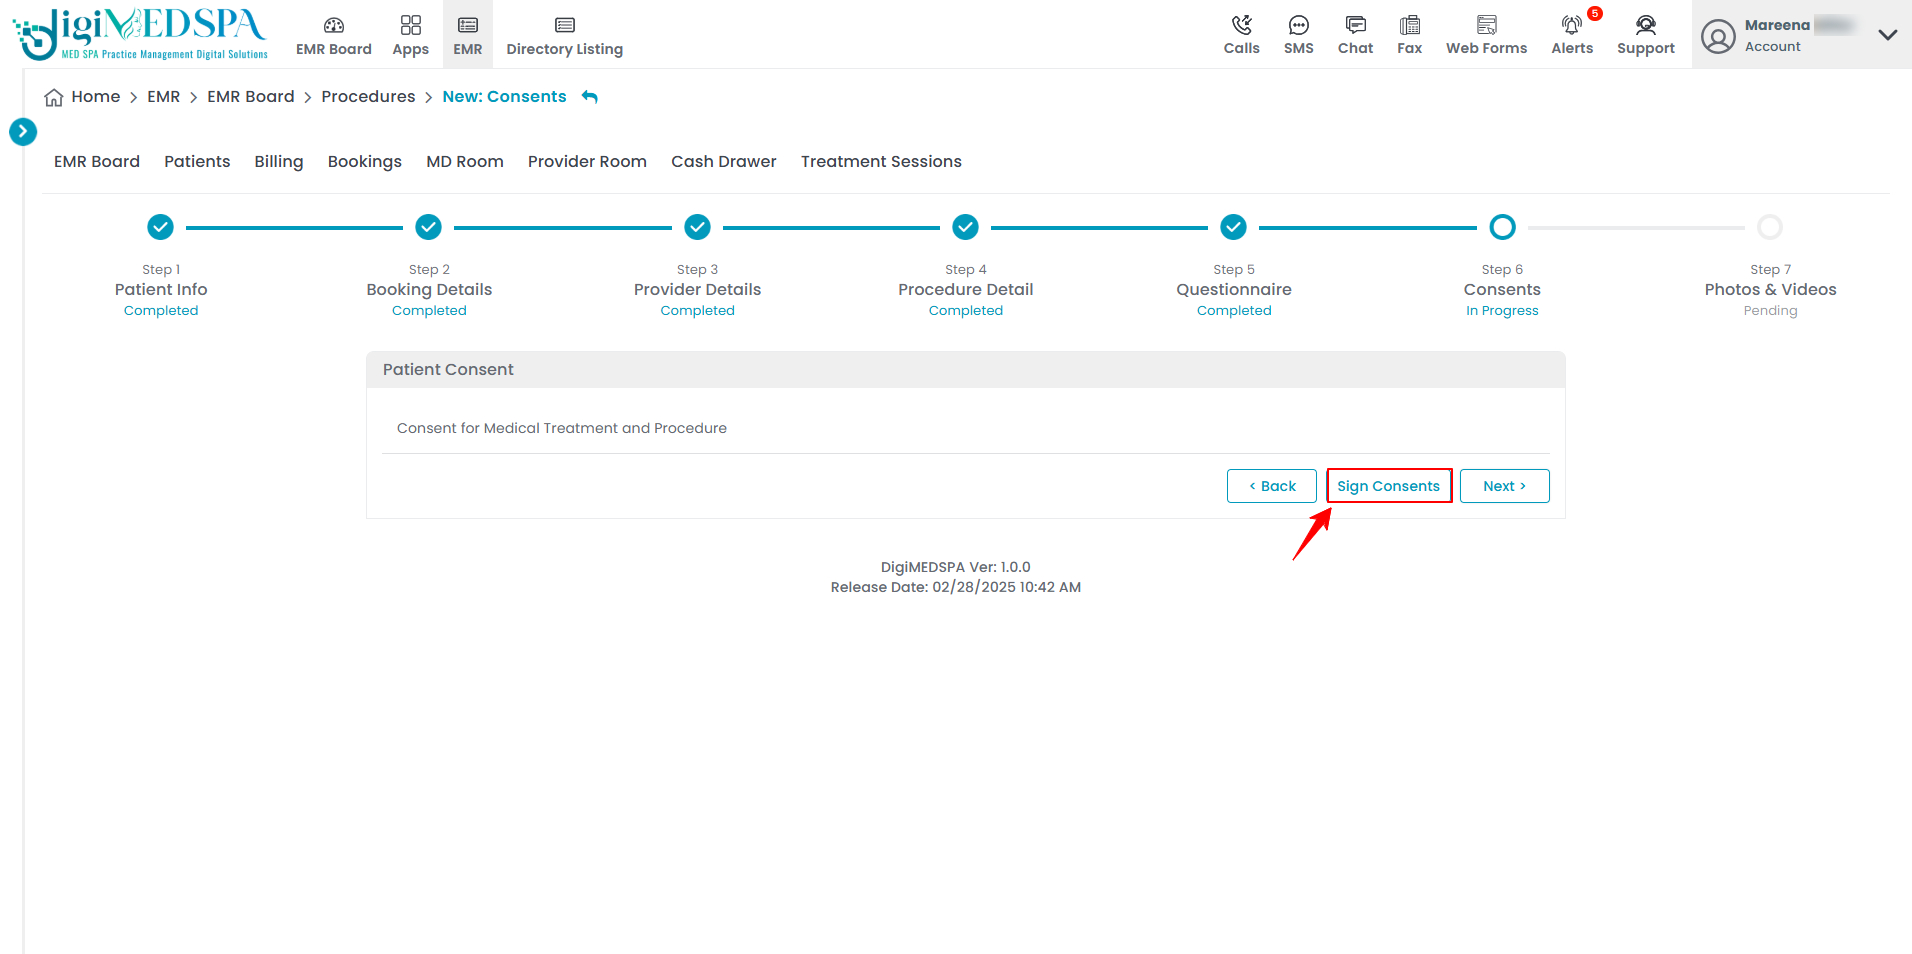
- If the patient has already checked in, click the "Click to Sign" button.

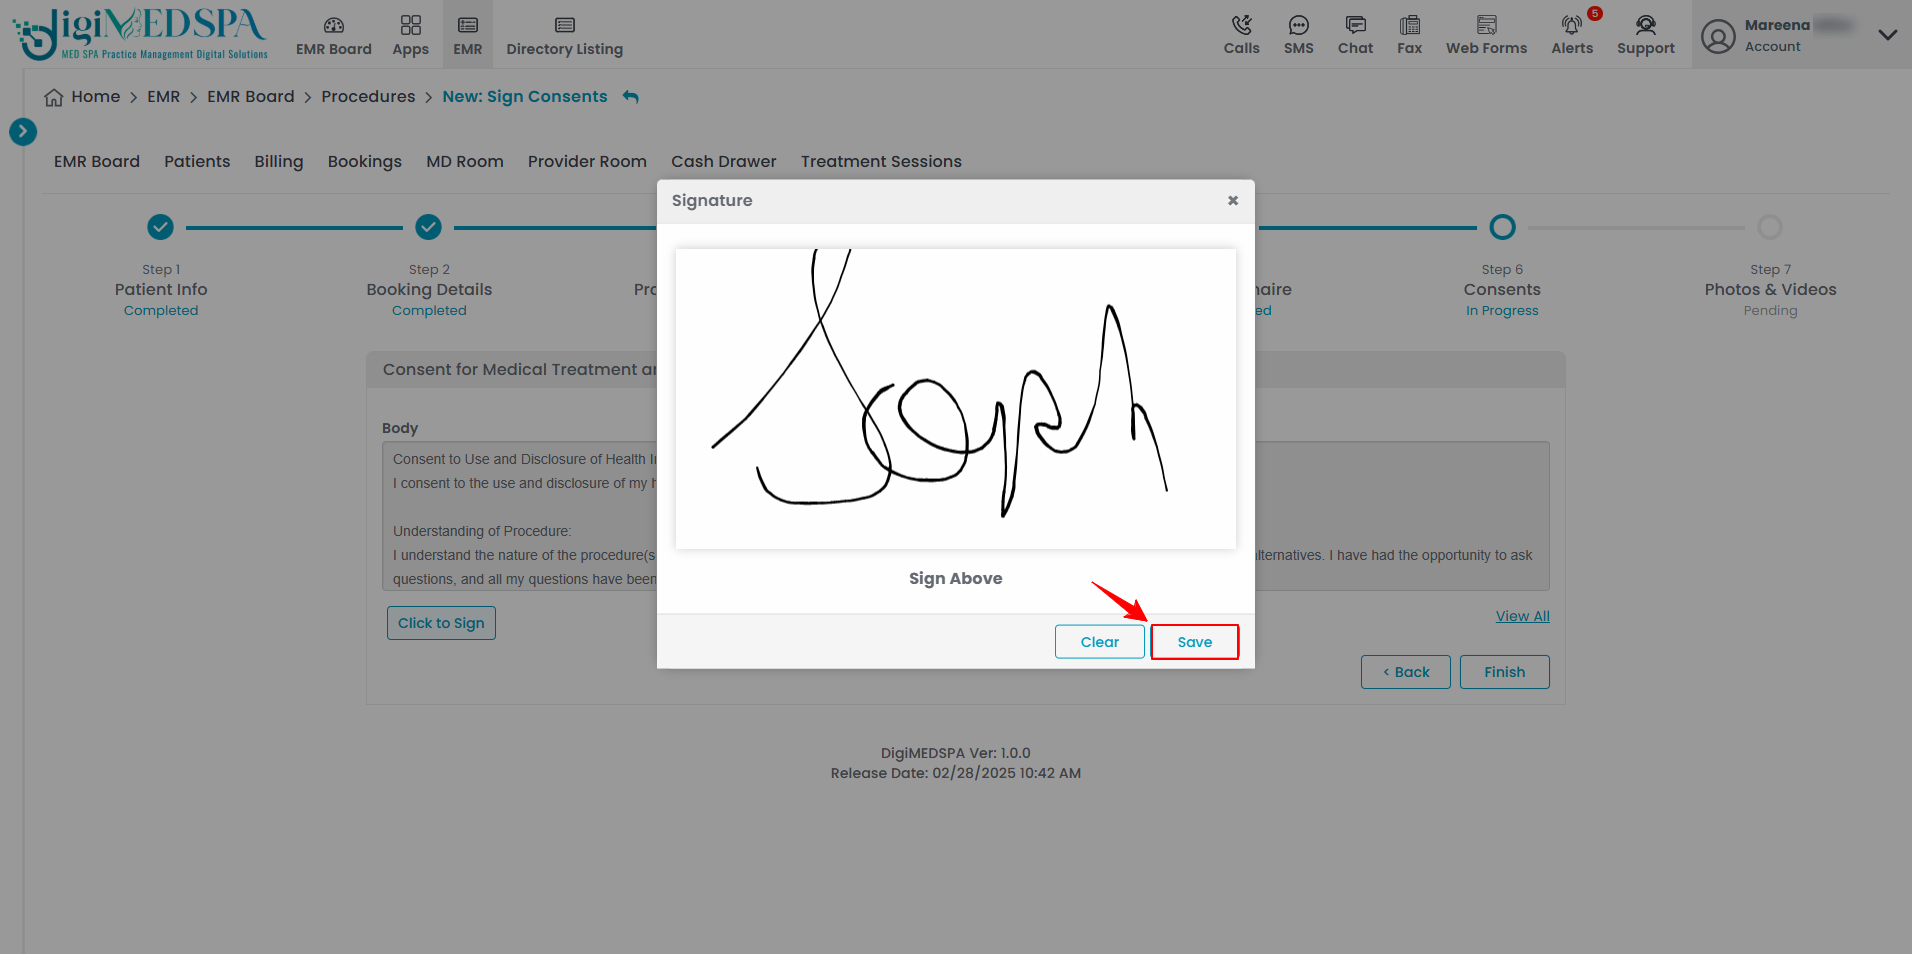
- A blank screen will appear for the patient to provide their electronic signature. Once the signature is completed, click "Save."

 Note: If the patient has not checked in, they can log in to their patient portal and sign the consent form for cosmetic procedure independently.
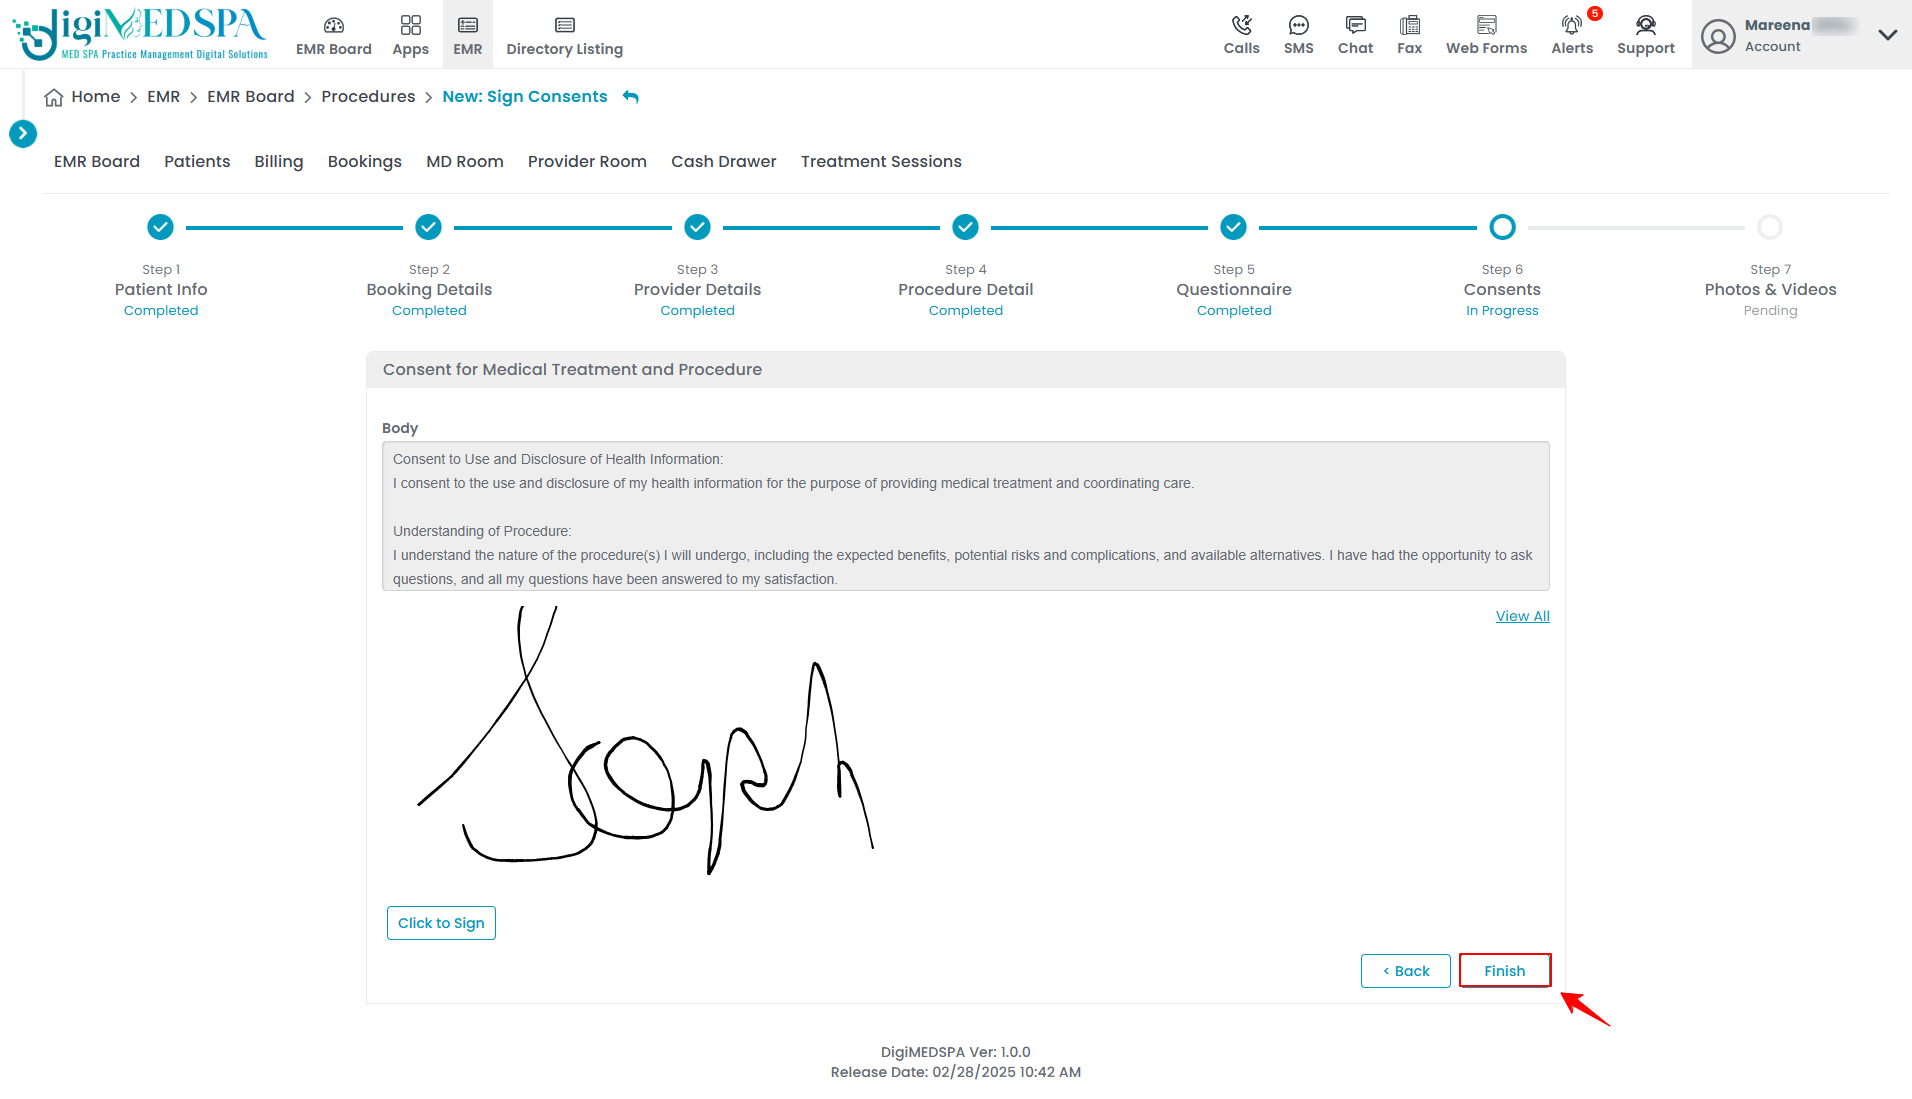
 - The patient's electronic signature will appear below the consent form on the screen. Once confirmed, click "Finish" to proceed.

- Complete the final step and "Save" the cosmetic procedure.
The consent form has been successfully signed for the cosmetic procedure!


