

 DigiMEDSPA EMR
 DigiMEDSPA CONNECT ™
Compare Before and After Images Using Comparison Tool
This user guide provides instructions on using the Comparison Tool to view Before and After Images side by side, which helps to assess treatment progress and results effectively.
Understanding Terminologies
Comparison Tool
The comparison tool is a feature that allows side-by-side viewing of before and after images to analyze treatment progress.
Before Images
Before images are the photos taken before a procedure to document the patient’s initial condition.
After Images
After images are the photos taken after a procedure to showcase results and track improvements.
Compare Before and After Images Using Comparison Tool Through the Procedure View Screen
- The user can access the Procedure View Screen through the patient profile by accessing the Patients List Screen. From the EMR Board Tabs, select “Patients.’’

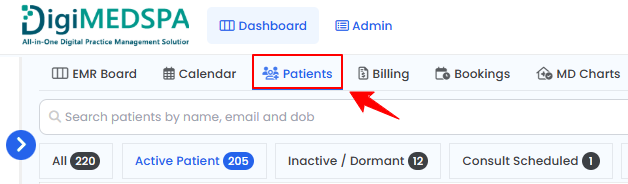
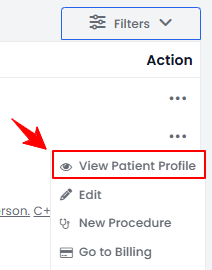
- To view a specific patient from the list, click the three dots under the action column and select "View Patient Profile," or simply click anywhere on the patient’s data.
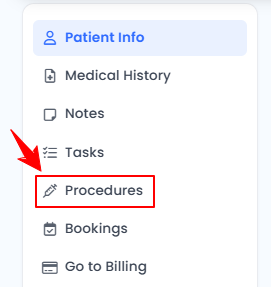
- On the Patient Information Screen, users can access a comprehensive summary of all patient details. To view the procedure images, simply click "Procedures" from the side panel.
- Here, you can view all patient procedures. To see details for a specific procedure, click “View Procedure.”
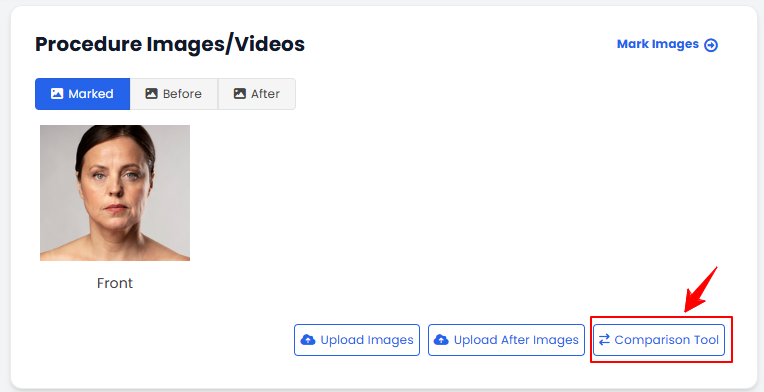
- Before using the comparison tool, ensure that after images are uploaded to enable proper comparison with the before images. To upload after images, click “Upload After Images” in the Procedure Images/Videos section to proceed.
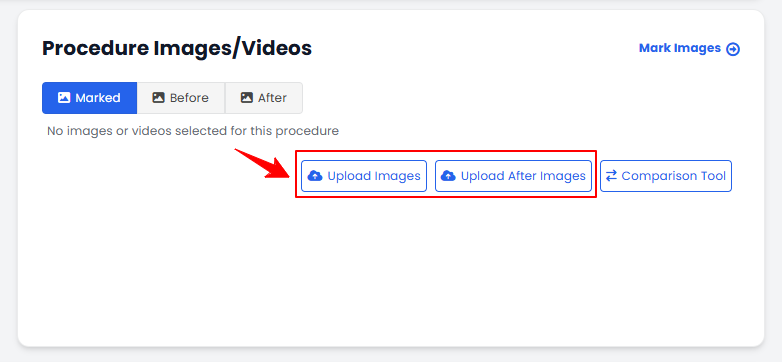 Note: If the images have already been uploaded, simply click the “Comparison Tool” button at this step to proceed to the Comparison Tool Screen.
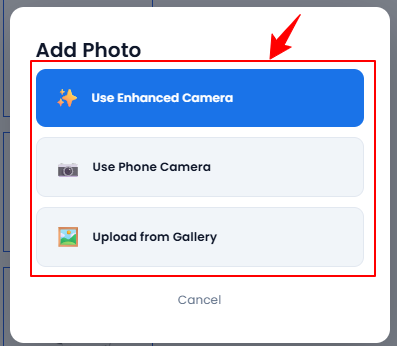
 - Click the “+” icon to add photos. A pop-up will appear, allowing you to choose how you want to upload the images. Select “Use Enhanced Camera,” “Use Phone Camera,” or “Upload from Gallery.”
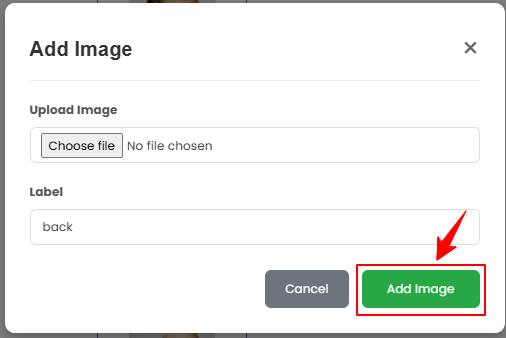
- Upload images from different angles, then select the desired images. To add additional images, click the “+ Add Image” button at the bottom of the screen. A pop-up window will open where you can upload your image and enter a label. Once finished, click “Add Image” to save it.
- Now click the “Back to Procedure” button to go back to the Procedure View Screen in the patient profile. Then, click on "Comparison Tool" to view and compare before and after images of a procedure side by side.
 Note: When uploading after images, click the “Comparison Tool” button directly from the image upload screen. You do not need to return to the View Procedure Screen.
Functions of Comparison Tool
- The first feature of the comparison tool is the Slider function. Use the slider arrows to compare before and after images, slide to the right to reveal the before image, and slide to the left to view the after image for a clear side-by-side comparison.
 Note: Slider mode is automatically set when you click on the ‘’Comparison Tool’’ button. For an accurate comparison, set the before image on one side and the after image on the other. If both sides are set to the before image, only the before image will be visible. The same applies if both sides are set to the after image.
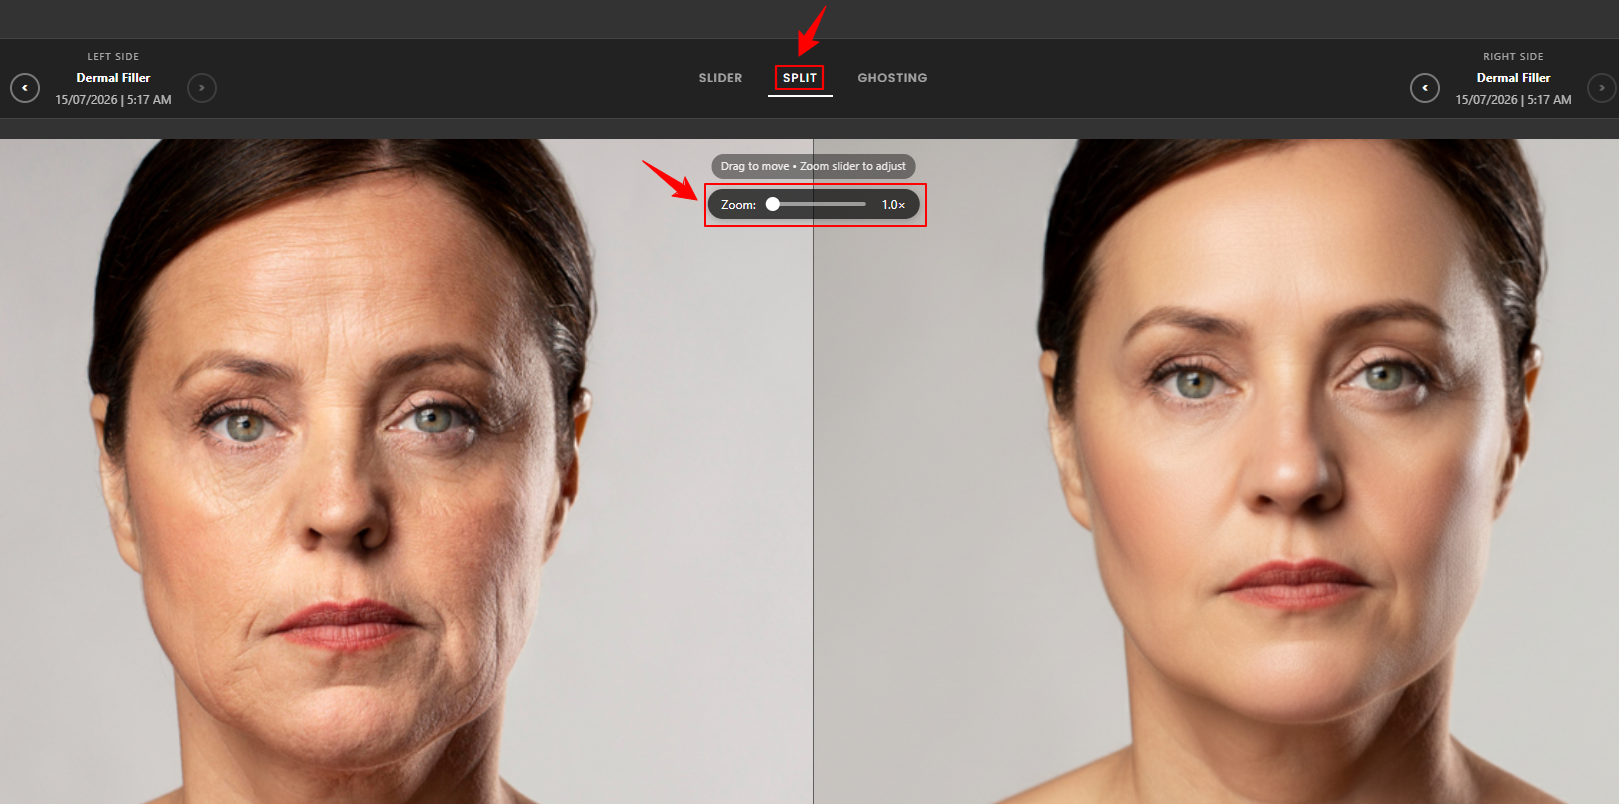
 - The second feature is Split view. Click “Split” at the top of the screen to display the before and after images side by side. Click the “Zoom” slider to zoom in or out. After zooming, you can drag the image to reposition it and examine details more closely.
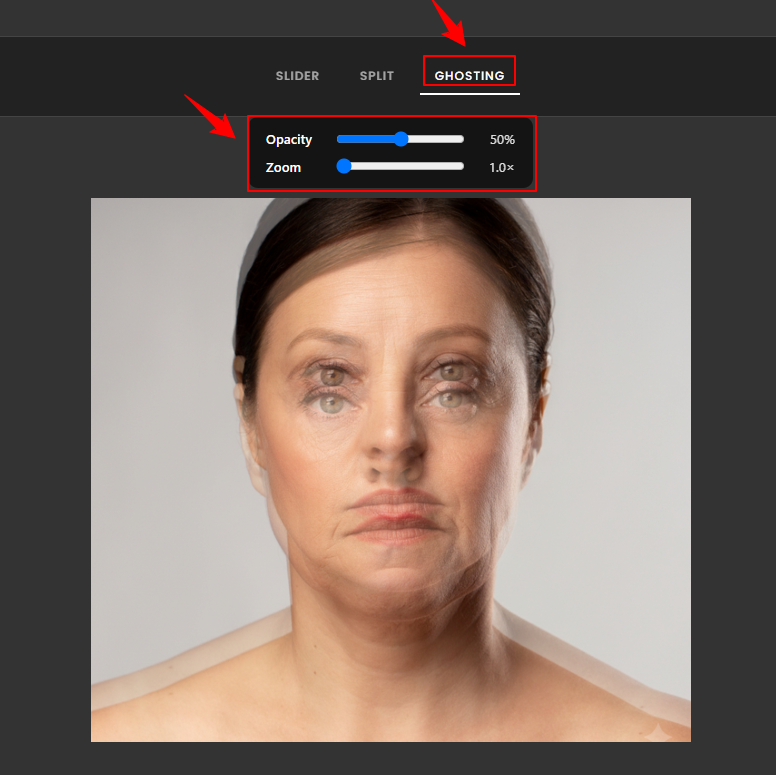
- The third feature is Ghosting. Click “Ghosting” at the top of the screen to overlay the before image onto the after image with a semi-transparent effect. Use the opacity slider to adjust the transparency level and zoom slider to adjust the zoom level.
- To view the before and after images from different angles, select the desired angle from the bottom, including front, right 45°, left 45°, left 90°, and right 90°.
 You have successfully learned how to compare before and after images using the comparison tool.