DigiMEDSPA - Logo

How to Upload Procedure Images?

This user guide provides step-by-step instructions for uploading procedure images, ensuring accurate documentation and efficient patient record management.

Understanding Terminologies

Procedure Images

Procedure images are visual records captured before, during, or after a medical or esthetic procedure to document treatment progress, ensure accuracy, and enhance patient records.

Upload Procedure Images While Creating a Cosmetic Procedure

  1. The user can upload procedure images while creating a “Cosmetic Procedure” from five entry points:
    1. From the EMR Board Tabs, click on the “MD Room” tab and select "New Cosmetic Procedure."
    2. From the EMR Board Tabs, click on the “Provider Room” tab and select "New Cosmetic Procedure.’’
    3. From the EMR Board select a booking from the ‘’Check-in’’ step then press the ‘’Next’’ button to move that booking to the ‘’In Procedure’’ phase.
      1. When a booking is in progress, the user can choose to create either a health procedure or a cosmetic procedure based on the specific requirements. Selecting "Cosmetic Procedure" will take the user to the first step of creating a cosmetic procedure.
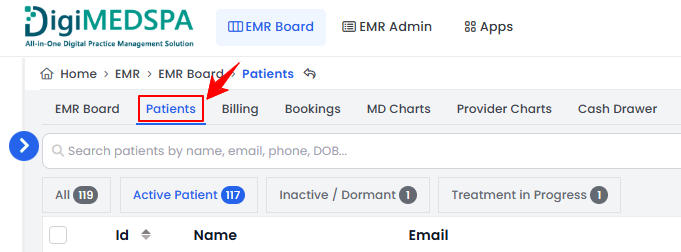
    4. From the EMR Board Tabs, click on “Patients.”
      1. From the patient listing, click on three dots under the action column and select "New Cosmetic Procedure" for the specific patient.
    5. From the EMR Board Tabs, click on “Bookings.”
      1. From the bookings list, click on three dots under the action column and select "New Cosmetic Procedure" for the specific booking.
        Note: Clicking the "New Cosmetic Procedure" button from any entry point will take the user to step 1 of creating a cosmetic procedure. If patient information and booking details are already entered, the user will go directly to Step 3 of creating a cosmetic procedure. For complete instructions on creating a cosmetic procedure, refer to ‘’Create a Cosmetic Procedure’’ user guide.
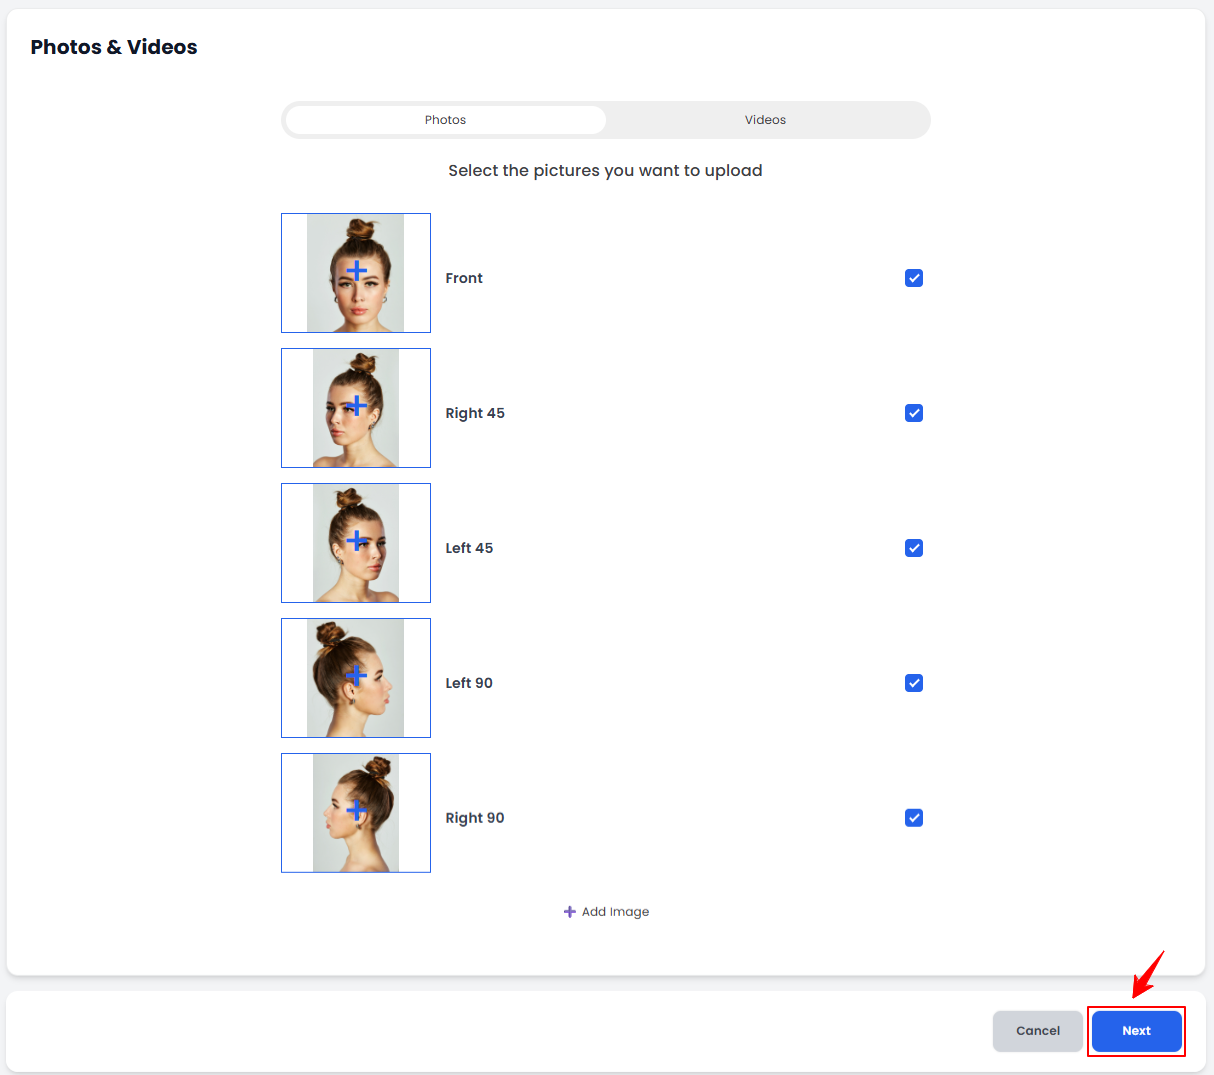
  2. Competel the first 6 steps and proceed to Step 7 of creating a cosmetic procedure. Select the patient’s images you want to upload from the following angles: front, right 45°, left 45°, right 90°, and left 90°.
  3. Once you have uploaded and selected the required images, click “Next” to move to the charting screen and complete the procedure.
    The procedure images have been successfully uploaded!

Upload Procedure Images Through the Patient Profile

  1. The user can upload procedure images through the patient profile by accessing the Patients List Screen via three entry points.
    1. From the EMR Board Tabs, select “Patients.’’
    2. From the EMR Panel, click on “Patients” under “EMR Board.’’
    3. From the Left Navigation, click on the “EMR Board” dropdown and select “Patients.”
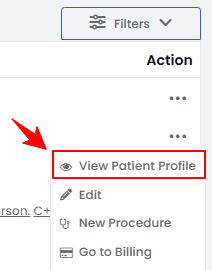
  2. From the patient list, click on three dots under the action column and select "View Patient Profile" for the specific patient.
  3. On the Patient Profile, users can access a comprehensive summary of all patient details. To view the procedures, simply click on the ‘’Procedures’’ tab.
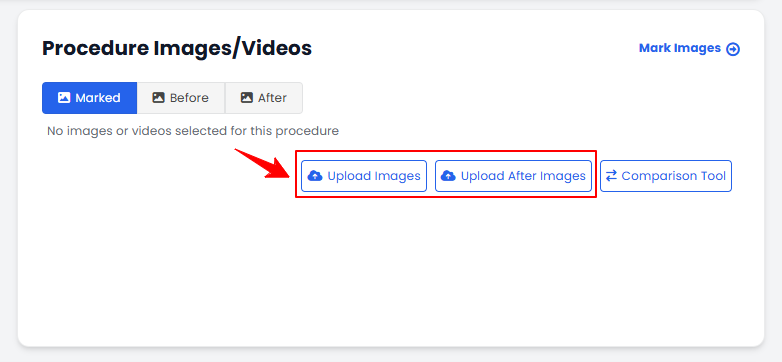
  4. Here, you will see all procedures for the patient, including both ‘’In Process’’ and ‘’Finished’’ procedures. To upload after images for any procedure, click ‘’Upload After Images.’’
    Note: The user can upload only ‘’After Images’’ through the patient profile, as before images are added during procedure creation. "Before Images" are the photos taken before a procedure to document the patient's initial condition for comparison. "After Images" are the photos taken after a procedure to show the results and track progress over time. ''Finished'' means the procedure has been fully completed, including all necessary documentation and approvals. ''In Process'' means the procedure is ongoing or has pending steps, such as documentation, approvals, or follow-ups.
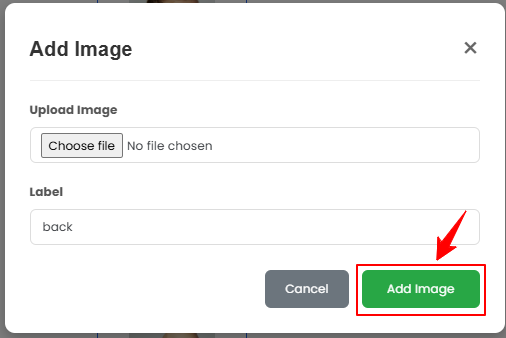
  5. To upload ‘’After Images,’’ click the “+” sign on the images and select the file to upload.
  6. Once the images are uploaded, click “Save” to complete the upload and add the after images to the procedure record.
    The procedure images have been successfully uploaded!

Upload Procedure Images Through the Procedure View Screen

  1. The user can upload the procedure images through the procedure view screen accessible via two entry points.
    1. From the EMR Board Tabs, select ‘’MD Room.’’
    2. From the EMR Board Tabs, select ‘’Provider Room.’’
  2. To view a procedure, click anywhere on the procedure's data or click on the three dots under the action column and select ‘’View’’ to view a specific procedure.
  3. On the Procedure View Screen, click on ‘’Upload After Images’’ on the right side under the ‘’Procedure Images/Videos’’ section.
    Note: The user can upload only ‘’After Images’’ through the procedure view screen, as before images are added during procedure creation.
  4. To upload ‘’After Images,’’ click the “+” sign on the images and select the file to upload.
  5. Once the images are uploaded, click “Save” to complete the upload and add the after images to the procedure record.
    The procedure images have been successfully uploaded!