Naming a Cosmetic Procedure
This user guide provides detailed step-by-step instructions on how to properly name a cosmetic procedure. Naming a procedure accurately ensures clear communication, proper service management, and a streamlined booking process for both patients and providers.
Understanding Terminologies
Cosmetic Procedure
They are typically focused on esthetic treatments, such as injectables (e.g., Botox, fillers) or skin rejuvenation therapies. These procedures often require photo documentation to track progress and results, as well as injection markings to ensure precise application. Accurate records for cosmetic treatments are essential for maintaining patient satisfaction, ensuring safety, and adhering to regulatory standards.
Naming a Cosmetic Procedure
Naming a cosmetic procedure refers to assigning a clear and specific name to the treatment or service offered at a Med SPA (e.g. Botox Injections, Laser Skin Resurfacing, Chemical Peel). Naming is important because it helps both providers and patients to easily identify and understand the procedure. A well-defined name clarifies what the treatment entails, making it easier for the Med SPA to manage bookings, documentation, and patient communication.
Naming a Cosmetic Procedure
- Cosmetic procedures are named by accessing the "Cosmetic Procedures" section, which is accessible through five different entry points.
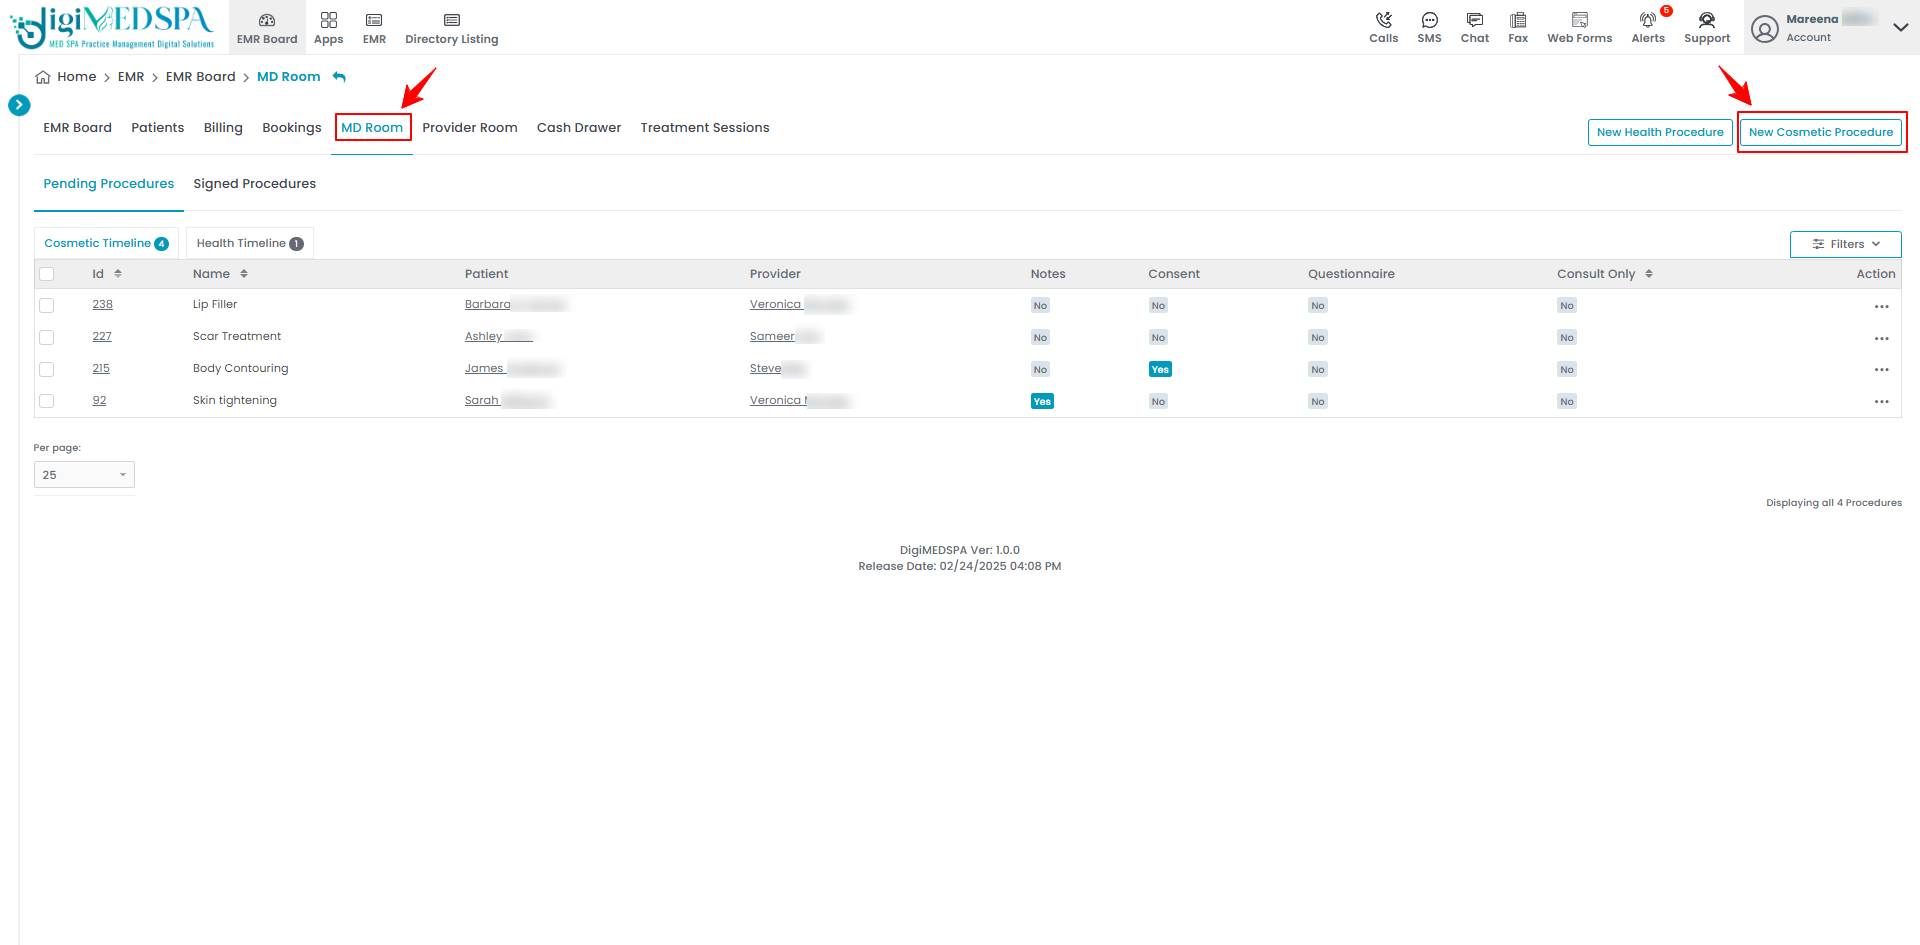
- From the EMR Board tabs, click on the “MD Room” tab and select "New Cosmetic Procedure" to create one.

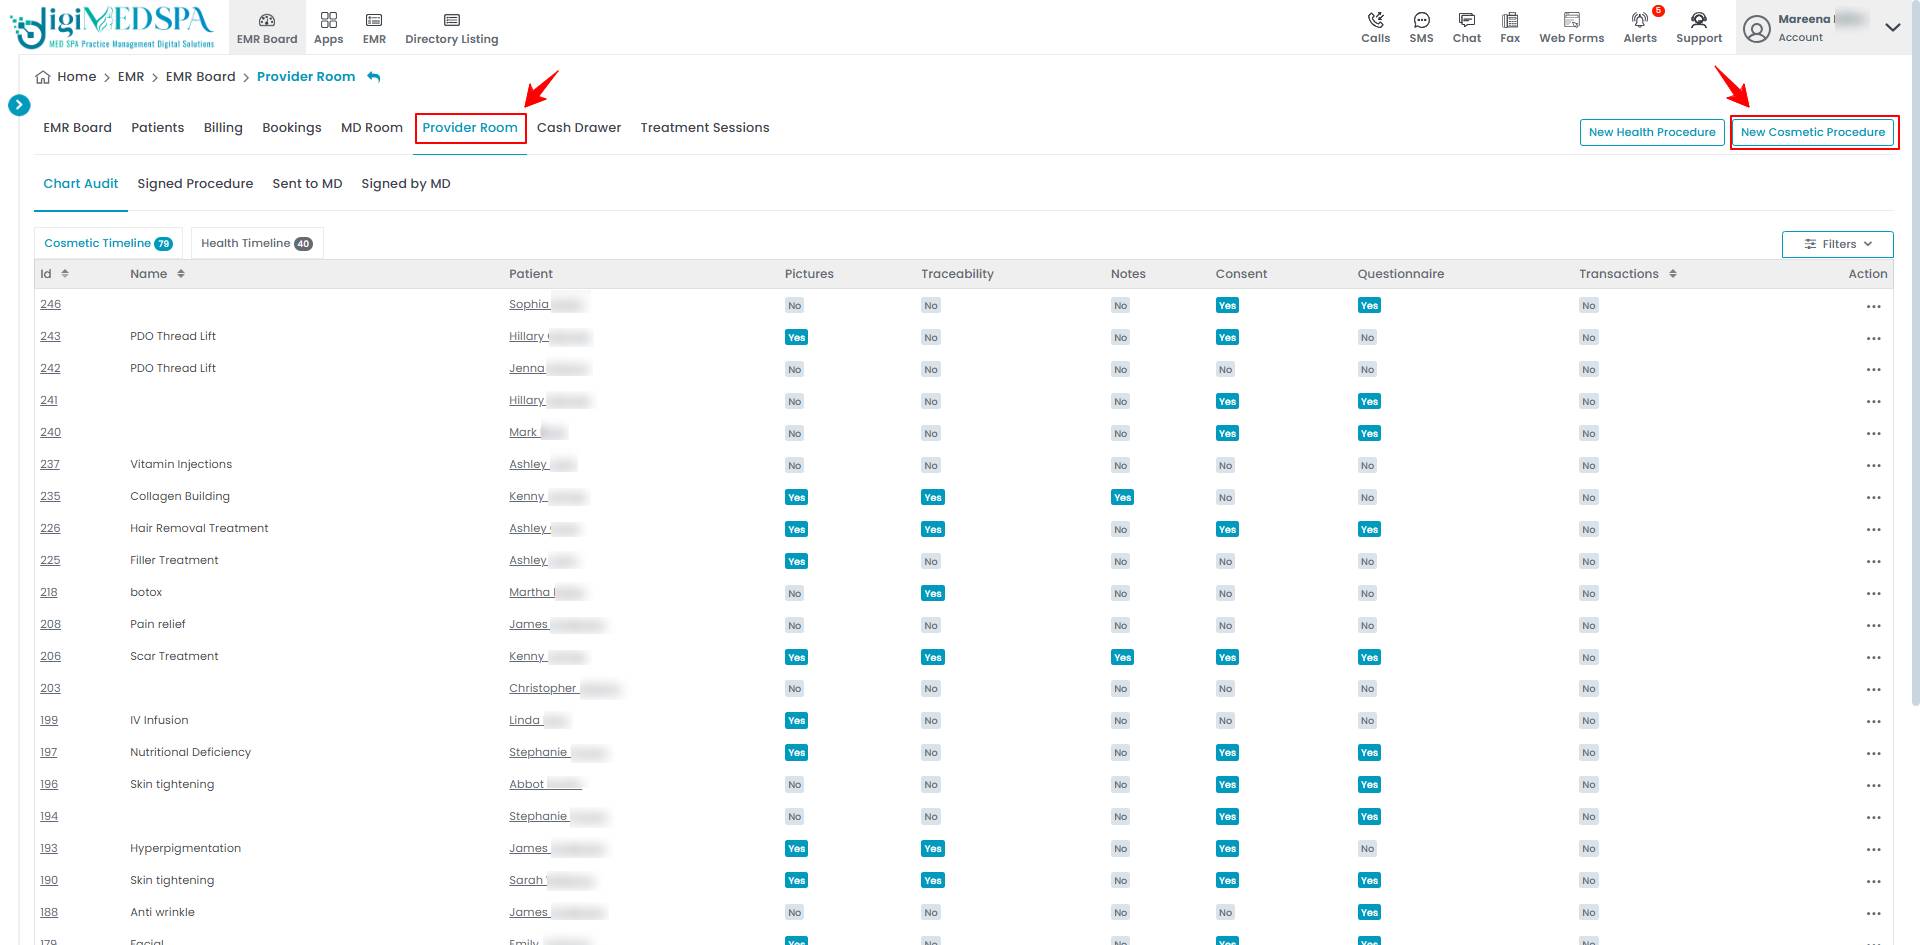
- From the EMR Board tabs, click on the “Provider Room” tab and select "New Cosmetic Procedure".

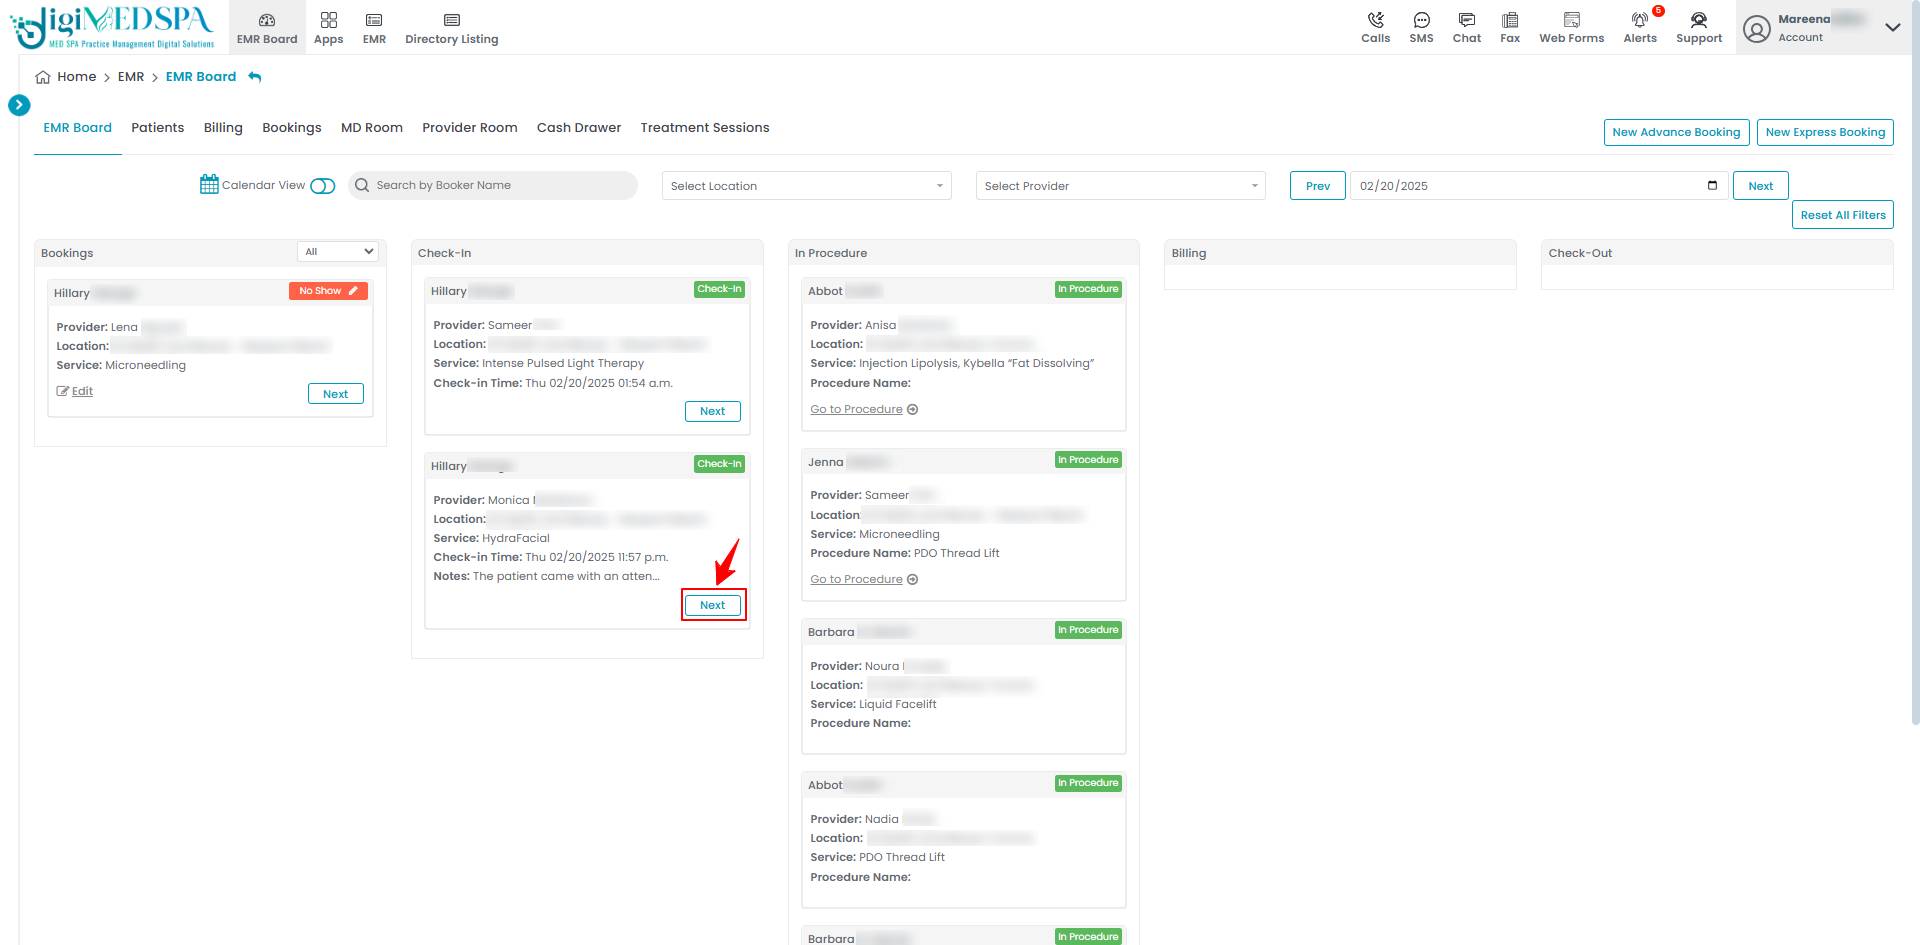
- From the EMR Board select an appointment or booking that is in the ‘’Check-in’’ step then press the ‘’Next’’ button to move that booking to the ‘’In Procedure’’ phase.

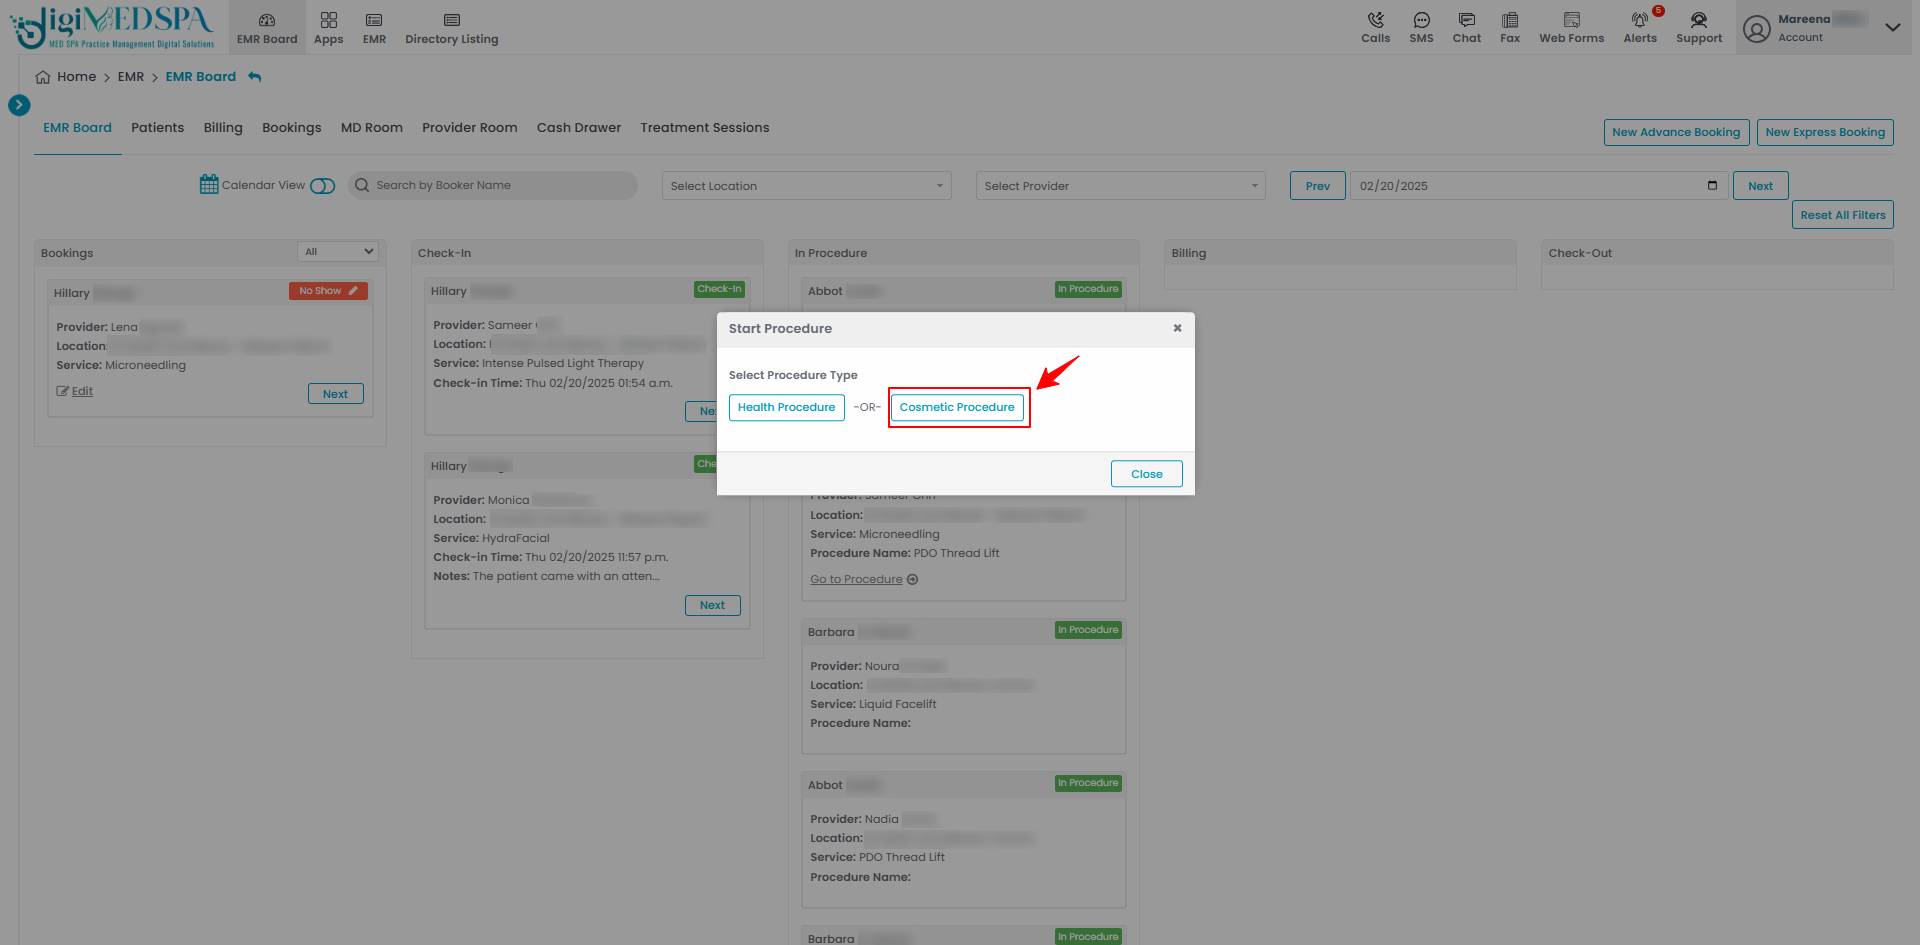
 When a booking is in progress, the user can choose to create either a health procedure or a cosmetic procedure based on the specific requirements. Selecting "Cosmetic Procedure" will take the user to the first step of creating a cosmetic procedure.
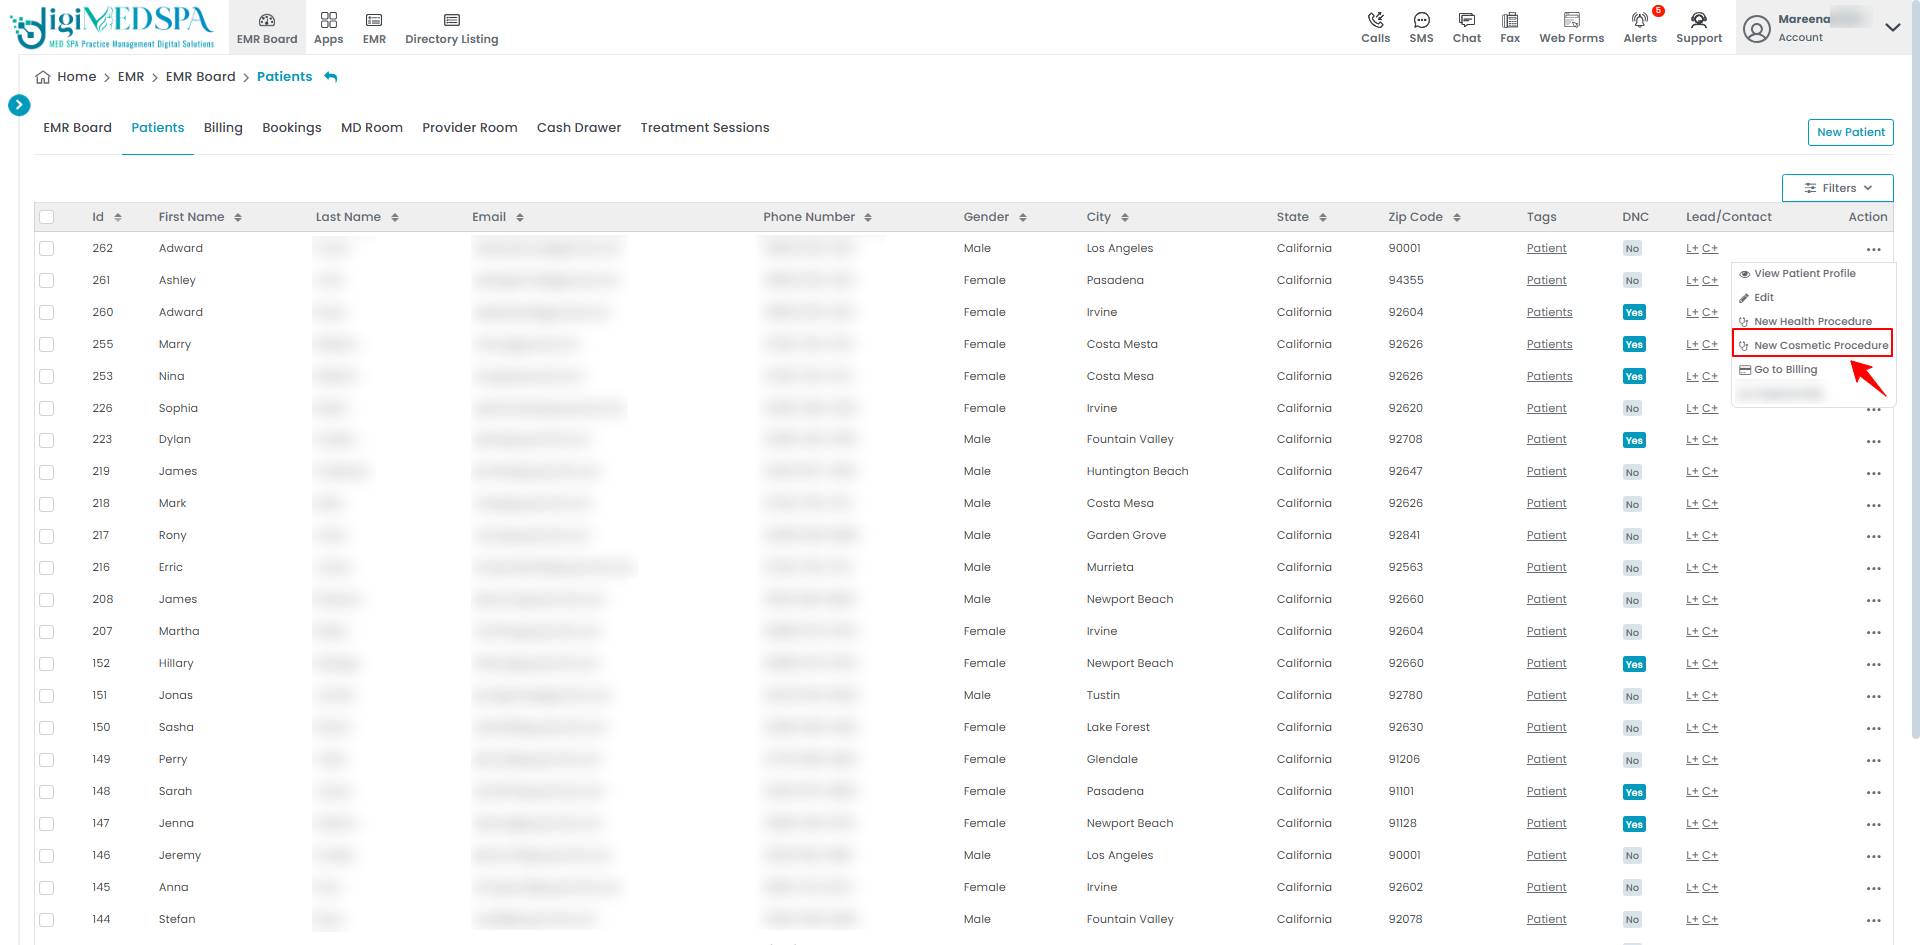
- From the EMR Board tabs, click on “Patients.”

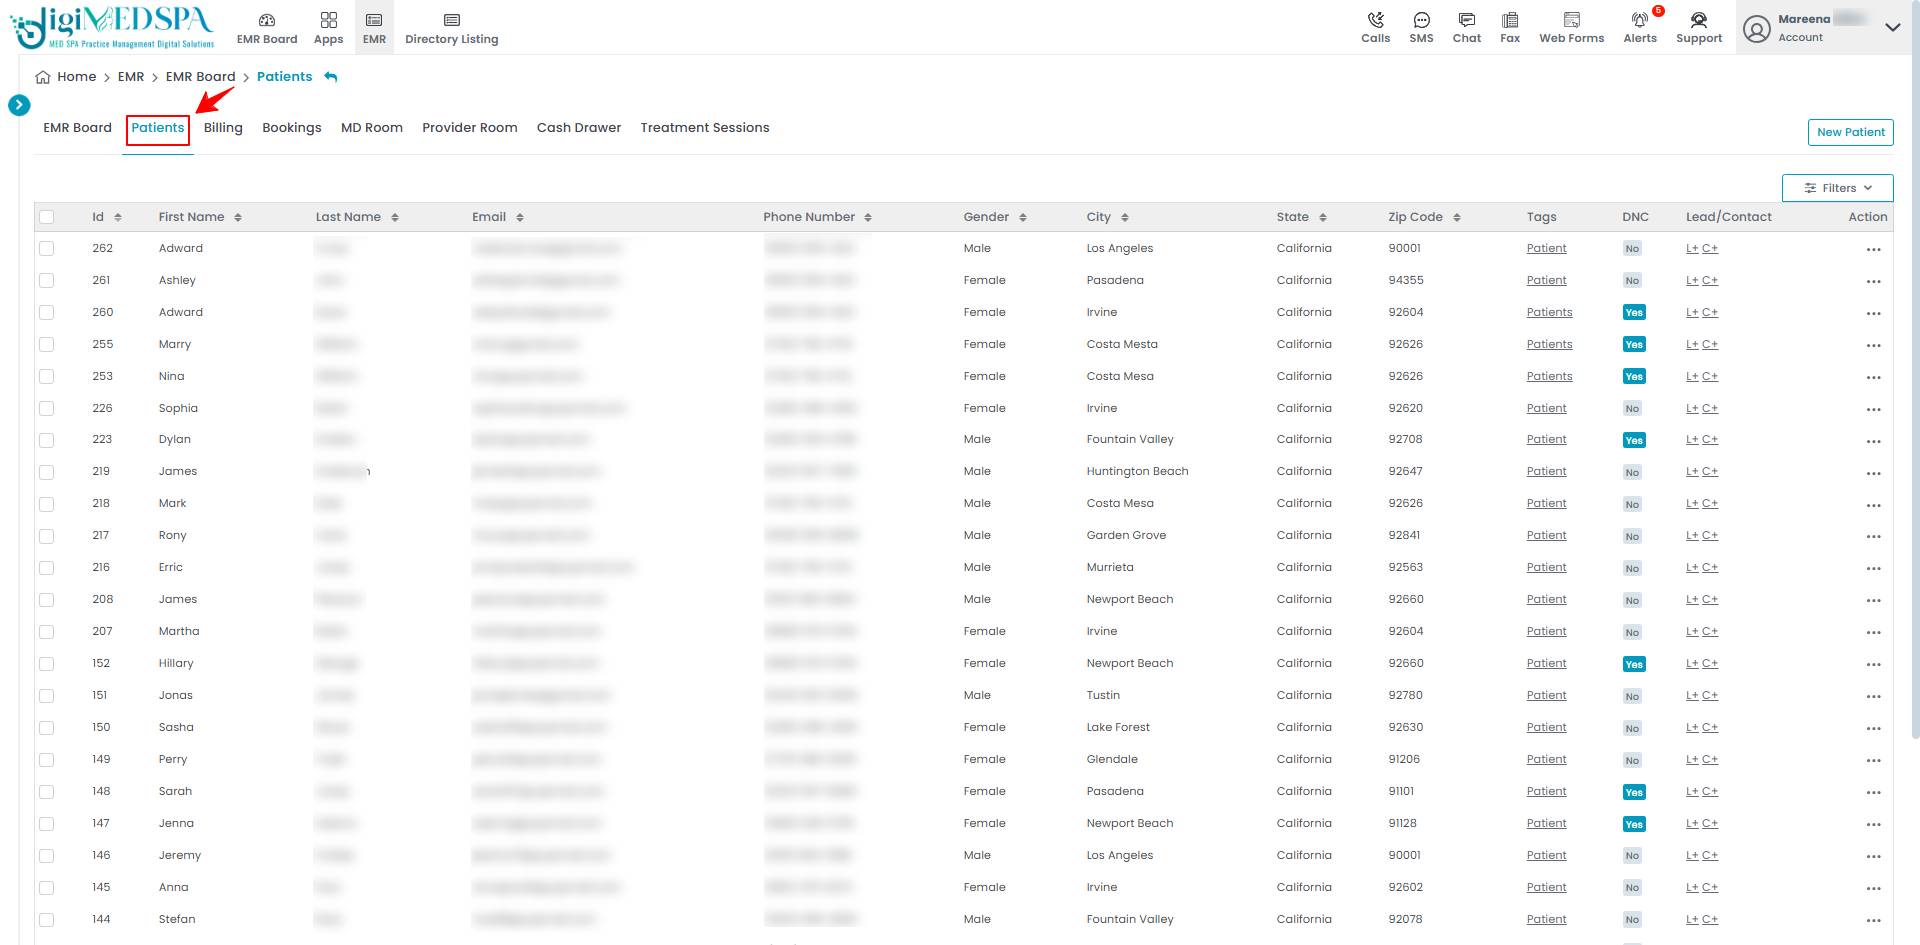 From the patient list, click on three dots under the action column and select "New Cosmetic Procedure" for the specific patient.
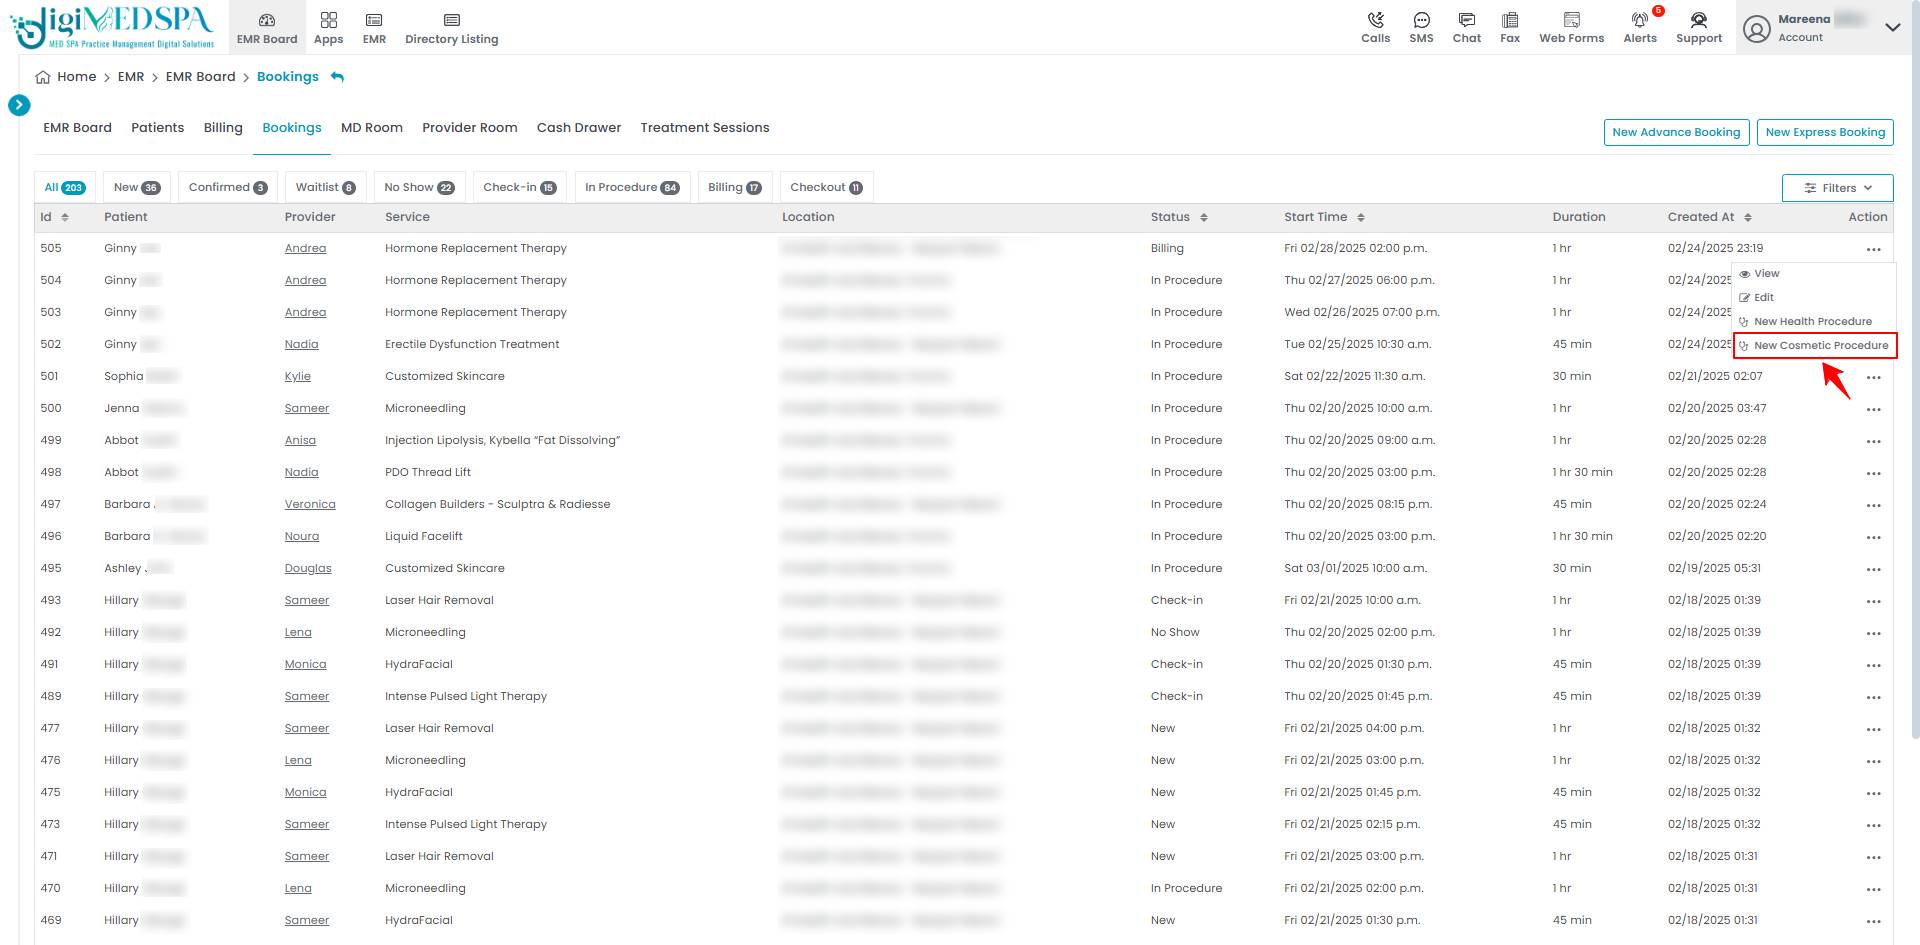
- From the EMR Board tabs, click on “Bookings.”

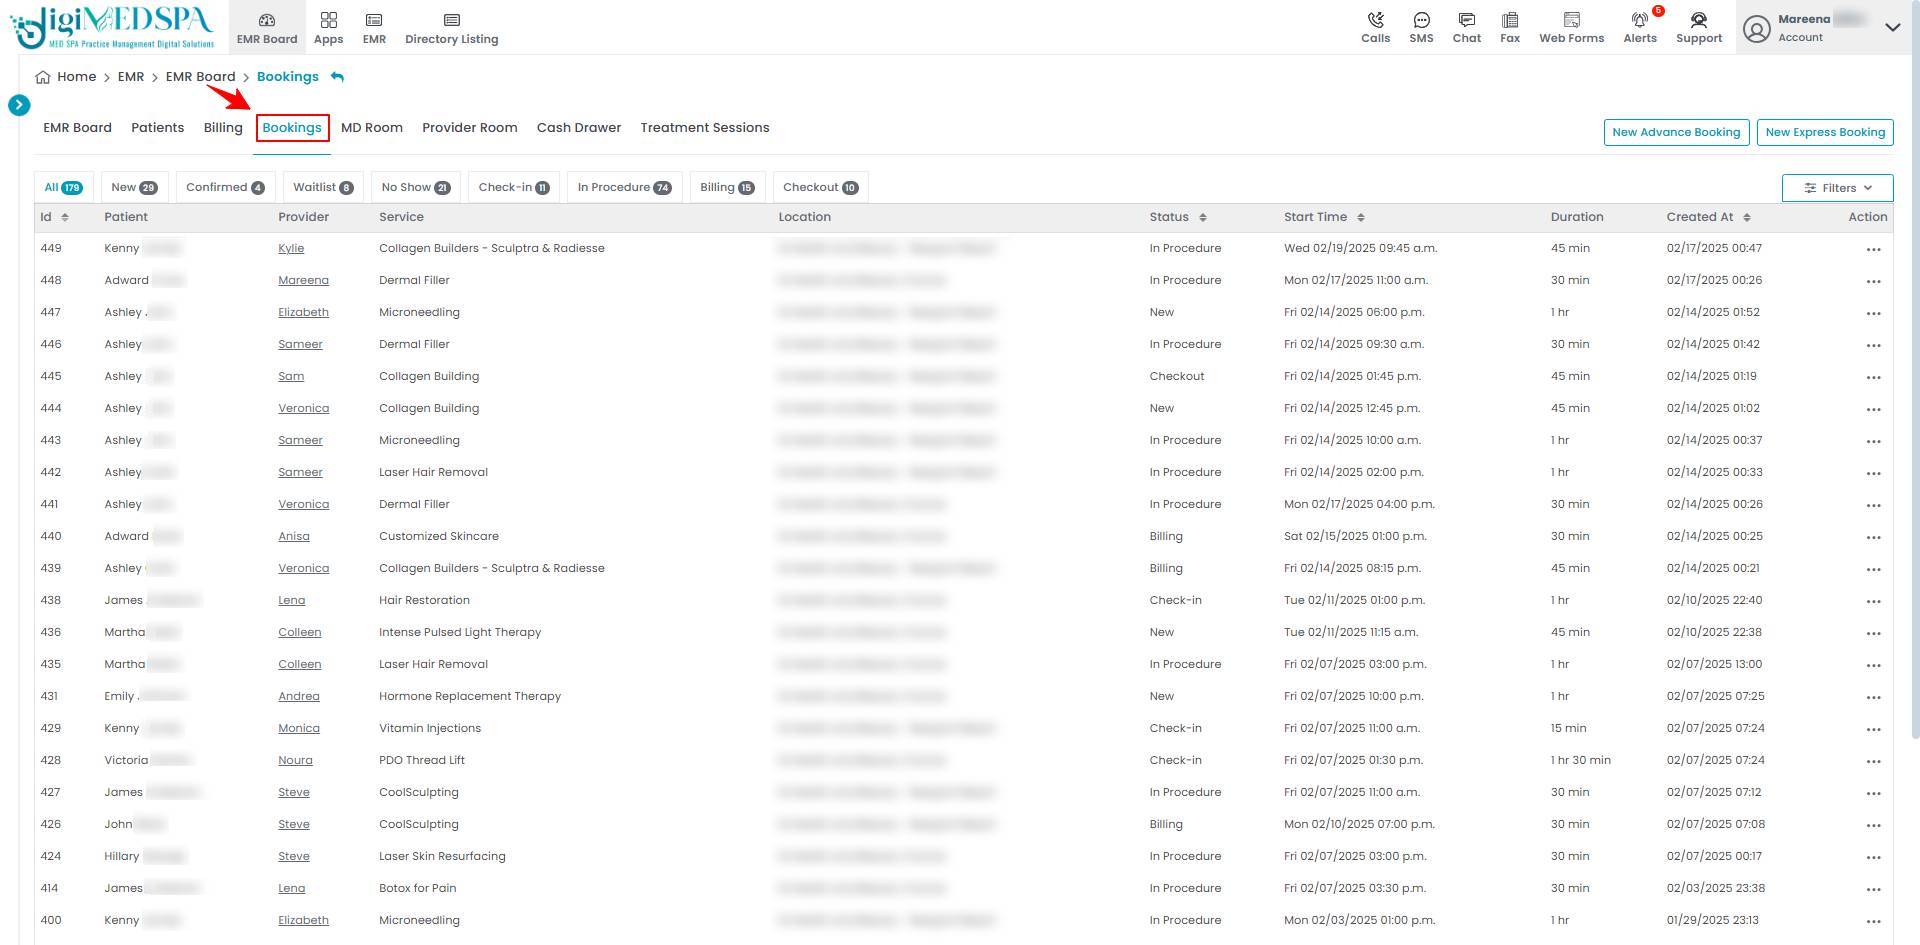 From the list of all bookings, click on three dots under the action column and select "New Cosmetic Procedure" for the specific booking.
 Note: Clicking the "New Cosmetic Procedure" button from any entry point will take the user to step 1 of creating a cosmetic procedure. If patient information and booking details are already entered, the user will go directly to Step 3 of creating a cosmetic procedure.
- From the EMR Board tabs, click on the “MD Room” tab and select "New Cosmetic Procedure" to create one.
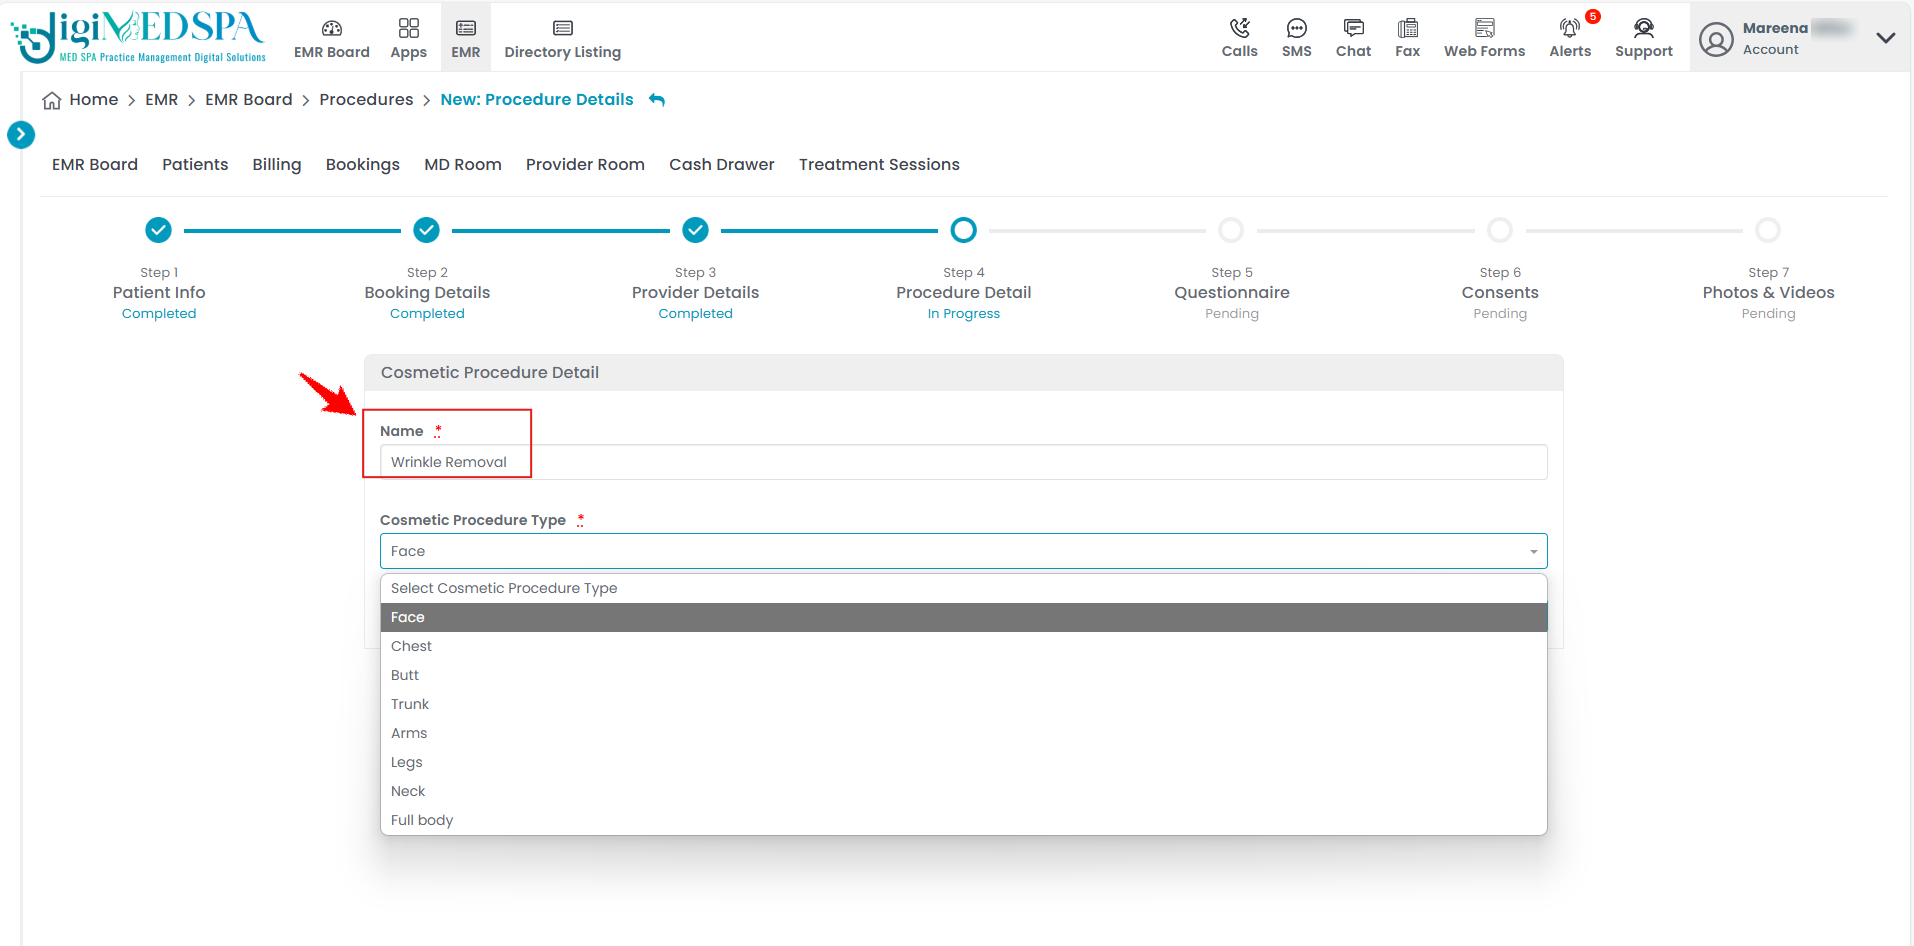
- Complete the first three steps of creating a cosmetic procedure, then proceed to Step 4, “Cosmetic Procedure Type.” Enter a relevant “Name” for your procedure. Select the “Cosmetic Procedure Type” from the dropdown menu. Select the appropriate type based on the area where the cosmetic procedure will be performed.

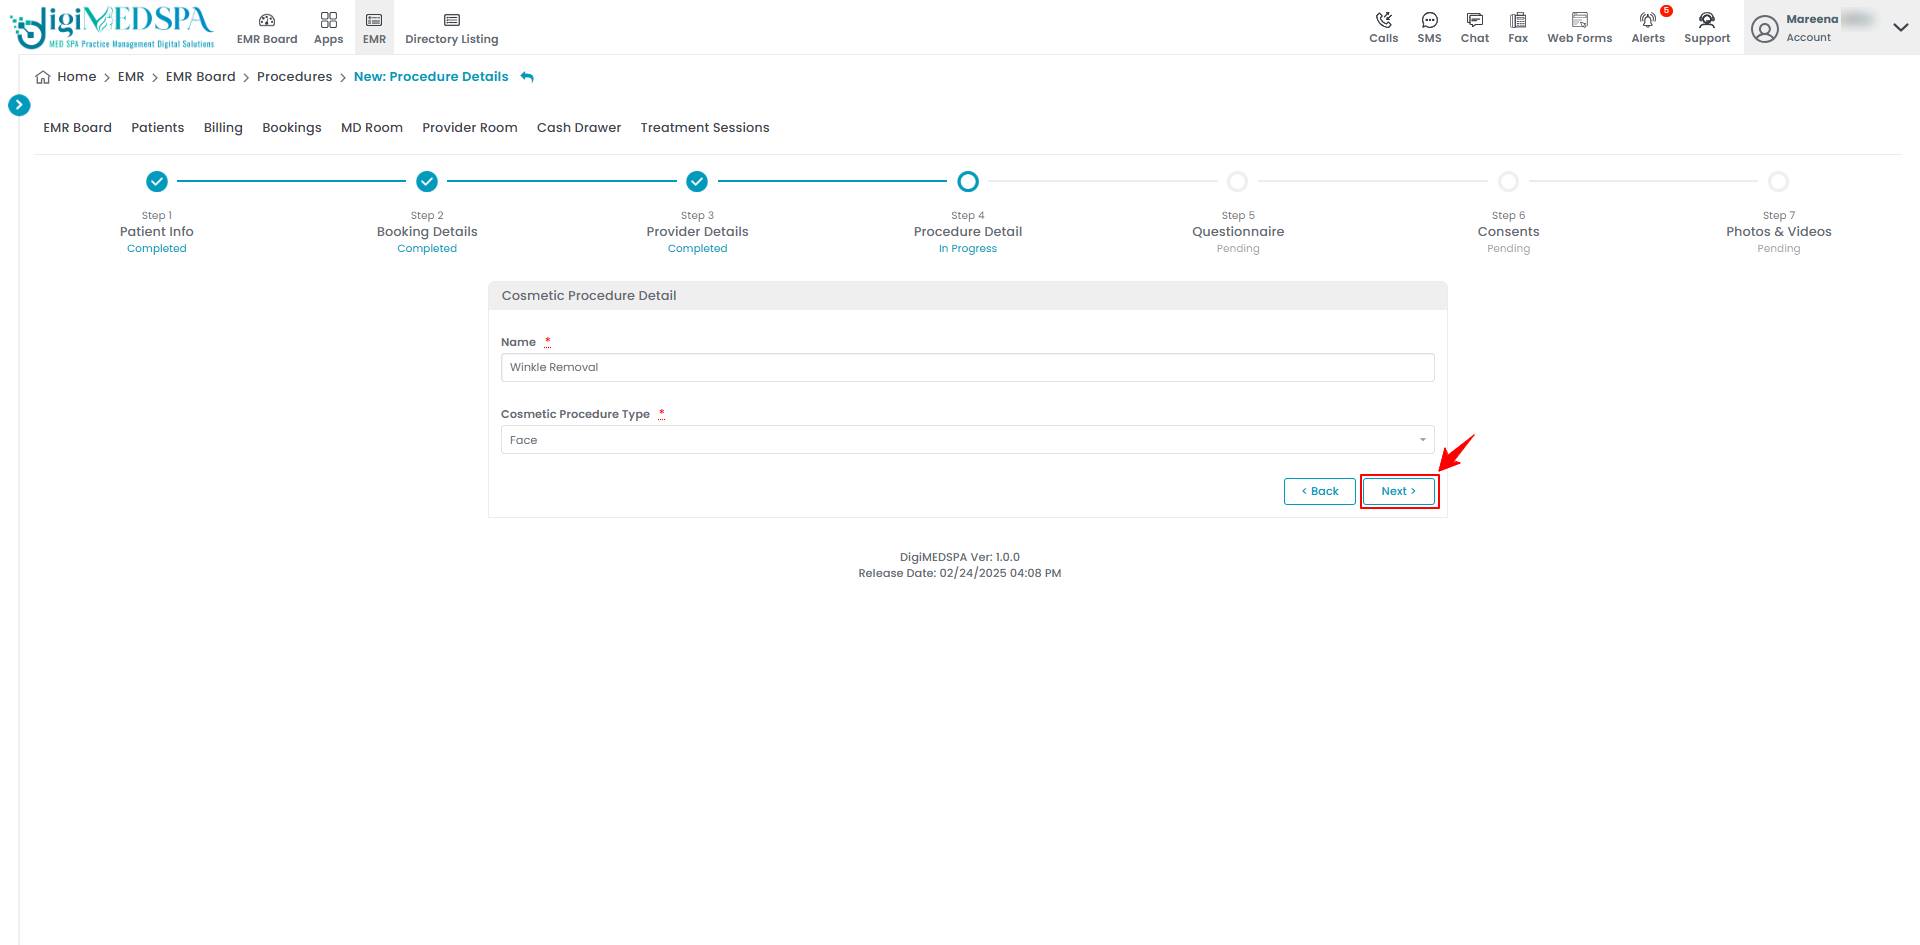
- Once you have entered the procedure name and selected the cosmetic procedure type, click "Next" to continue.

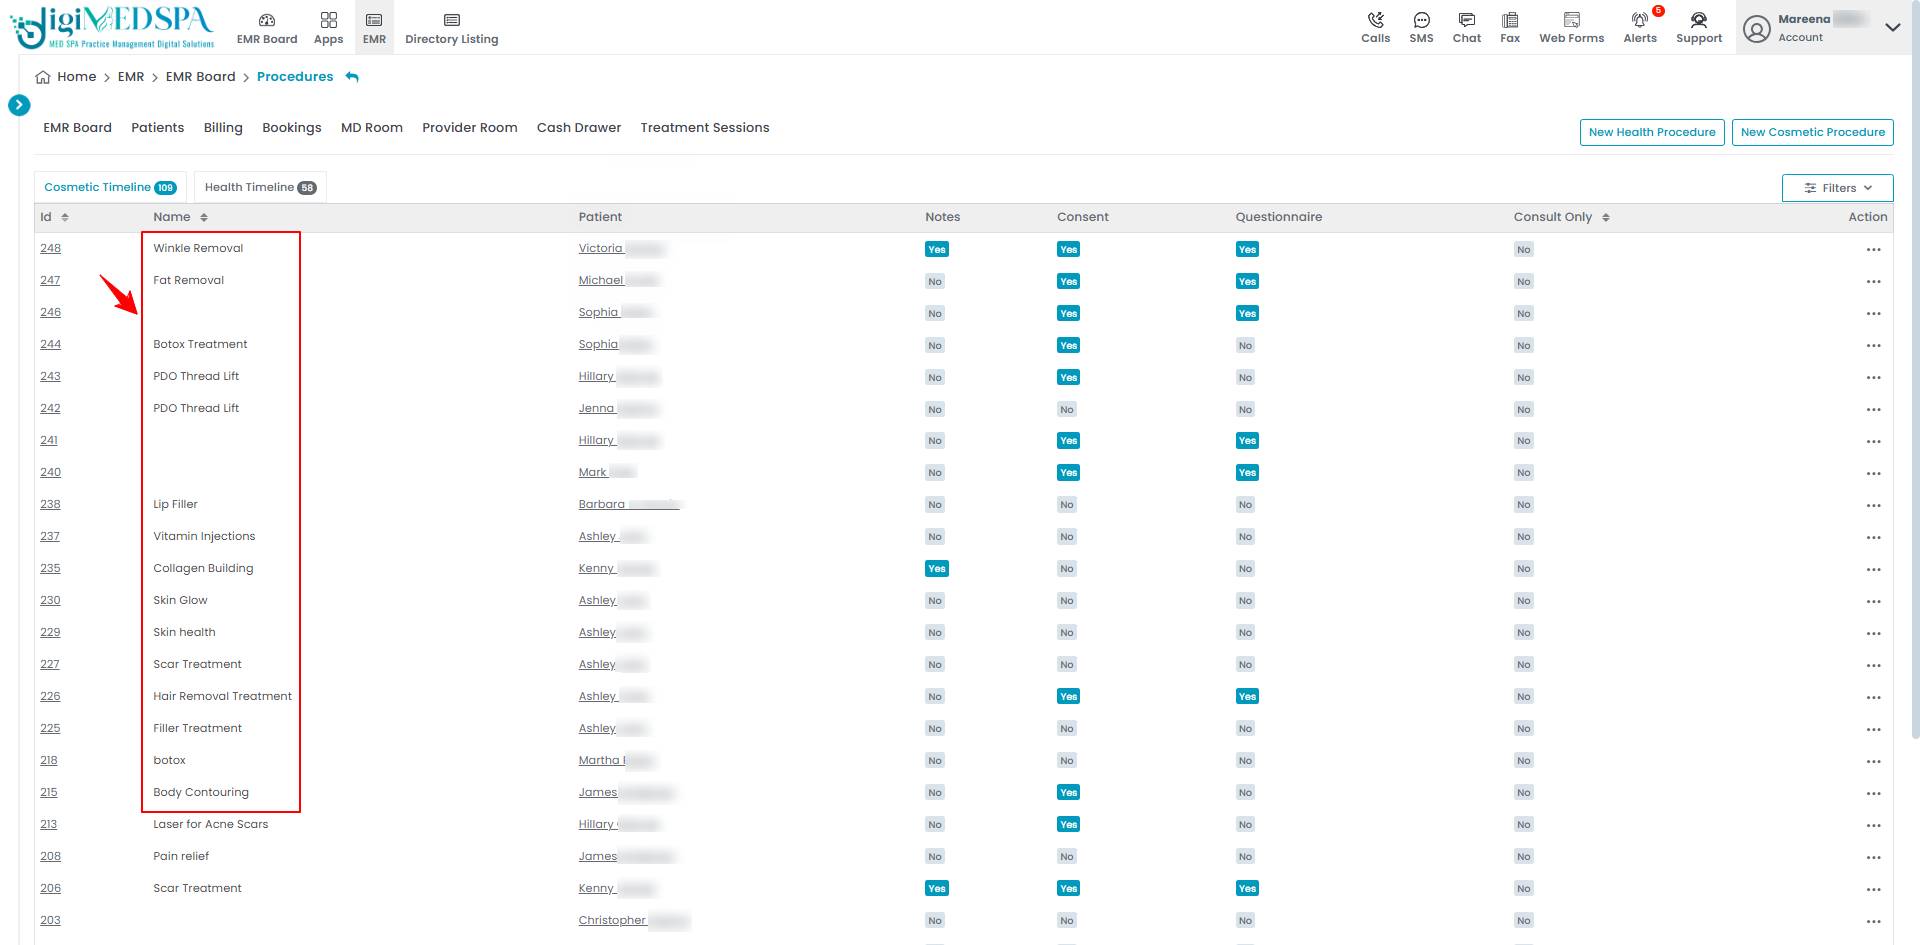
 Note: The "Procedure Information" column for incomplete procedures before Step 4 will appear empty in the "MD Room" and "Provider Room" procedure lists because they haven't been named yet.
- Complete the remaining steps and "Save" the cosmetic procedure.
Your cosmetic procedure has been successfully named! Note: Refer to our ‘’Create a Cosmetic Procedure’’ user guide for detailed instructions on all the steps.


