Create a Treatment Plan Template and Add a Treatment Plan to the Patient's Profile
This user guide provides step-by-step instructions for creating a customizable treatment plan for Med SPA professionals covering essential components, including plan type selection and defining a clear treatment goal, as well as session details.
Understanding Terminologies
Treatment Plan Template
A treatment plan template is a structured document that outlines a personalized approach to a patient’s esthetic and wellness goals. It includes the plan type, treatment goals, recommended treatments, session frequency, and product recommendations with pricing. The template ensures personalized care, treatment consistency, and transparency, helping patients achieve optimal results.
Create a Treatment Plan Template
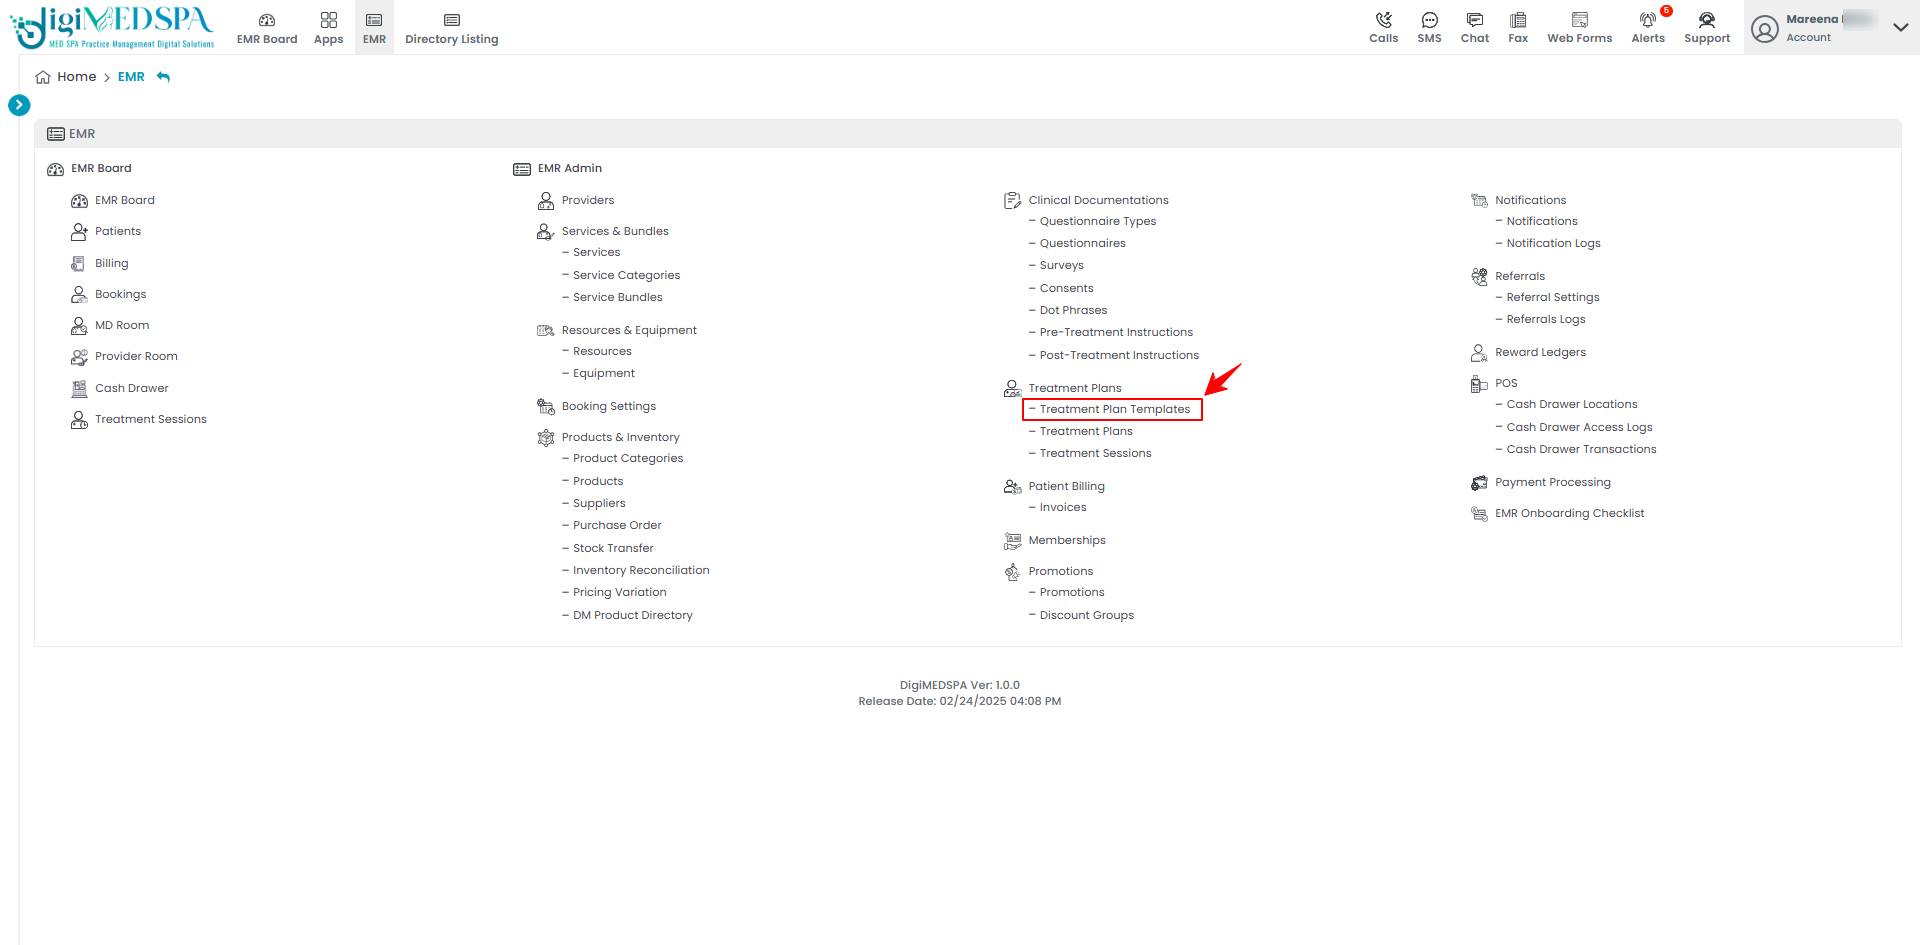
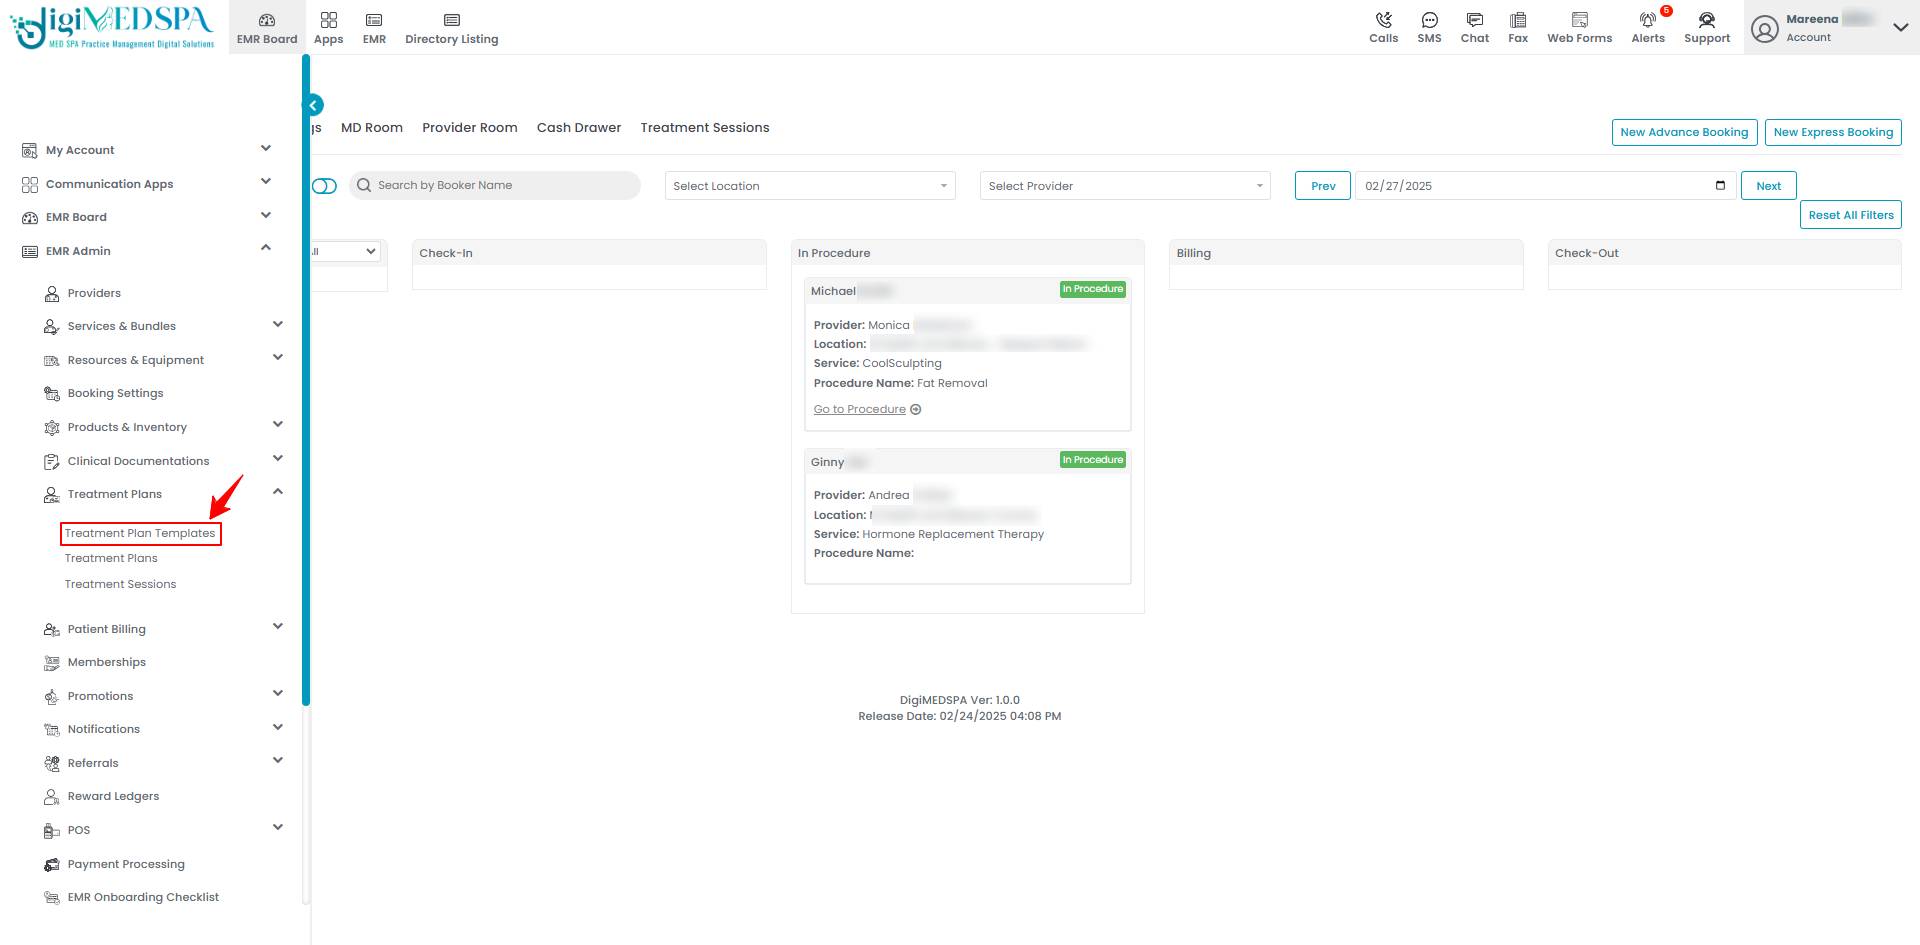
- The user can create a treatment plan template by accessing the “Treatment Plan Templates” through the Treatment Plans App from two entry points.
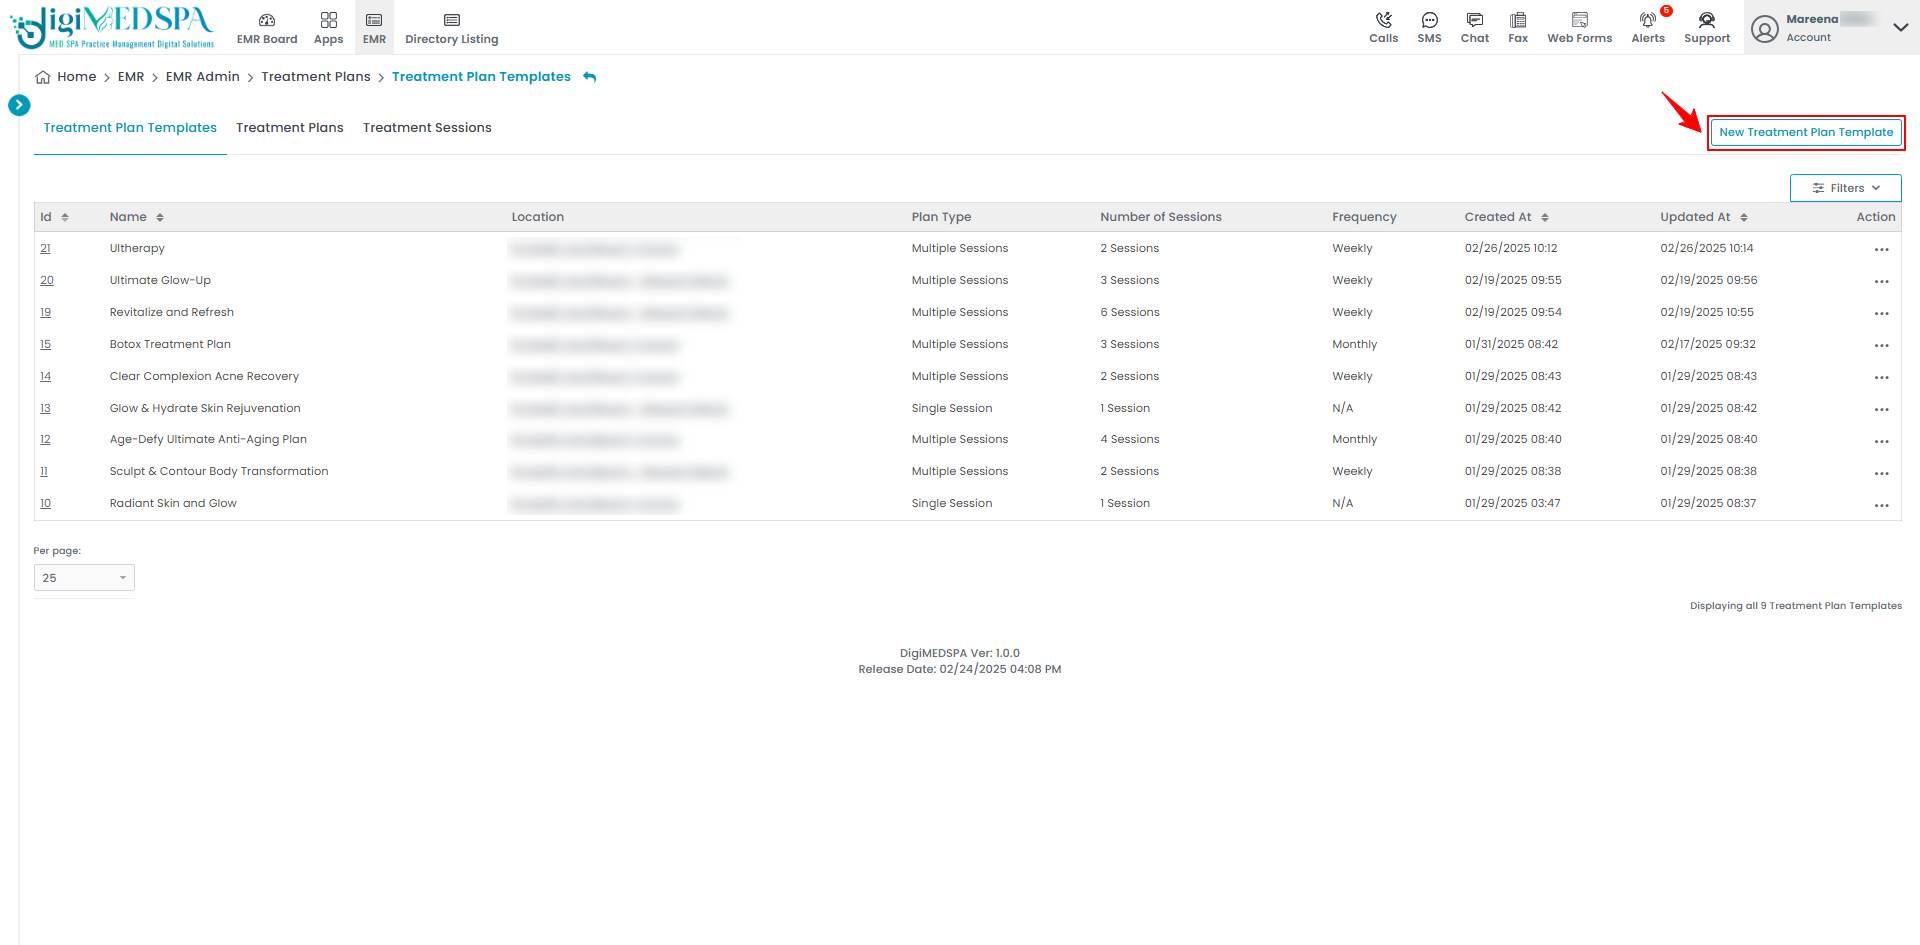
- To create a new treatment plan template, click on the “New Treatment Plan Template‘’ button in the top right corner of the screen.

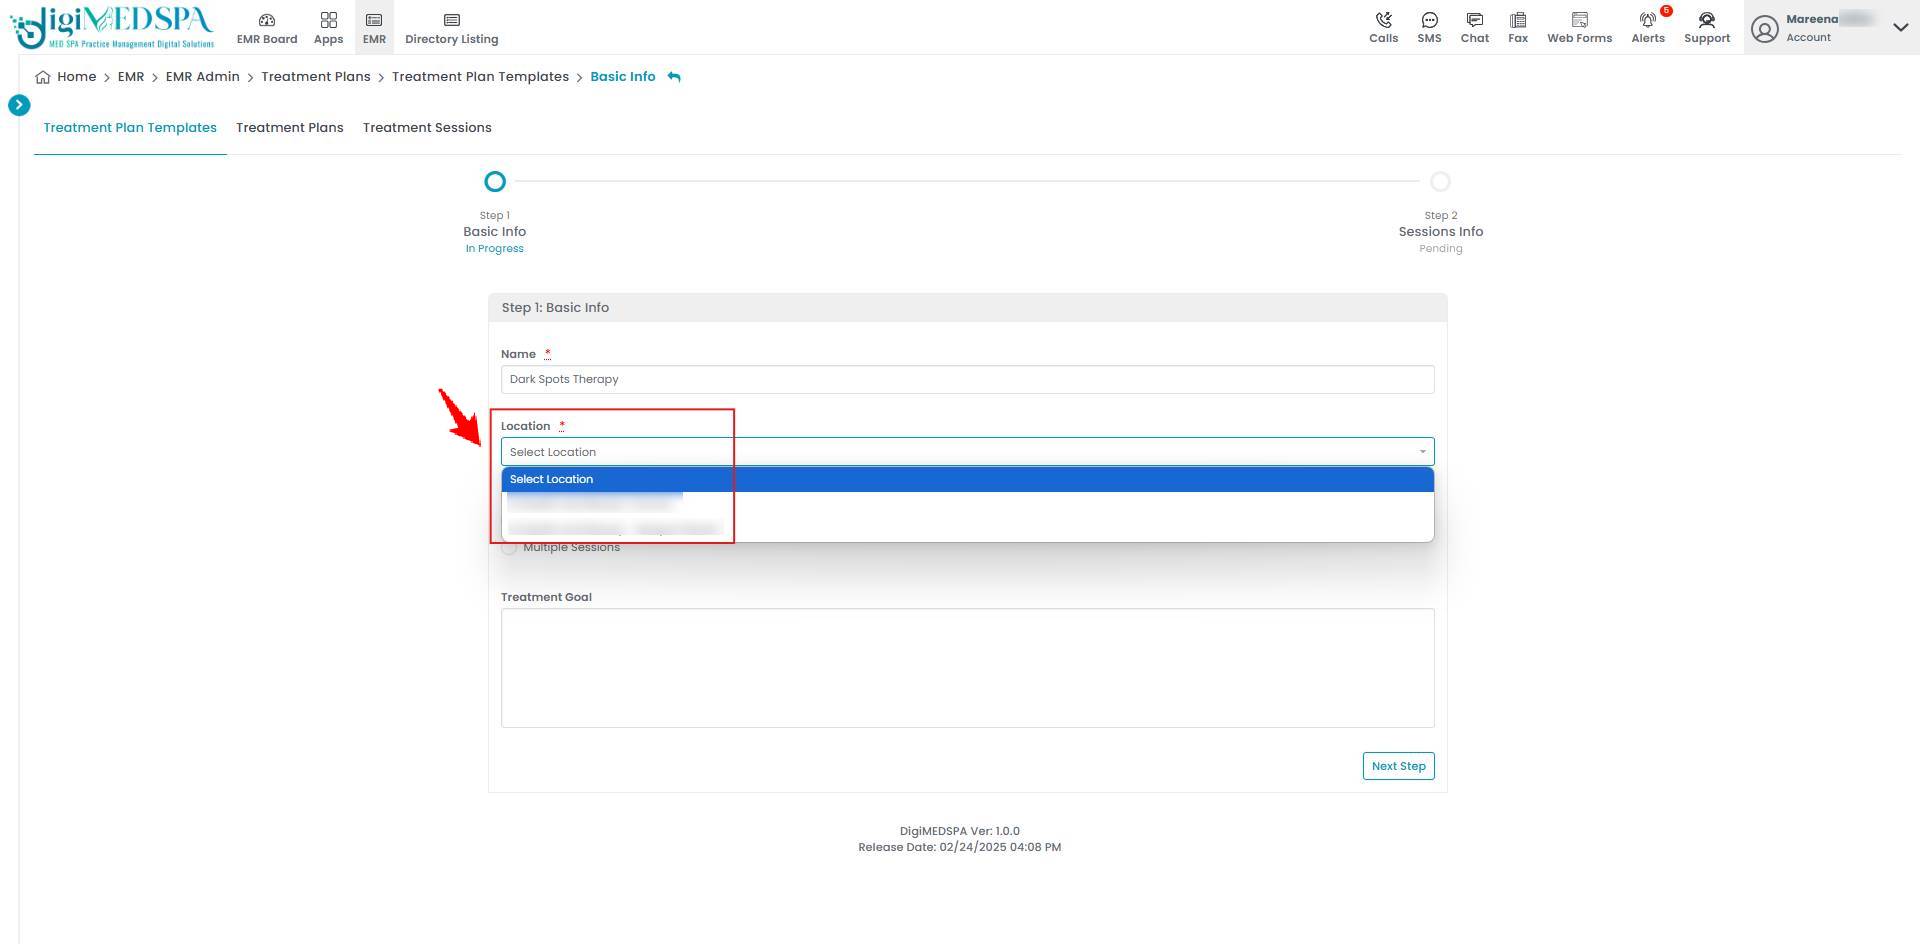
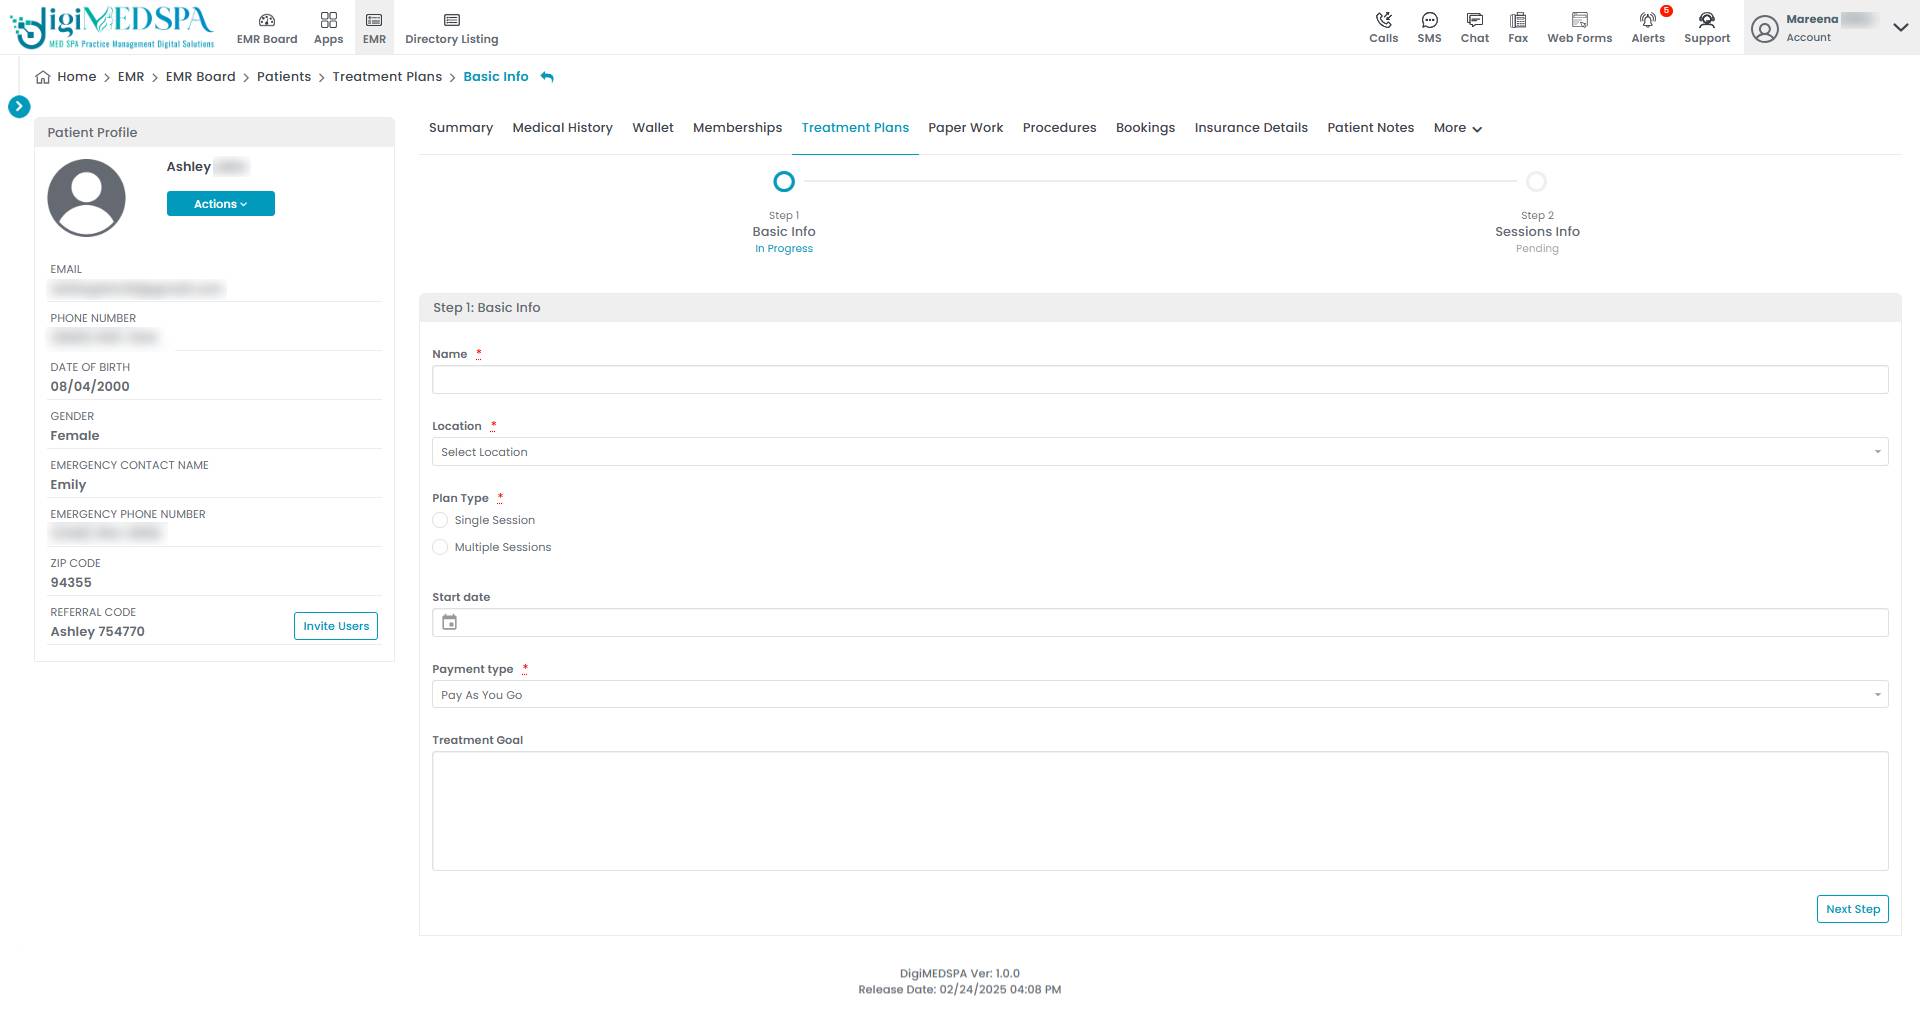
- Enter a Name for the treatment plan template and select a Location from the dropdown menu.

- Select a Plan Type. If you choose ‘Single Session,’ enter the Treatment Goal. Once all required information is added, click ‘Next Step.’

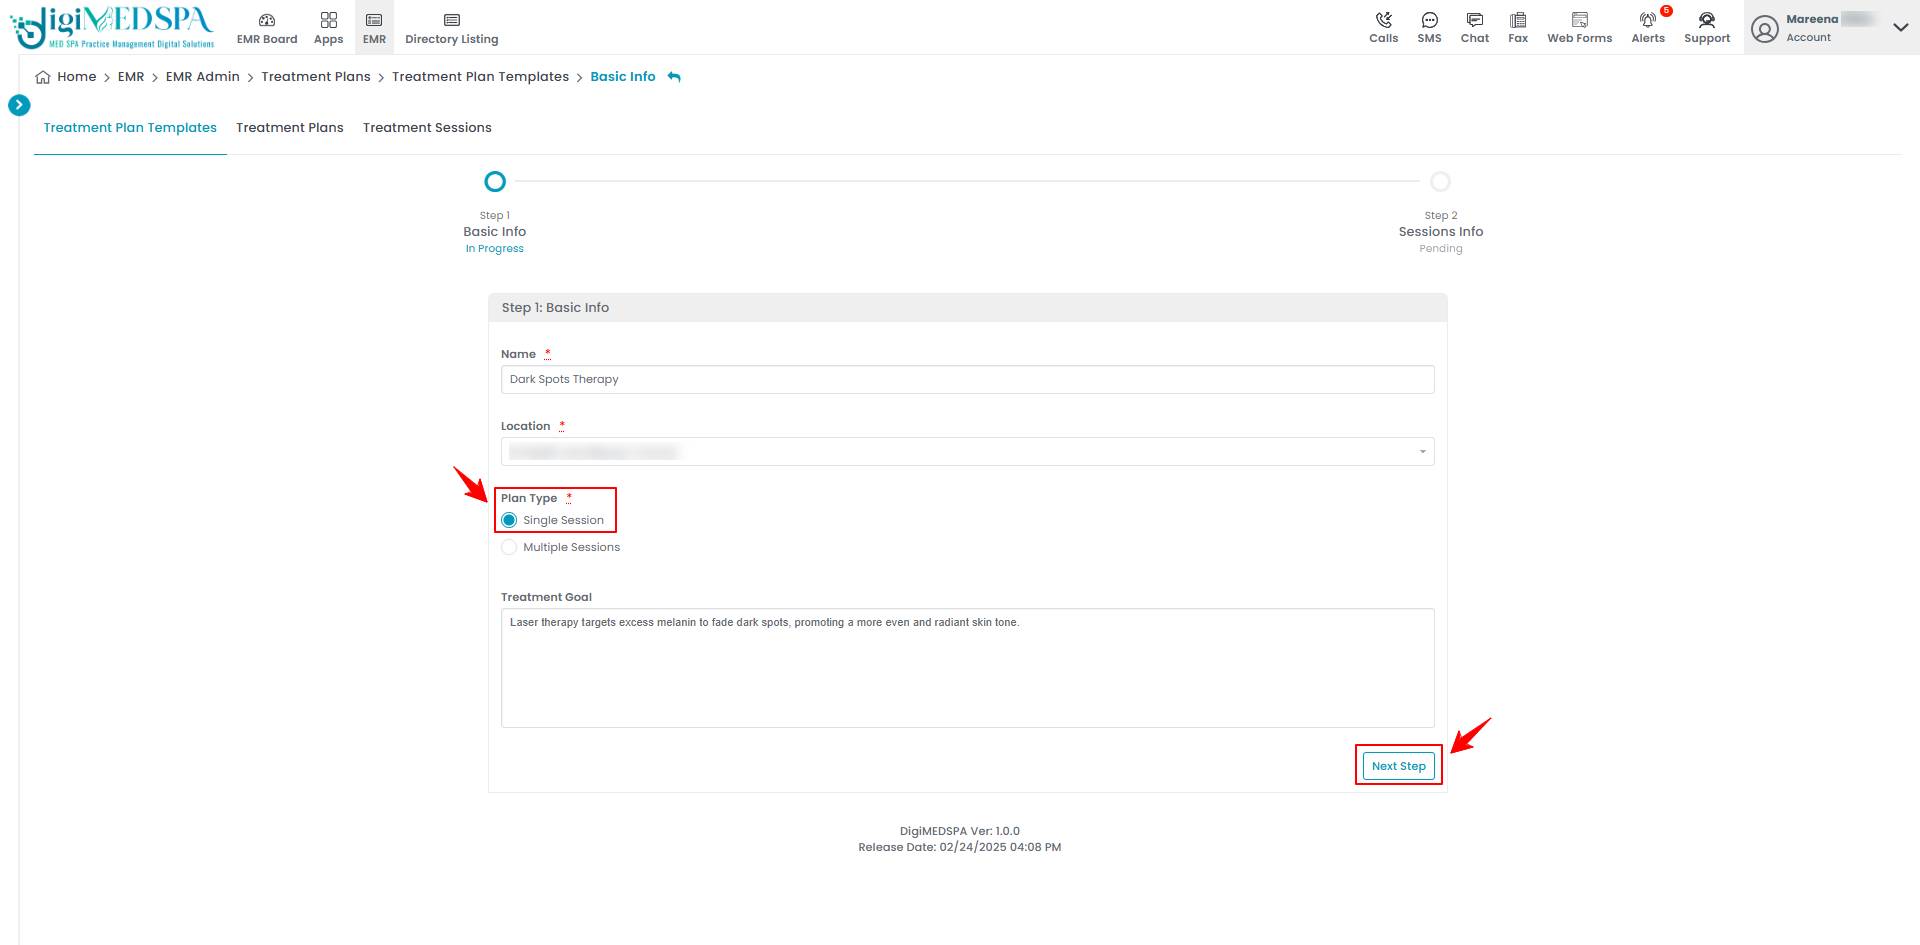 Note: ‘Plan Type’ refers to the structure of the treatment, specifying whether it involves a single session or a series of multiple sessions. This determines the duration and frequency of the treatments required to achieve the desired results. ‘Treatment Goal’ is the specific outcome the patient wishes to achieve, such as enhancing skin texture, reducing wrinkles, or contouring the body. It helps guide the selection of appropriate treatments and sets expectations for results.
 - If "Multiple Sessions" is selected for the treatment plan, additional fields will be displayed to specify the number of sessions, and for setting the schedule. Enter the Number of Sessions and click "Set Schedule."

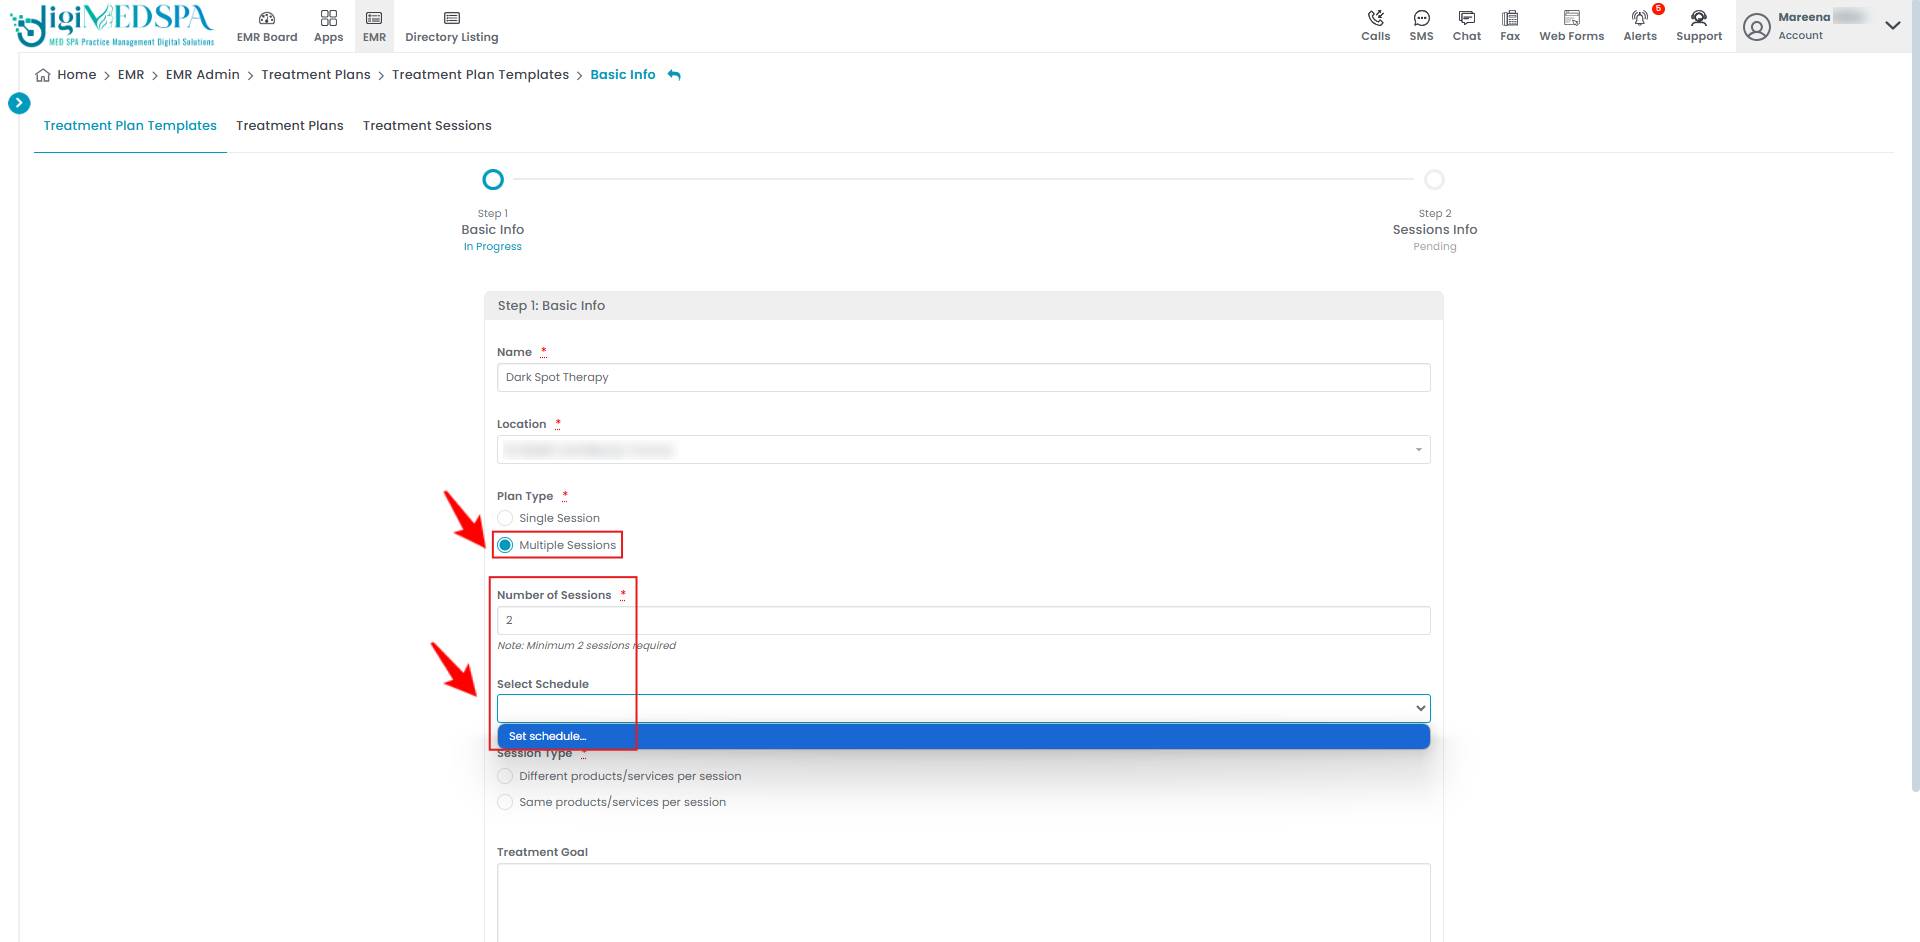 Note: ‘Number of Sessions’ refers to the total count of treatment appointments required to achieve the desired results as outlined in the treatment plan.
 - After selecting "Set Schedule," a popup will appear for you to set the treatment schedule. Select the Frequency from the dropdown and choose a day for the treatment. Click "OK" to finalize.

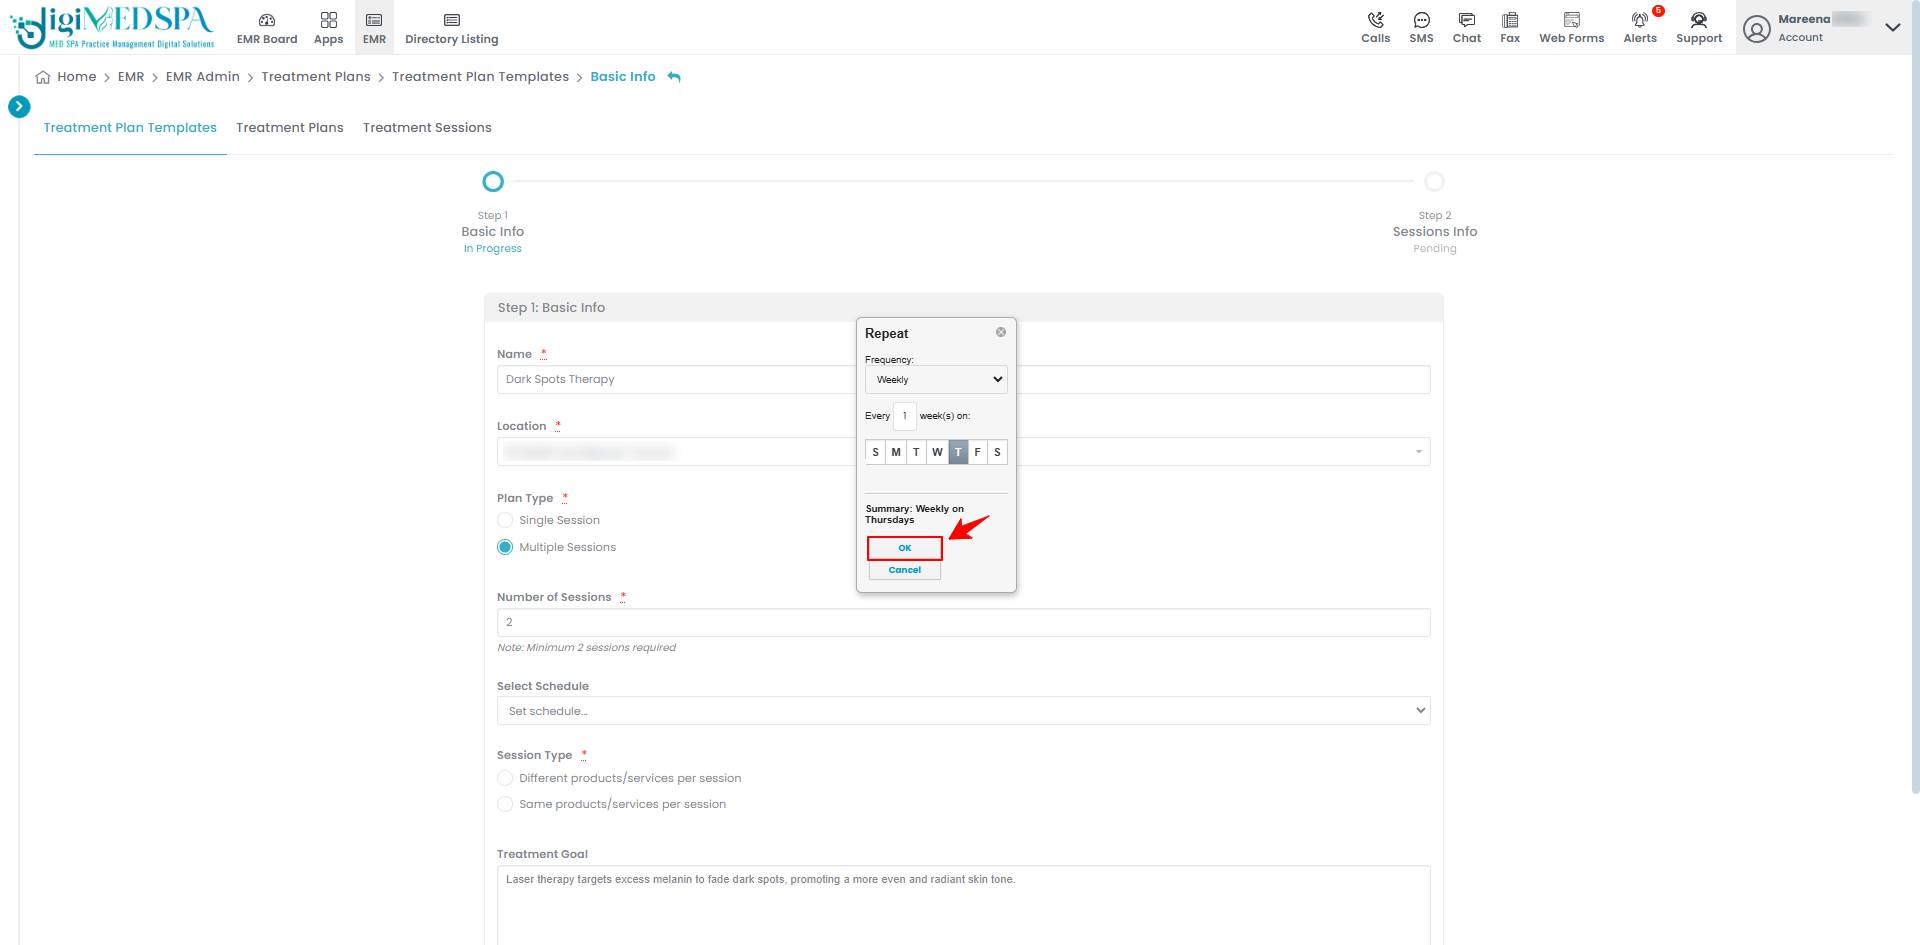 Note: ‘Frequency’ is the interval or number of times a treatment session will occur within a given timeframe (e.g., daily, weekly, monthly).
 - Select a Session Type. If you choose ‘Same products/services per session,’ additional fields will appear, allowing you to select a Product and a Service from the dropdown menu. After making your selections, enter a Treatment Goal and click ‘Next Step.’

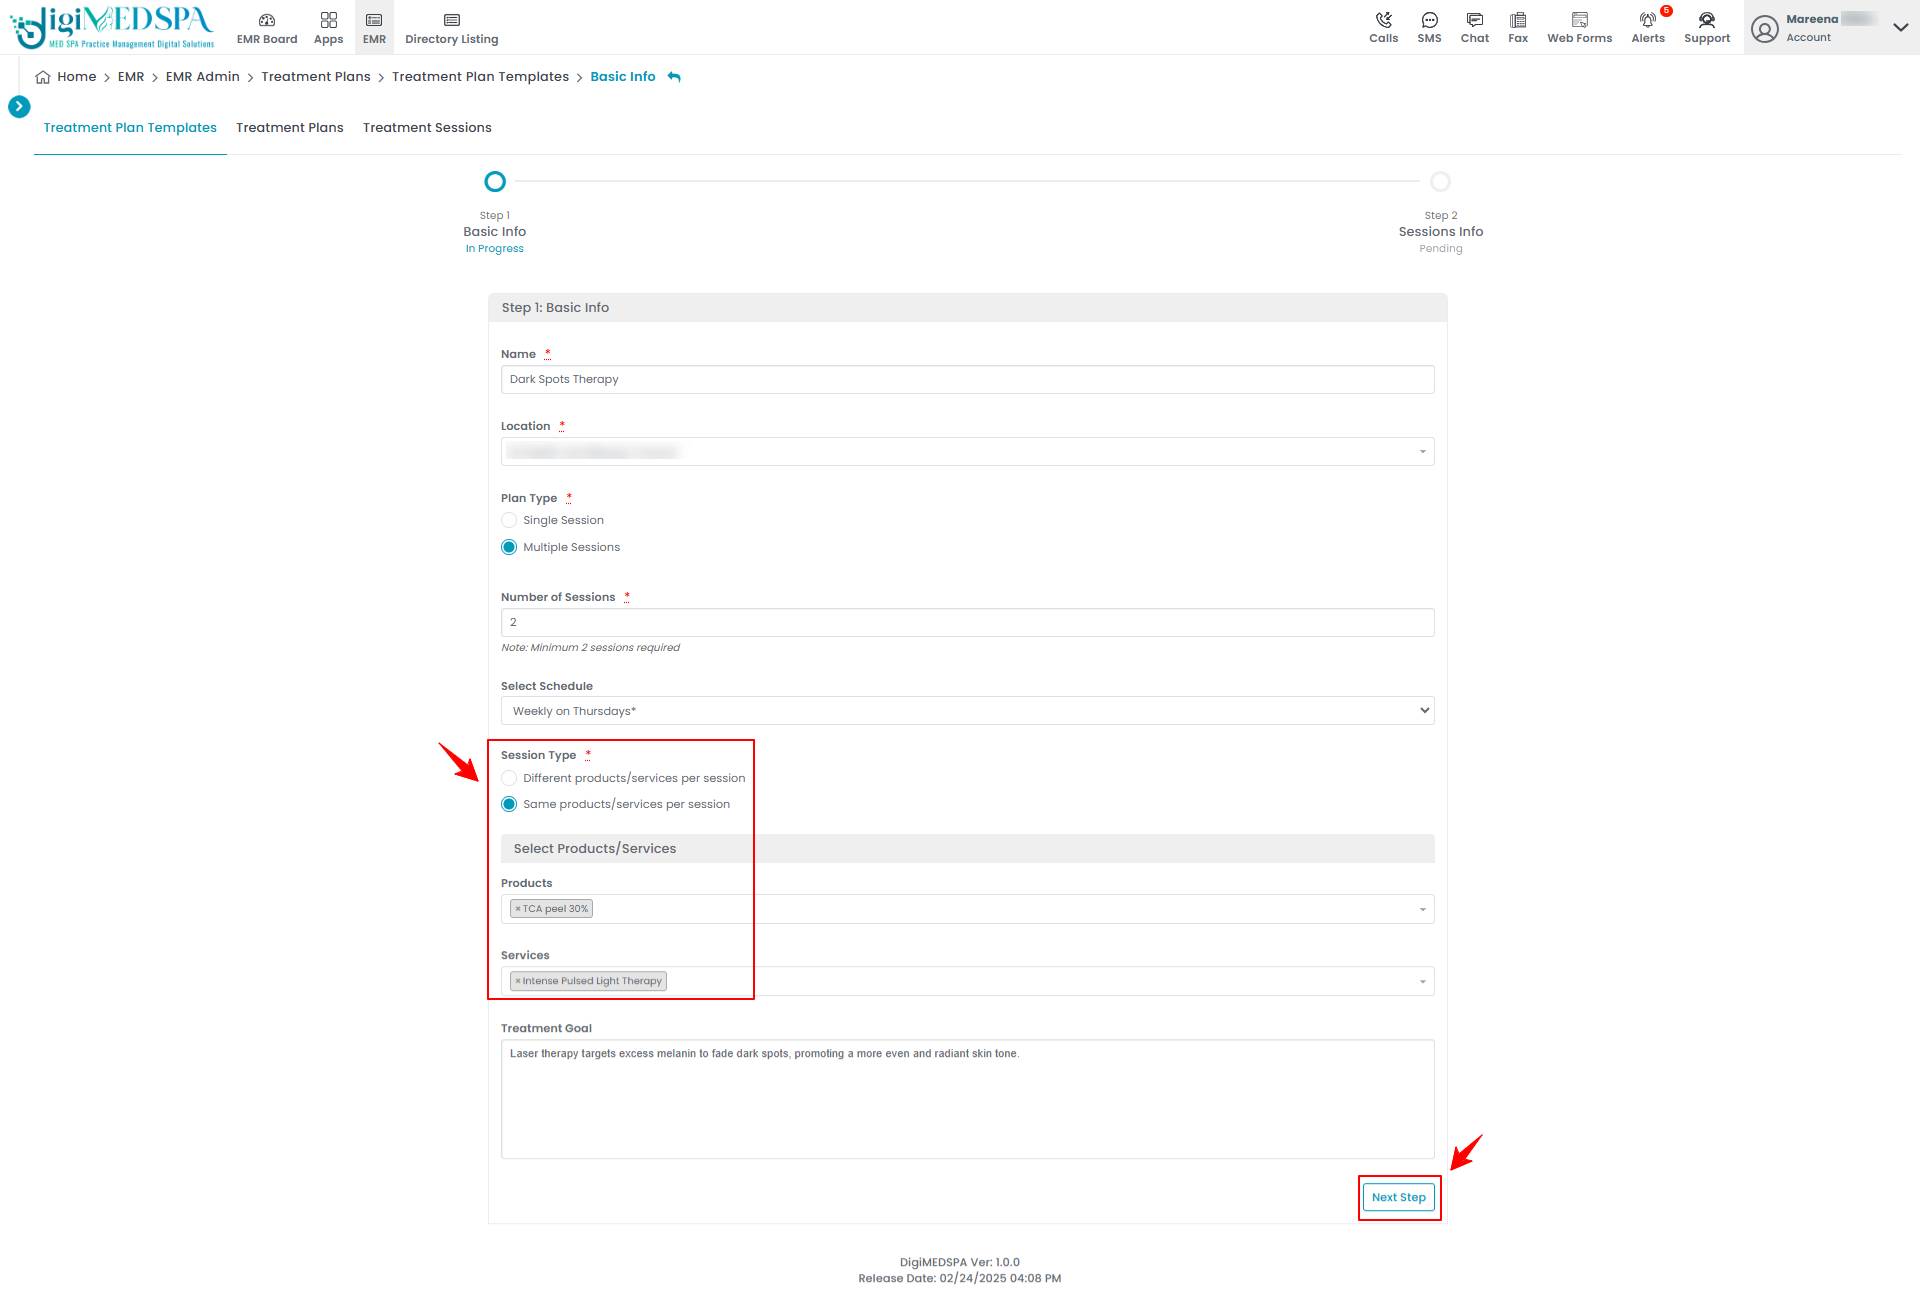 Note: ‘Session Type’ is a classification determining whether the same or different products and services will be used across multiple treatment sessions. ‘Same Products/Services Per Session’ means a session type where the selected product(s) and service(s) remain consistent for each appointment, ensuring uniform treatment throughout the plan. ‘Different Products/Services Per Session’ refers to a session type that allows variations in products and services for each appointment, enabling a customized approach to treatment.
 - In Step 2, set up products and services for each session. Enter the Unit, choose the Discount Type, specify the Amount, and set the Tax Percentage. The Base Price will be filled automatically from Products and Inventory, which will be used to calculate the Final Price and Subtotal once all fields are completed.

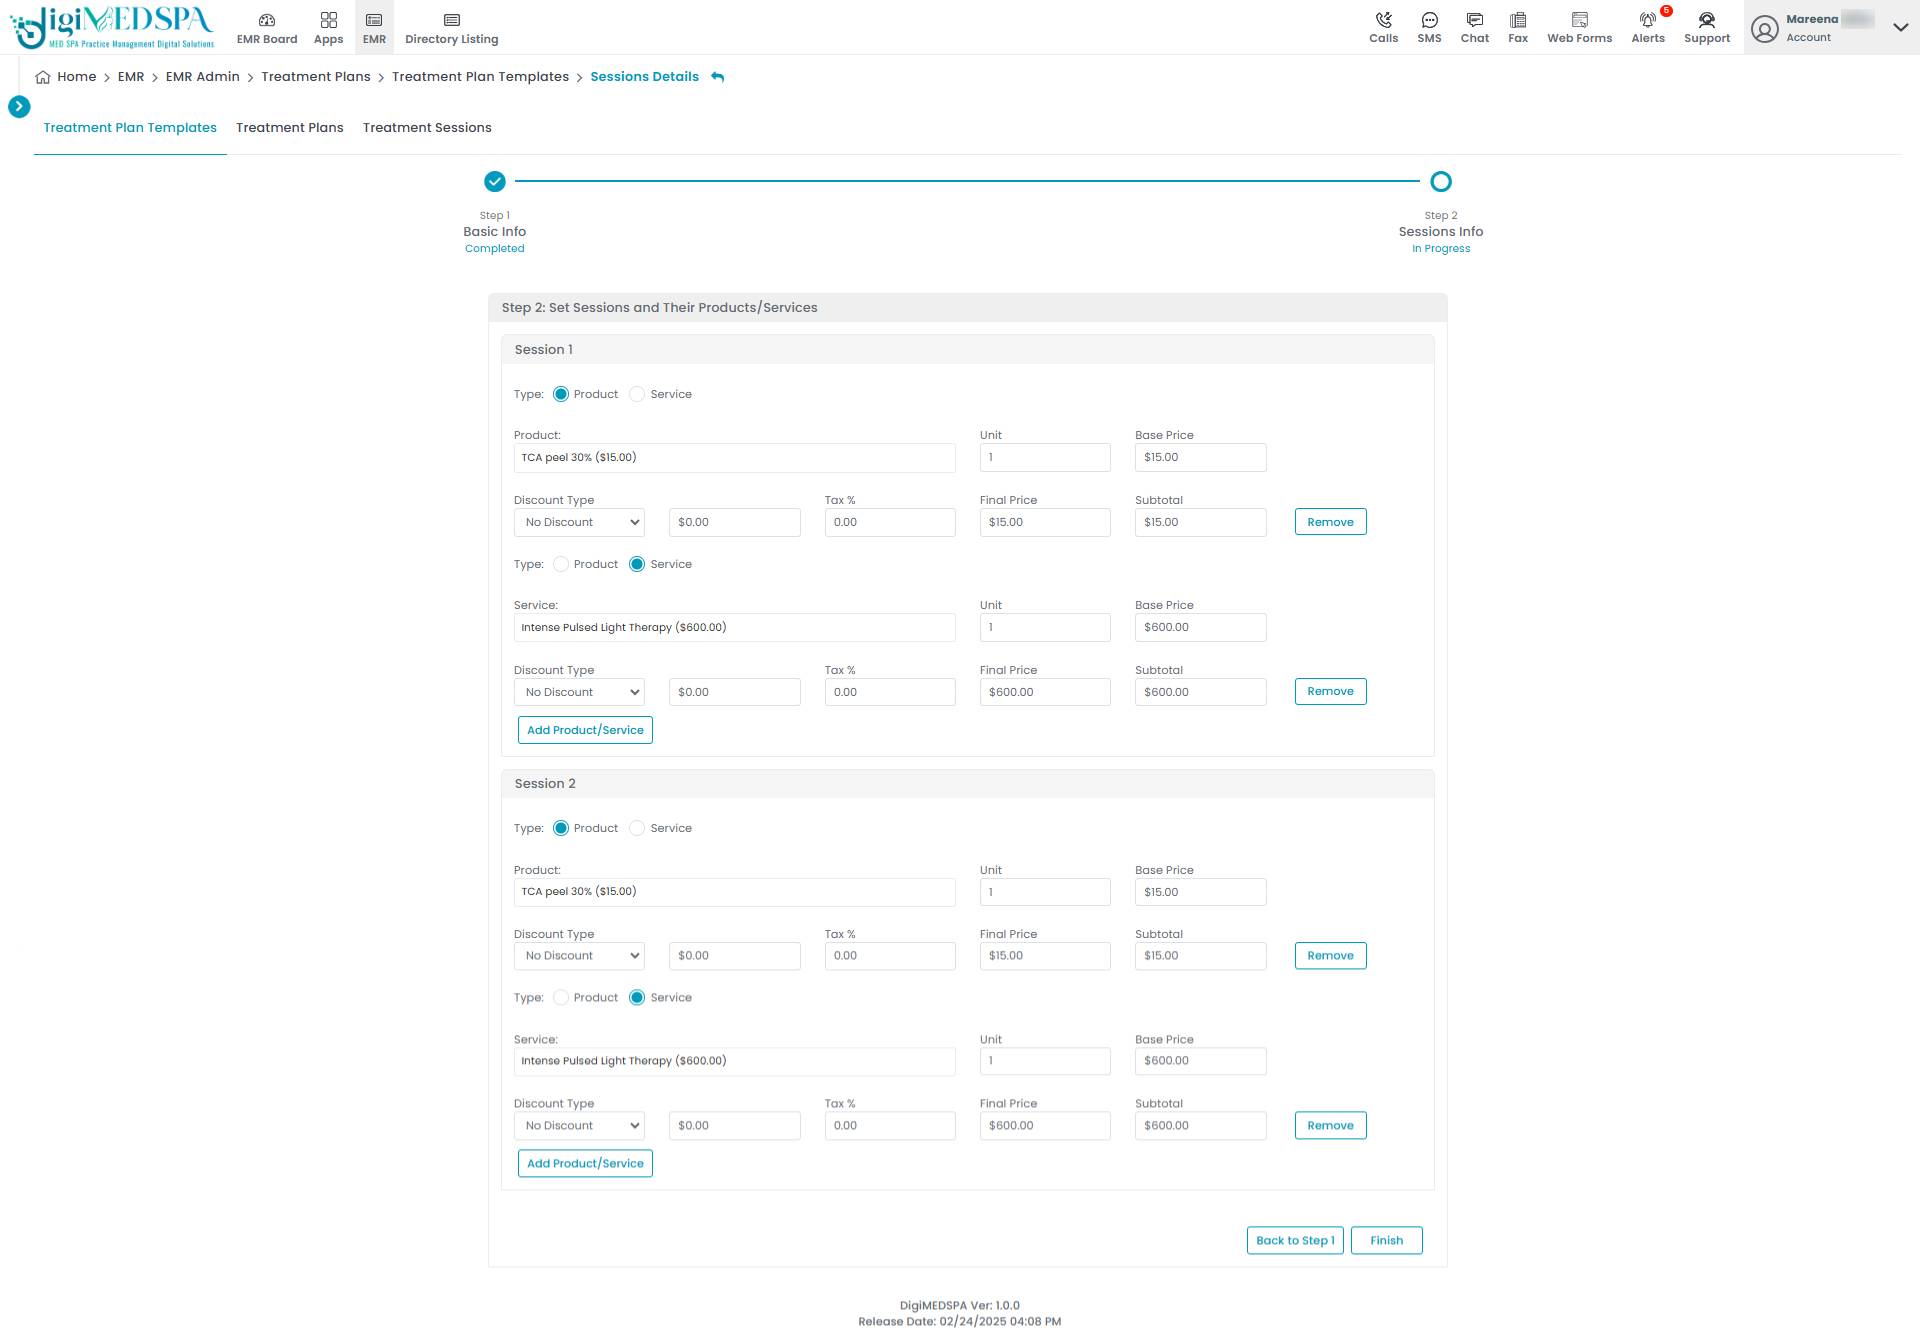 Note: A ‘Unit’ measures a product or service, such as per syringe for injectables, per treatment session, or per bottle for skincare products. ‘Discount Type’ applies price reductions, including percentage-based discounts, fixed amount discounts, BOGO offers, or special pricing for memberships and packages. ‘Tax’ is the sales or service tax applied to products, and treatments vary by location and whether the service is considered medical or elective. ‘Base Price’ is the original price of a product or service before any discounts, taxes, or additional fees are applied.
 - To add a new product or service, click the ‘Add Product/Service’ button. After entering all the required information, click ‘Finish’ to create and save the treatment plan template.

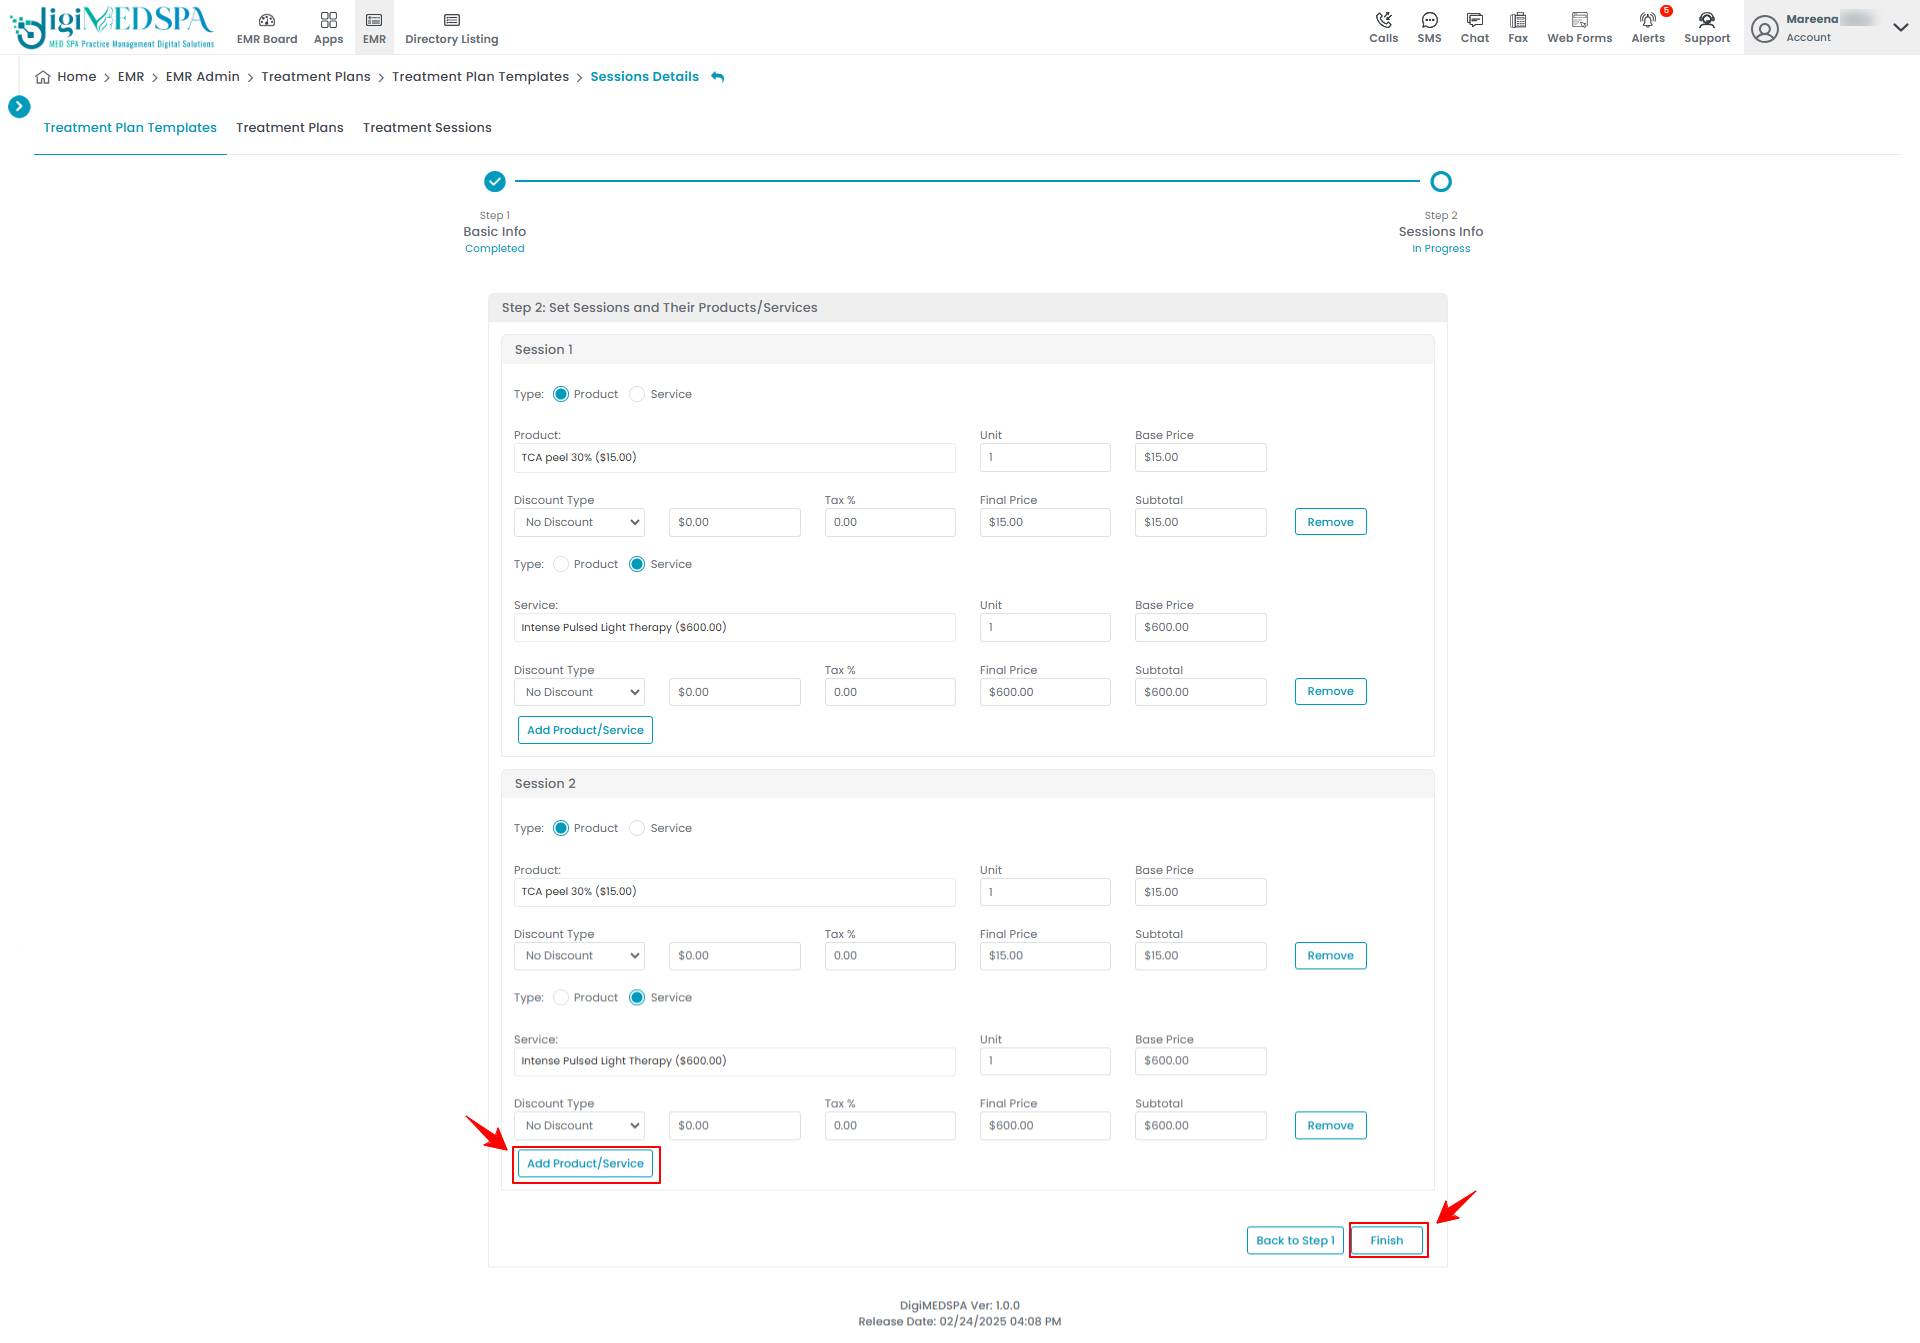 The treatment plan template has been successfully created!
Edit a Treatment Plan Template
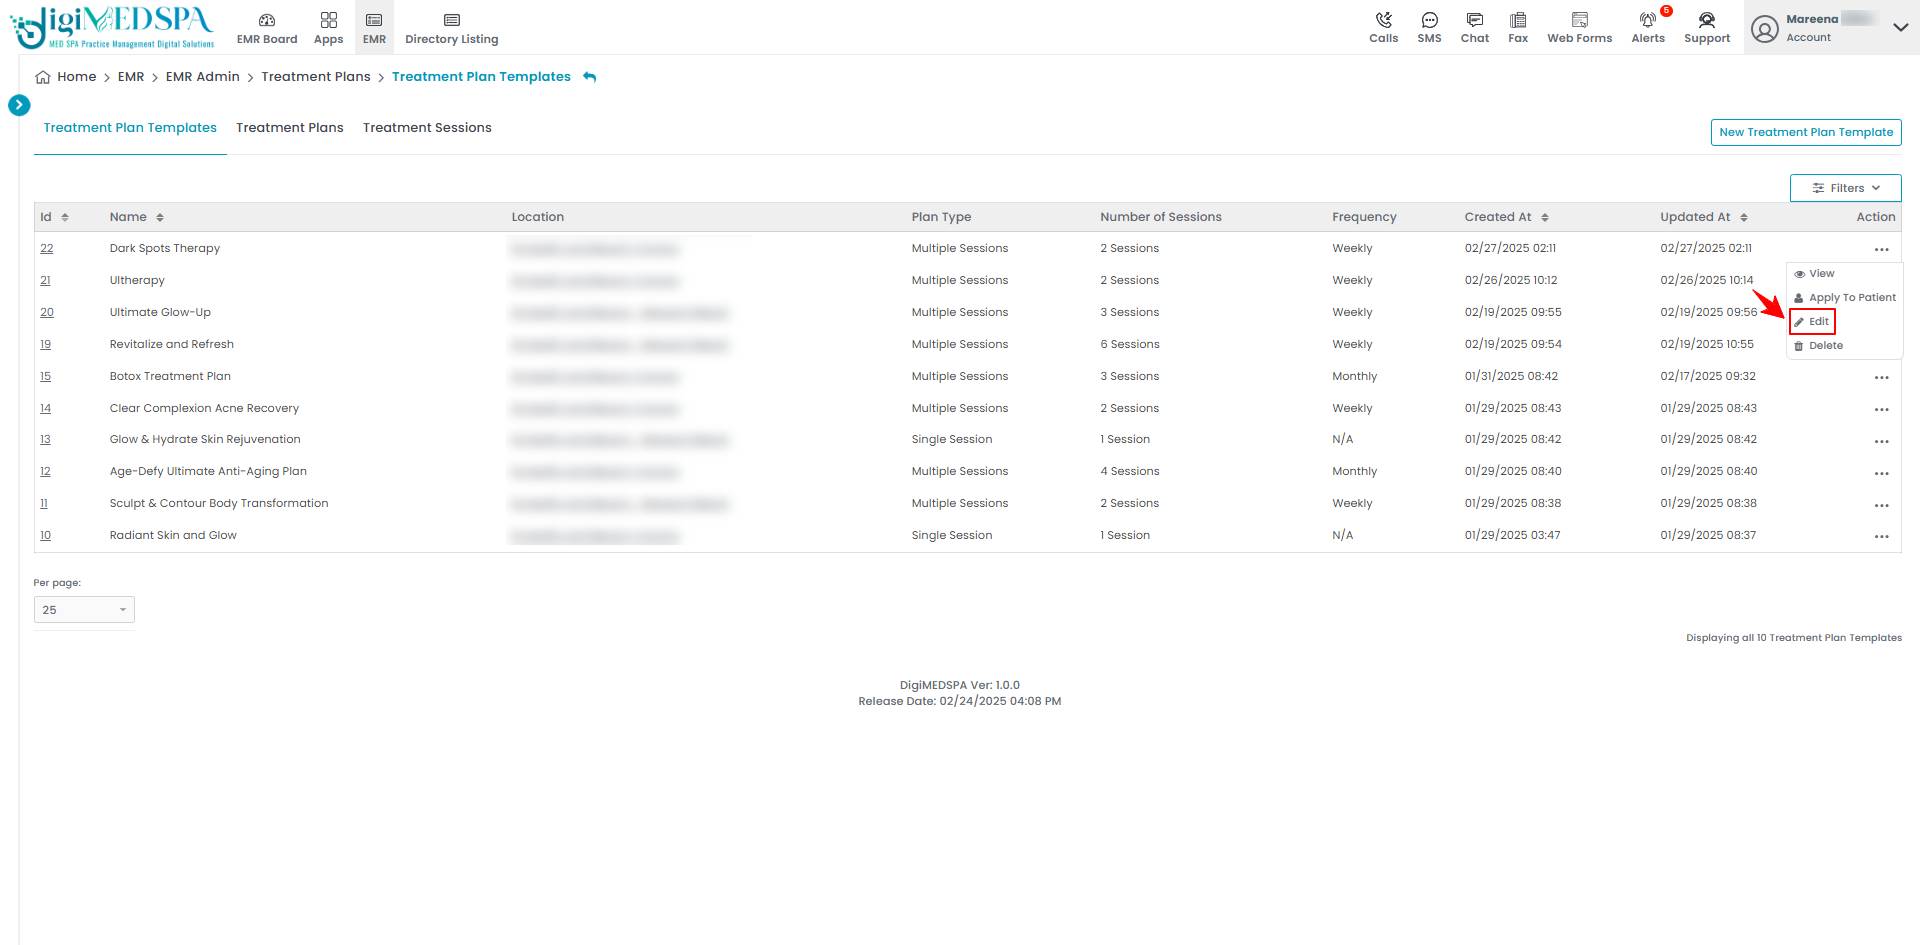
- From the treatment plan template list, click on three dots under the action column and select "Edit" for the treatment plan template.

- Go to the step where changes are required. After making the desired updates, click ‘’Finish.”

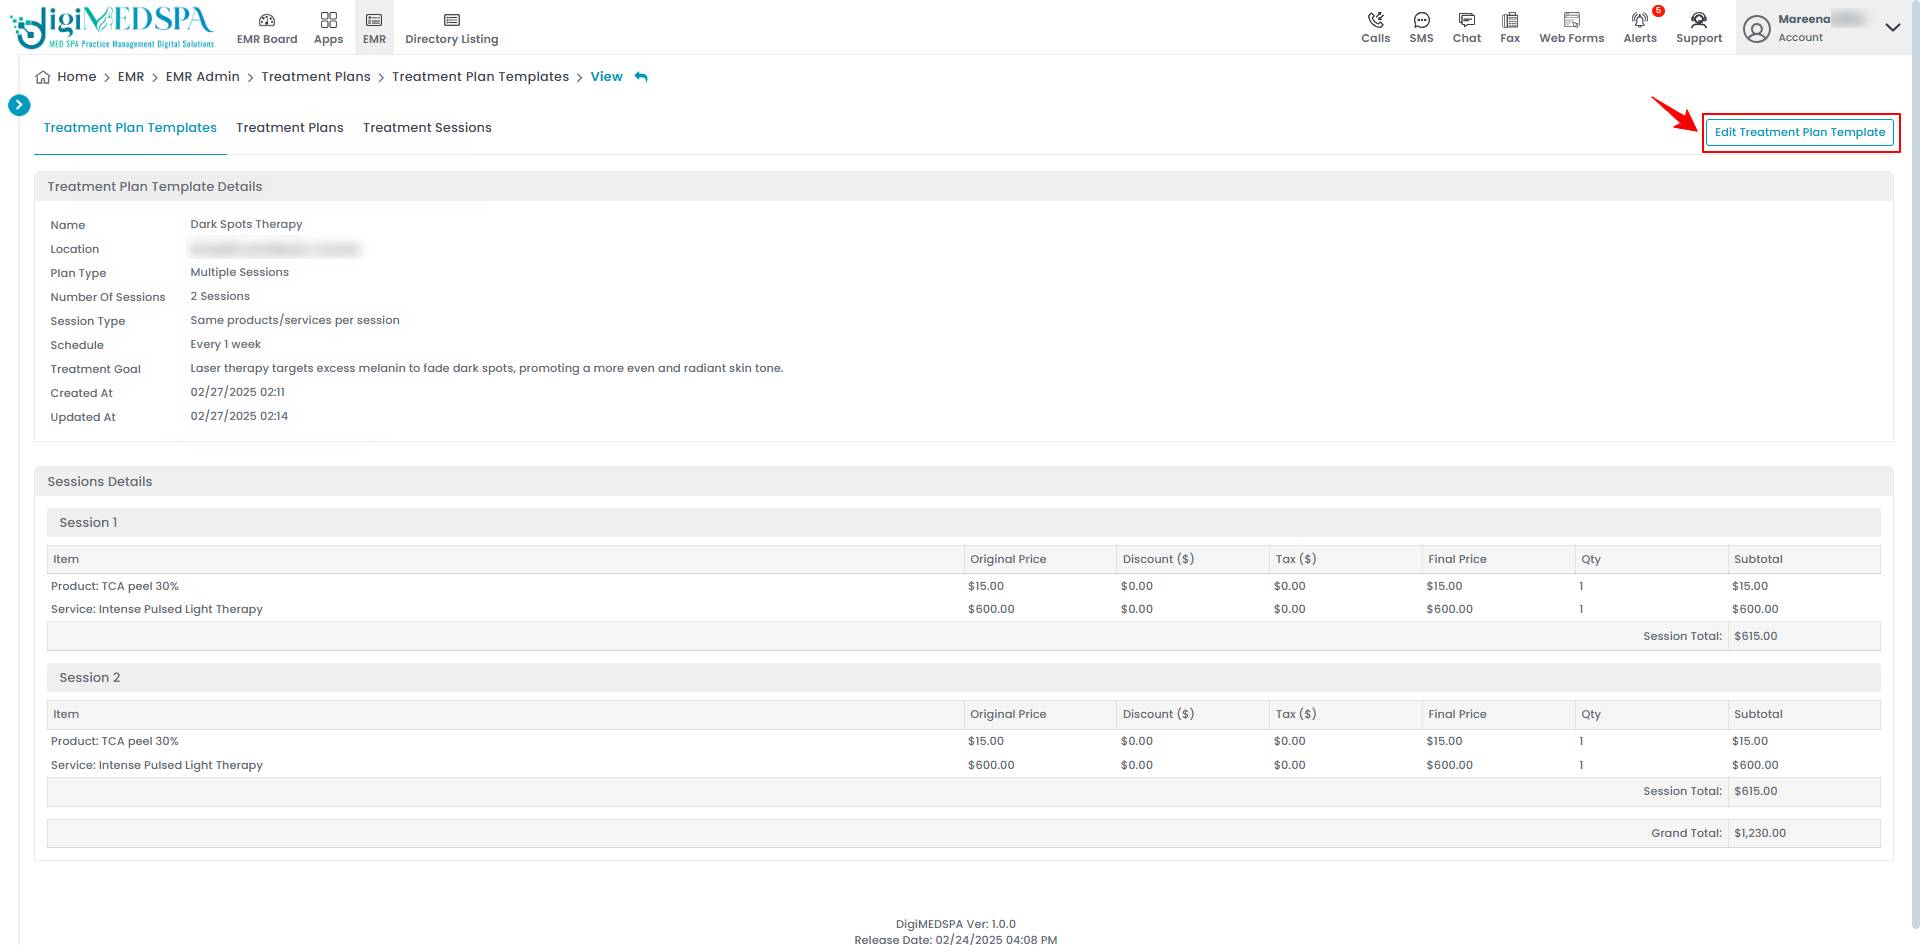
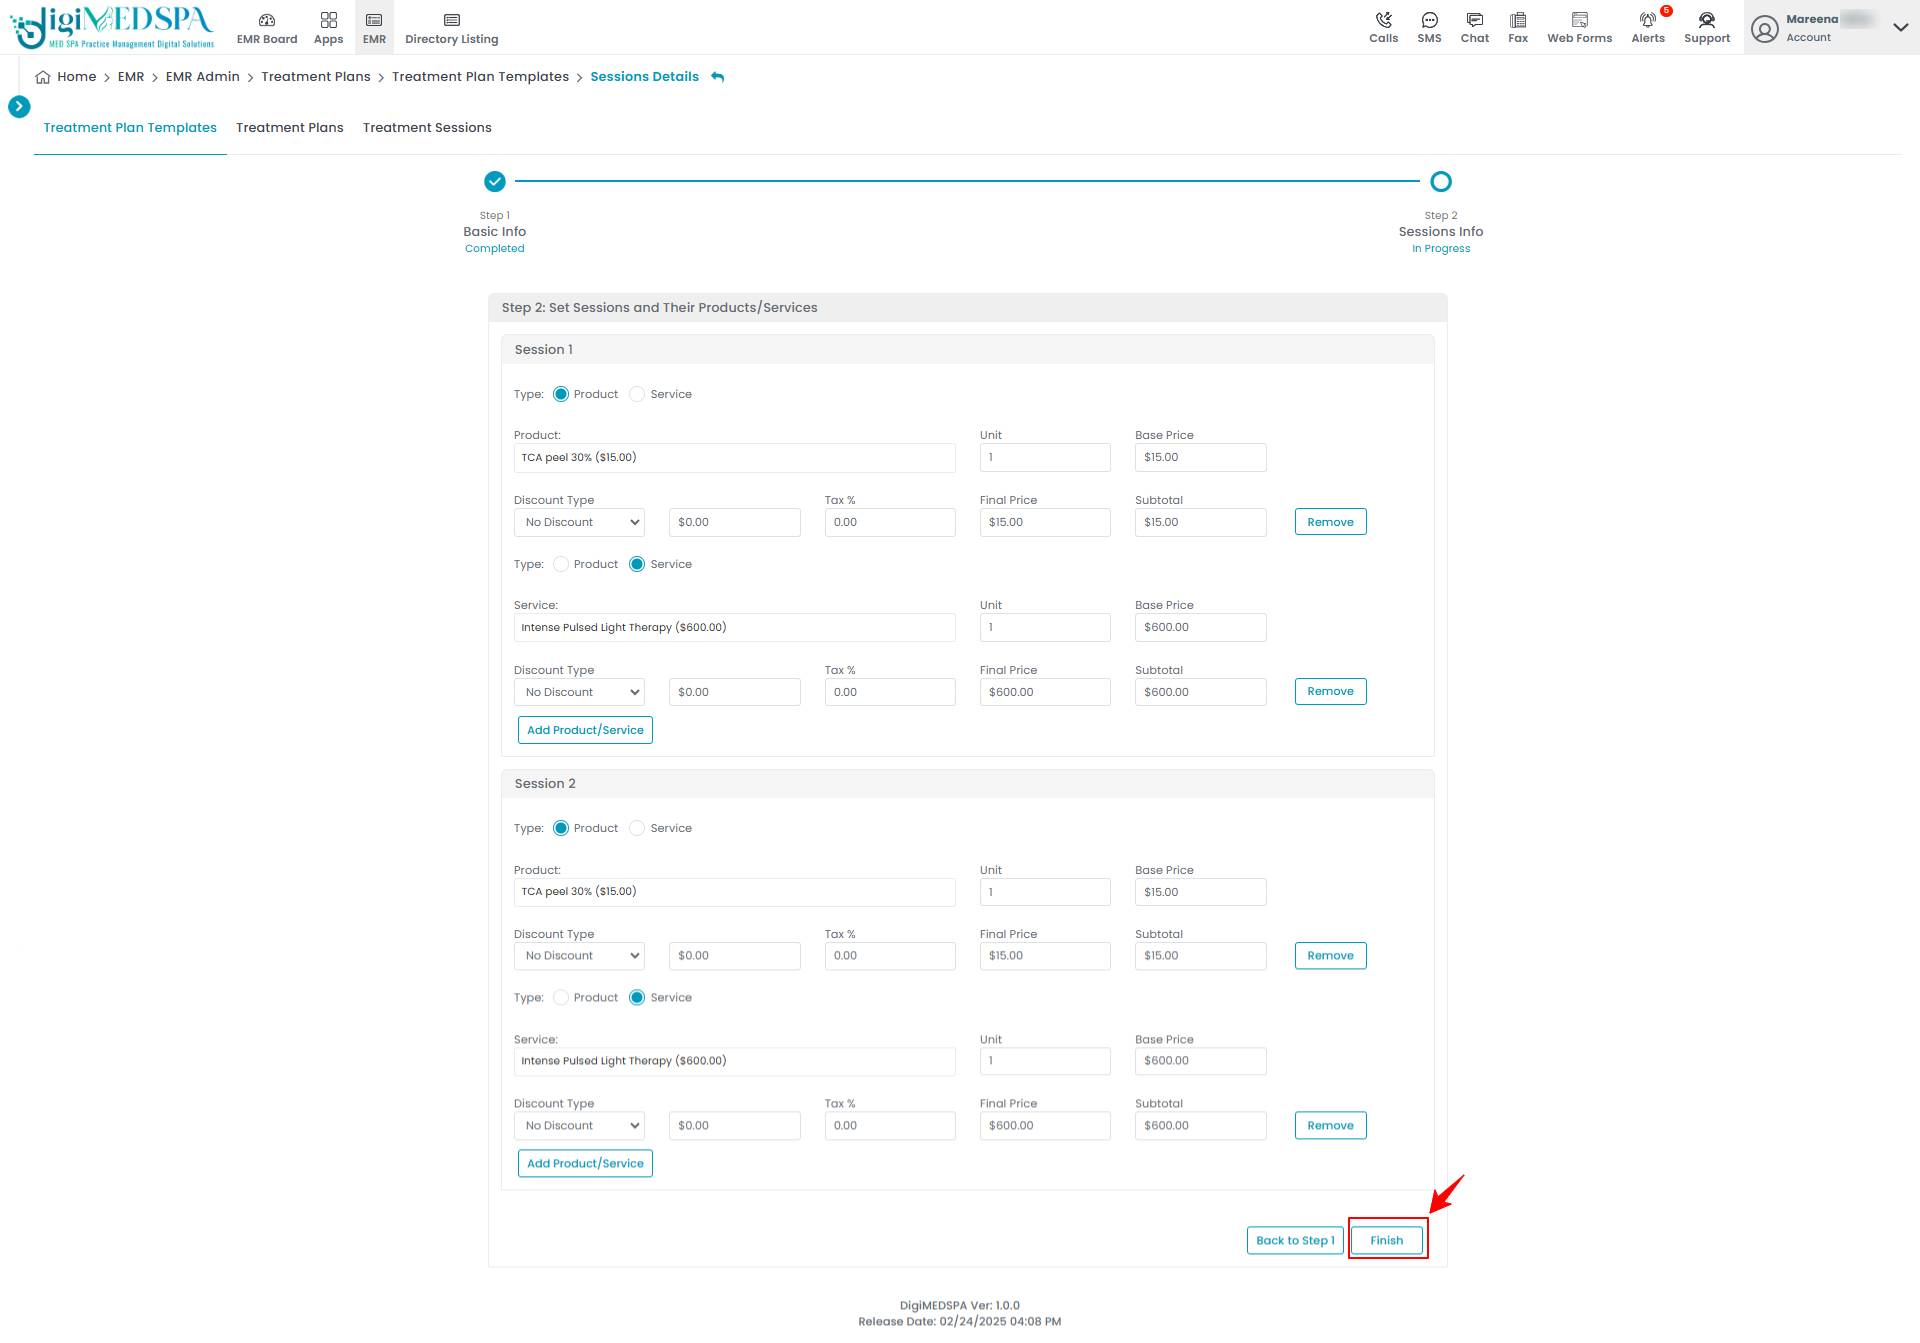 The treatment plan template has been successfully edited!Note: The treatment plan template can also be edited by clicking the "Edit Treatment Plan Template" button in the top right corner of the View Treatment Plan Template Page.
Add a Treatment Plan to the Patient's Profile
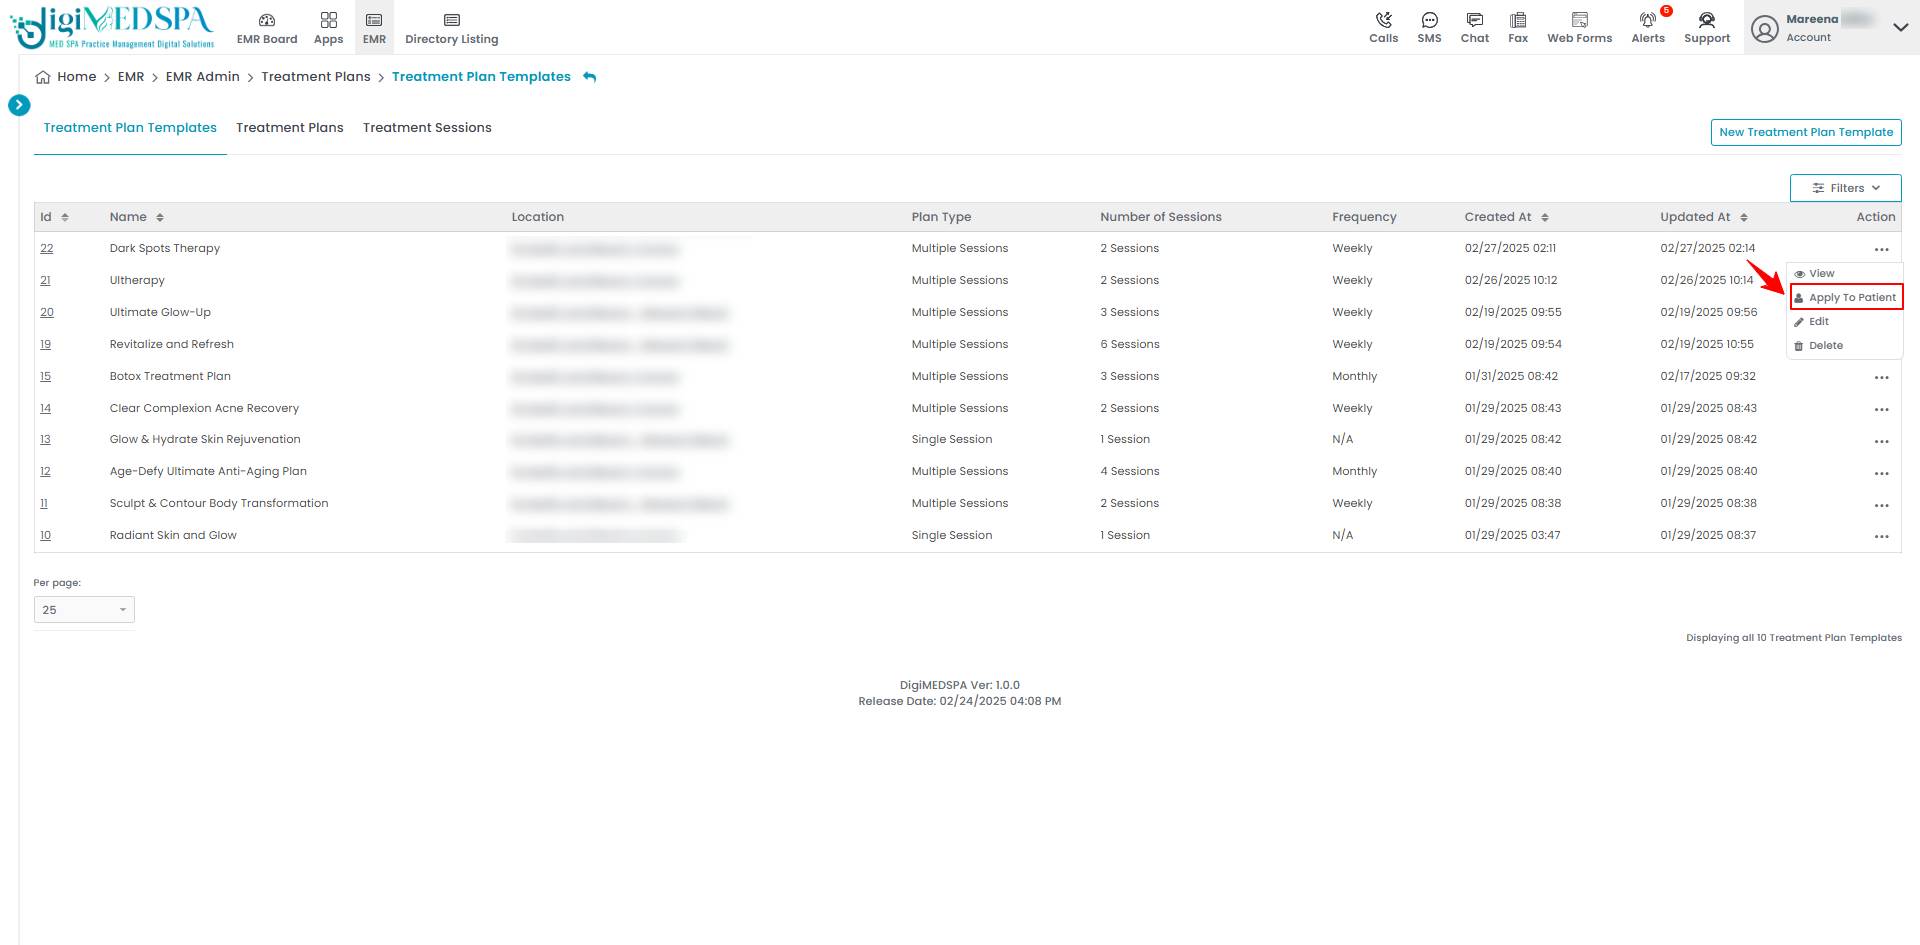
- To add a treatment plan to a patient profile, open the treatment plan template list, click the three dots under the Action column, and select "Apply to Patient" for the desired template.

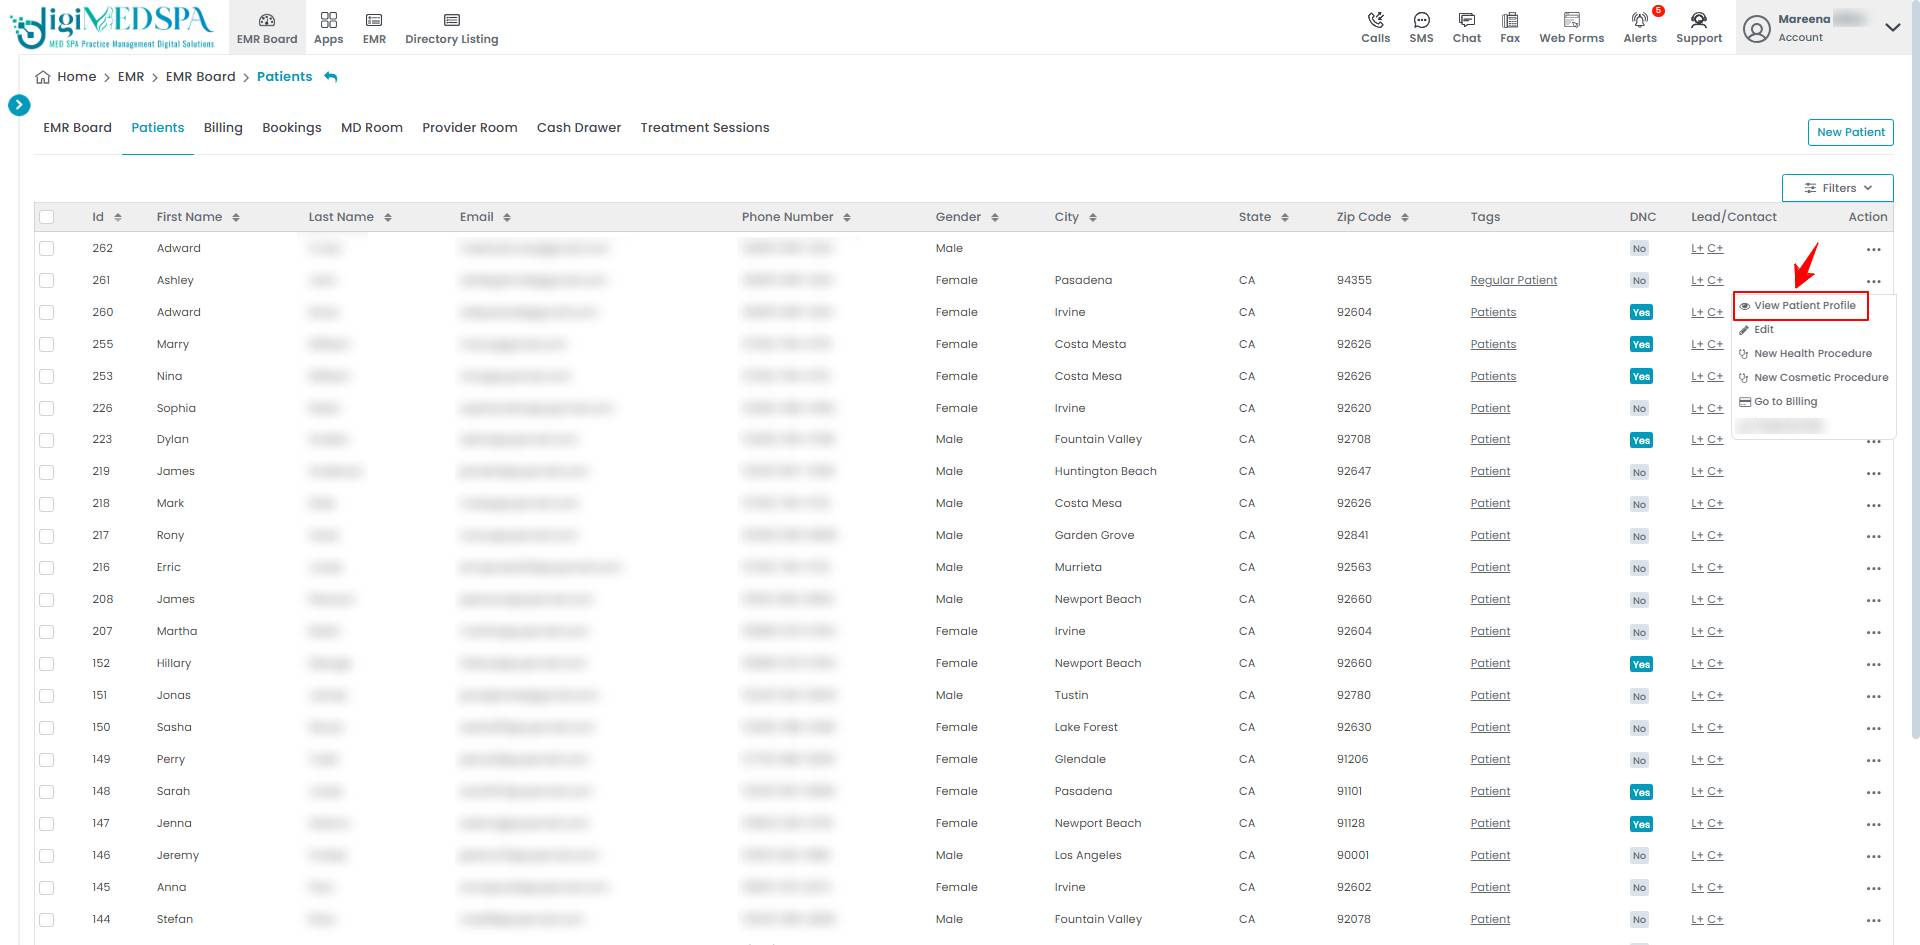
- The Patients List will open. From the patient list, click the three dots in the Action column and select "View Patient Profile" for the desired patient.

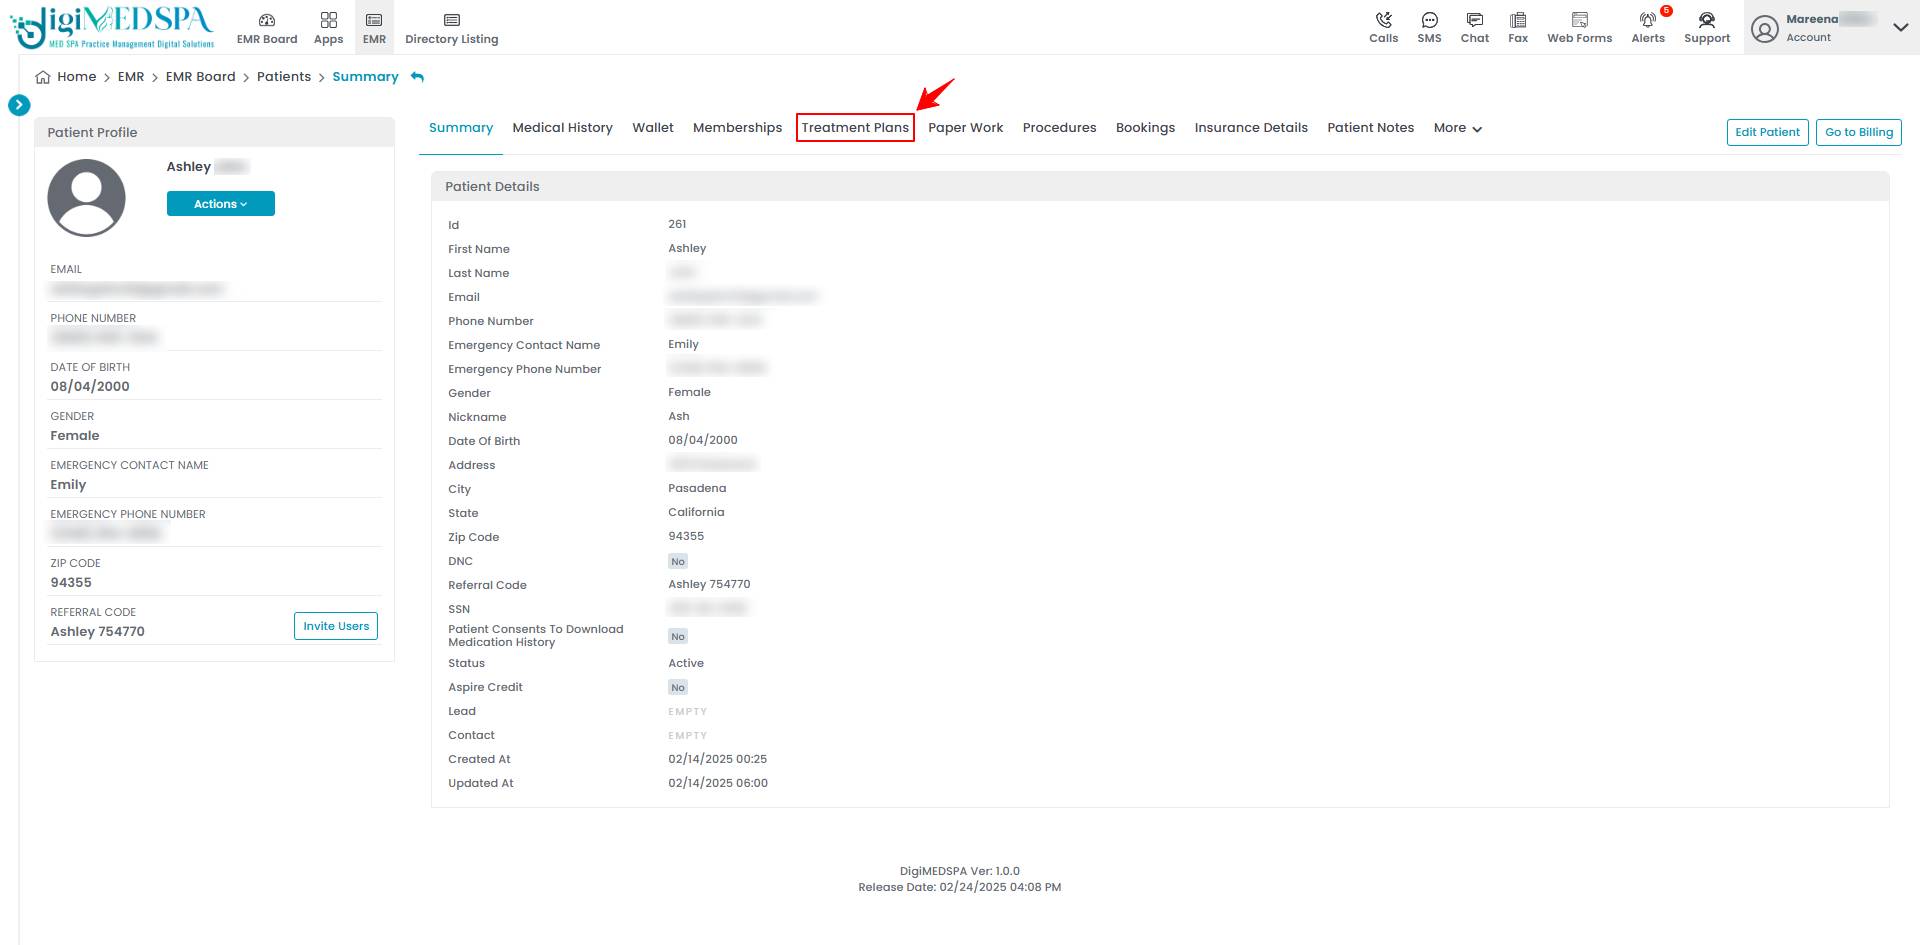
- On the Patient Profile page, users can access a comprehensive summary of all patient details. To create a treatment plan, simply click on the ‘Treatment Plans’ tab.

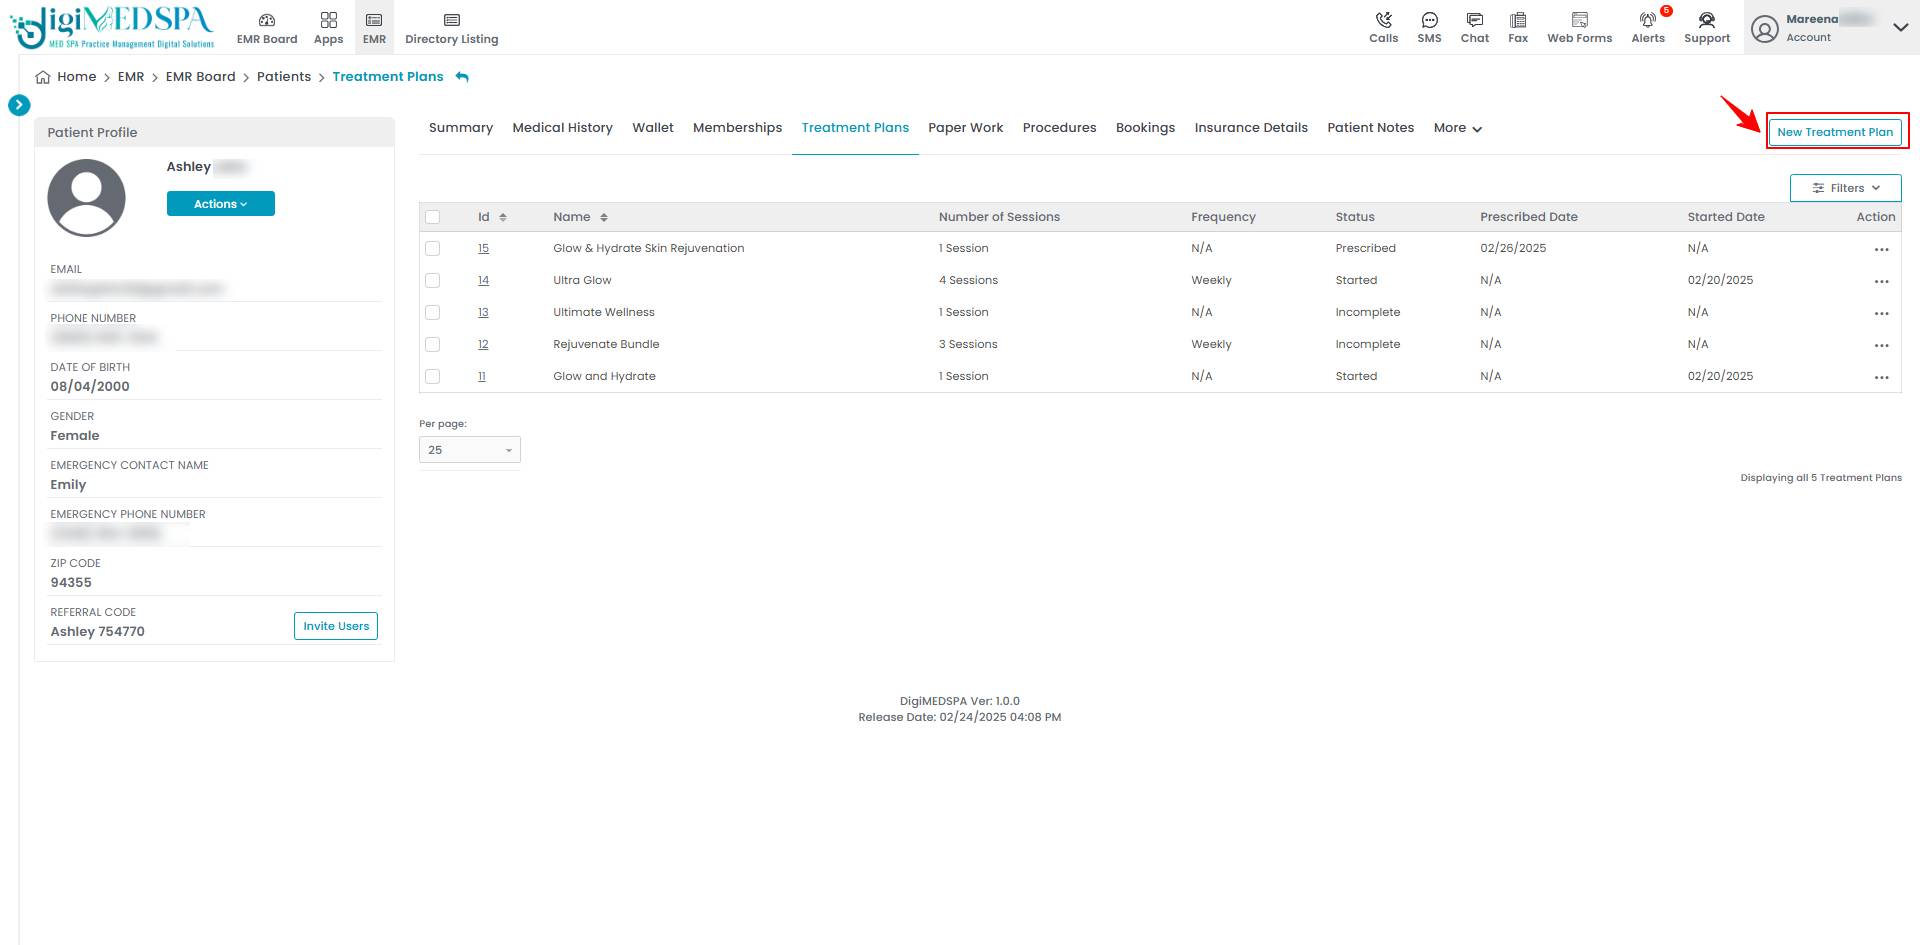
- The patient's existing treatment plans will be displayed here. To create a new one, click the "New Treatment Plan" button in the top right corner of the screen.

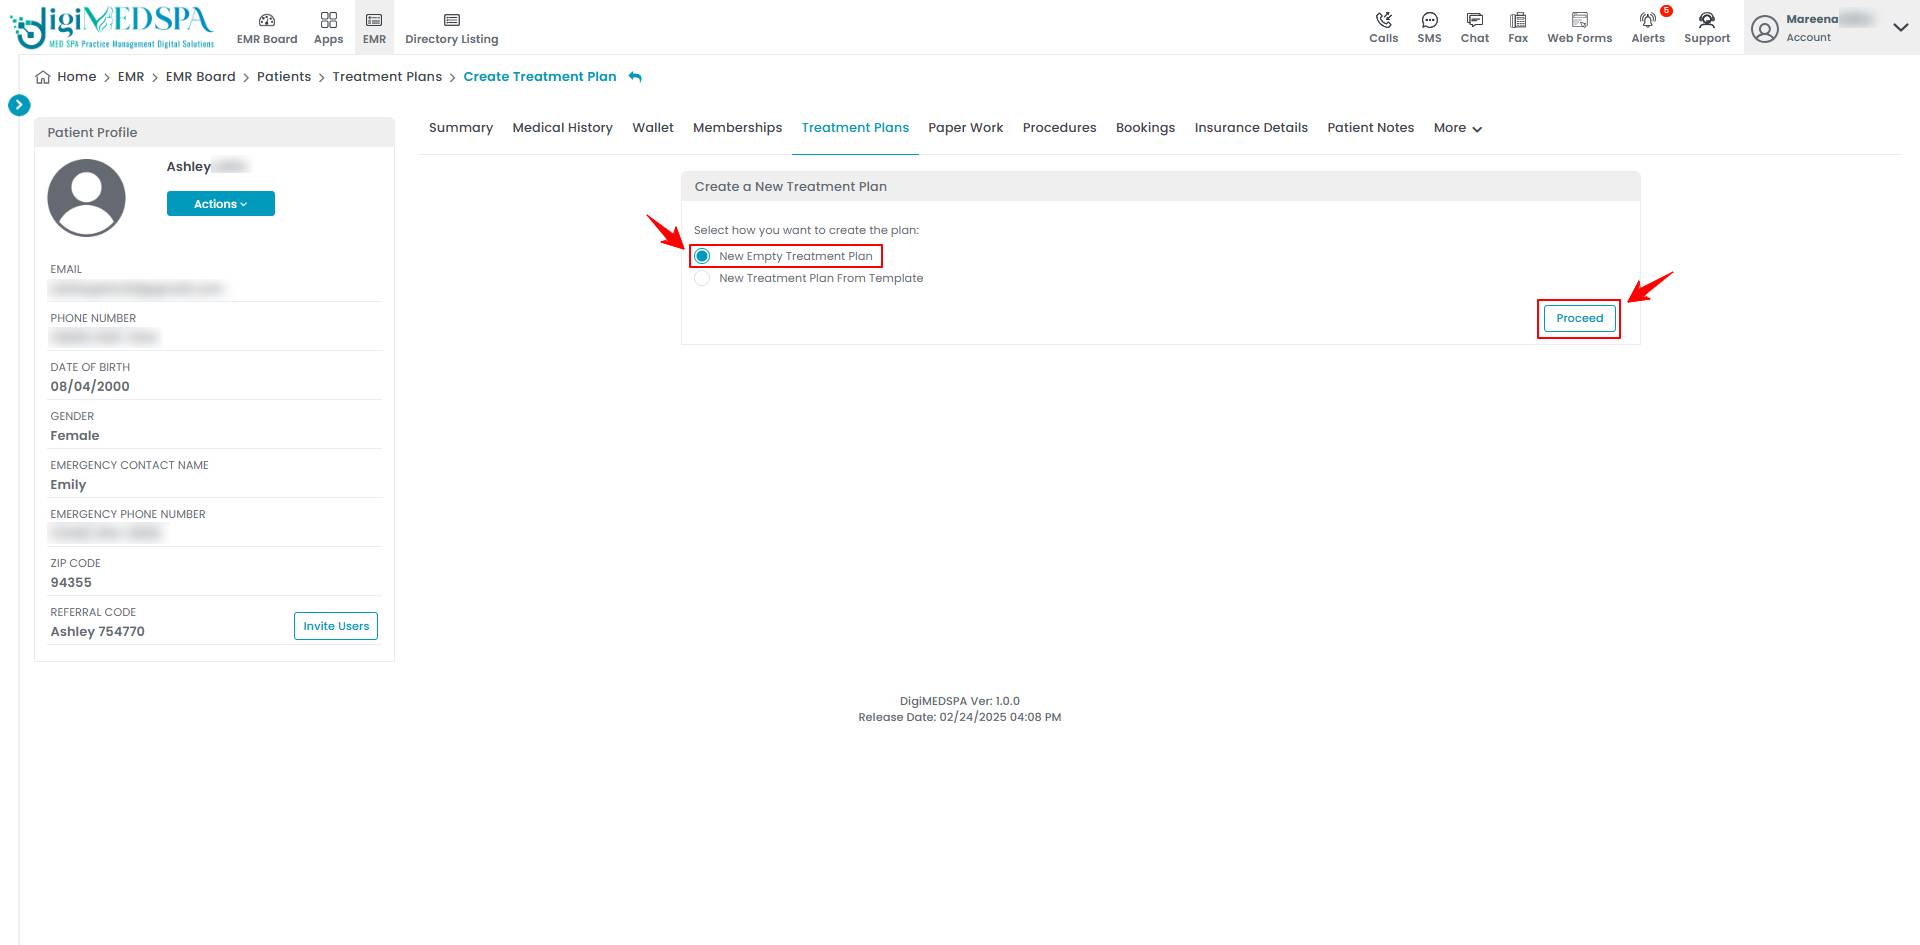
- Here, you can choose to create either a new empty treatment plan or a treatment plan from a template. To start fresh, select ‘New Empty Treatment Plan’ and click ‘Proceed’ to create it.

 Note: An empty treatment plan form will be displayed. To create a new treatment plan, follow the steps mentioned above in this user guide.
- To apply a pre-existing treatment plan template, select ‘New Treatment Plan Template From Template’ and choose a template from the dropdown. Once selected, click ‘Proceed.’

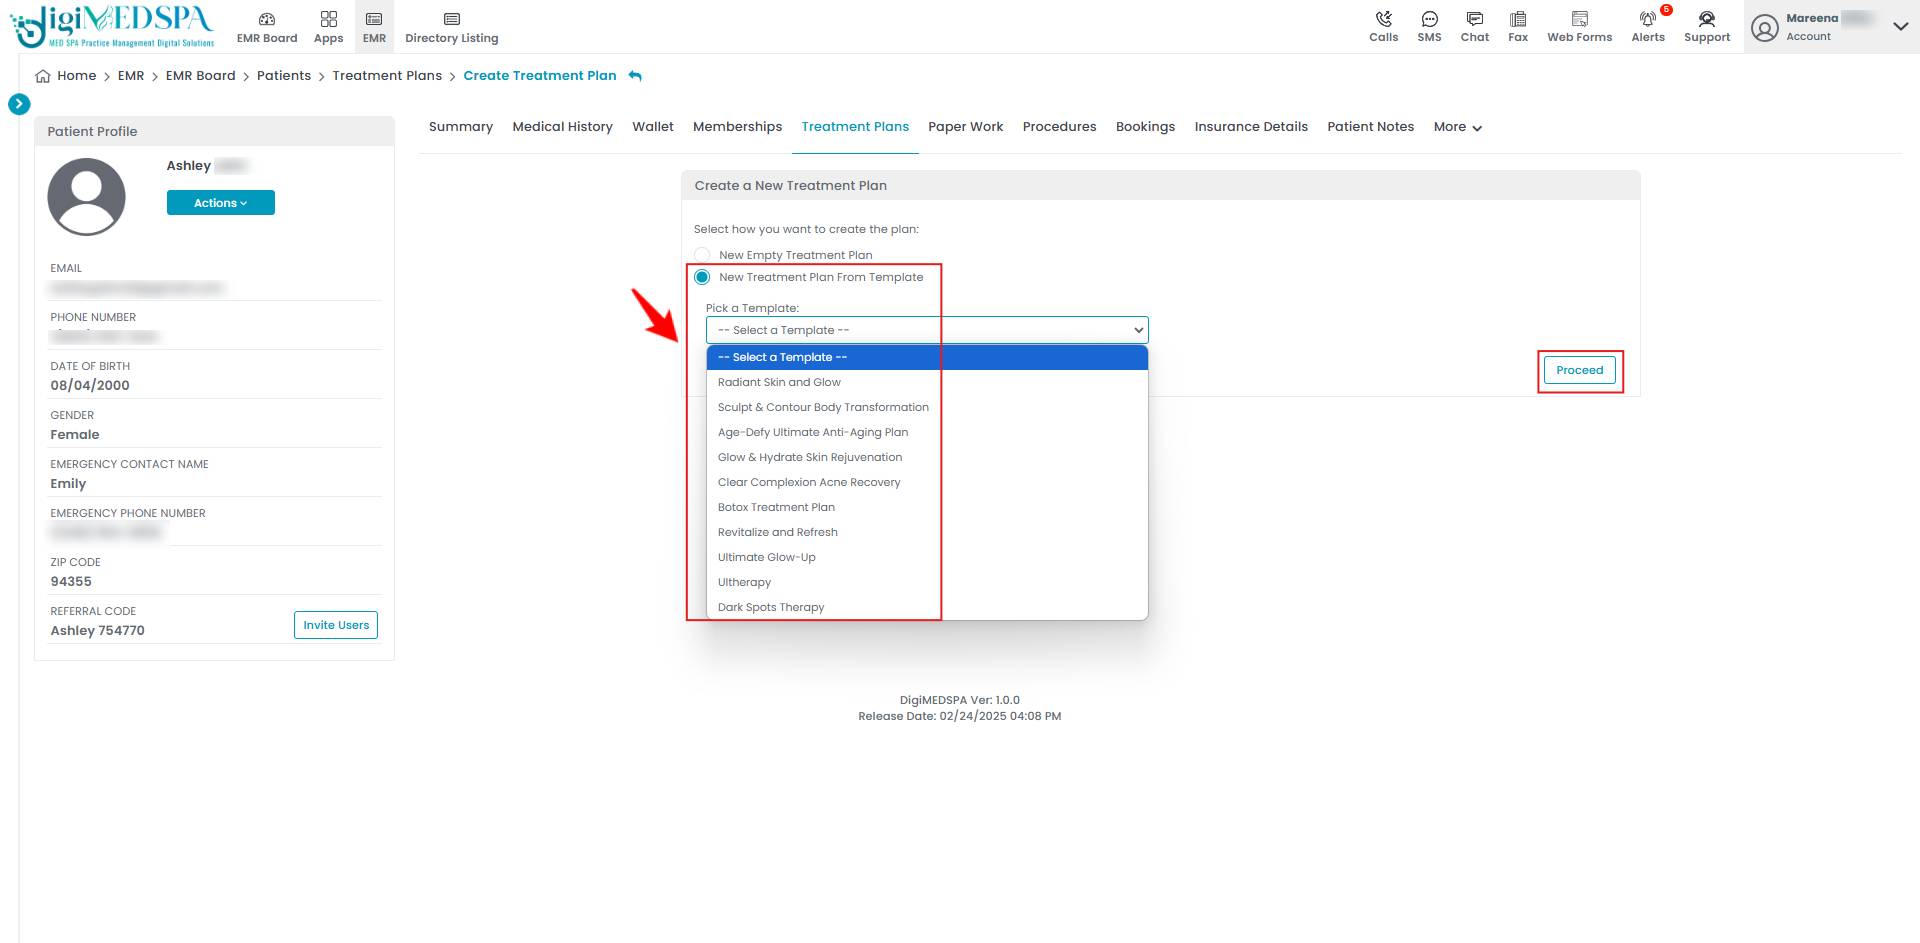 Note: The selected treatment plan template will be displayed. You can make changes to the template and click ‘Finish’ in Step 2.
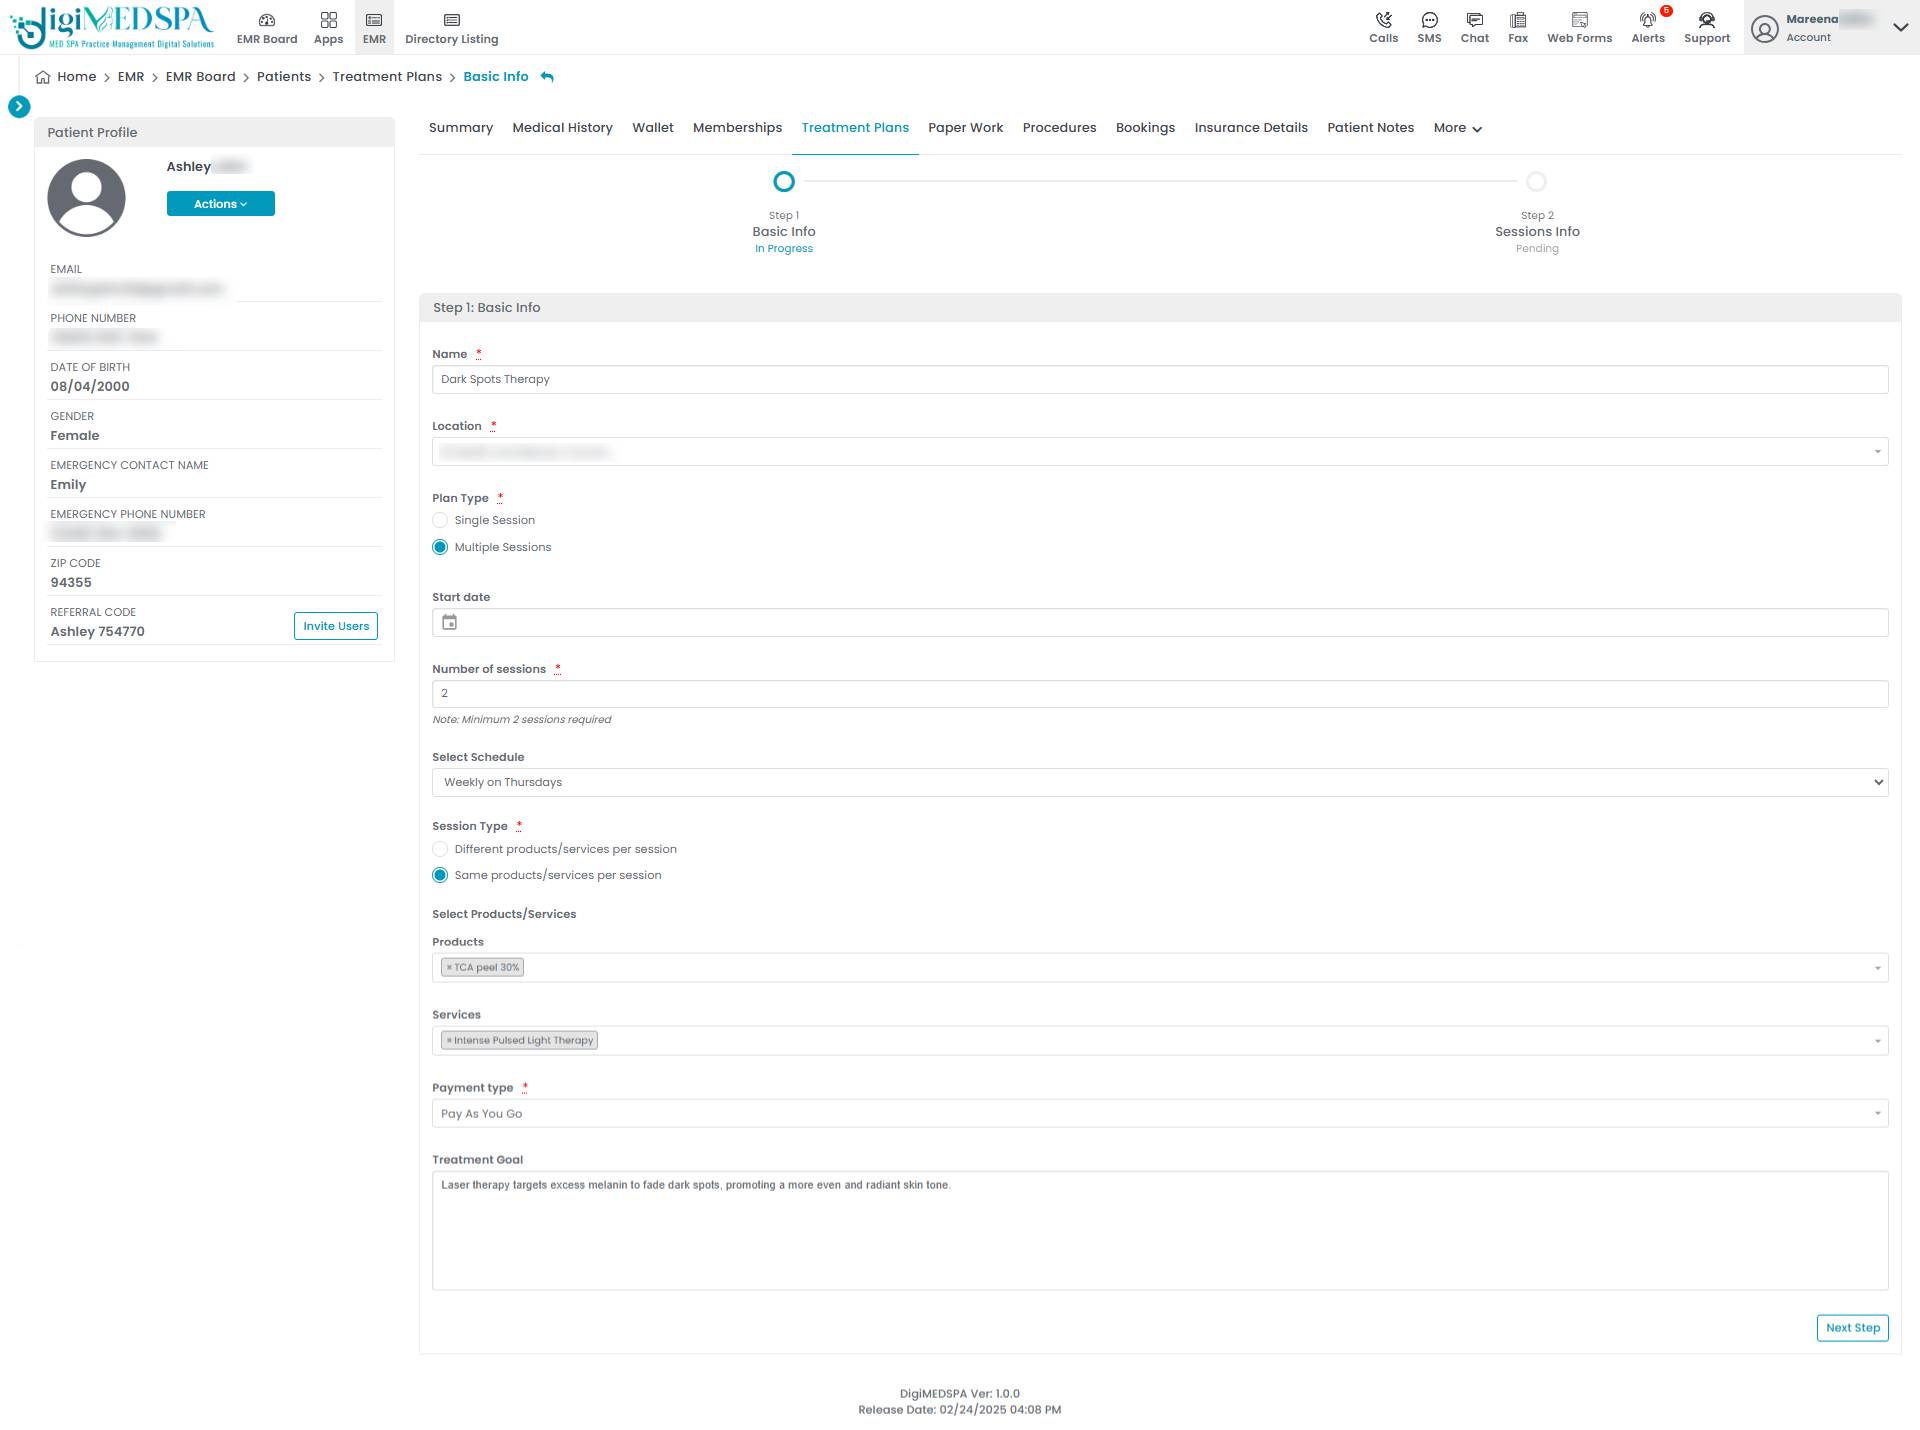 The treatment plan template has been successfully applied to the patient profile!


