

Understanding Terminologies
- Services
Services refer to cosmetic and health procedures offered at Med SPAs, such as facials, laser treatments, injectables, body contouring, etc. Managing services in the DigiMEDSPA Portal is important for accurate scheduling, resource management, and ensuring patients receive the appropriate treatments. It keeps offerings up to date, enables correct bookings, and provides pricing accuracy and overall operational efficiency.
Part 1 of 4
Add a Service
-
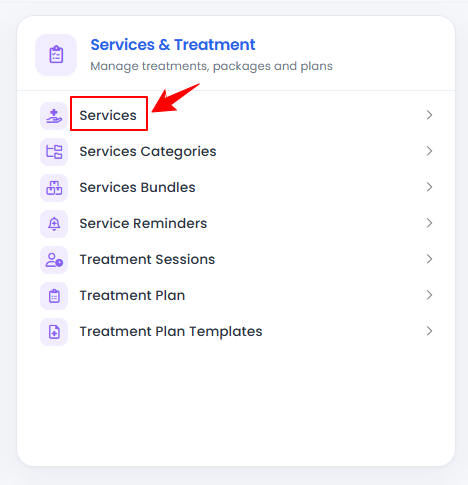
The user can add a service by accessing the Services List Screen. From the “Admin” dashboard, click on “Services” under “Services & Treatment,” or search services in the top search bar.
-
To add a new service, click "New Service" in the top right corner of the screen.
-
Step 1: General
-
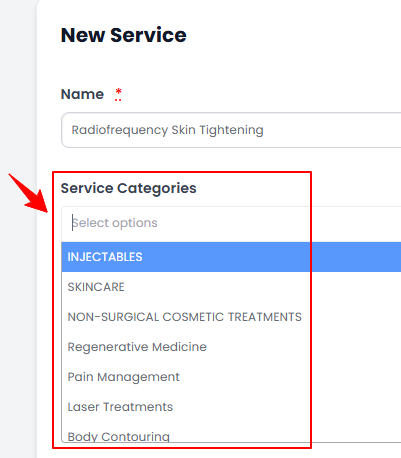
In Step 1, enter the service Name and select the most relevant Service Categories from the dropdown menu to classify the service accurately.
-
Select the Duration for the service from the dropdown menu. If you select Custom as the Duration, enter the specific time manually in the Custom Duration field.
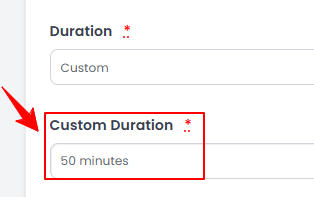 NoteThe service duration entered will be displayed throughout the portal wherever the service is selected.
 -
Enter the Price and Service Cost (for Commission), set the Status to Enable or Disable, and select a Calendar Color for the service.NoteService Cost (for Commission) is the cost of providing the service, used to calculate profit-based provider commissions. Calendar Color is the color assigned to the service, displayed on the EMR calendar to help identify appointments in the calendar view. Selecting “Enable” makes the service visible and available throughout the portal, while “Disable” hides it from all selection options within the portal.
-
Check “Is this service taxable?” if tax applies to the service you are creating. Select the location(s) for the service from the dropdown menu. If tax applies to this service, enter the tax percentage for each selected location.Note''Tax'' refers to the mandatory percentage added to the service cost, as local or state regulations require. This tax contributes to public funding and varies based on the service type and location.
-
Next, select the Providers who offer the service from the dropdown menu.
-
If a Deposit is required, select "Yes" and enter the Deposit Amount. Next, choose the Service Type (In-Person, Virtual or Both).
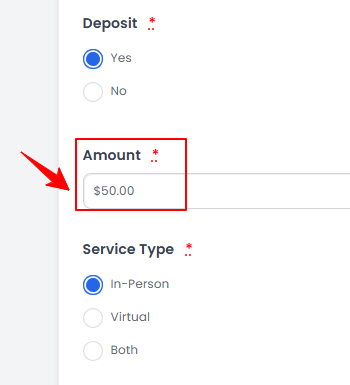 Note''Service Type'' refers to how a service is delivered to patients. ‘’In-Person’’ means the patient must visit the Med SPA location to receive the treatment or procedure. Examples include facials, laser treatments, and injectables. ''Virtual'' means the service is conducted remotely, often through video consultations or telehealth. This may include skincare consultations, pre-treatment assessments, or follow-up appointments. Moreover, the patient can attach the services added here to a new booking.
 -
Select the Procedure Type and Body Area from the dropdown menu.
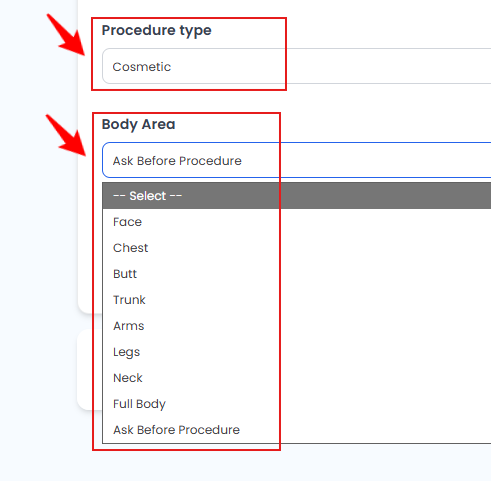 Note“Procedure type” refers to the category used to classify a service based on its purpose. Procedures are categorized as “Cosmetic,” focusing on aesthetic enhancement, or “Health,” focusing on medical care, wellness, or therapeutic treatment. “Body area” refers to the specific part of the body where a procedure or treatment will be performed, helping ensure accurate treatment planning and documentation. “Ask Before Procedure” indicates that the body area can be selected or confirmed before starting the procedure to ensure proper preparation and accuracy.
 -
To configure reminder notifications for this service, click the "Edit" icon. You will be taken to the Service Reminders List screen, where you can add or manage service reminders. Once finished, click "Next" to proceed to the next step.
 NoteFor step-by-step instructions on managing service reminder notifications, refer to the “Add/View/Edit Service Reminder Notifications” article.
-
-
Step 2: Clinical Resources
-
In Step 2, Clinical Resources, select the relevant Intake Forms, Consent Forms, Booking Resources, Pre-Treatment Instructions, and Post-Treatment Instructions from their respective dropdown menus to attach them to the service.
-
Enter a Description for the service, then click “Add Survey” to attach a relevant survey from the dropdown and specify when it should be sent to the patient. Once all details are entered, click "Next" to proceed.NoteTo remove a survey attached to a service click “Remove” before saving. For detailed instructions on surveys, refer to the user guide ‘’Manage Surveys.’’
-
-
Step 3: Additional Information
-
In Step 3, fill in the Additional Information, including, availability for online booking, card capture settings, free consultation, same day booking, and minimum time for booking, rescheduling, or canceling. Also, specify refund options, cancellation type and fee. All fields are mandatory. Once you are done, click “Submit” to save your changes.NoteEnsure that the settings are set to “By Service” in the “Booking Settings” so the user can edit the additional information when adding a service. If the settings are set to “By Clinic,” the default settings will be applied, and the additional information fields will not be editable for the user. For detailed instructions, refer to our “Manage Booking Settings” user guide.You have successfully added a service!
-
Part 2 of 4
Add Service Through Billing Screen
-
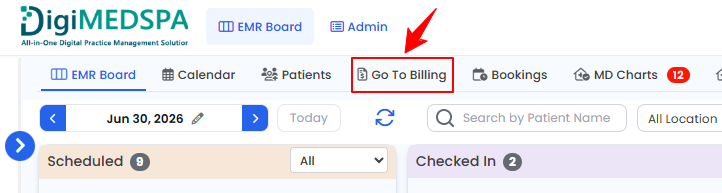
The user can add a service during checkout through the Billing Screen. From the EMR Board Tabs, select “Go to Billing.”
-
Search for the patient in the Search tab to begin billing. If the patient has bookings at multiple clinic locations, select the appropriate location by clicking "Go to Billing." Then, click "Collect Payment" next to the booking for which the patient wants to make a payment.

-
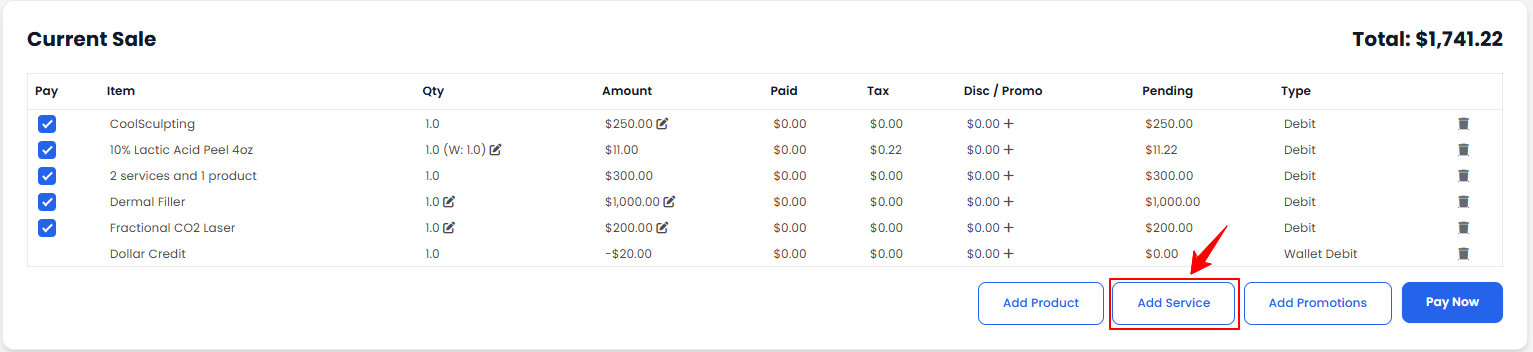
A list of all items associated with that booking, along with the pending amount, will be displayed. Click the “Add Service” button to add a service.
-
Use the search bar to find a service to add to the cart or select one from the suggestions below.
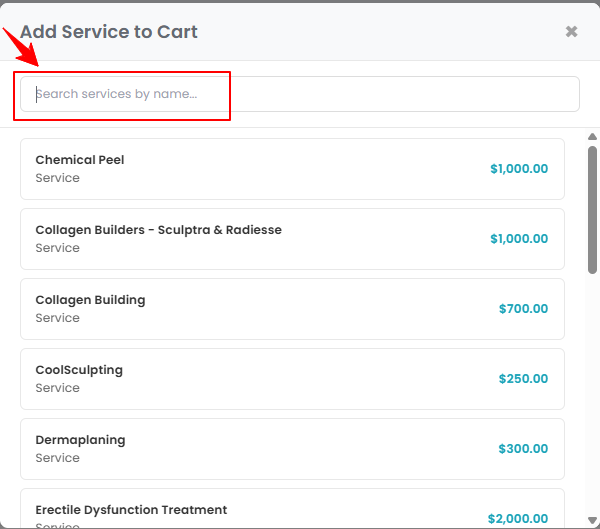 The service has been successfully added to the cart!
Part 3 of 4
View a Service
-
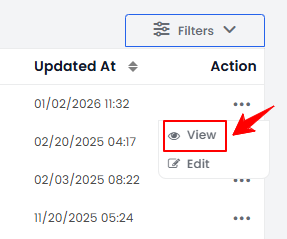
To view a service’s information, click anywhere on the service’s data in the services listing, or click the three dots in the action column next to the specific service and select '’View.’’
-
The Service View Screen will open, displaying all the details of the service.
-
The Service View Screen includes a Service Statistics section that shows how many times the service has been booked today, this week, the previous week, this month, and the previous month. To view the complete list of bookings for this service, click the "View All" button on the right.

Part 4 of 4
Edit a Service
-
There are two ways to edit an existing service.
-
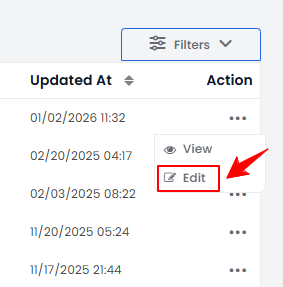
From the service list, click on three dots under the action column and select "Edit" for the specific service.
-
On the View Service Screen, click on ‘’Edit Service’’ button on the top right corner of the screen.
-
-
Go to the step you want to edit by clicking "Next" to move through the steps. Make the necessary changes, and once complete, click "Submit" to save your changes. The service has been successfully edited!
You’re all set
That’s every step of “Add / View / Edit a Service”. Up next: Disable a Service and Service Bundle.