

This user guide provides detailed step-by-step instructions on how to add, view, edit, and mark inventory reconciliation as resolved in the DigiMEDSPA Portal.
Understanding Terminologies
- Inventory Reconciliation
Inventory reconciliation involves comparing and aligning the physical inventory count of products with the expected stock levels recorded in the system. Inventory reconciliation means verifying that actual stock, like skincare products or treatment tools, matches the quantities listed in the inventory management system. This process helps identify discrepancies such as expired products, shortages, or damaged items, ensuring accurate stock records, preventing inventory loss, and maintaining smooth operations.
Add an Inventory Reconciliation
-
The user can add an inventory reconciliation by accessing the Inventory Reconciliations List Screen from two entry points.
-
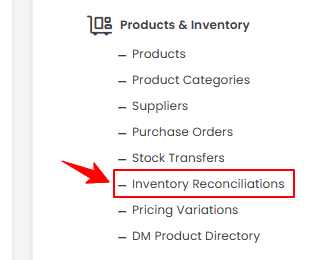
From the EMR Admin, click on “Inventory Reconciliations” under “Products & Inventory.’’
-
From the Left Navigation, open the “EMR Admin” dropdown, select “Products & Inventory,’’ and then choose “Inventory Reconciliations” from the subsequent dropdown menu. Alternatively, you can type “Inventory Reconciliations” into the search bar in the Left Navigation.
-
-
To add a new inventory reconciliation, click on the “New Inventory Reconciliation‘’ button in the top right corner of the screen.NoteThe Expected Stock, In Stock, and Deviation fields remain blank for reconciliations that are unresolved and saved as drafts.
-
Step 1: Product & Location
-
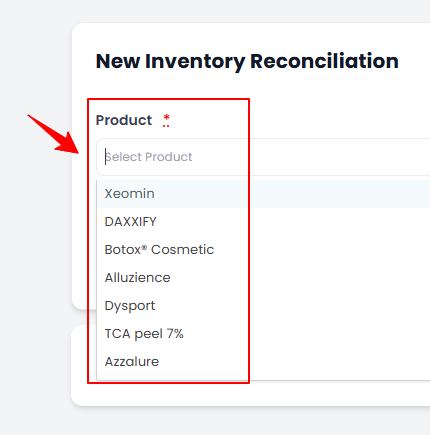
Select the Product you want to reconcile inventory for, from the dropdown menu.
-
Select the Location from the dropdown menu where you want to reconcile inventory for the chosen product.
-
After selecting the product and location, click “Next” to proceed.
-
-
Step 2: Reconciliation
-
Step 2 has two sections. In the first, Inventory Reconciliation, the Product Name and Expected Stock value are autofilled based on the completed purchase orders for the selected product. Enter the In Stock value, and the Deviation will automatically calculate the difference between the expected and actual stock present in the inventory.
 Note“Expected Stock” refers to the quantity of a product that is anticipated to be available in the inventory based on recorded purchase orders, usage, and stock transfers. “In Stock” refers to the actual physical count of a product currently available at a specific location (location chosen in the first step). “Deviation” is the difference between the expected stock and the in-stock quantity, indicating a discrepancy, which could result from damage, loss, or unrecorded transactions.
 -
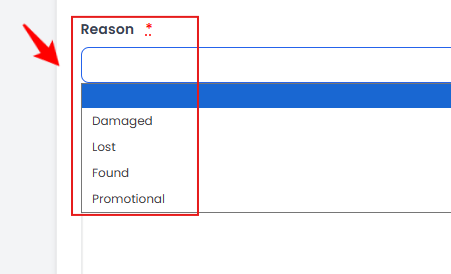
If the expected stock does not match the actual stock, select a reason like Damaged or Lost from the dropdown, and add details in the Note field.
-
To access “dot phrases”, type a dot (.) in notes. These pre-created phrases will appear in a dropdown menu, allowing you to quickly select and insert repetitive notes instead of typing them manually.NoteIn order to access dot phrases, the user will need to first create them through the “Clinical Documentation’’ in the portal. Refer to our “Add / Edit Dot Phrases” article for more information.
-
The next section of this step, Resolve Deviation in Batches, contains details for the selected product's batches. The Batch and Expected Stock fields are autofilled based on the batches recorded in the inventory through purchase orders and stock transfers. Enter the In Stock value for each batch, and the Deviation will automatically be calculated.
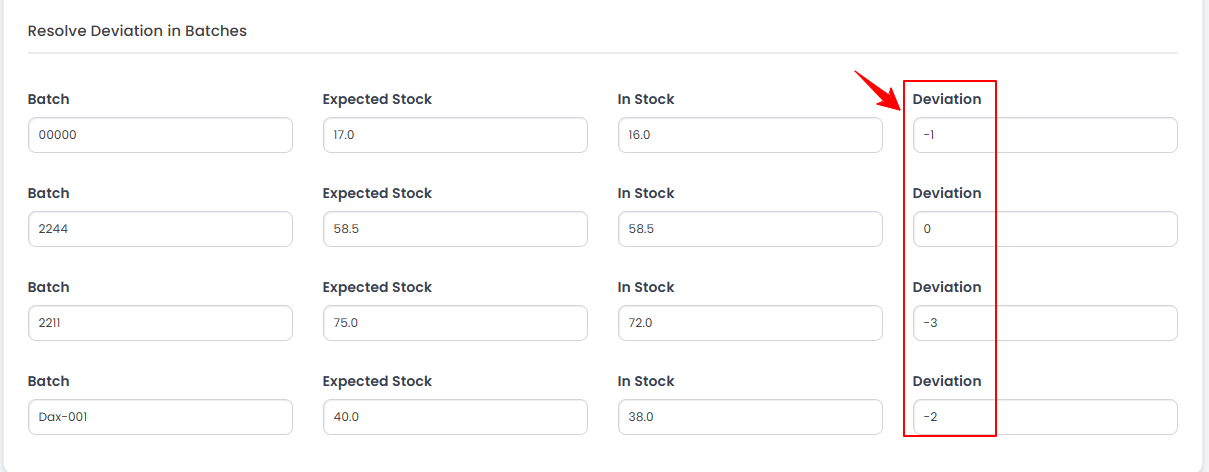 NoteThe sum of all batch deviations must be equal to the total deviation entered in the first section for the selected product. Here the total deviation is -6, and the batch deviations (e.g., -1, -3 and -2) sum is -6, indicating which quantities went missing from each batch.
 -
Once all the required information is entered, click “Save as Draft” to save your progress.
The inventory reconciliation has been added successfully!
-
View an Inventory Reconciliation
-
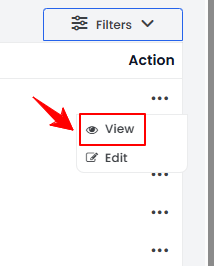
To view an inventory reconciliation, click the three dots under the action column next to the specific inventory reconciliation and select '’View” or simply click anywhere on the inventory reconciliation’s data.
-
The Inventory Reconciliation View Screen will open, displaying all the details of the inventory reconciliation.
Save an Inventory Reconciliation as Resolved
-
To view an inventory reconciliation, click the three dots under the action column next to the specific inventory reconciliation and select '’View” or simply click anywhere on the inventory reconciliation’s data.
-
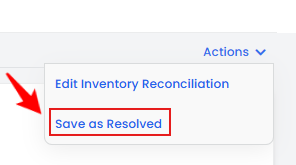
To save an inventory reconciliation as resolved, hover over the Actions menu and click on ‘’Save as Resolved’’ in the top right corner of the screen.
-
The Inventory Reconciliation form will open for verification. Make any necessary changes, then click ‘’Save as Resolved’’ to finalize the reconciliation.NoteWhen you click “Save as Resolved”, the stock details are updated in the system based on the inventory reconciliation, and the inventory is adjusted accordingly. On the other hand, clicking “Save as Draft” will simply enter the reconciliation in the list without making any changes to the inventory, allowing you to review and resolve it later.The inventory reconciliation has been successfully saved and resolved!
Edit an Inventory Reconciliation
-
There are two ways to edit an existing inventory reconciliation.
-
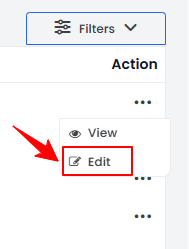
From the inventory reconciliations list, click on three dots under the action column and select "Edit" for the specific inventory reconciliation.
-
On the Inventory Reconciliation View Screen, click on the ‘’Edit Inventory Reconciliation’’ button on the top right corner of the screen.NoteThe ‘’Edit’’ option will not be available for inventory reconciliations that have been saved as resolved.
-
-
Make the necessary changes and click "Save as Draft."
The inventory reconciliation has been edited successfully!
You’re all set
That’s every step of “Manage Inventory Reconciliation”. Up next: Add / View / Edit Pricing Variations.