Book an Appointment Through Express Booking
This user guide provides step-by-step instructions to help you quickly book an appointment using the Express Booking feature.
Understanding Terminologies
Express Booking
Express Booking is an efficient scheduling system that enables patients to book appointments with a single provider at a specific location. It captures essential information for both booking and patient needs. It does not allow multiple services or service bundles to be selected. This system is ideal for straightforward, single-service appointments, ensuring a quick and seamless scheduling experience for patients and providers.
Book an Appointment Through Express Booking
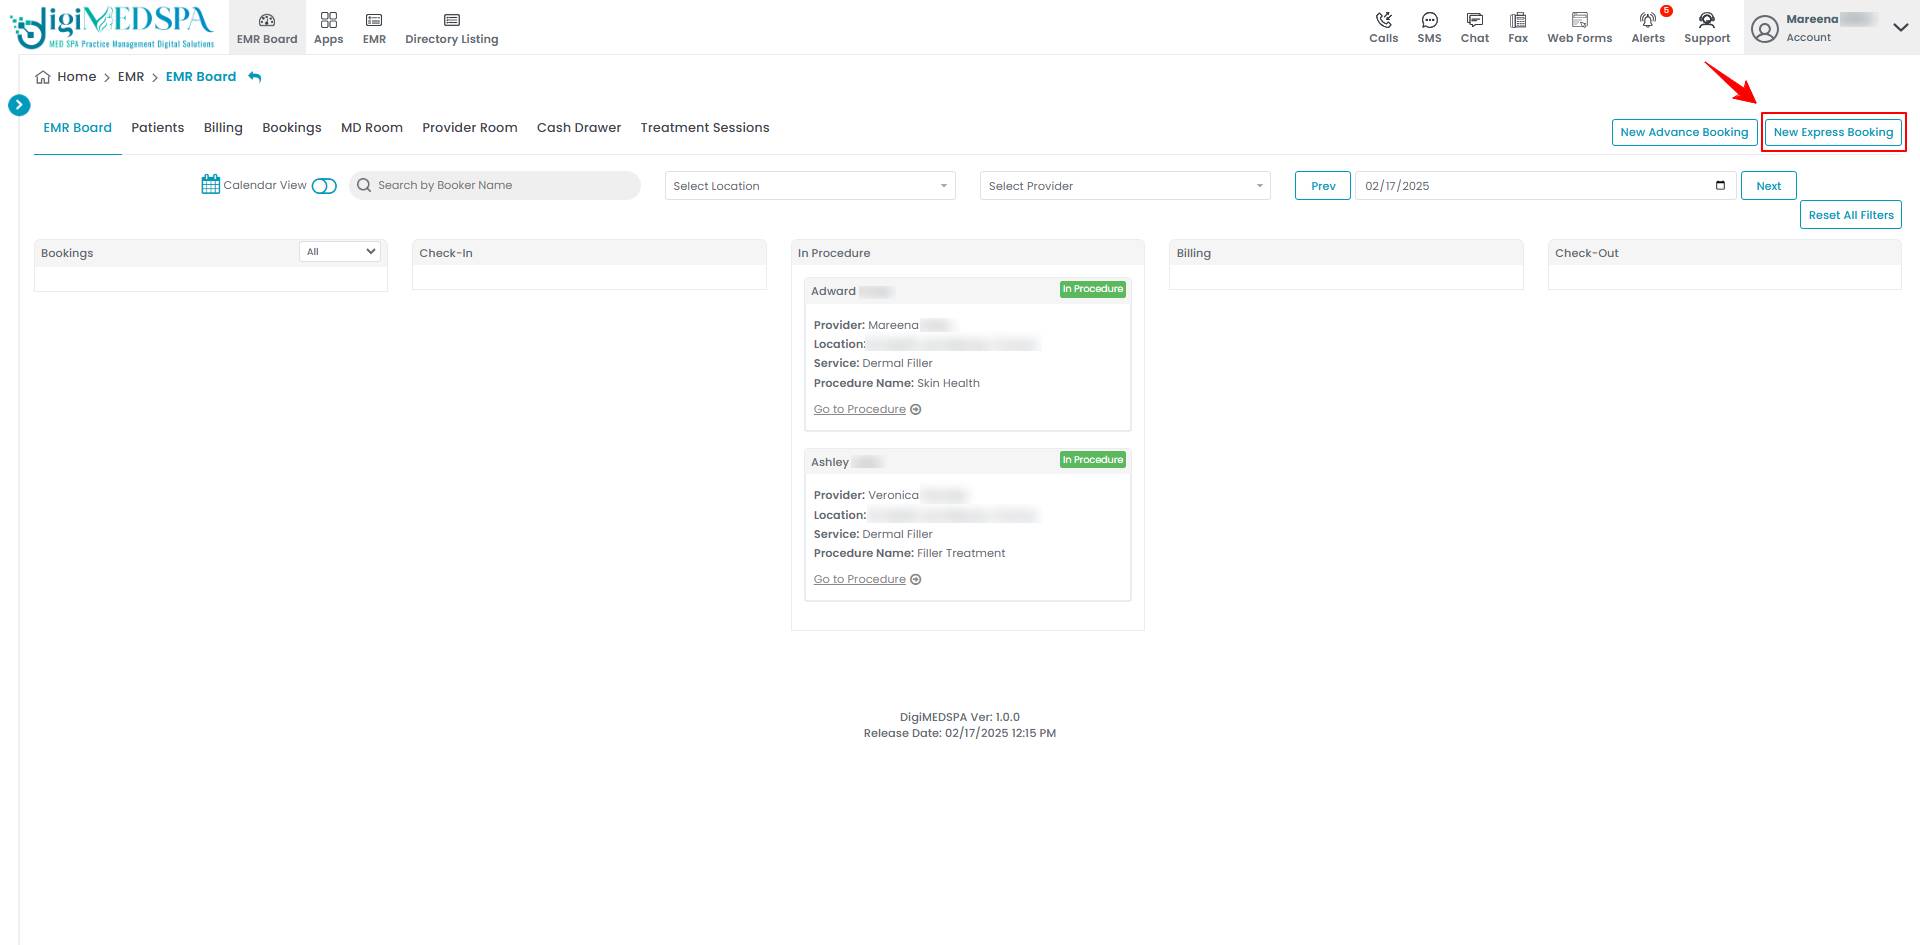
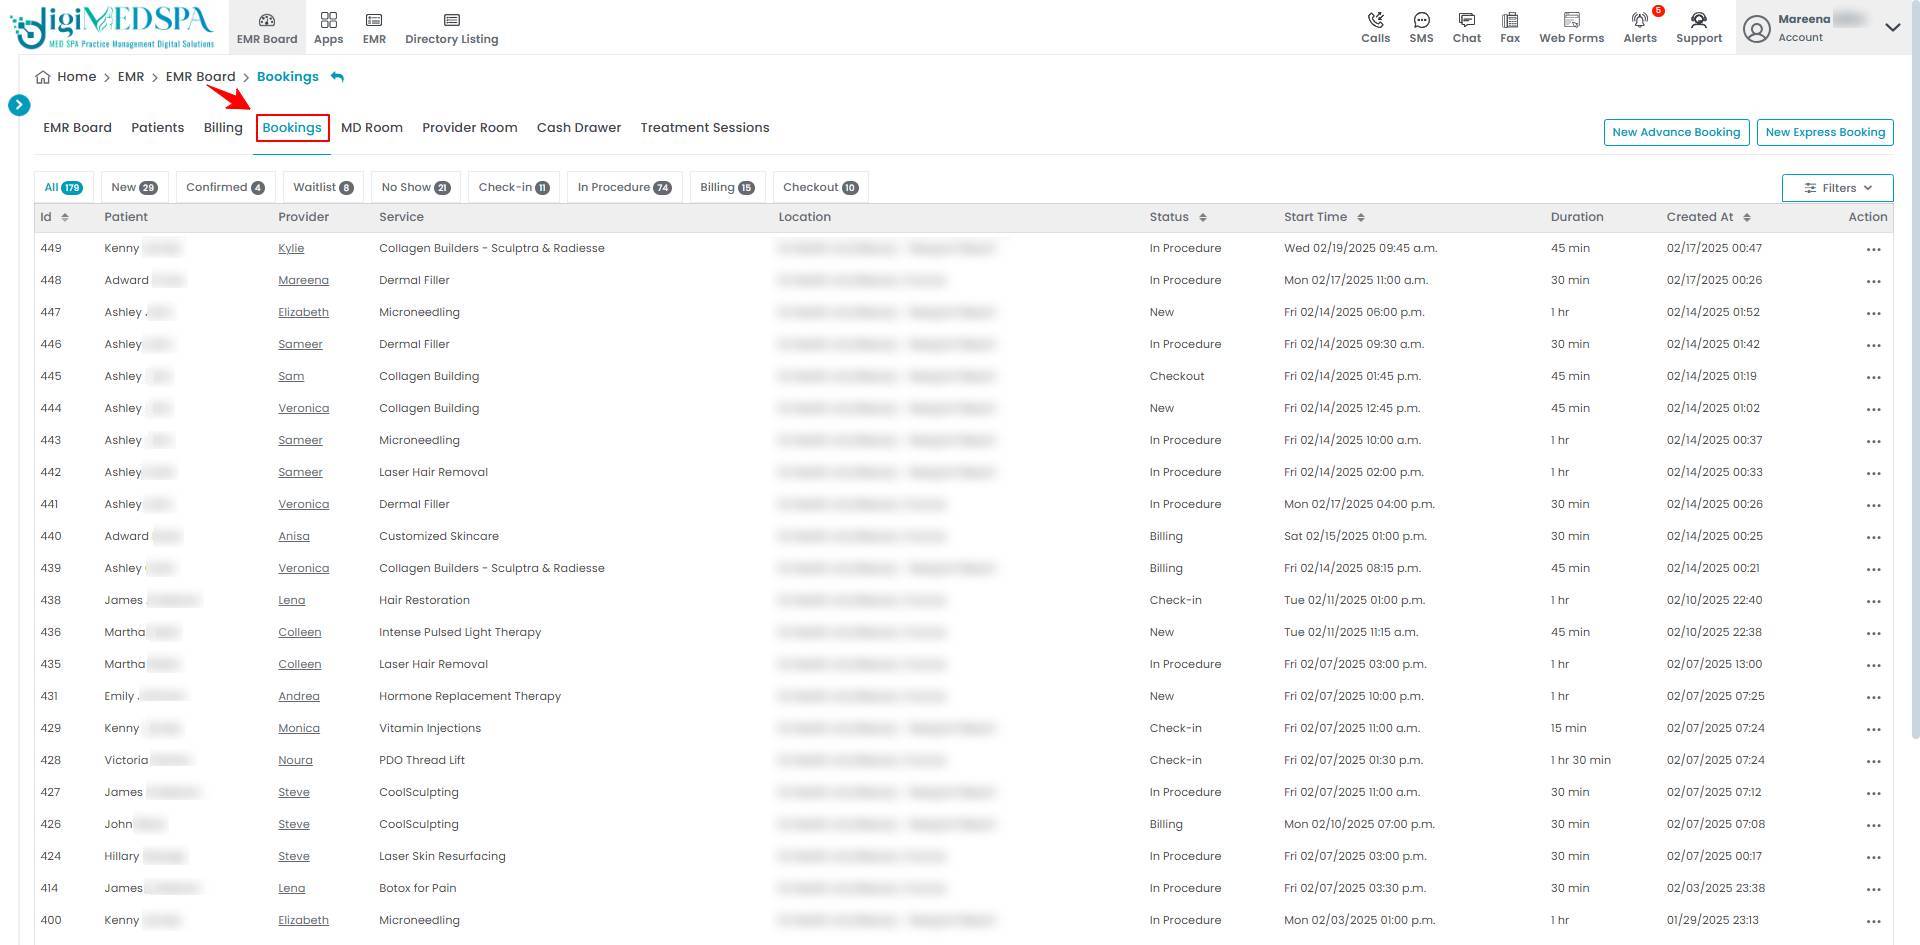
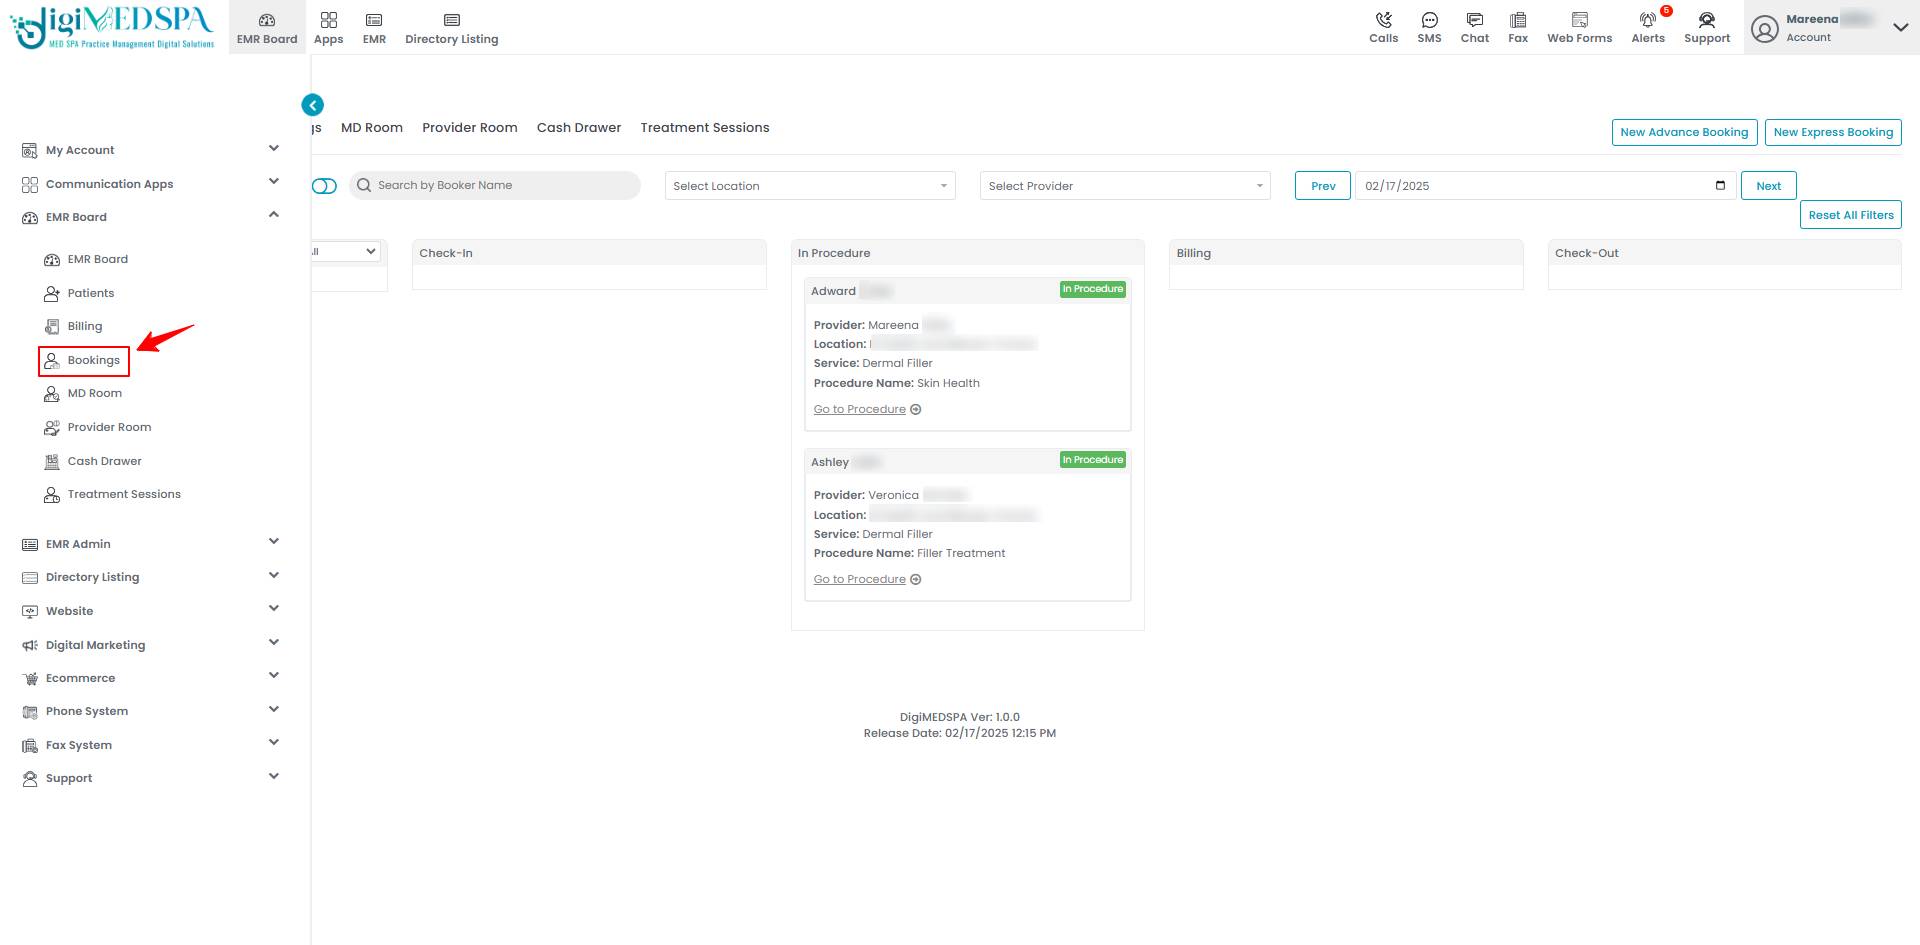
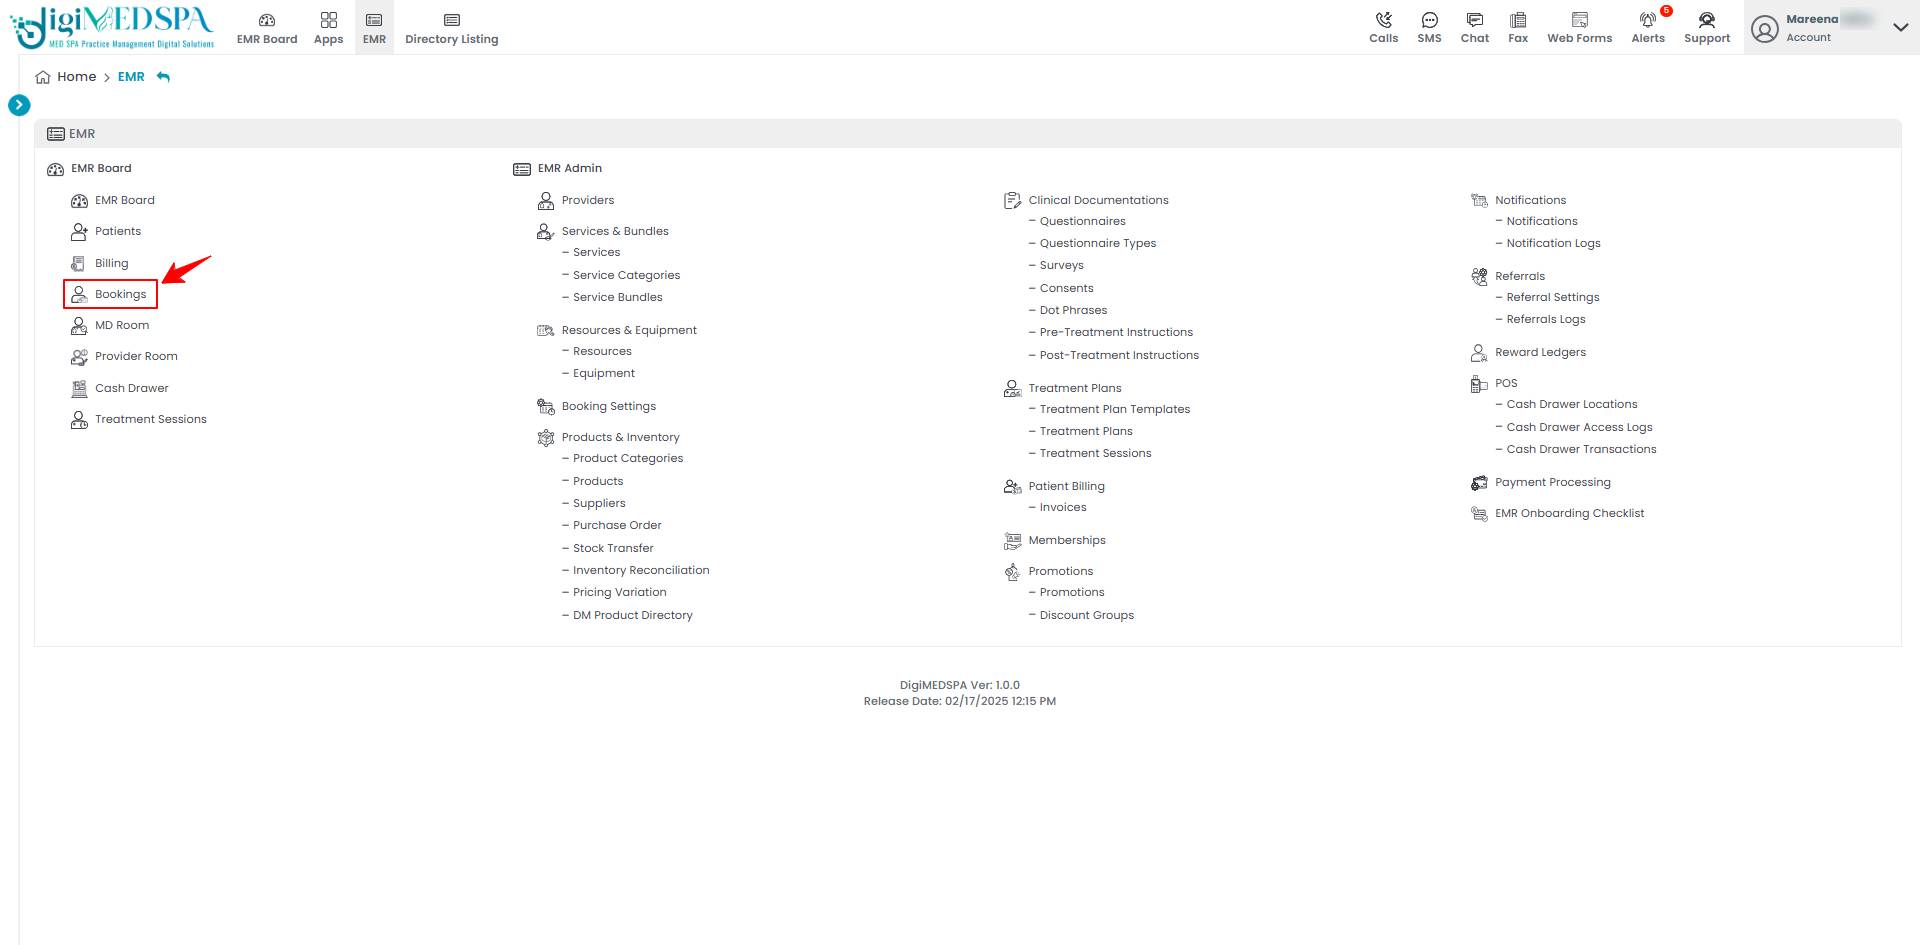
- The user can book an appointment through Express Booking, accessible via the Bookings App from four entry points.
- The user can book an appointment through the Express Booking accessible via Patients App.
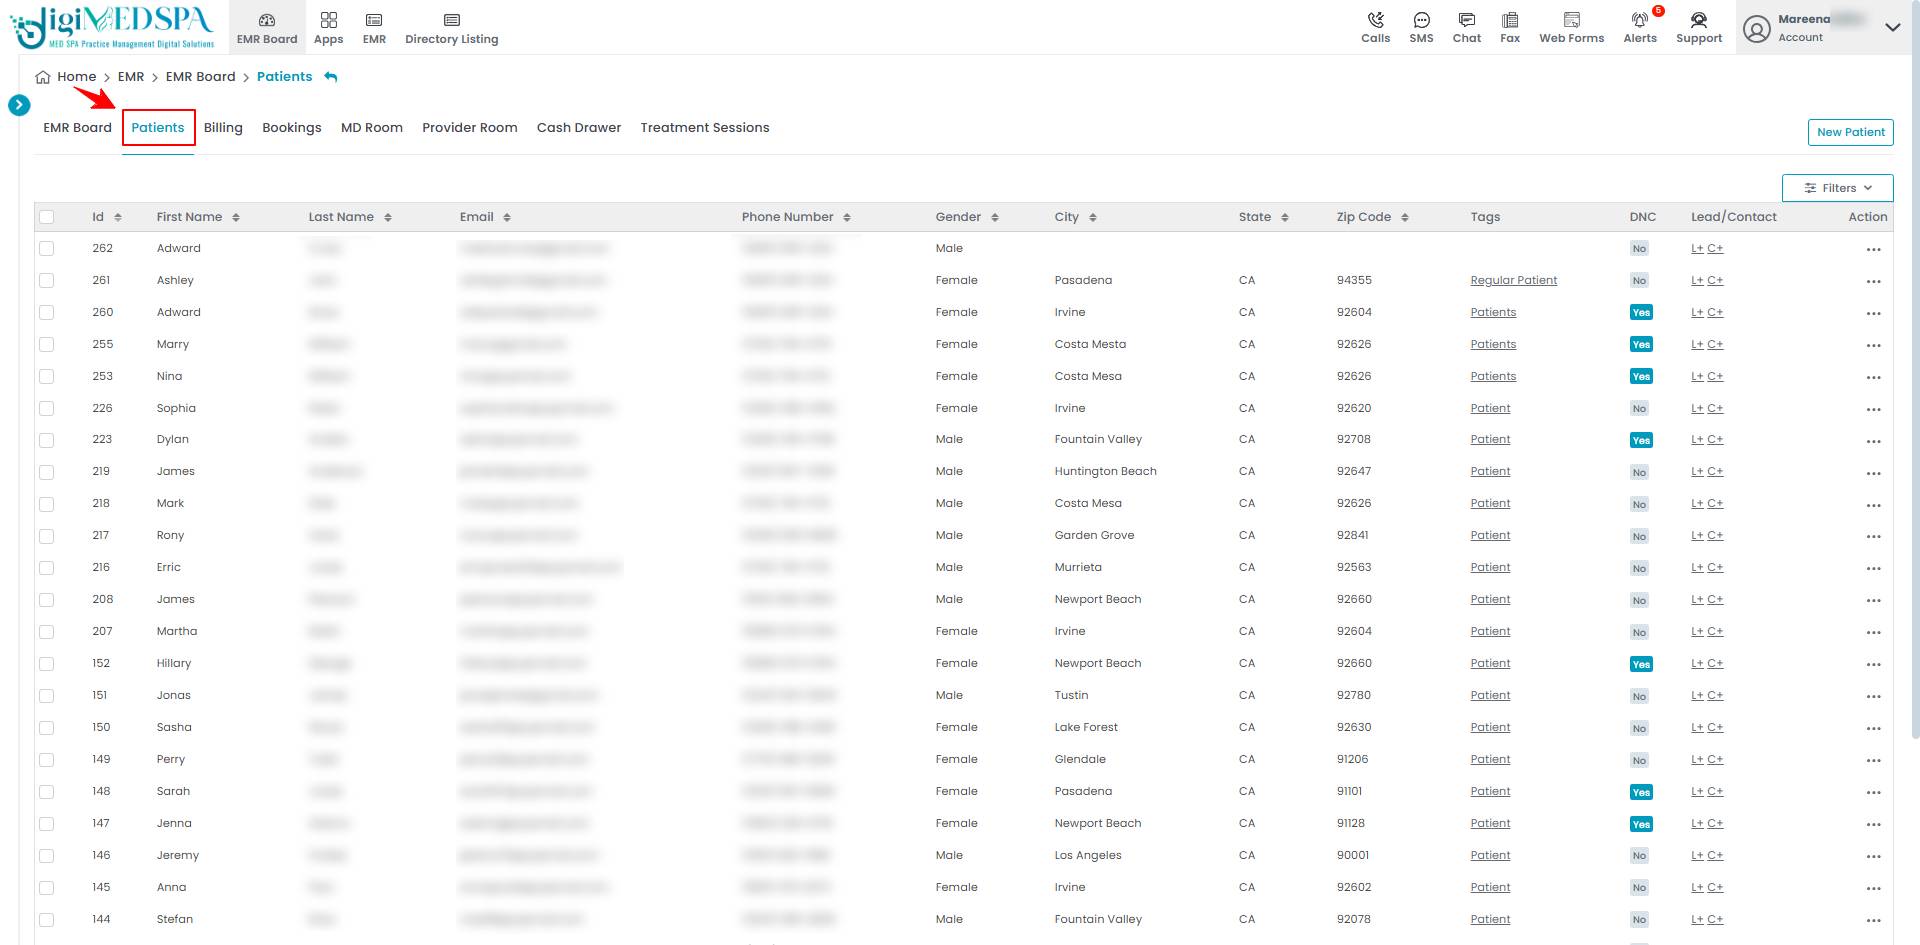
- From the EMR Board tabs, click on ‘’Patients.’’

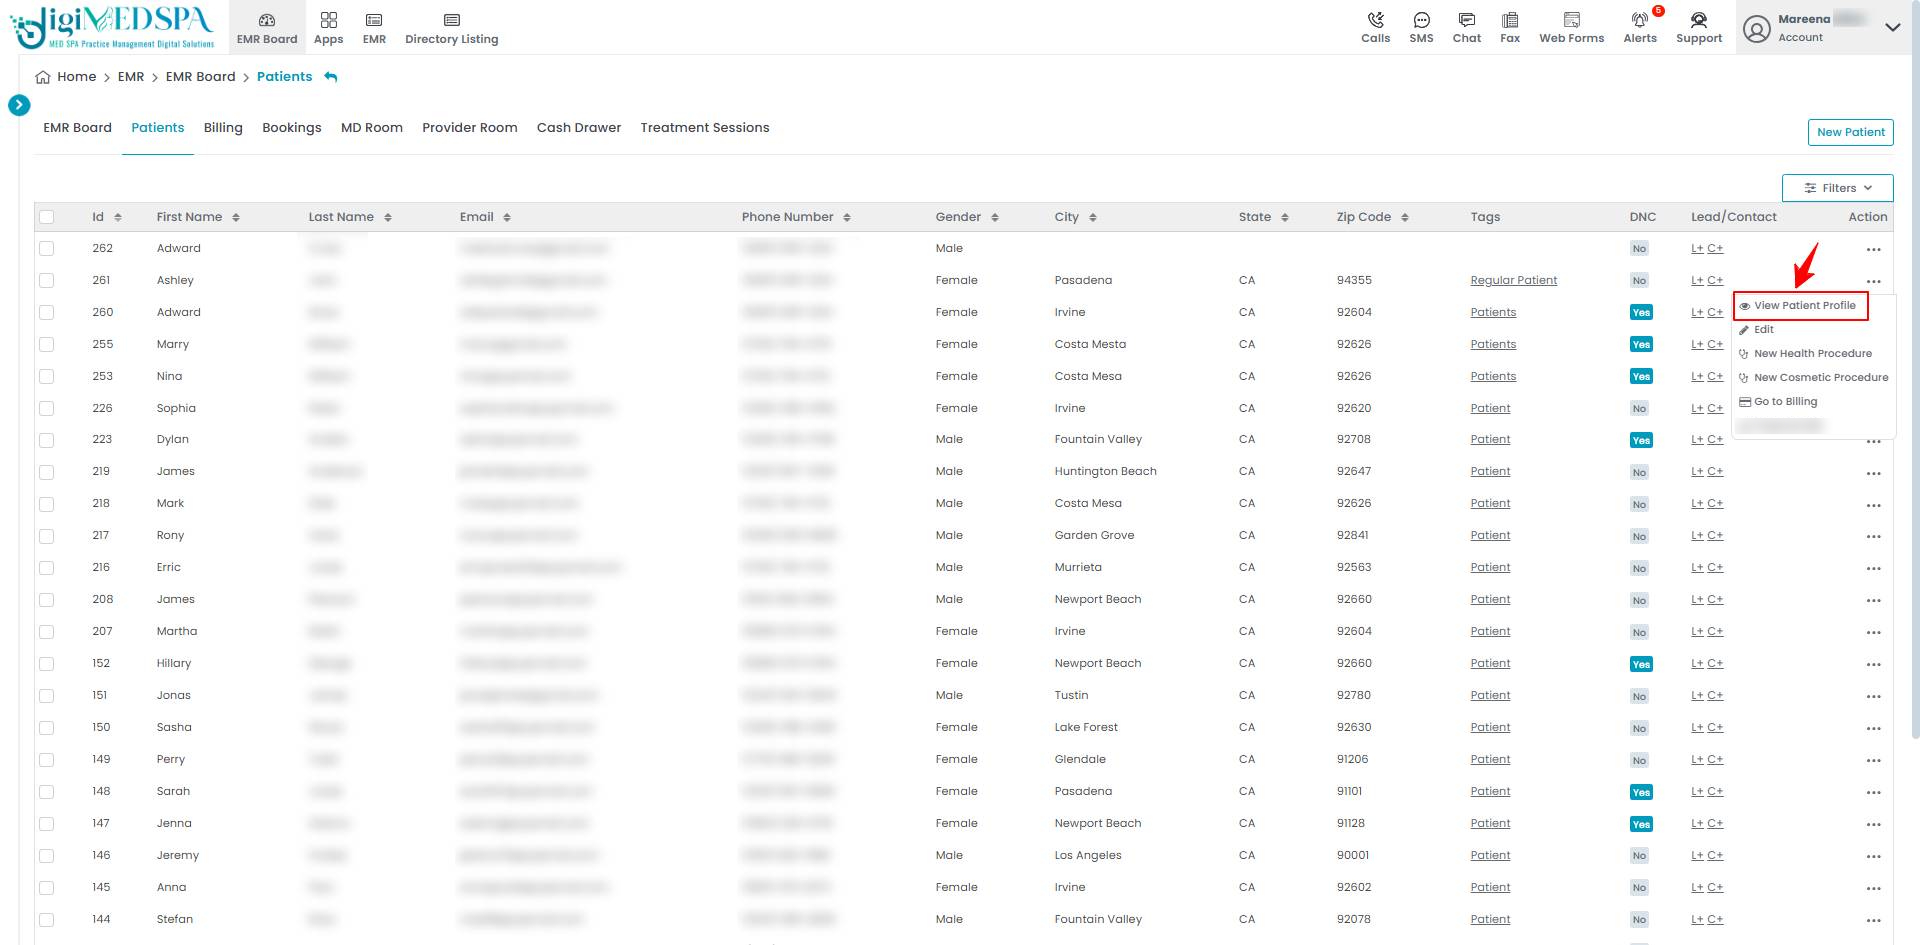
- Once you are inside the Patients App then from the patient list, click on three dots under the action column and select "View Patient Profile" for the specific patient.

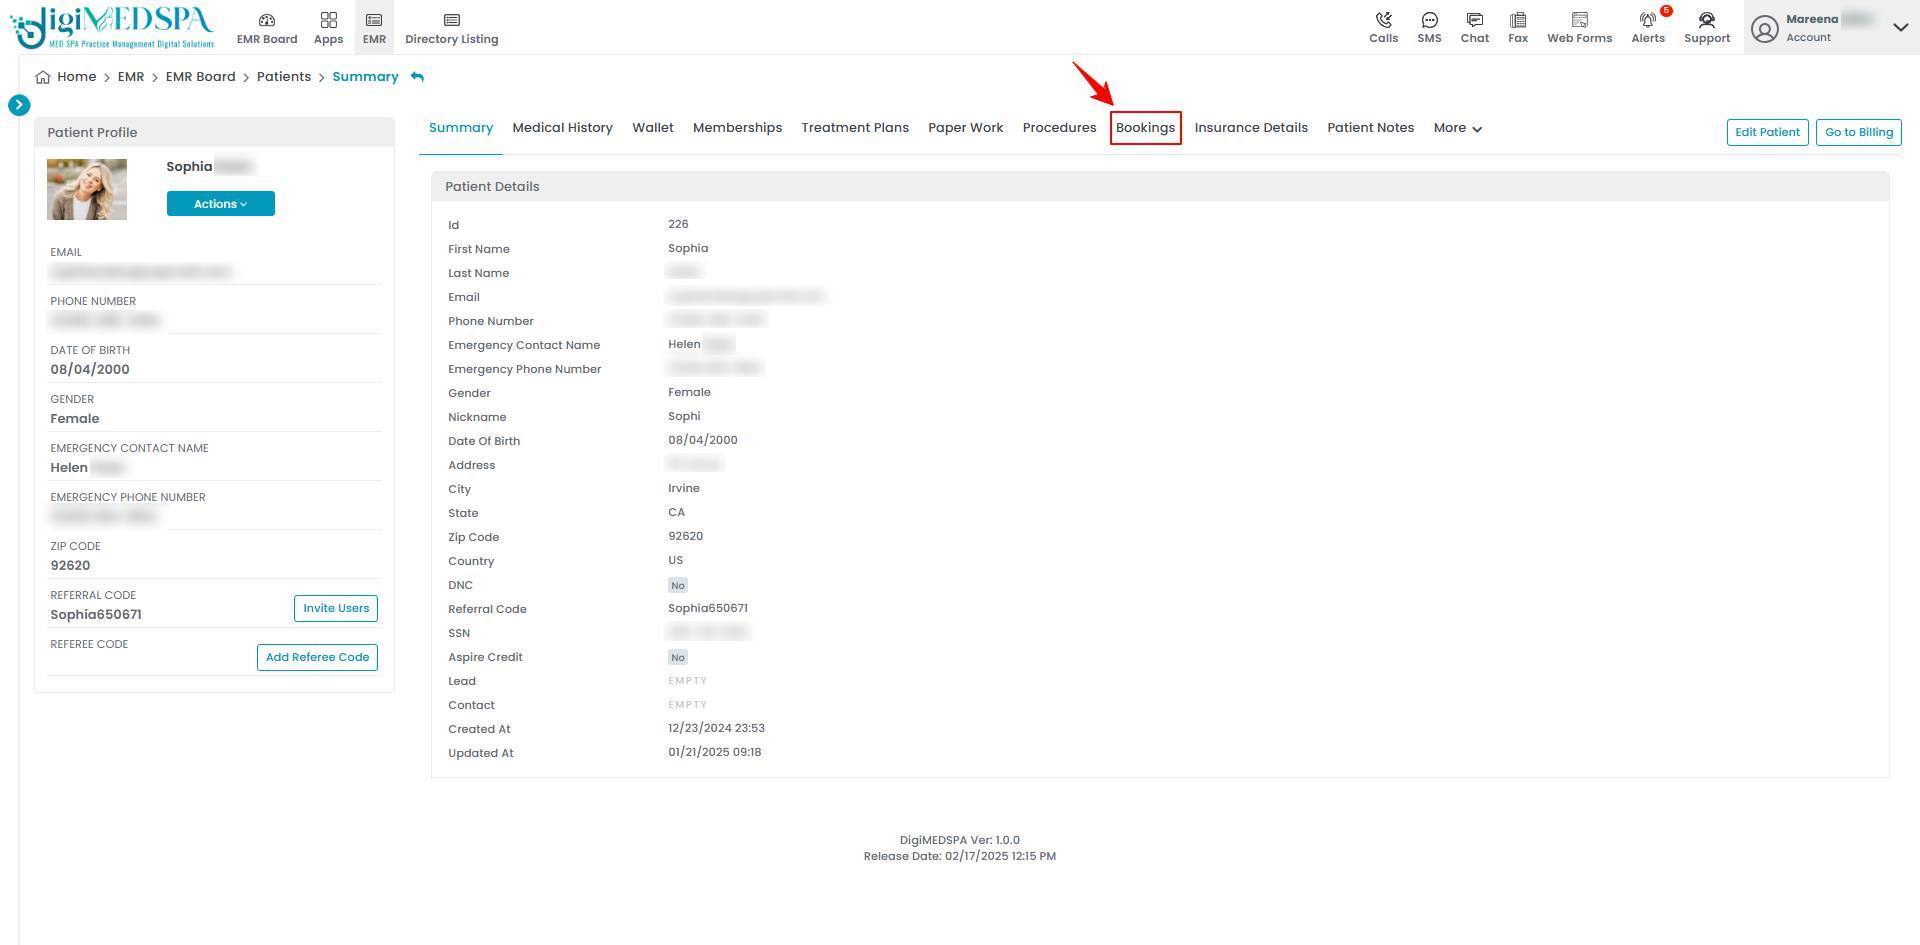
- In the patient profile, select ‘’Bookings.’’

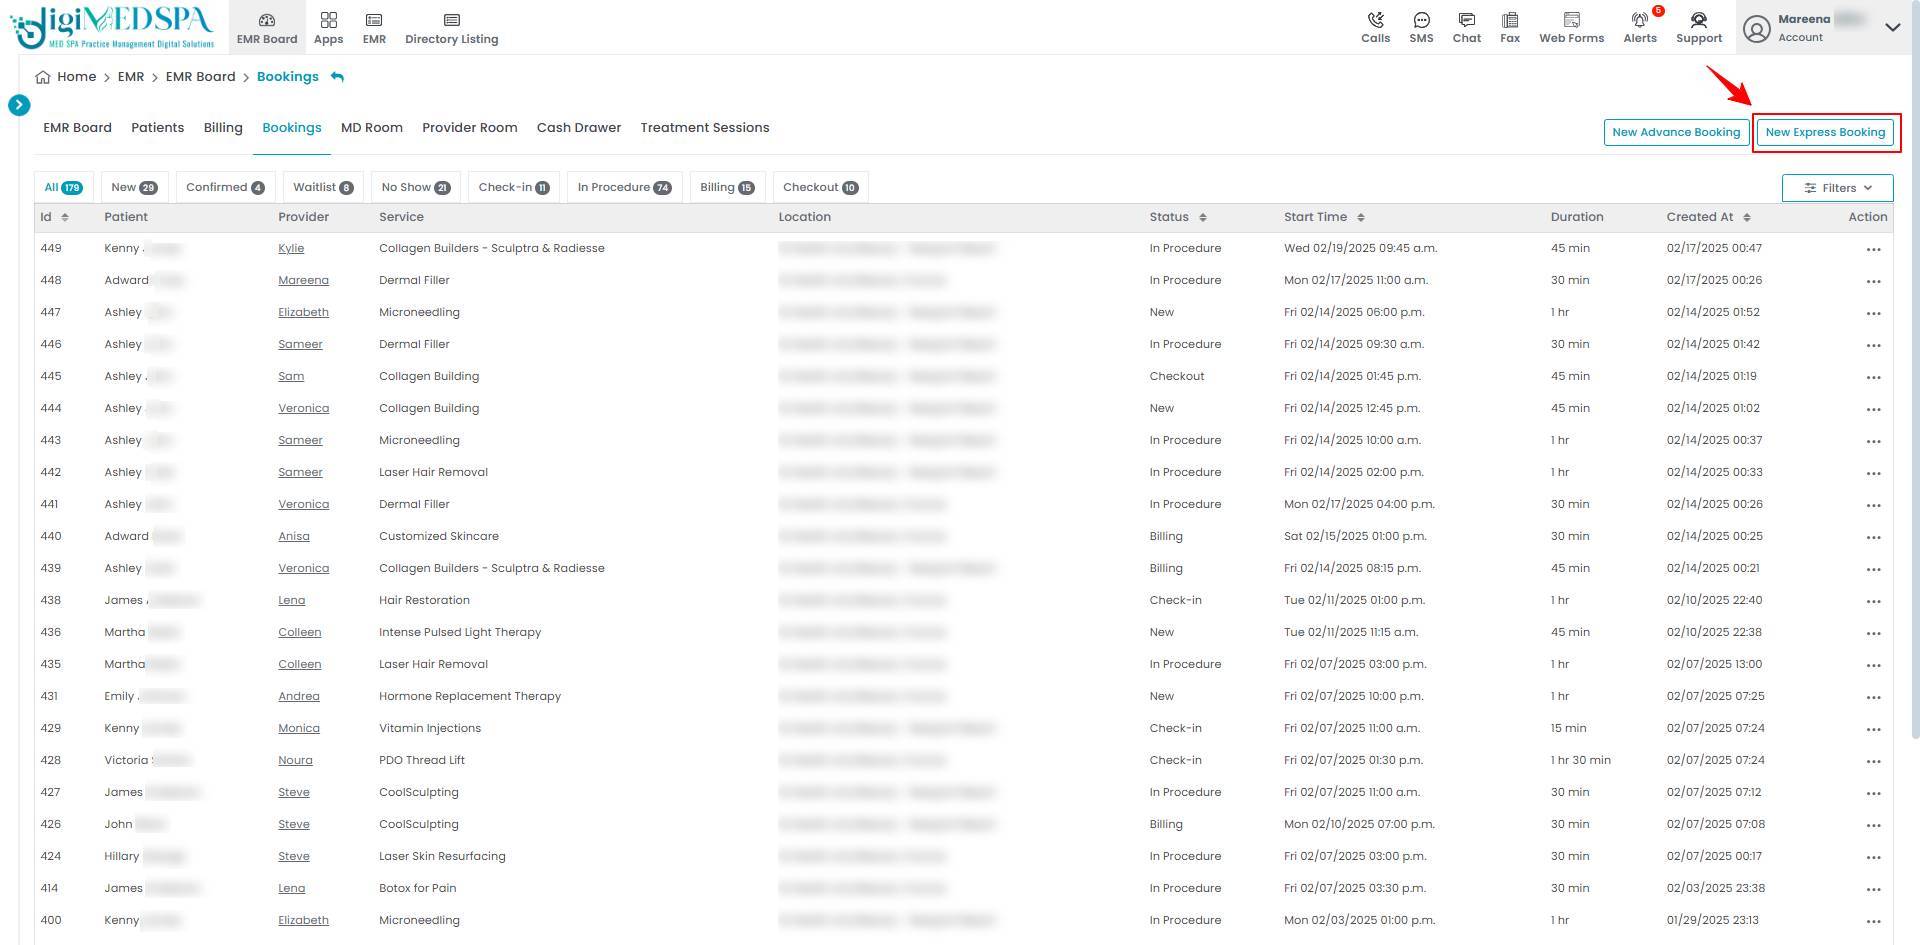
- Once inside the Bookings App, click on ‘’New Express Booking’’ in the top right corner of the screen.

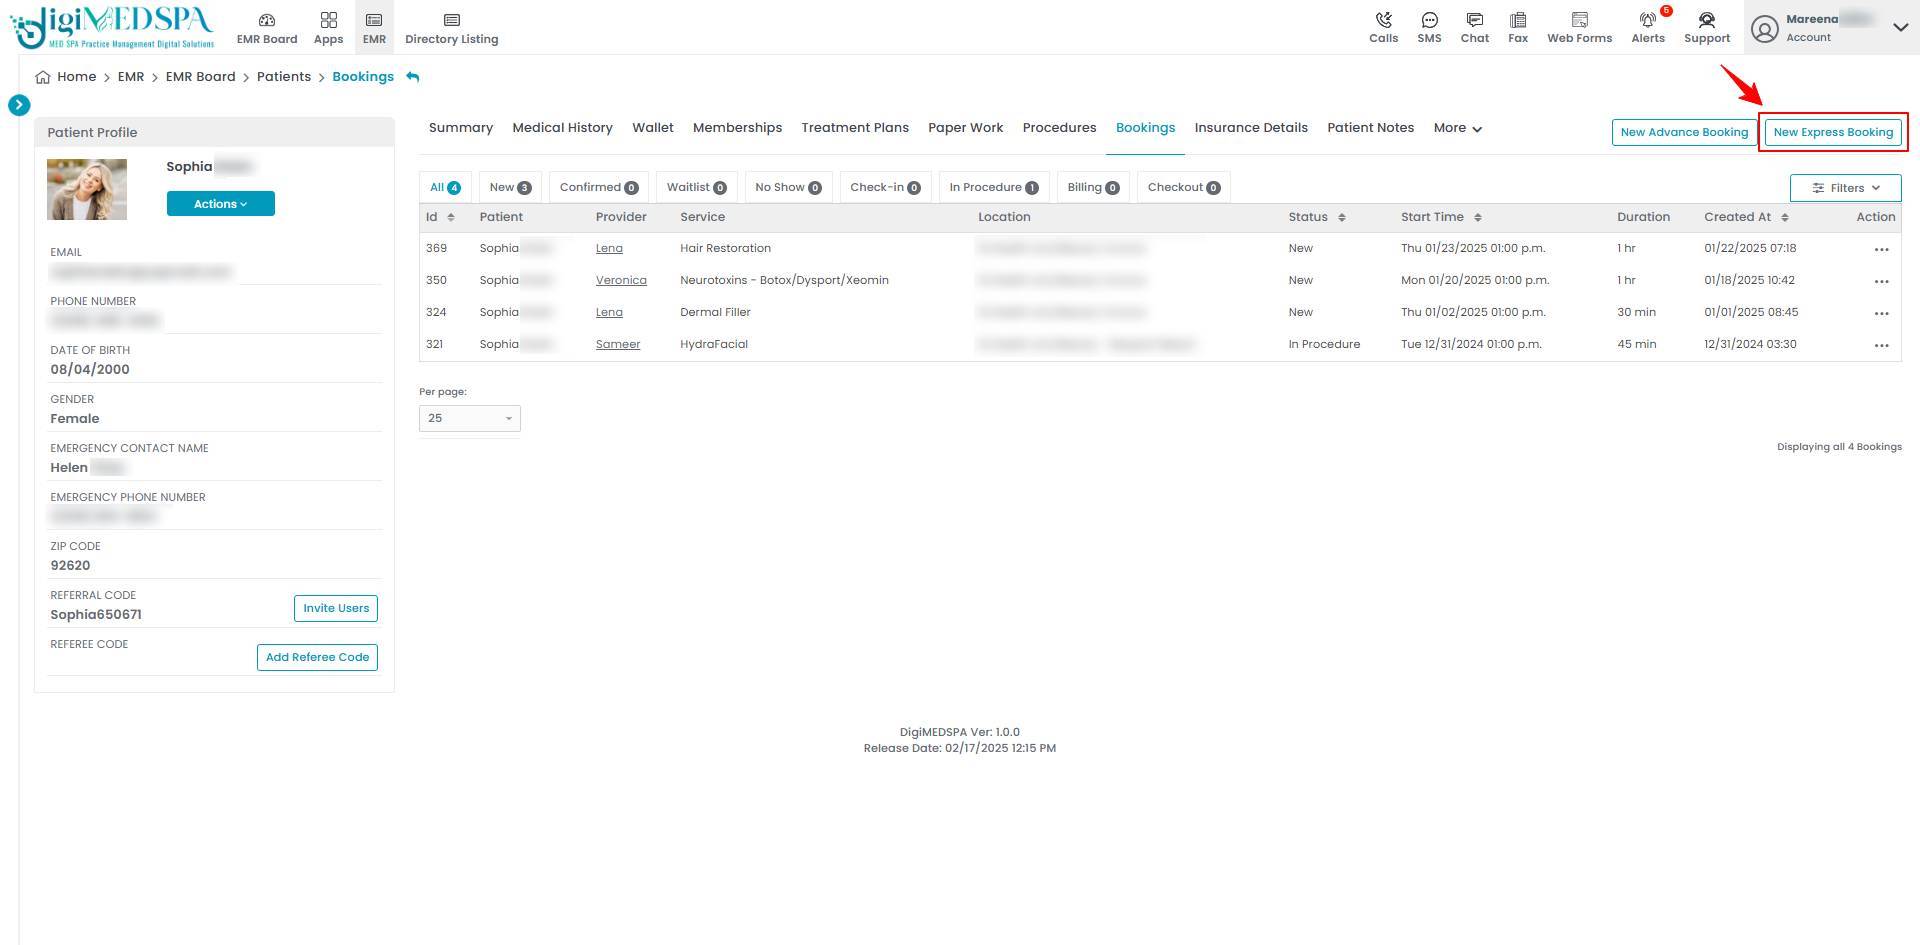
- Once you are inside the Patients App then from the patient list, click on three dots under the action column and select "View Patient Profile" for the specific patient.
- From the EMR Board tabs, click on ‘’Patients.’’
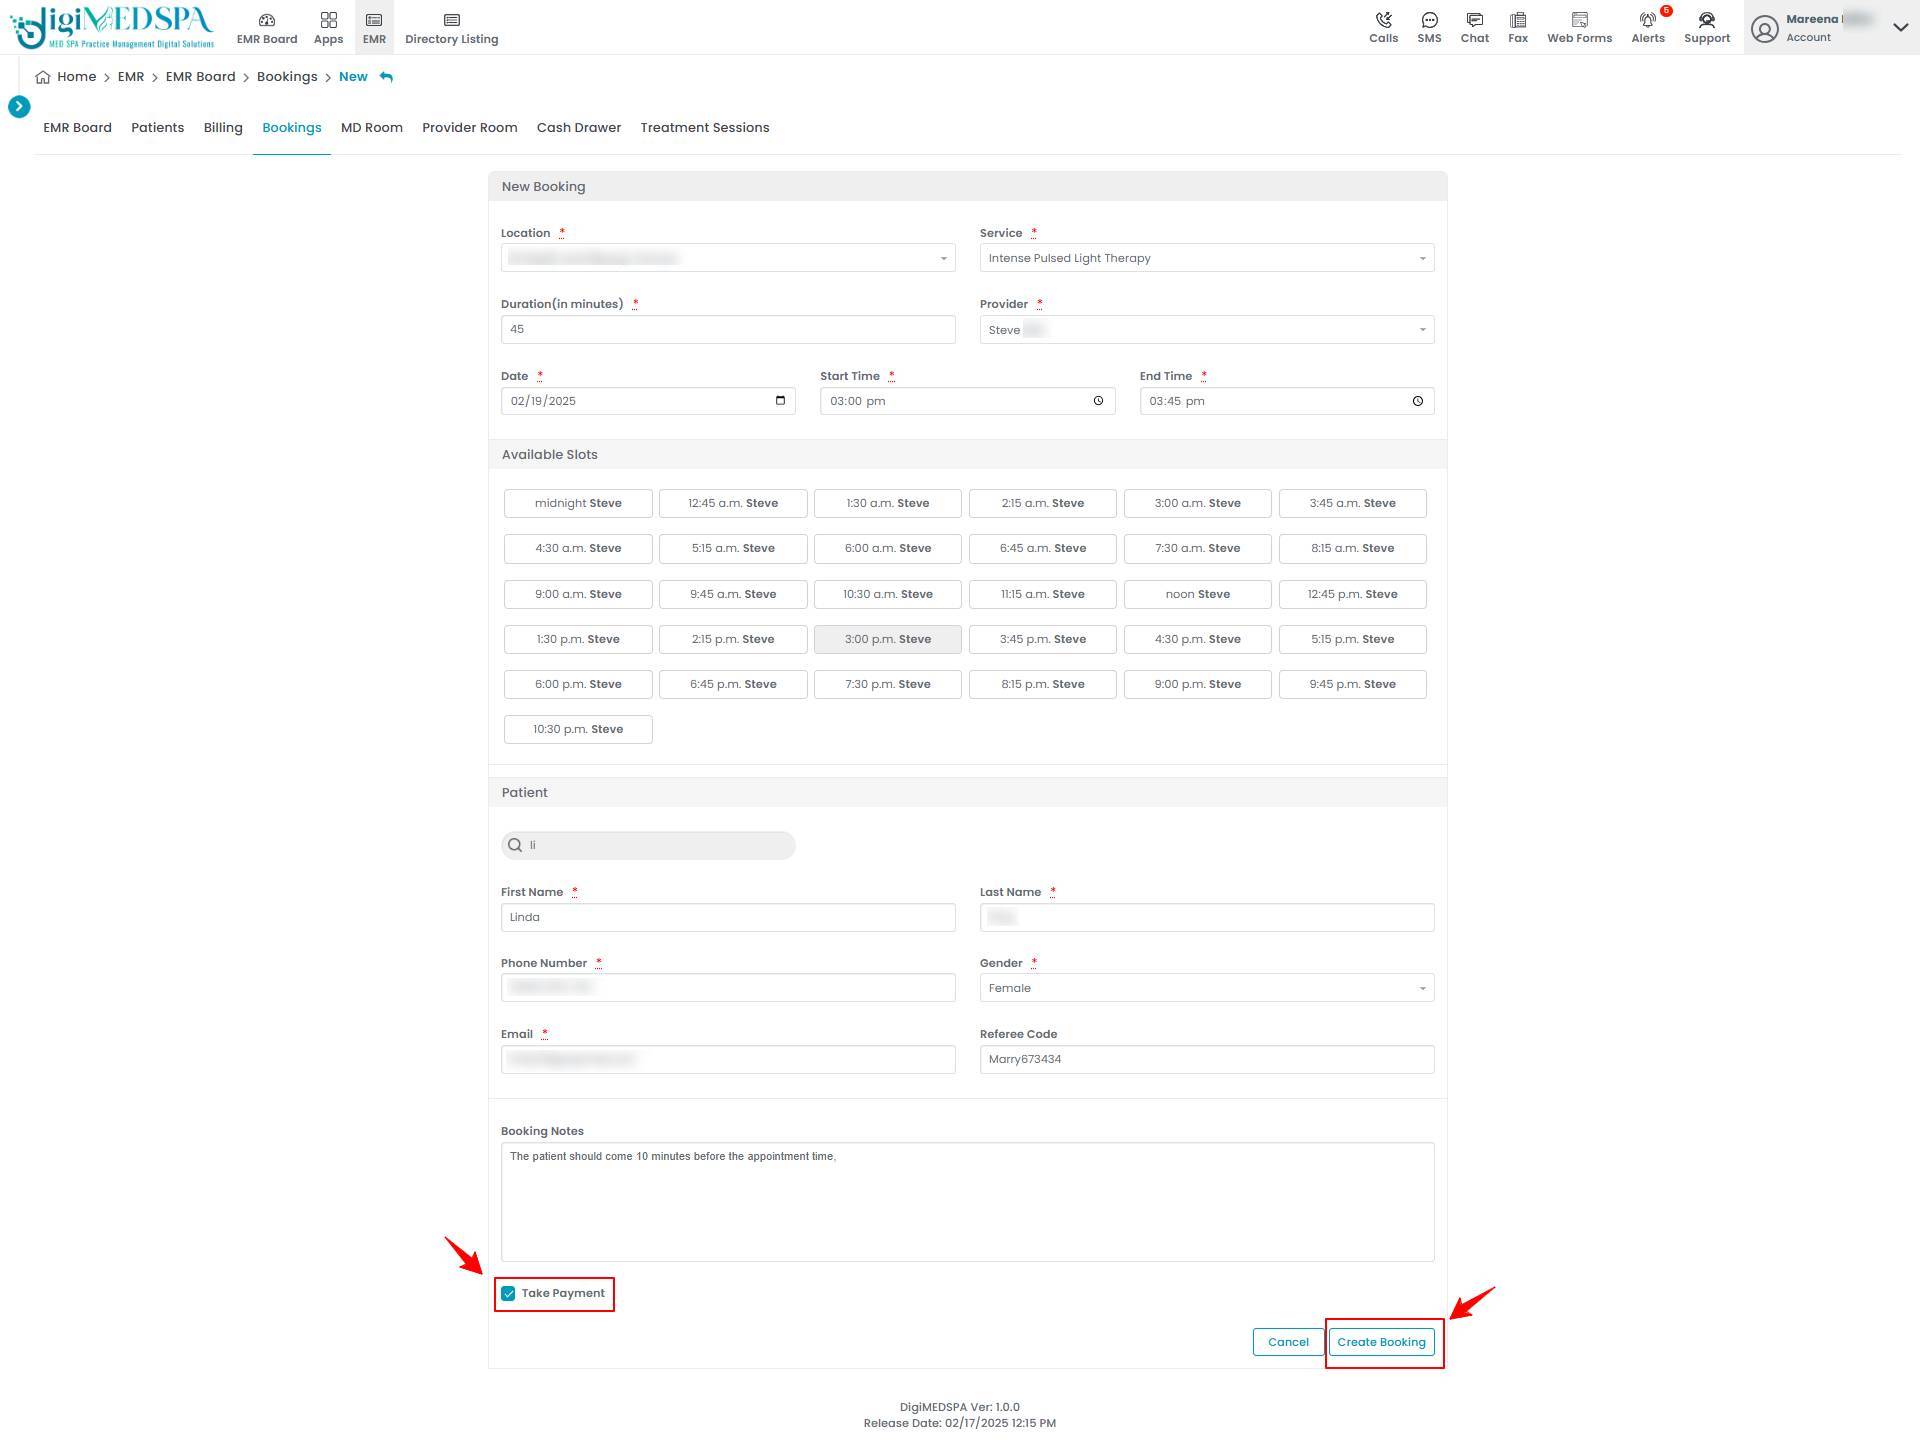
- Select the Location for your appointment from the ‘’Location Dropdown.’’

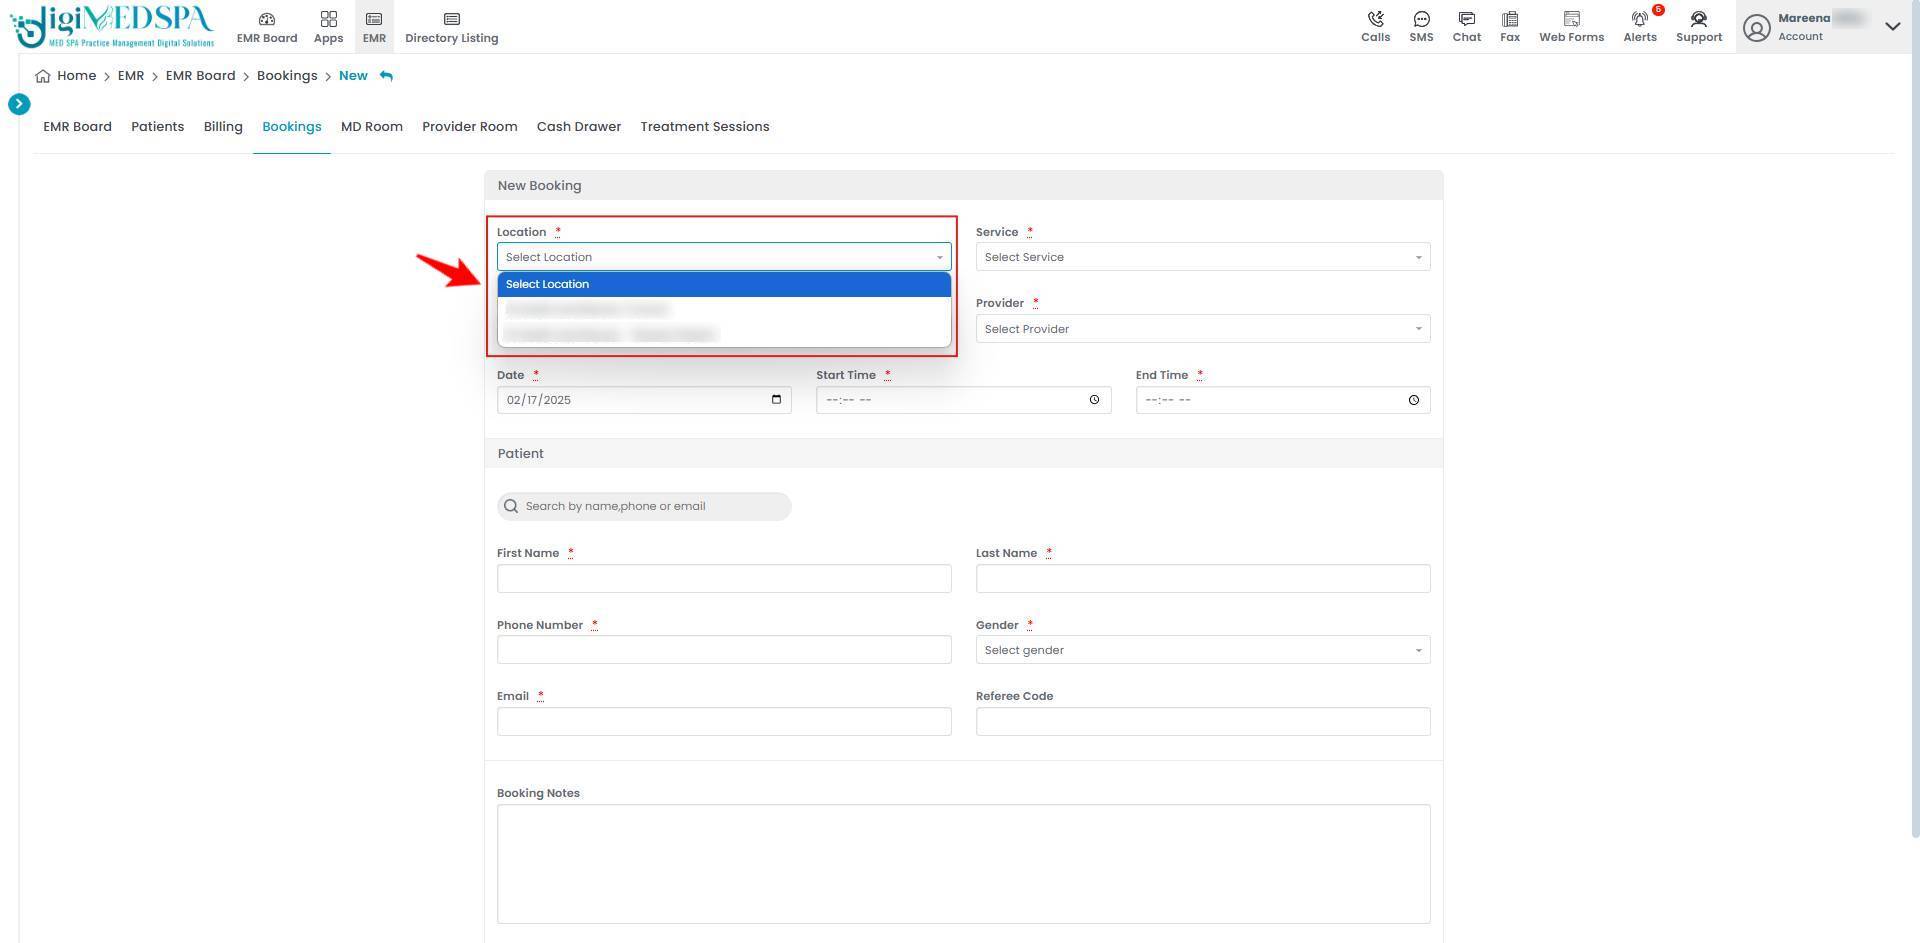 Note: You can only select a single location, service, and provider while booking an appointment through the Express Booking feature.
 - Select the Service you want to avail from the ‘’Service Dropdown.’’

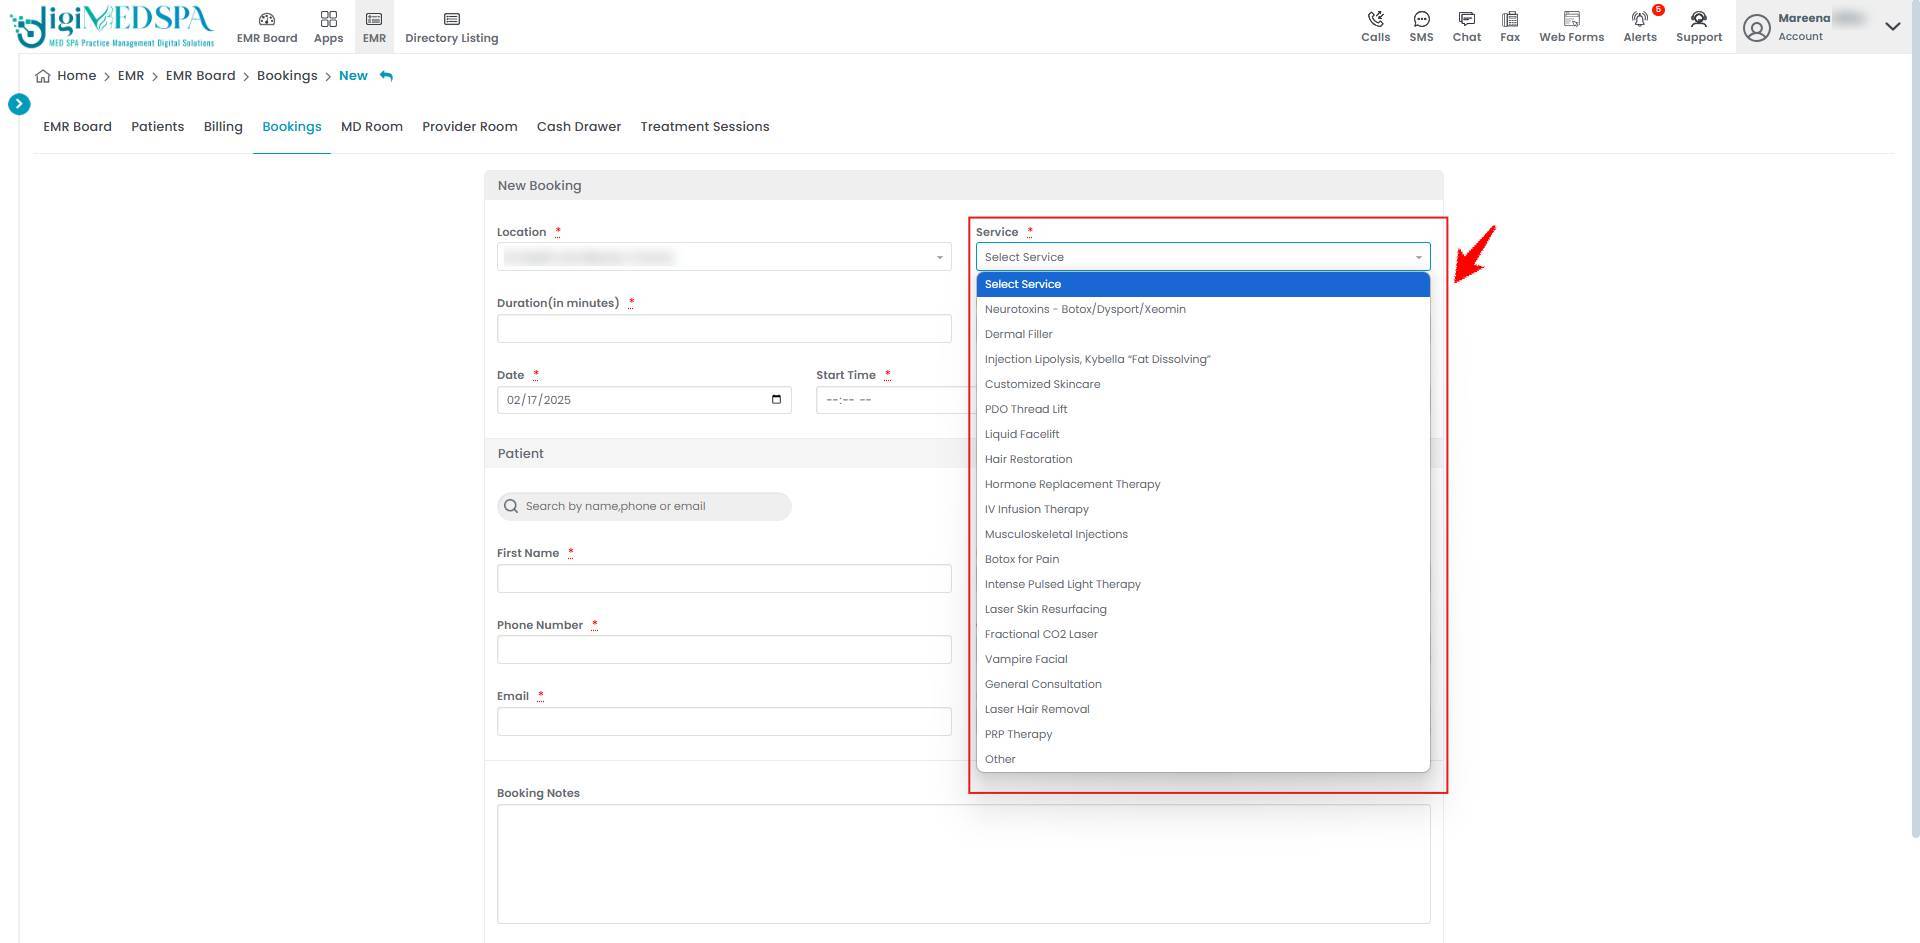
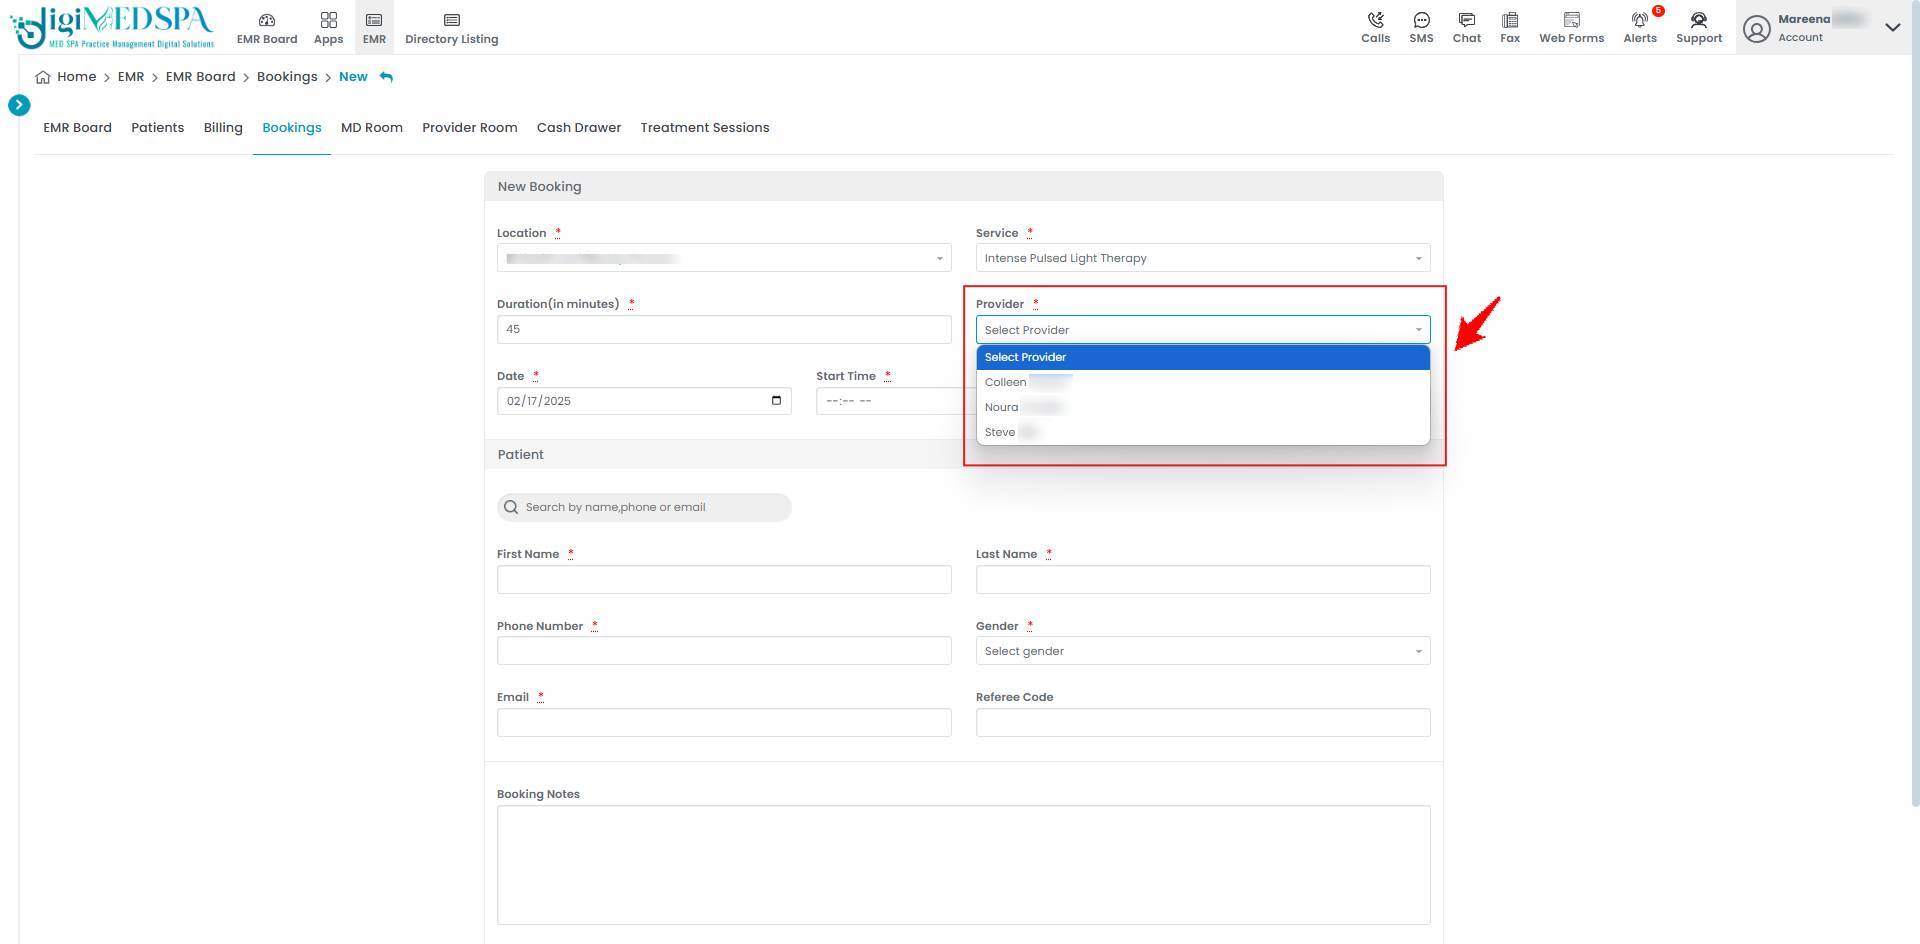
- Once the Service is selected, the Duration for that procedure will be auto-filled. Then select the Provider from the dropdown.

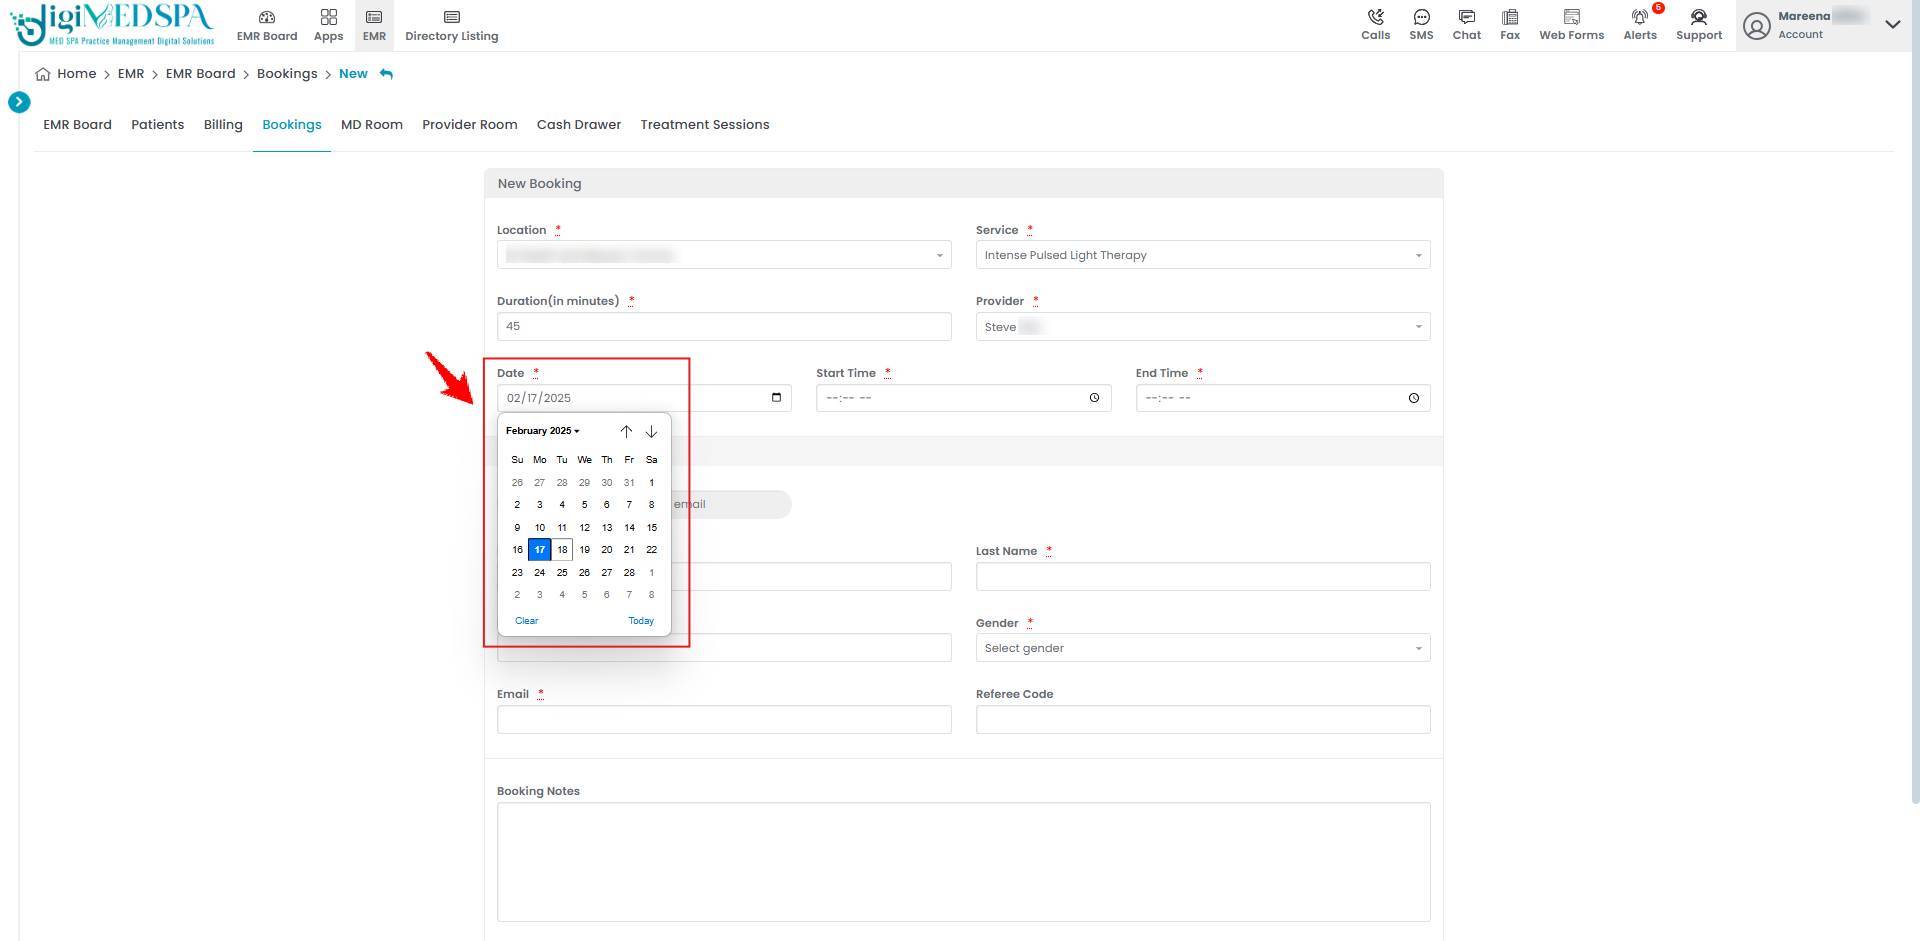
- Choose the Date from the calendar on which you want to book the appointment.

- Choose the slot you want to book from the ‘’Available Slots.’’

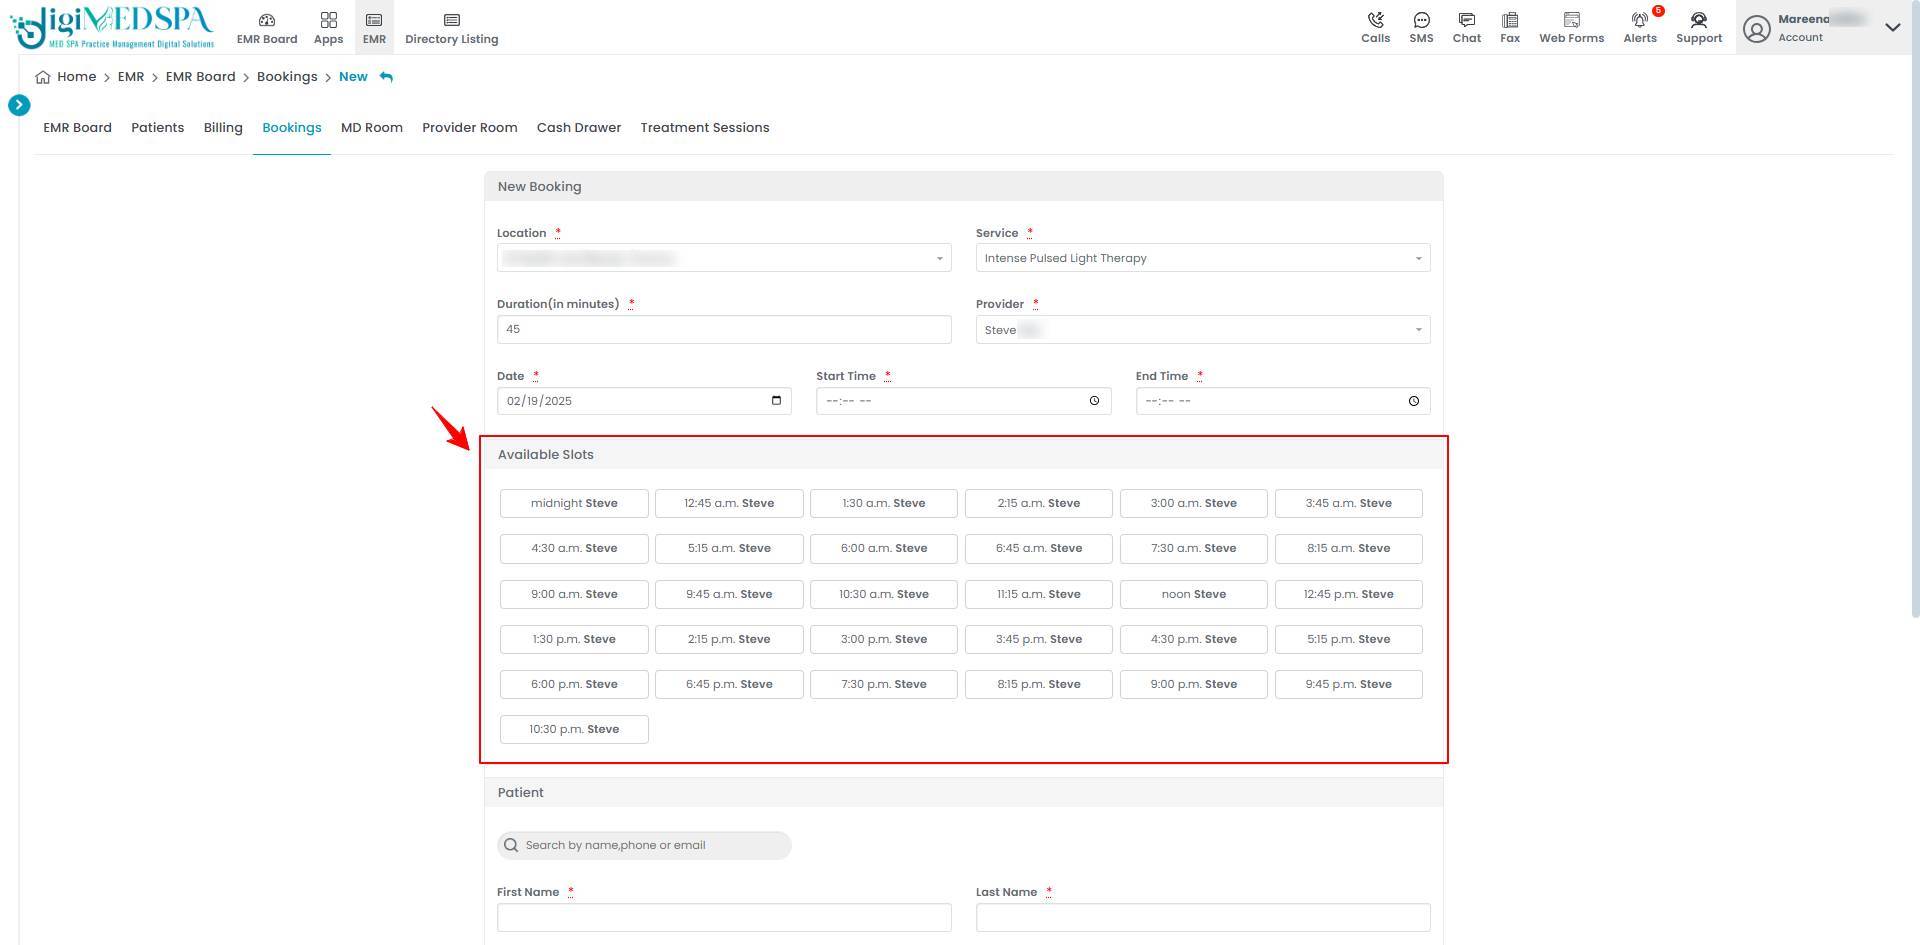 Note: ‘Available Slots’ represent available time slots when Med SPA providers can schedule appointments, based on their working hours and existing bookings. These slots are automatically updated as appointments are made, ensuring only open times are available to patients while creating a booking.
 - Complete the required patient information, including the First and Last Name, Email, Phone, Gender, Referee Code, and Booking Notes.

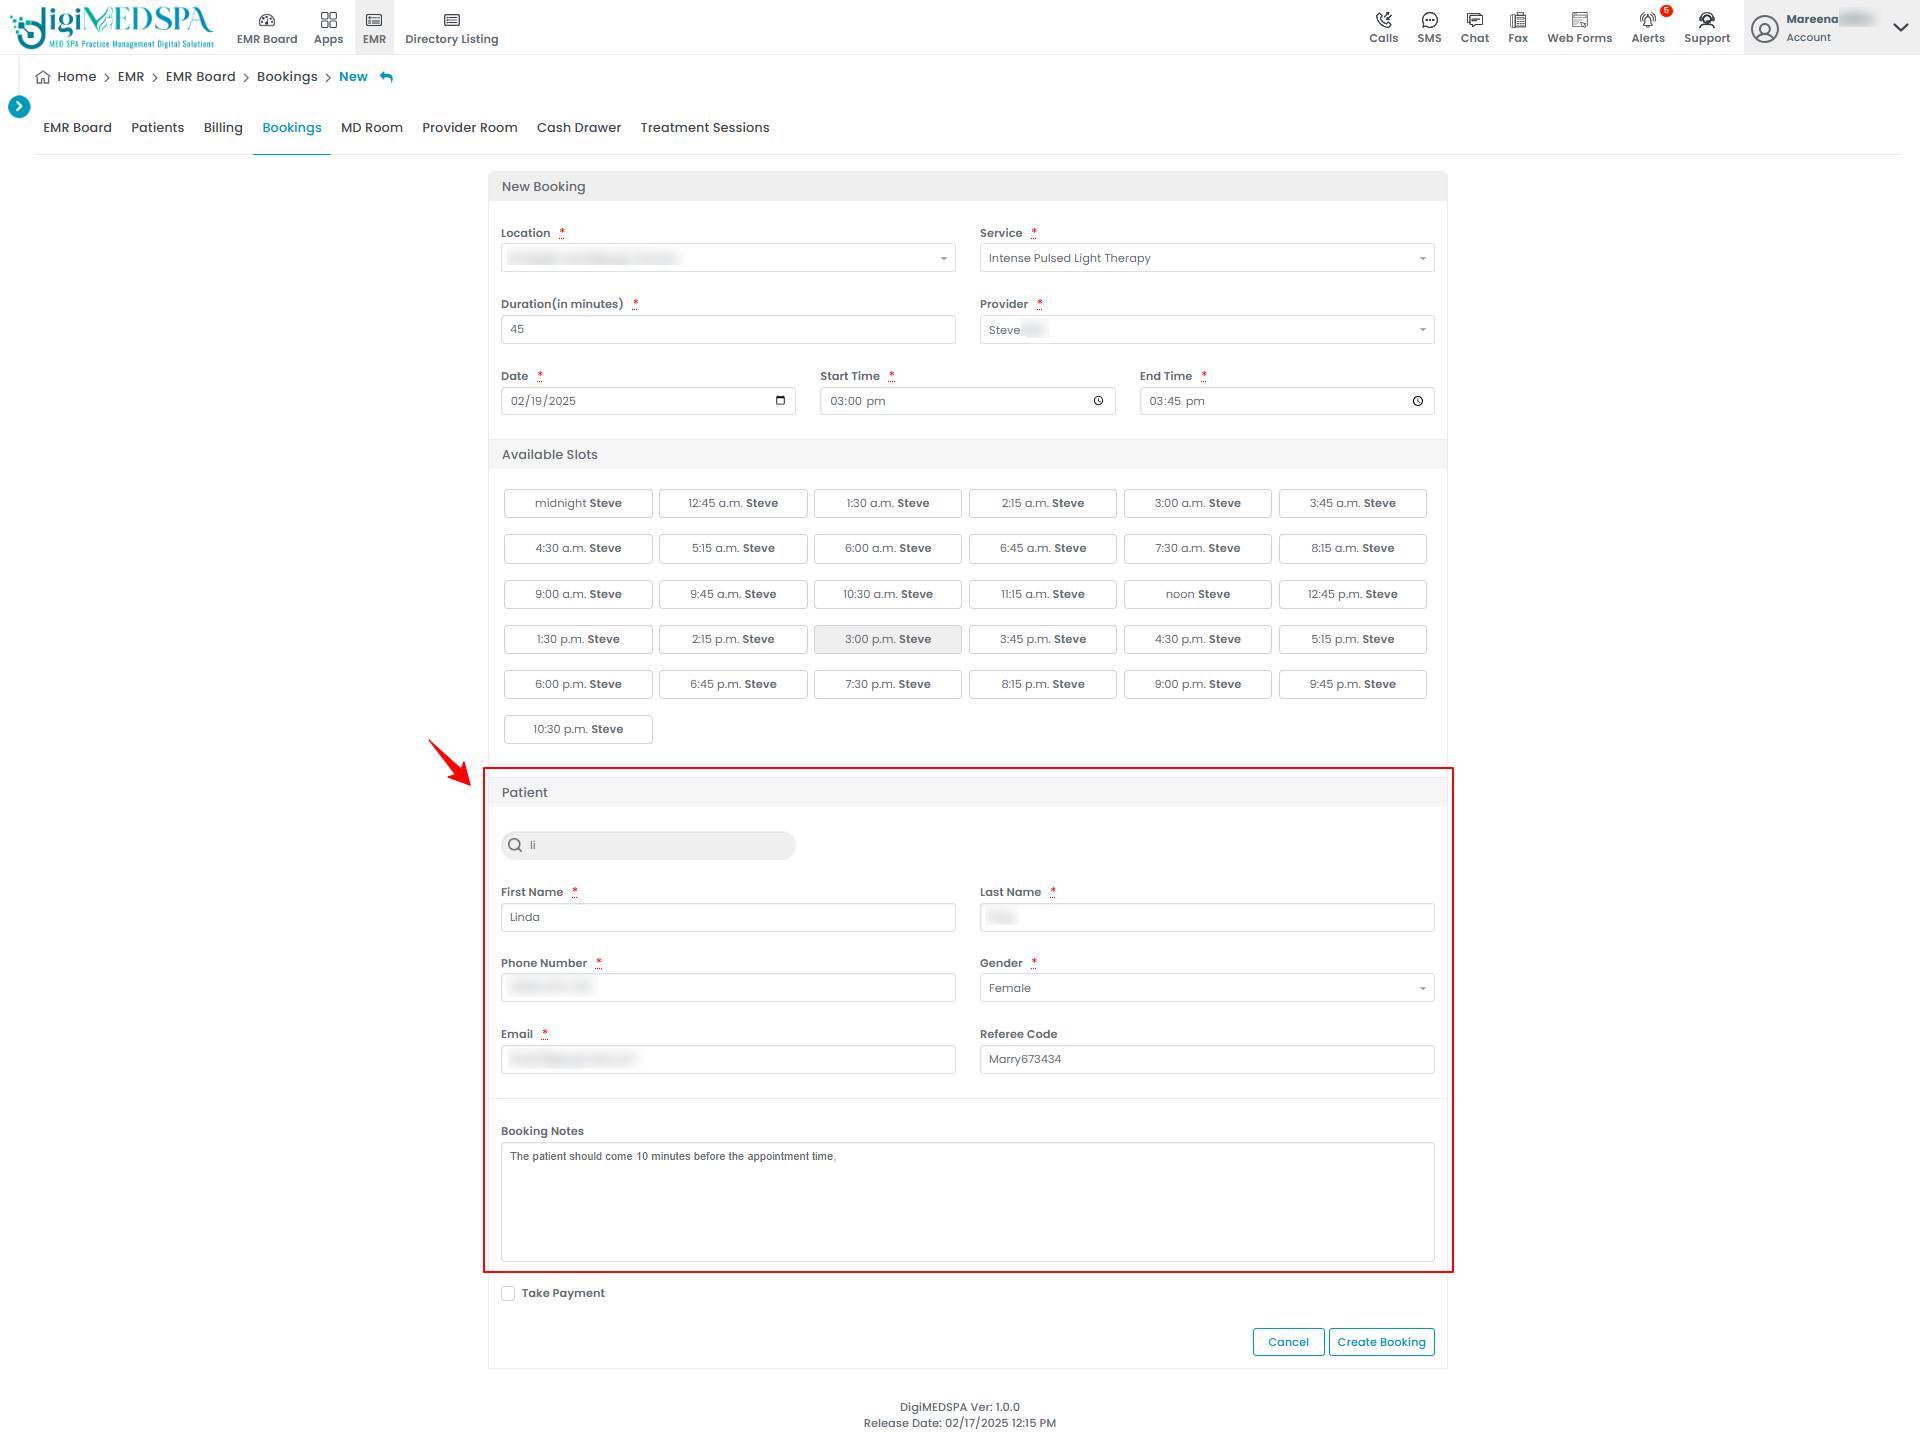 Note: A ‘Referee Code’ is a special code given to someone who refers patients to the Med SPA. It helps track referrals and reward partnerships. The referee code field will only be visible for patients who do not already have a referee code saved in their profile.For detailed instructions on Referee Code, refer to our ‘’Add Referee Code’’ user guide.
 - To use Dot Phrases, users must first create and save these repetitive phrases in the Dot Phrases App. Once saved, you can easily insert them by typing a dot wherever needed.

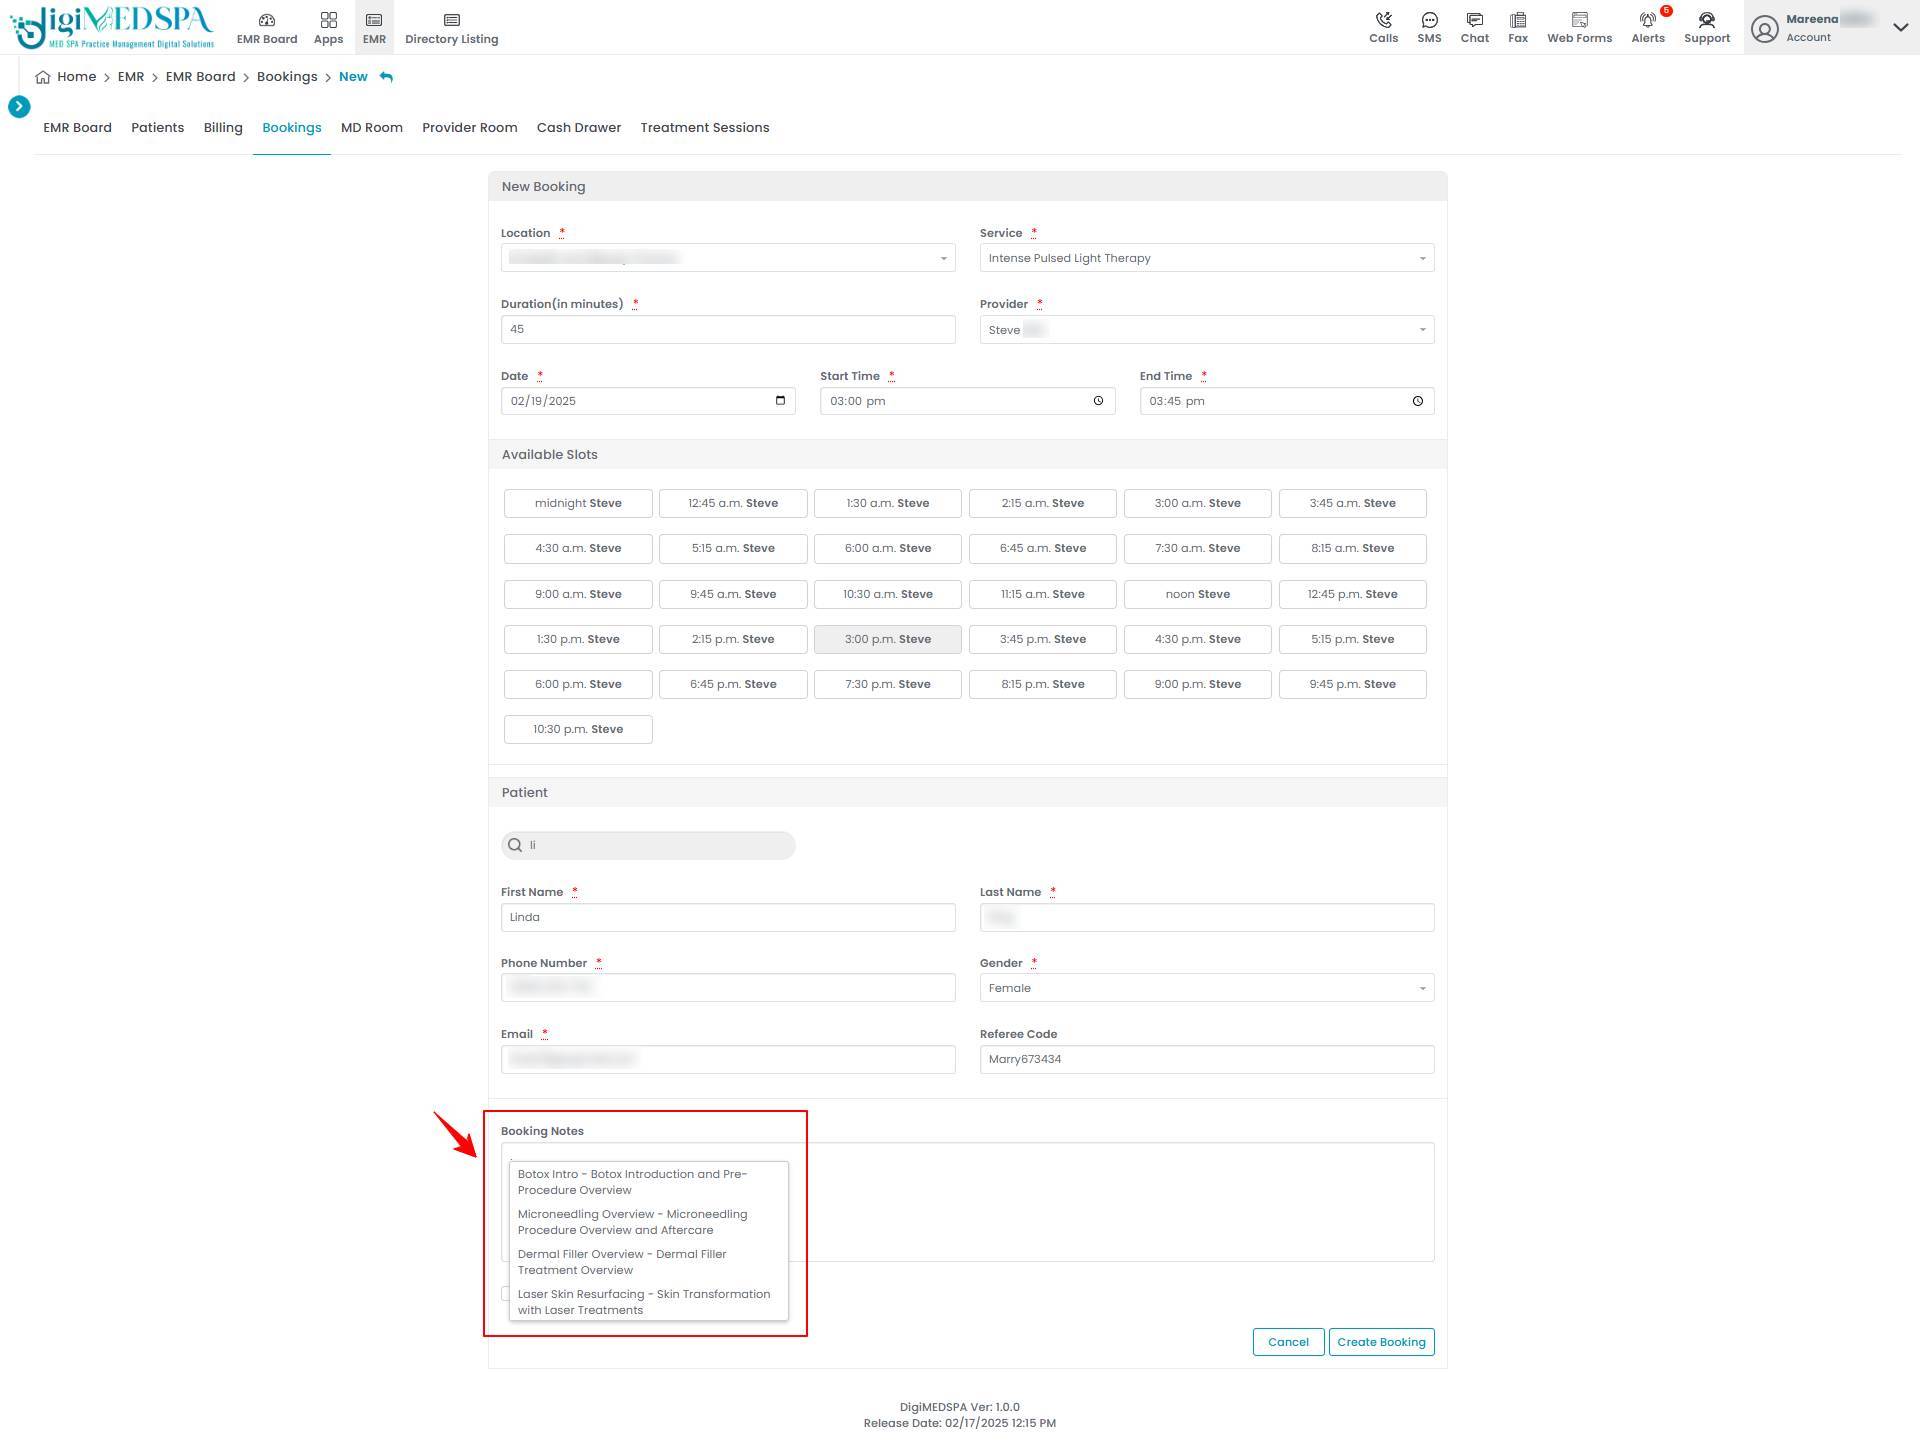 Note: Dot Phrases can be created and managed within the 'Clinical Documentation' App in the portal. For step-by-step instructions, refer to the “Add / Edit Dot Phrases” tutorial.
 - If you wish to take advance payment, check mark the ‘’Take Payment’’ option and then press ‘’Create Booking.’’

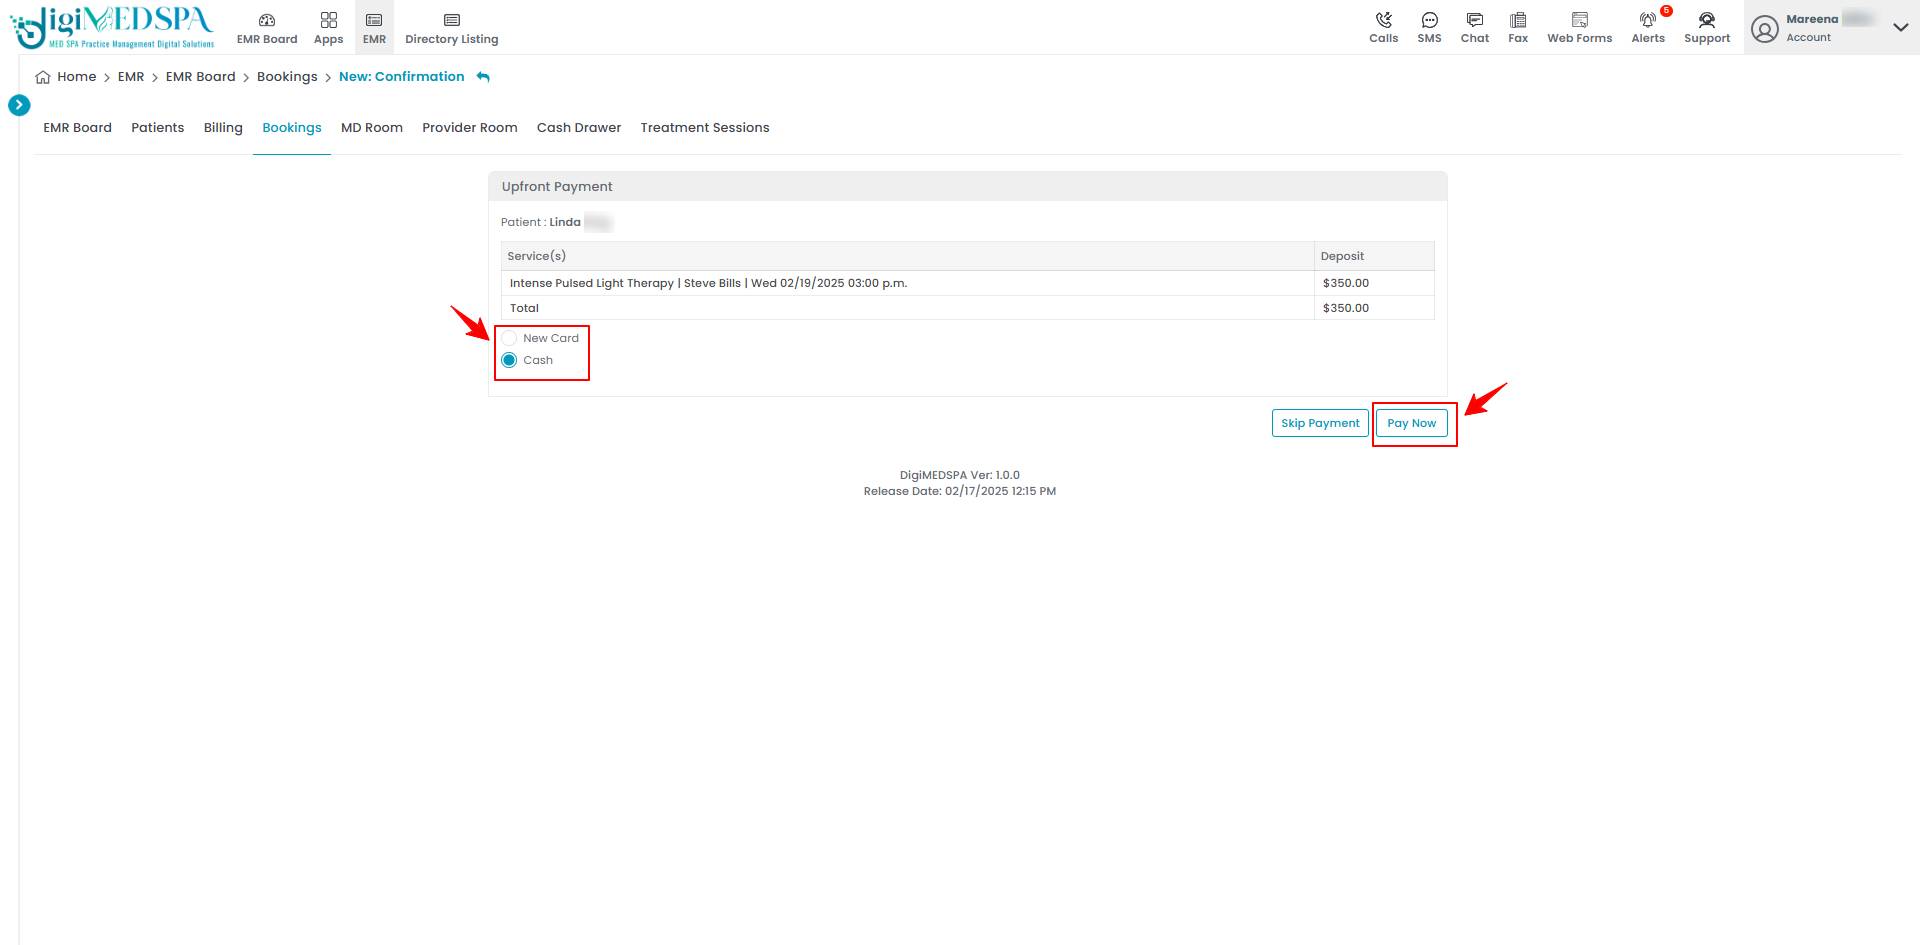
- Choose whether you want to pay by card or by cash and press ‘’Pay Now’’ to create the booking. If you choose to pay by cash then simply press ‘’Pay Now’’ button to continue.

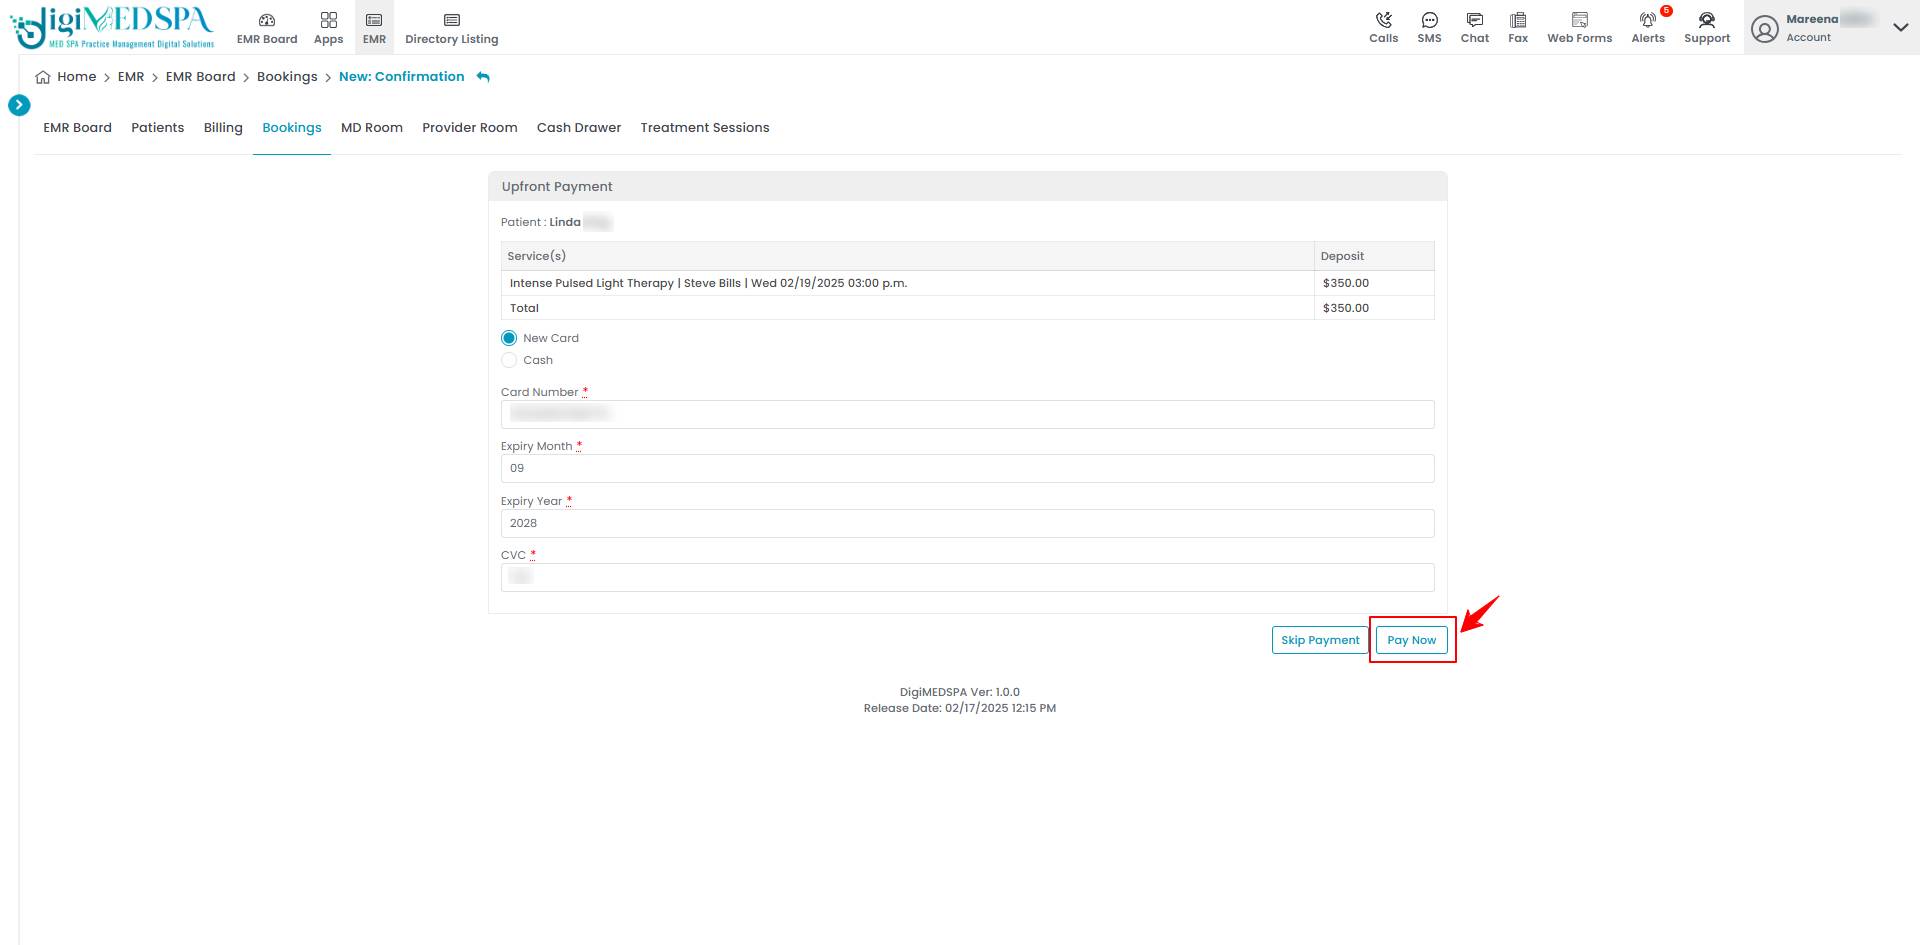
- If you choose to pay by ‘’New Card’’ then fill in the card details, including Card Number, Expiry Month, Expiry Year, and CVC. Then, press ‘’Pay Now’’ to create the booking.

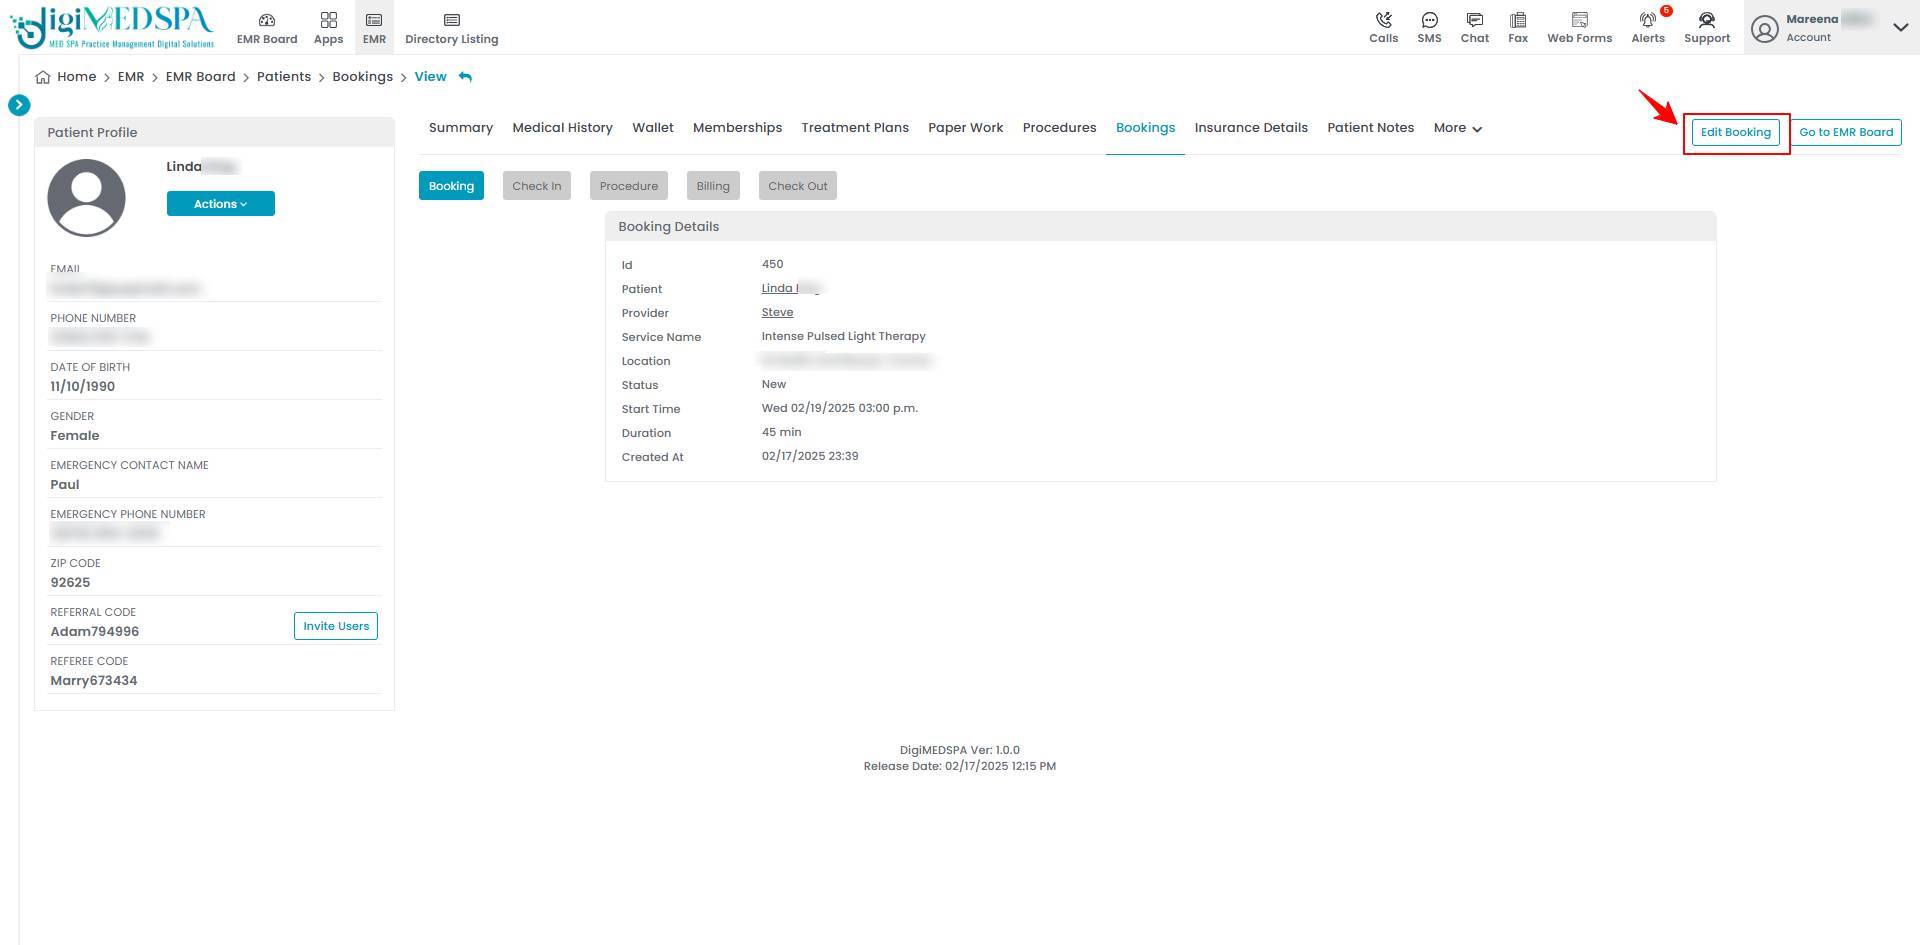
 You have successfully booked an appointment through express booking!
 - You can edit the booking you created by clicking the ‘’Edit Booking’’ button in the top right corner of the View Booking page.

 Note: To reschedule/edit a booking refer to our ‘’Reschedule/Edit Booking’’ user guide.


