

 DigiMEDSPA EMR
 DigiMEDSPA CONNECT ™
Book an Appointment Through Advance Booking
Our portal offers two convenient booking options: New Booking and Advance Booking. New Booking provides a quick way to schedule a single service, while Advance Booking allows users to book multiple services at once. This user guide provides step-by-step instructions for managing the advance booking process, from selecting multiple services to personalizing your booking.
Understanding Terminologies
Advance Booking
Advance booking is a scheduling option that allows patients to book multiple services or service bundles in a single session. This feature provides flexibility, enabling users to tailor their bookings to their specific needs for a more comprehensive experience at the Med SPA.
Access this link: https://digimedspa.com/ap2/bookings
Book an Appointment Through Advance Booking
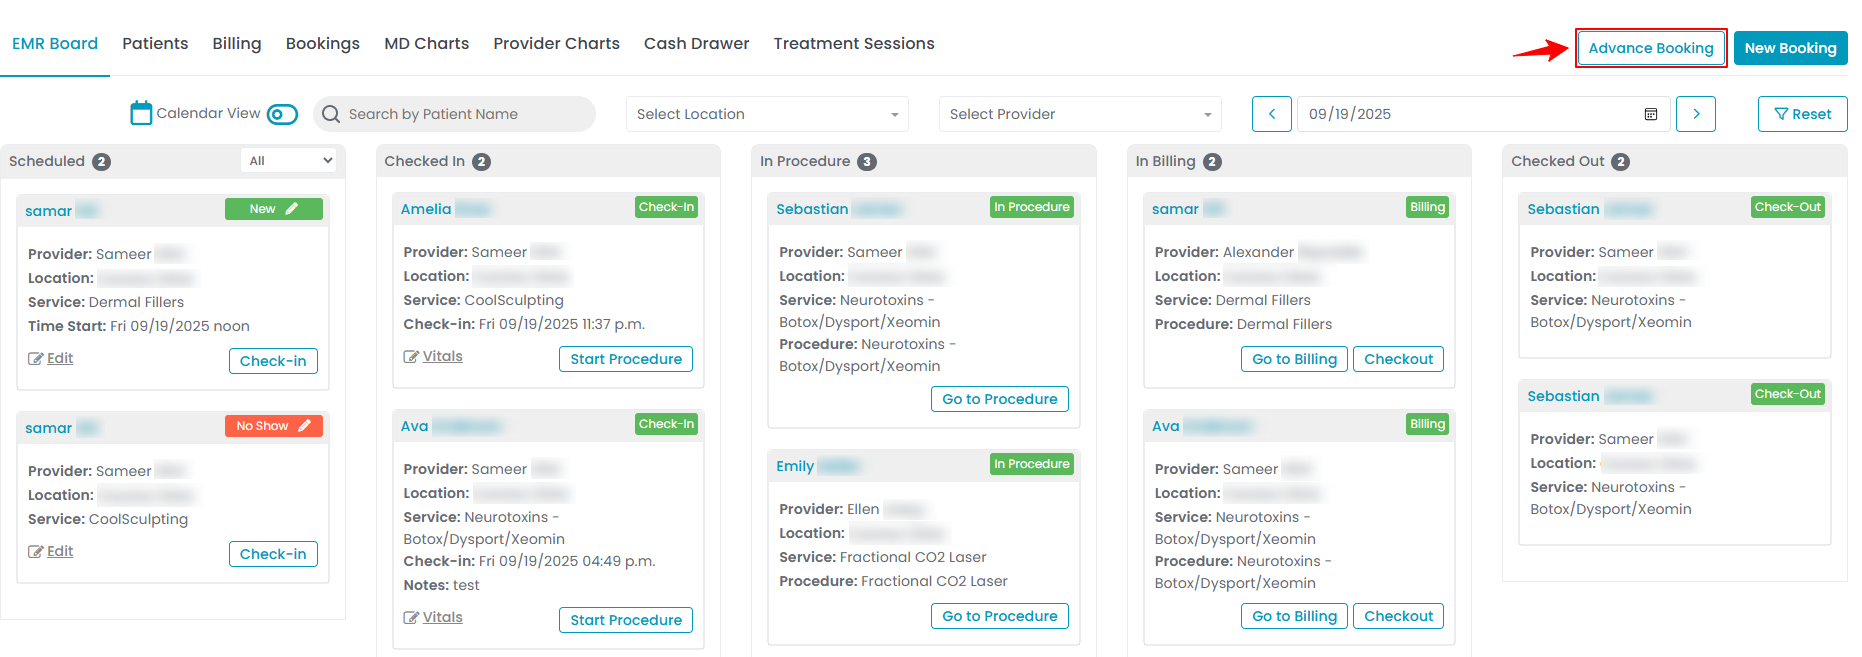
- The user can book an appointment through Advance Booking accessible via three entry points.
- From the EMR Board, click on ‘’Advance Booking.’’

- Navigate to the Bookings List Screen to book an appointment through New Booking.
- From the EMR Board Tabs by selecting “Bookings.”
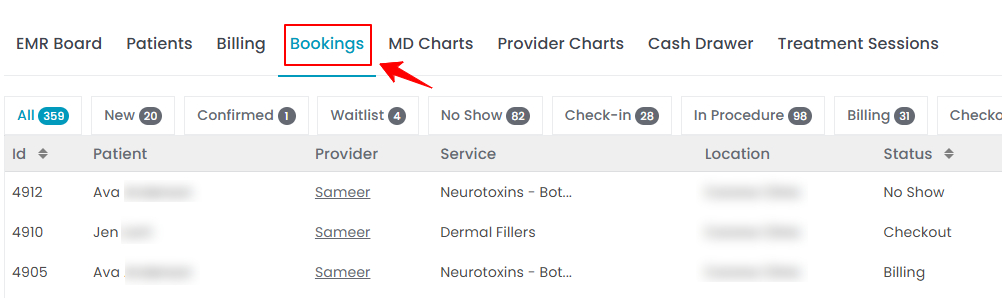
- Alternatively, from the Left Navigation, click on the “EMR Board” dropdown menu and select “Bookings.”
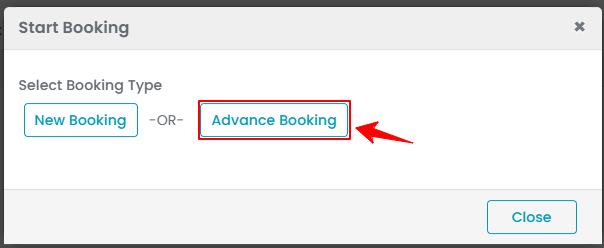
- On the Bookings List Screen, click on the “New Booking” button in the top right corner of the screen.
- Now choose to book an appointment either through New Booking or Advance Booking, based on your specific requirements. Selecting "Advance Booking" will take the user to the first step of creating an advance booking.
- From the EMR Board Tabs by selecting “Bookings.”
- The user can also book an appointment through Advance Booking accessible via Patients List Screen.
- From the EMR Board Tabs, click on ‘’Patients.’’
- To view a specific patient from the list, click the three dots under the action column and select "View Patient Profile," or simply click anywhere on the patient’s data.
- On the patient profile, hover over the “Actions” menu on the right side of the screen and select ‘’New Booking’’ from the dropdown menu.
- Now choose to book an appointment either through New Booking or Advance Booking, based on your specific requirements. Selecting "Advance Booking" will take the user to the first step of creating an advance booking.Note: All three entry points will direct the user to the first step of creating an advance booking.
- From the EMR Board, click on ‘’Advance Booking.’’
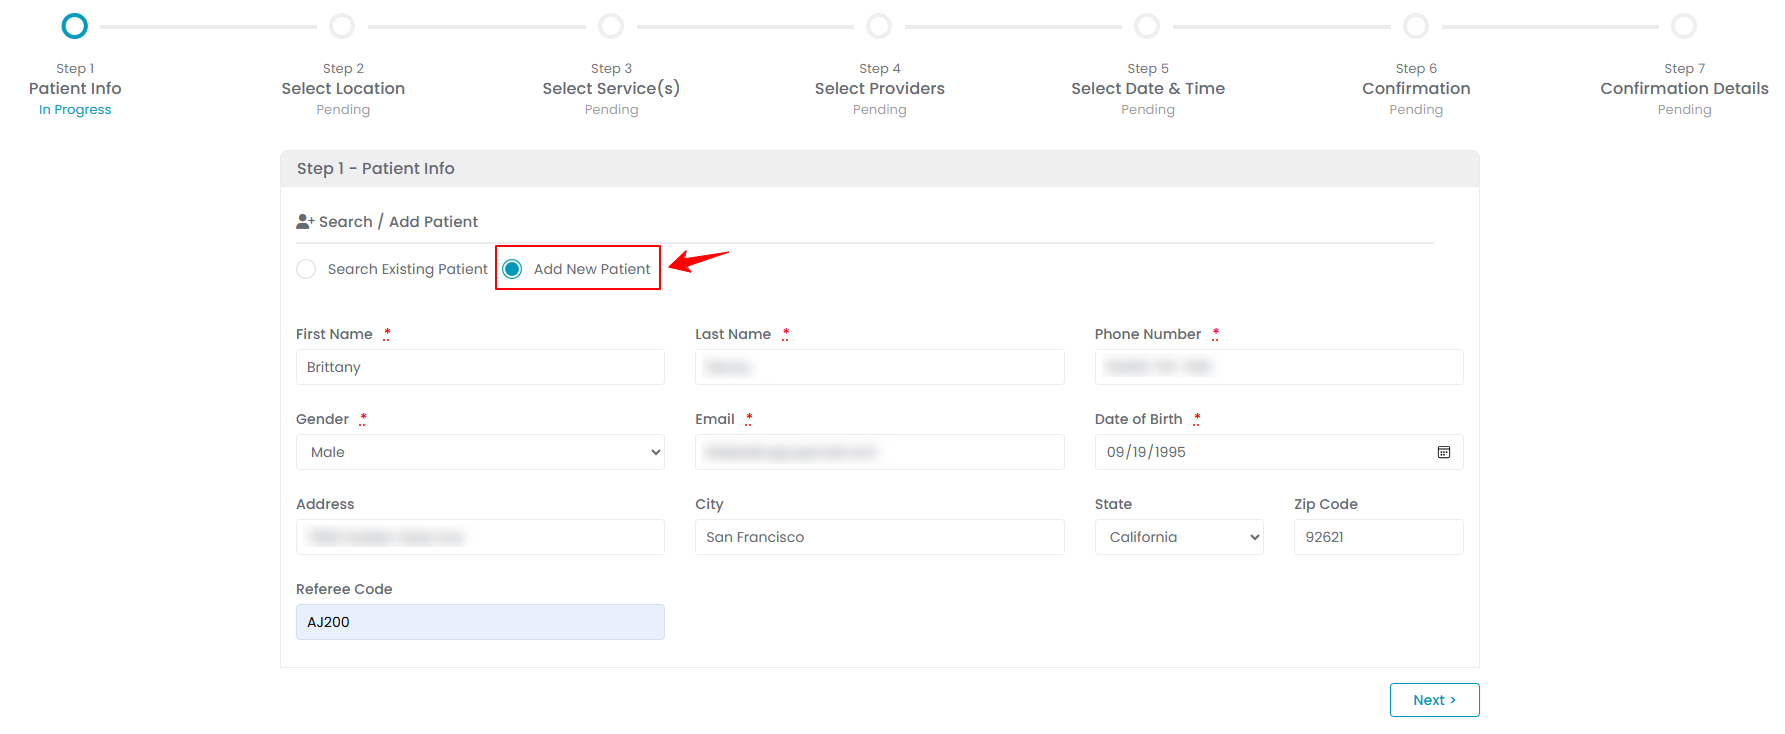
- In Step 1, select “Search Existing Patient” if the patient’s information is already in the portal, then type the patient’s name in the search bar to auto-fill their details.
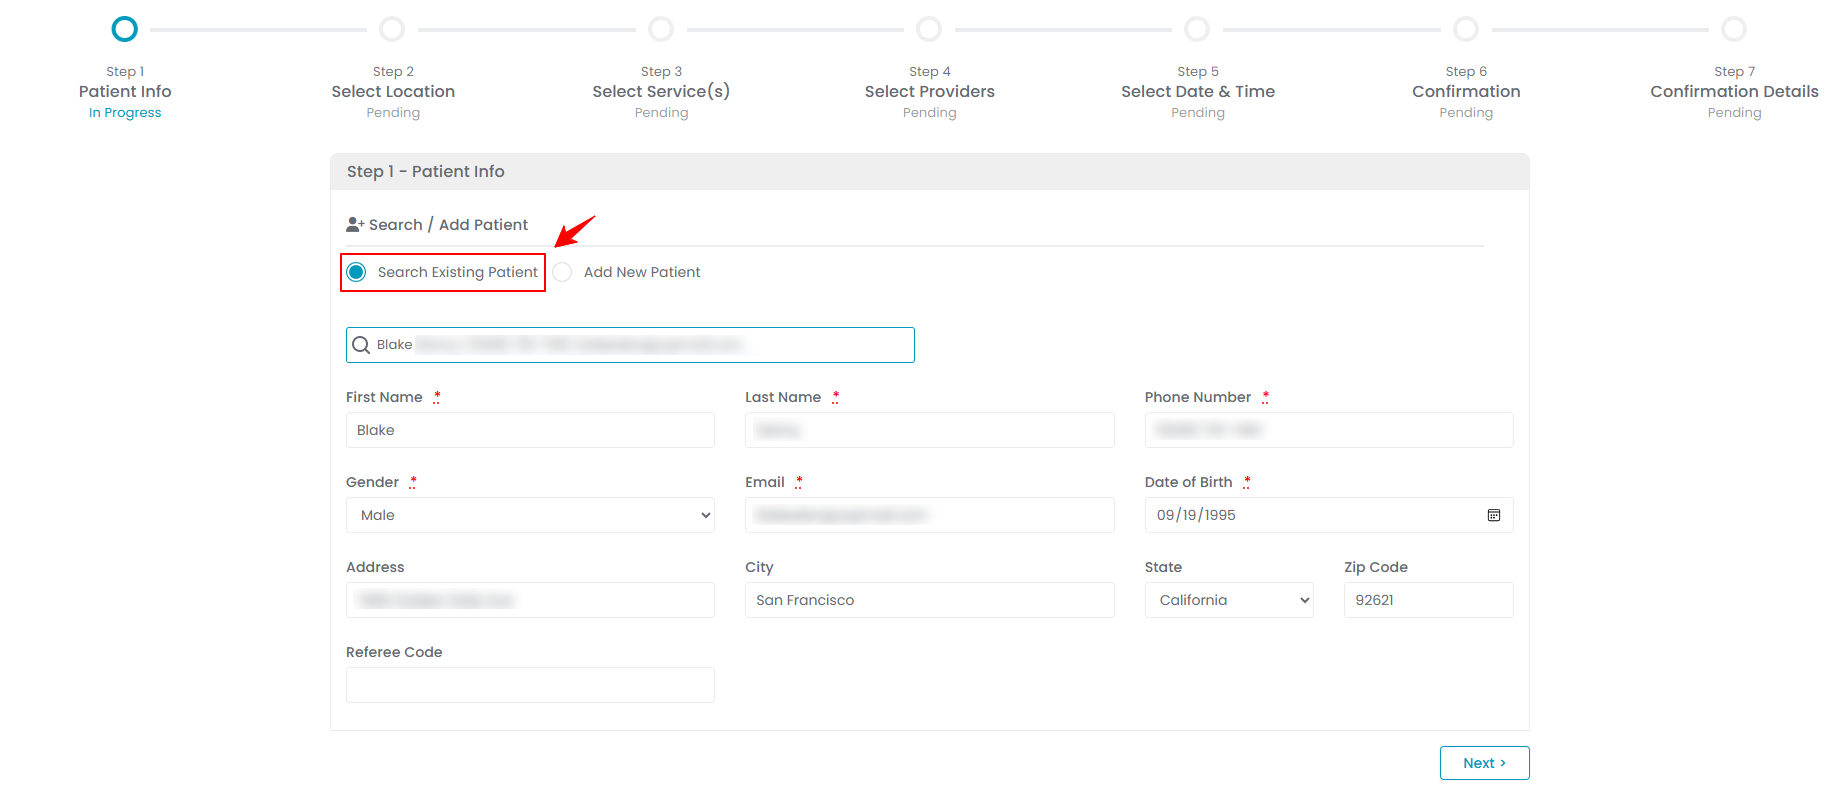 Note: A ‘Referee Code’ is a special code given to someone who refers patients to the Med SPA. It helps track referrals and reward partnerships. The referee code field will only be visible for patients who do not already have a referee code saved in their profile. For detailed instructions on Referee Code, refer to our ‘’Add Referee Code’’ user guide.
 - For a new patient, select “Add New Patient” and enter the required patient details, including First and Last Name, Phone, Gender, Email, Date of Birth, Address, City, State, Zip Code, and Referee Code.
 Note: A “Referee Code” is a special code given to someone who refers patients to the Med SPA. It helps track referrals and reward partnerships. The referee code field will only be visible for new patients. For detailed instructions on Referee Code, refer to our ‘’Add Referee Code’’ user guide.
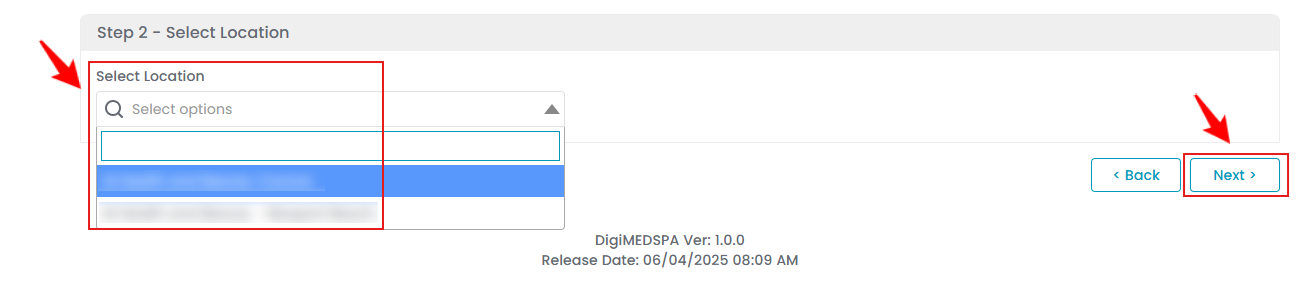
 - In Step 2, select the Location for your booking from the dropdown menu and press ‘’Next’’ to proceed.
- In Step 3, click a service bundle to view its included services, then select the service you want to book from the dropdown. When finished, click “Next” to proceed.
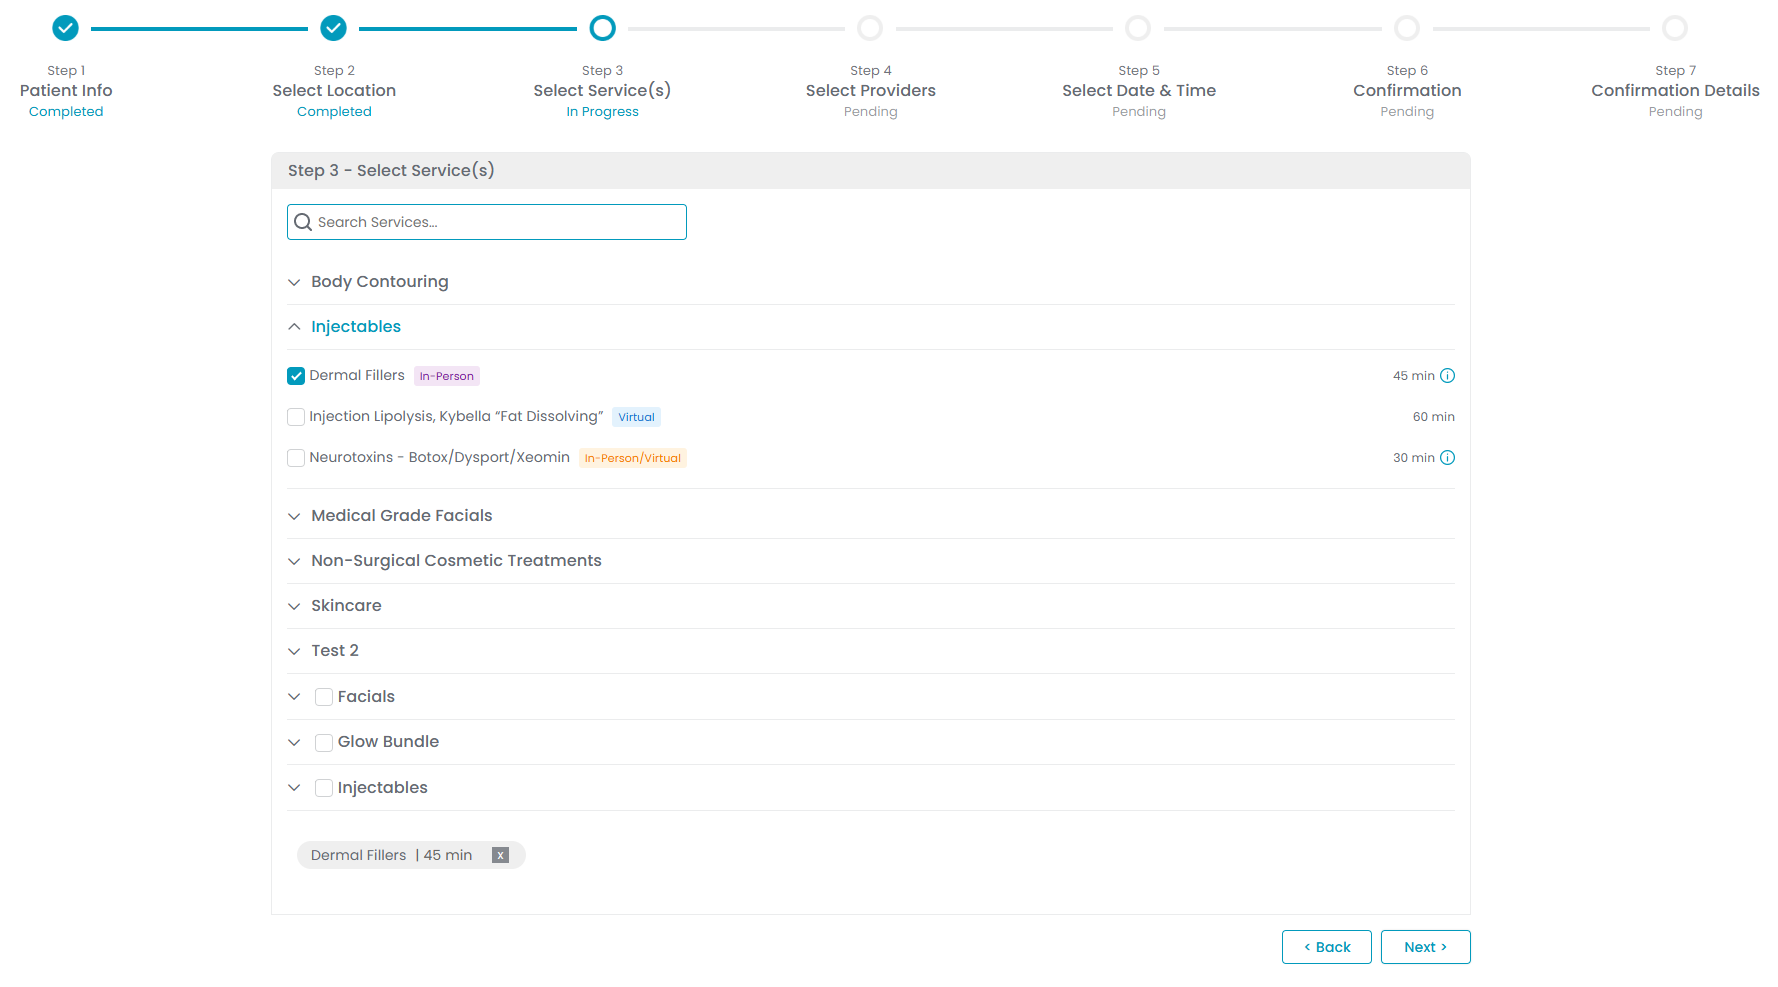 Note: If you select multiple services, a pop-up will ask whether you want a “single booking” (all services in one appointment) or “multiple bookings” (each service in a separate appointment).
 - In Step 4, select the providers for your services by choosing either “Any” provider or a “Specific Provider.” Once selected, press '’Next'’ to proceed.
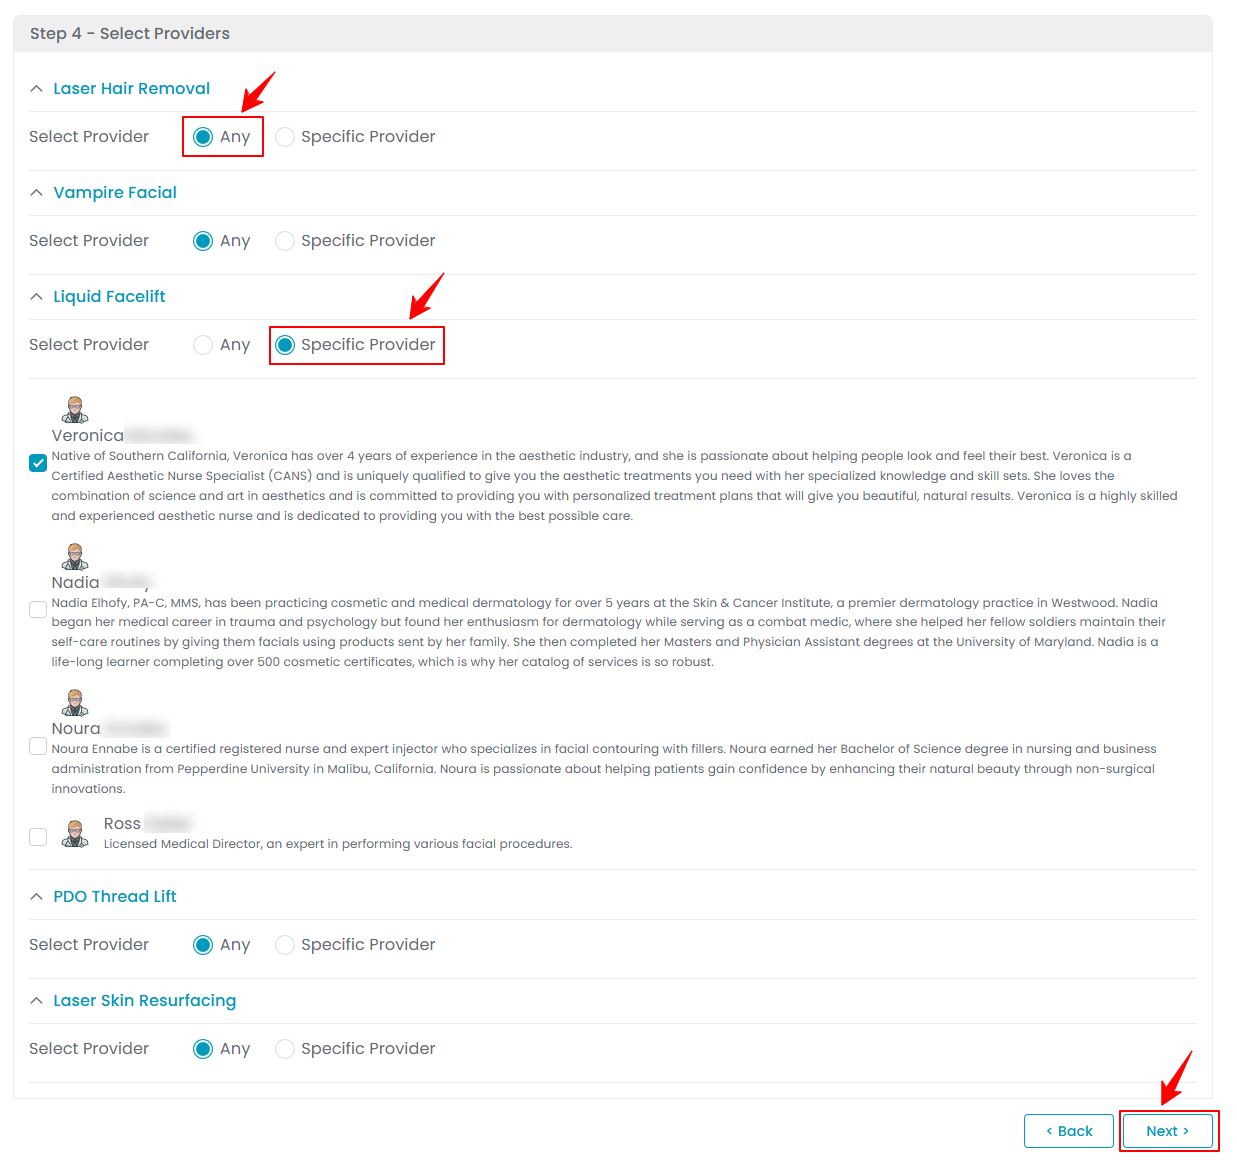 Note: Selecting "Any" provider will assign a randomly available provider for your chosen service and booking time. If you choose "Specific Provider," you can select a particular provider who will attend your session at the scheduled time.
 - In Step 5, select the Date from the calendar for your booking. Then select the specific time slots for each service. Once selected, press ‘’Confirm’’ to confirm the Date and Time.
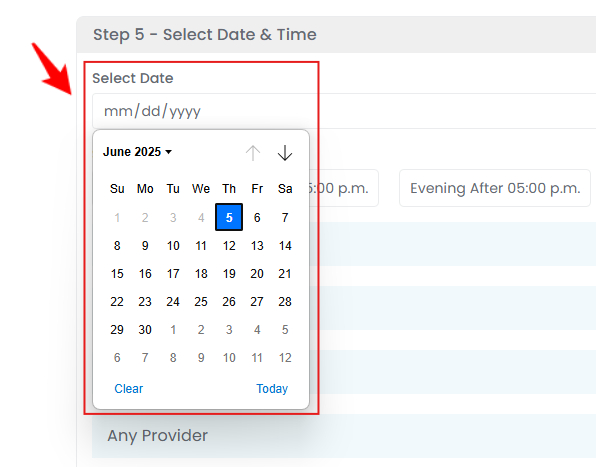 Note: “Time Slots” are specified intervals for scheduling treatments or consultations with providers. They are arranged according to service duration, provider availability, and patient preferences to ensure efficiency.
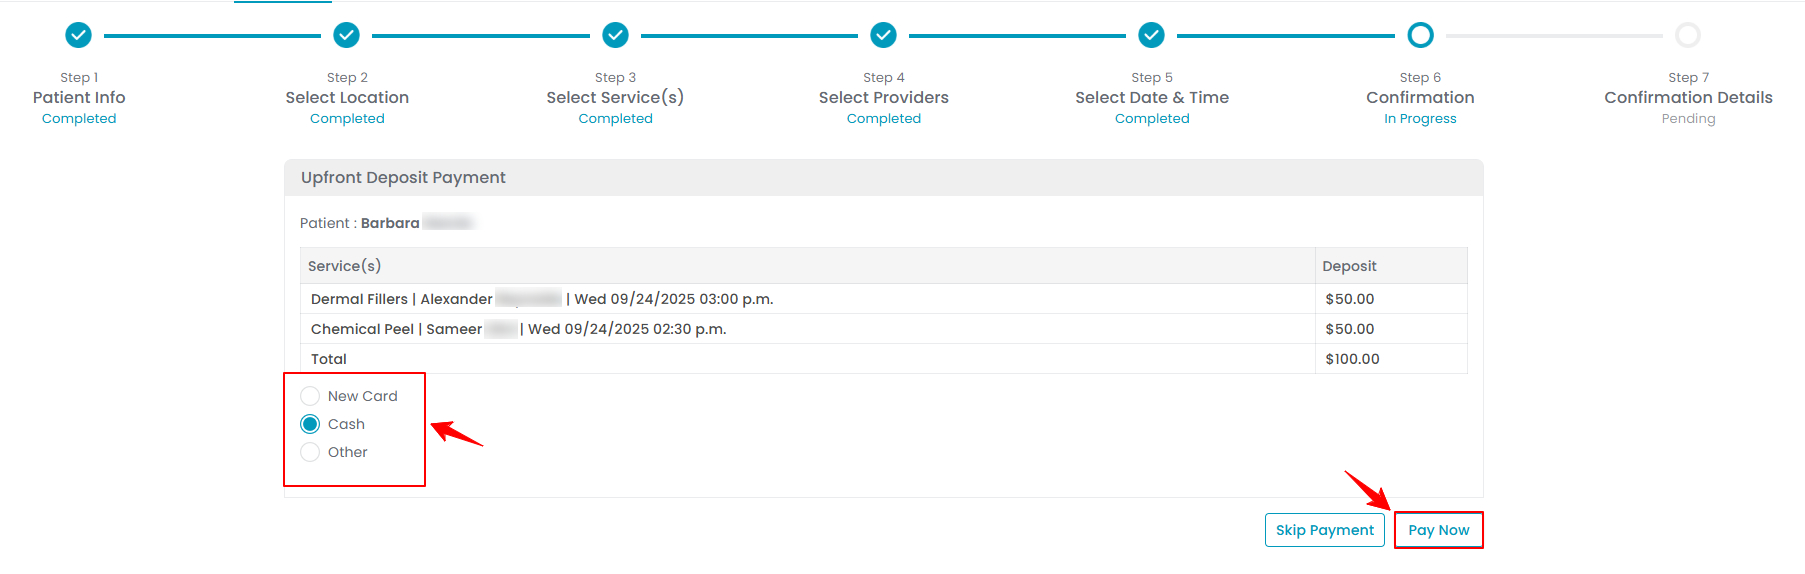
 - In Step 6, if a deposit applies to the selected service, the Upfront Deposit Payment Screen will display the amount. Choose a payment method (Existing Card, New Card, Cash, or Other), fill in the required details, then click “Pay Now” to proceed.
- The Appointment Confirmed Screen will appear, showing the Email Content and SMS Content of the notification. Click "Send Notification" to send the booking confirmation to the patient or "Skip Notification" if you prefer not to send it.
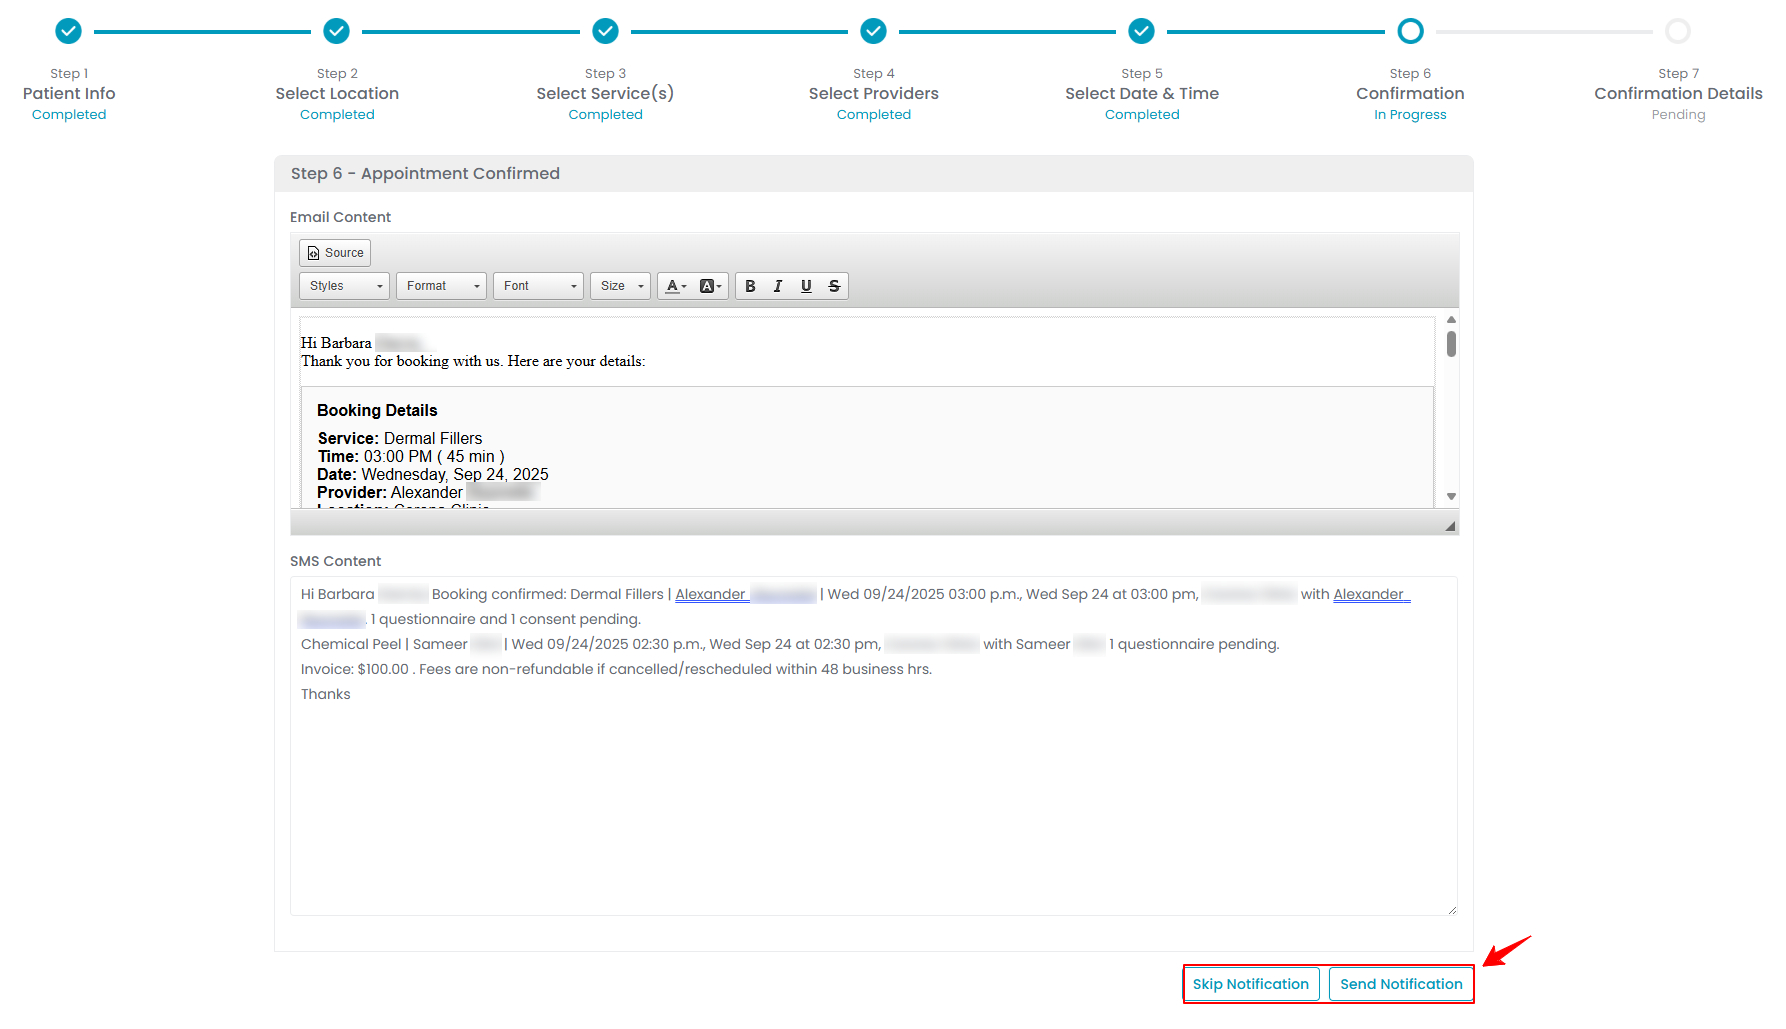 Note: In our portal, consent forms, pre-treatment and post-treatment instructions can only be typed manually or hyperlinked in an email or text.
 - In Step 7, appointment confirmation details will be displayed. Click on ‘’Go to EMR Board’’ to return to the EMR Board.
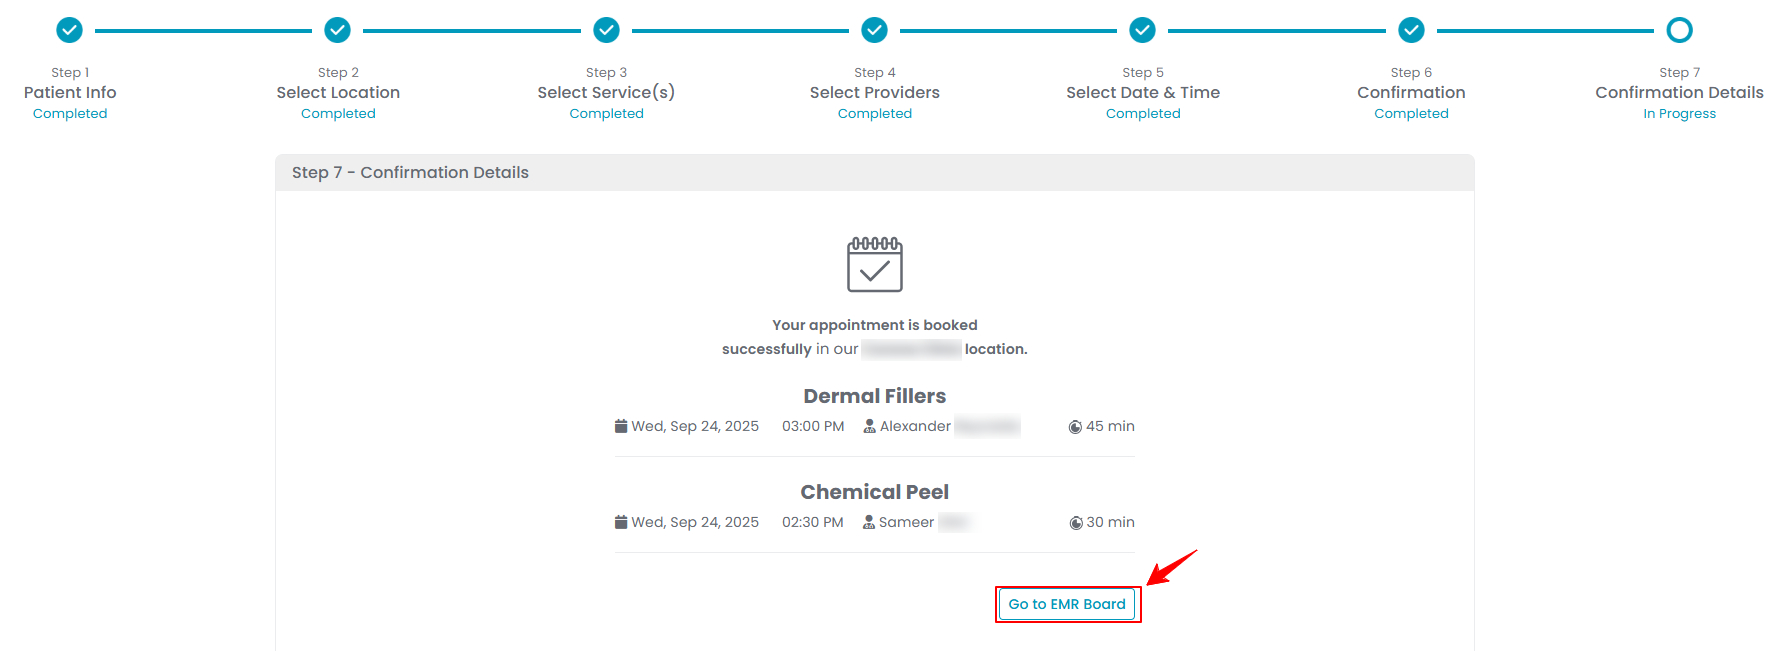
- When you return to the EMR Board, you will see that the booking has been successfully scheduled.
The Advance Booking has been successfully created! - In our portal, patients can be marked as Confirmed, Waitlist, No Show, or Cancelled directly from the EMR Board.
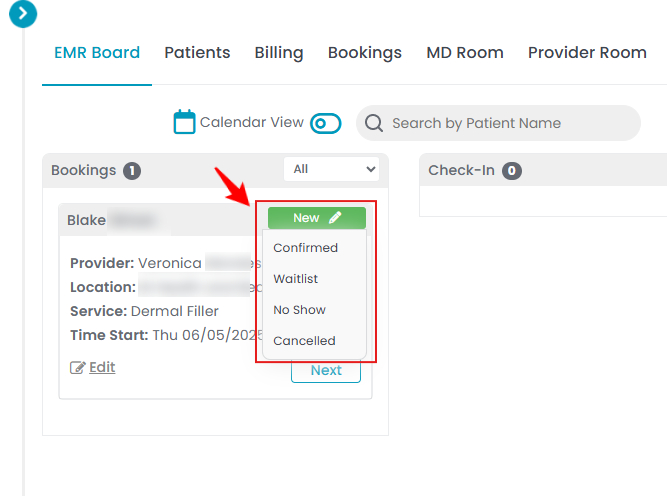 Note: A “Confirmed” status means the patient has acknowledged and verified their appointment, ensuring it will proceed as planned. “Waitlist” indicates the patient is waiting for an available time slot when their preferred time is unavailable. “No Show” means the patient did not arrive for the scheduled appointment without prior cancellation or rescheduling. “Cancelled” signifies that the patient canceled the appointment before the scheduled time.