Add / Edit / Delete Employees Timelog
This user guide provides step-by-step instructions on how to add and edit employee time logs in the DigiMEDSPA Portal.
Understanding Terminologies
Employee Time Log
An employee time log is a record that tracks the hours an employee works, including clock-in and clock-out times, breaks, and lunch periods. The employee time log is essential for managing payroll, monitoring employee attendance, and ensuring compliance with labor laws and company policies. It provides a detailed, accurate record of each employee's working hours.
Add Employee Timelog
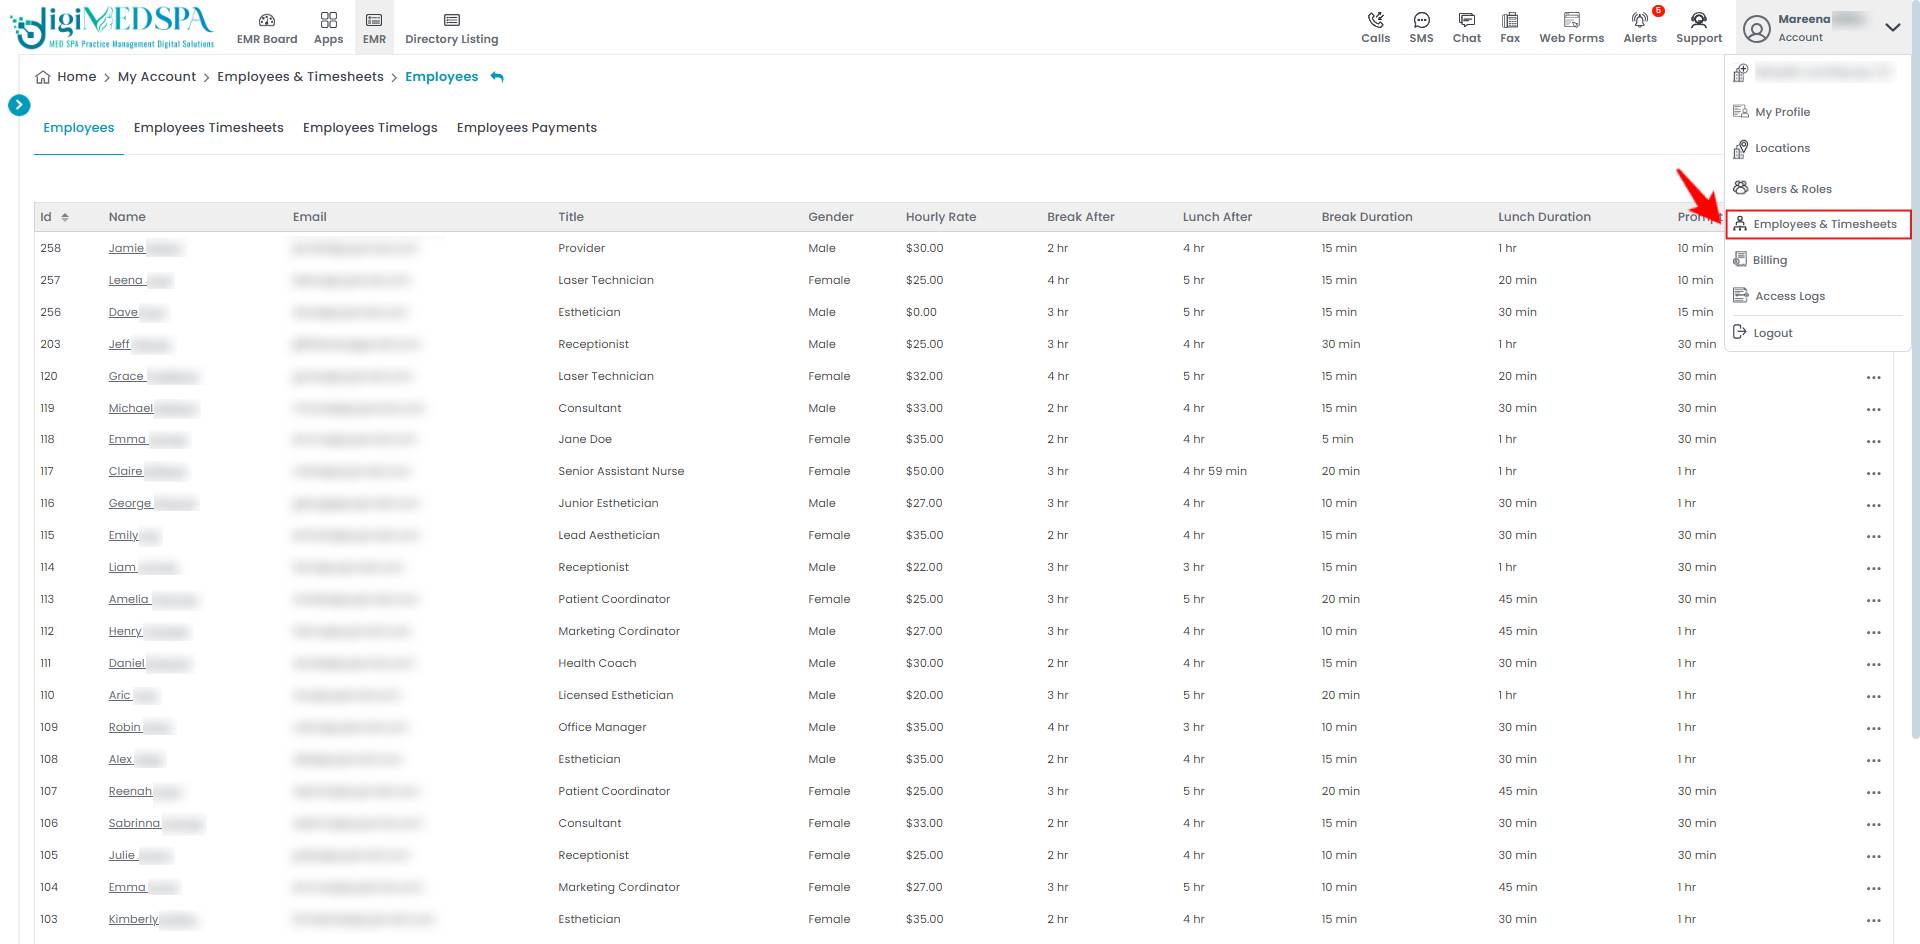
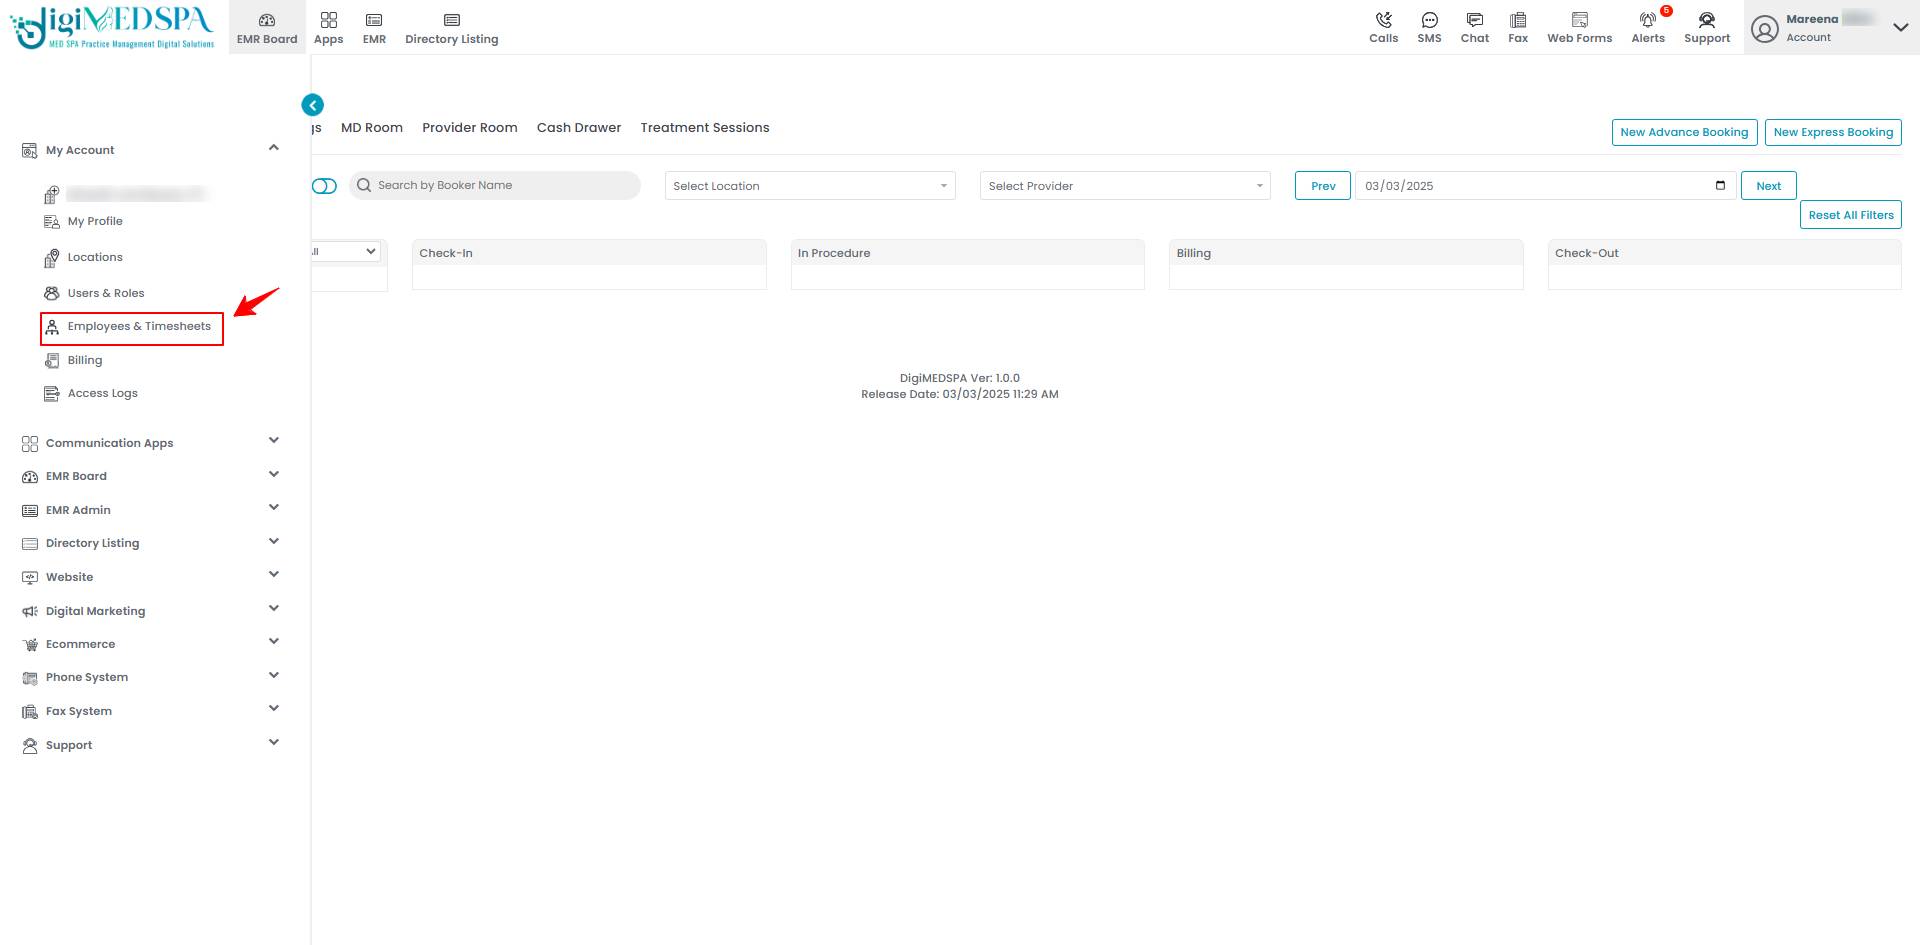
- The user can add employee time log by accessing the “Employees & Timesheets” App from two entry points.
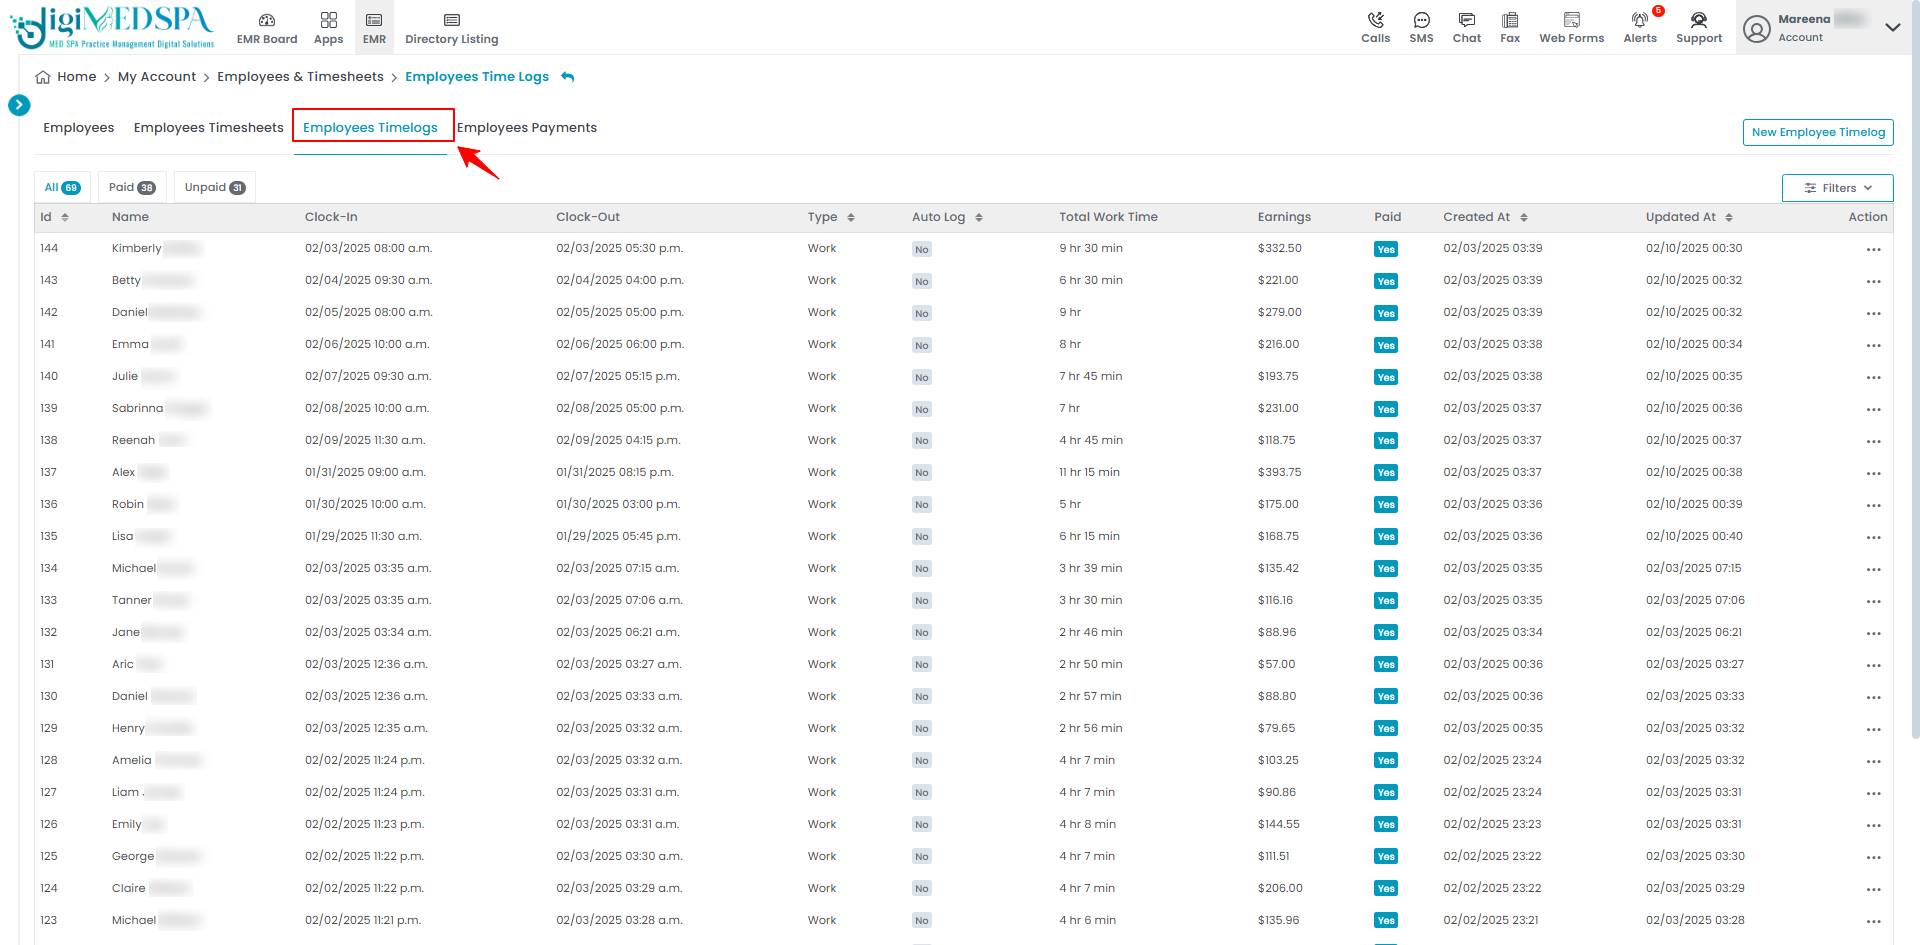
- To access timelogs, click ‘Employees Timelogs’ in the menu bar.

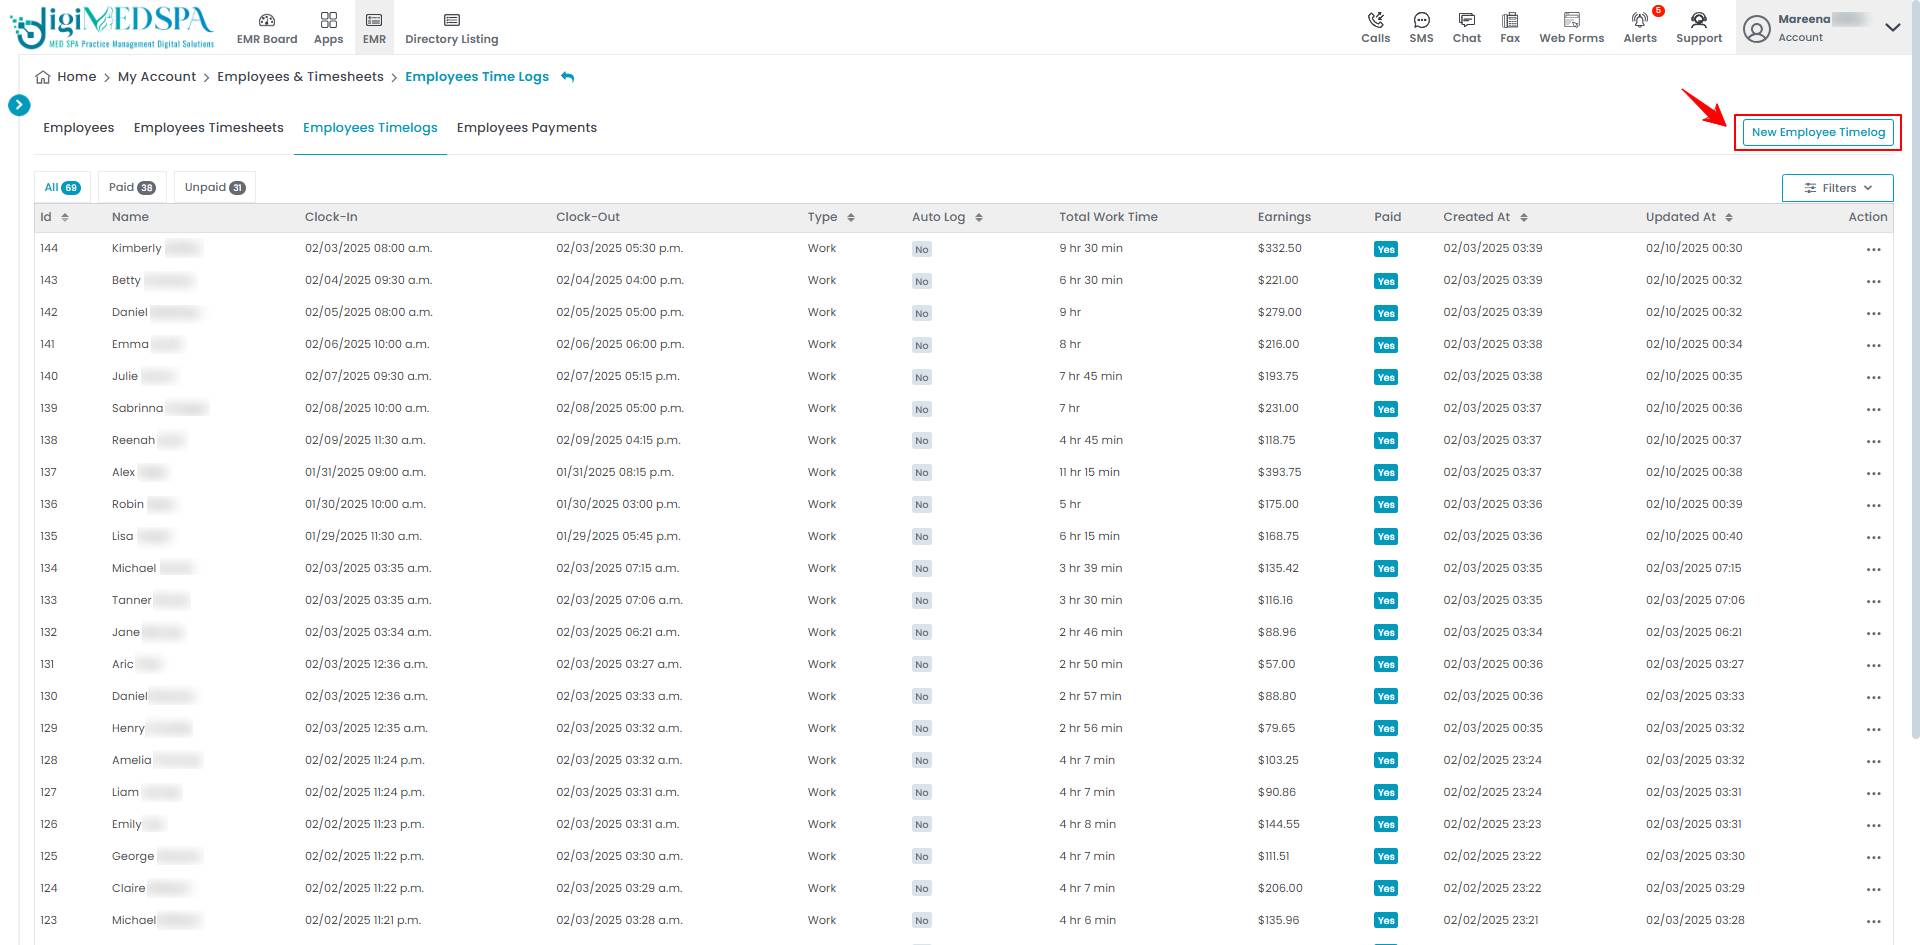
- To add a new employee timelog, click on the “New Employee Timelog‘’ button in the top right corner of the screen.

- Select the “Employee” from the dropdown menu.

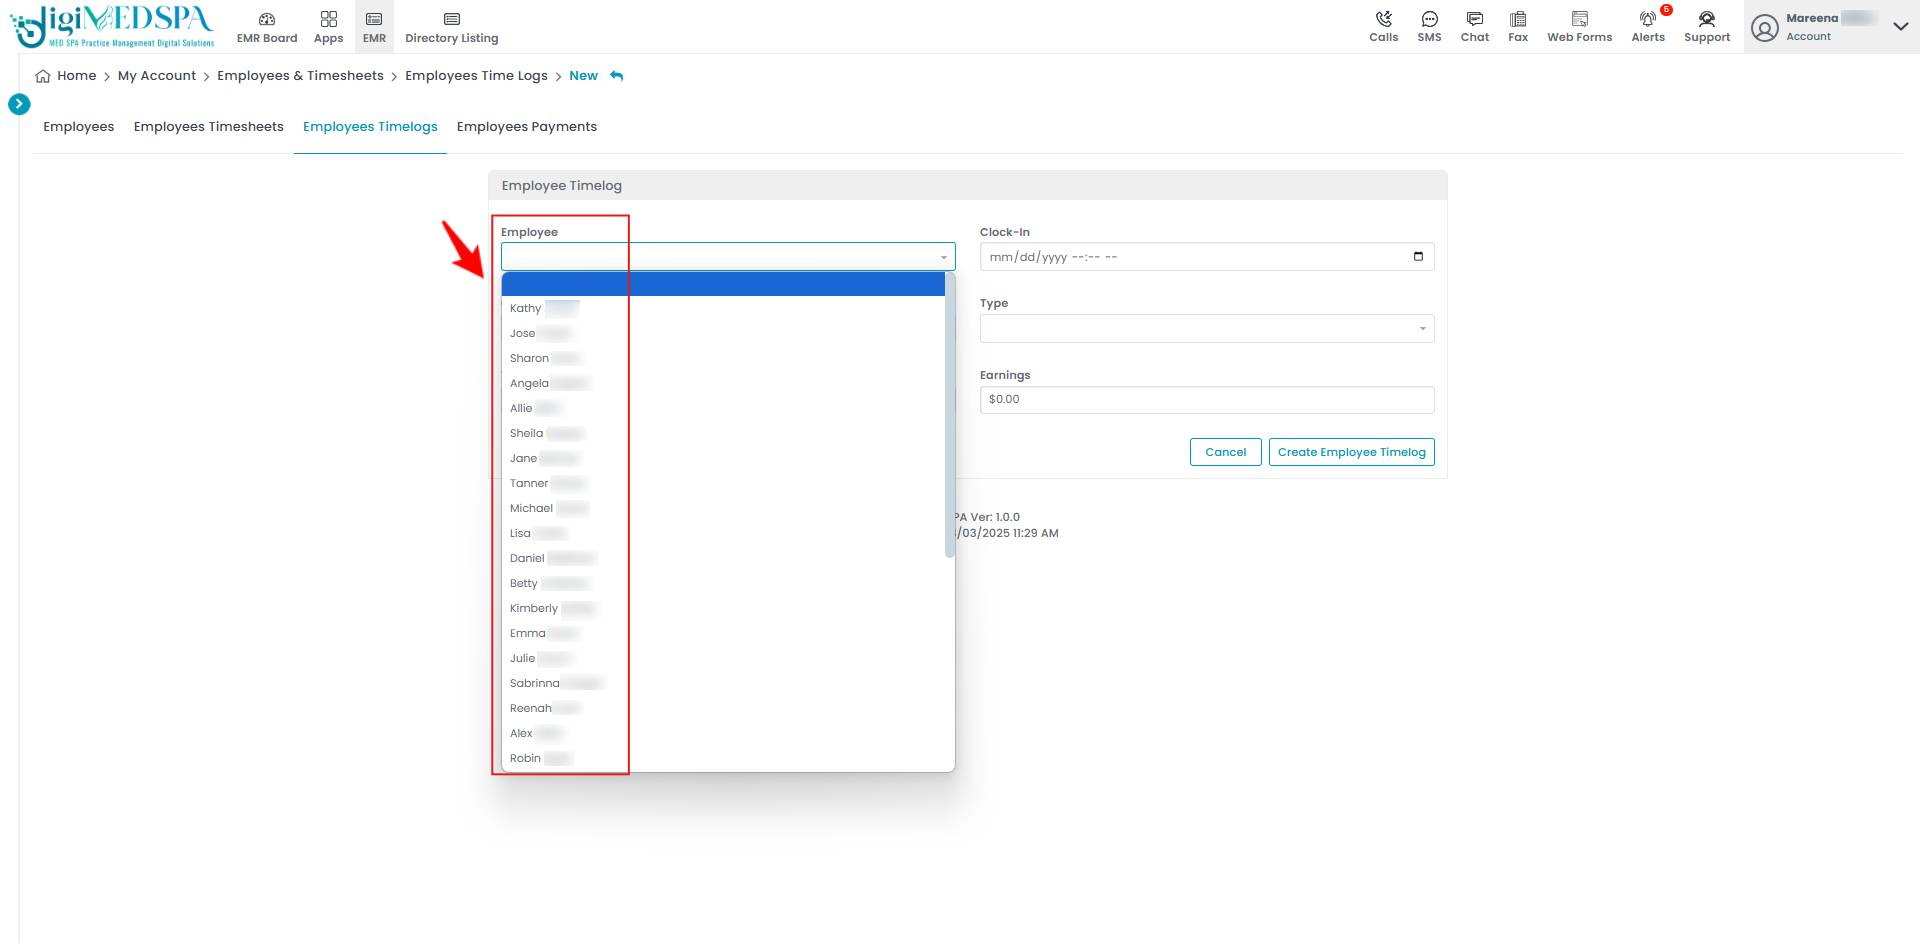 Note: The dropdown displays all the employees currently listed in the employee list.
 - Enter the “Clock In” and “Clock Out” dates and times for the selected employee.

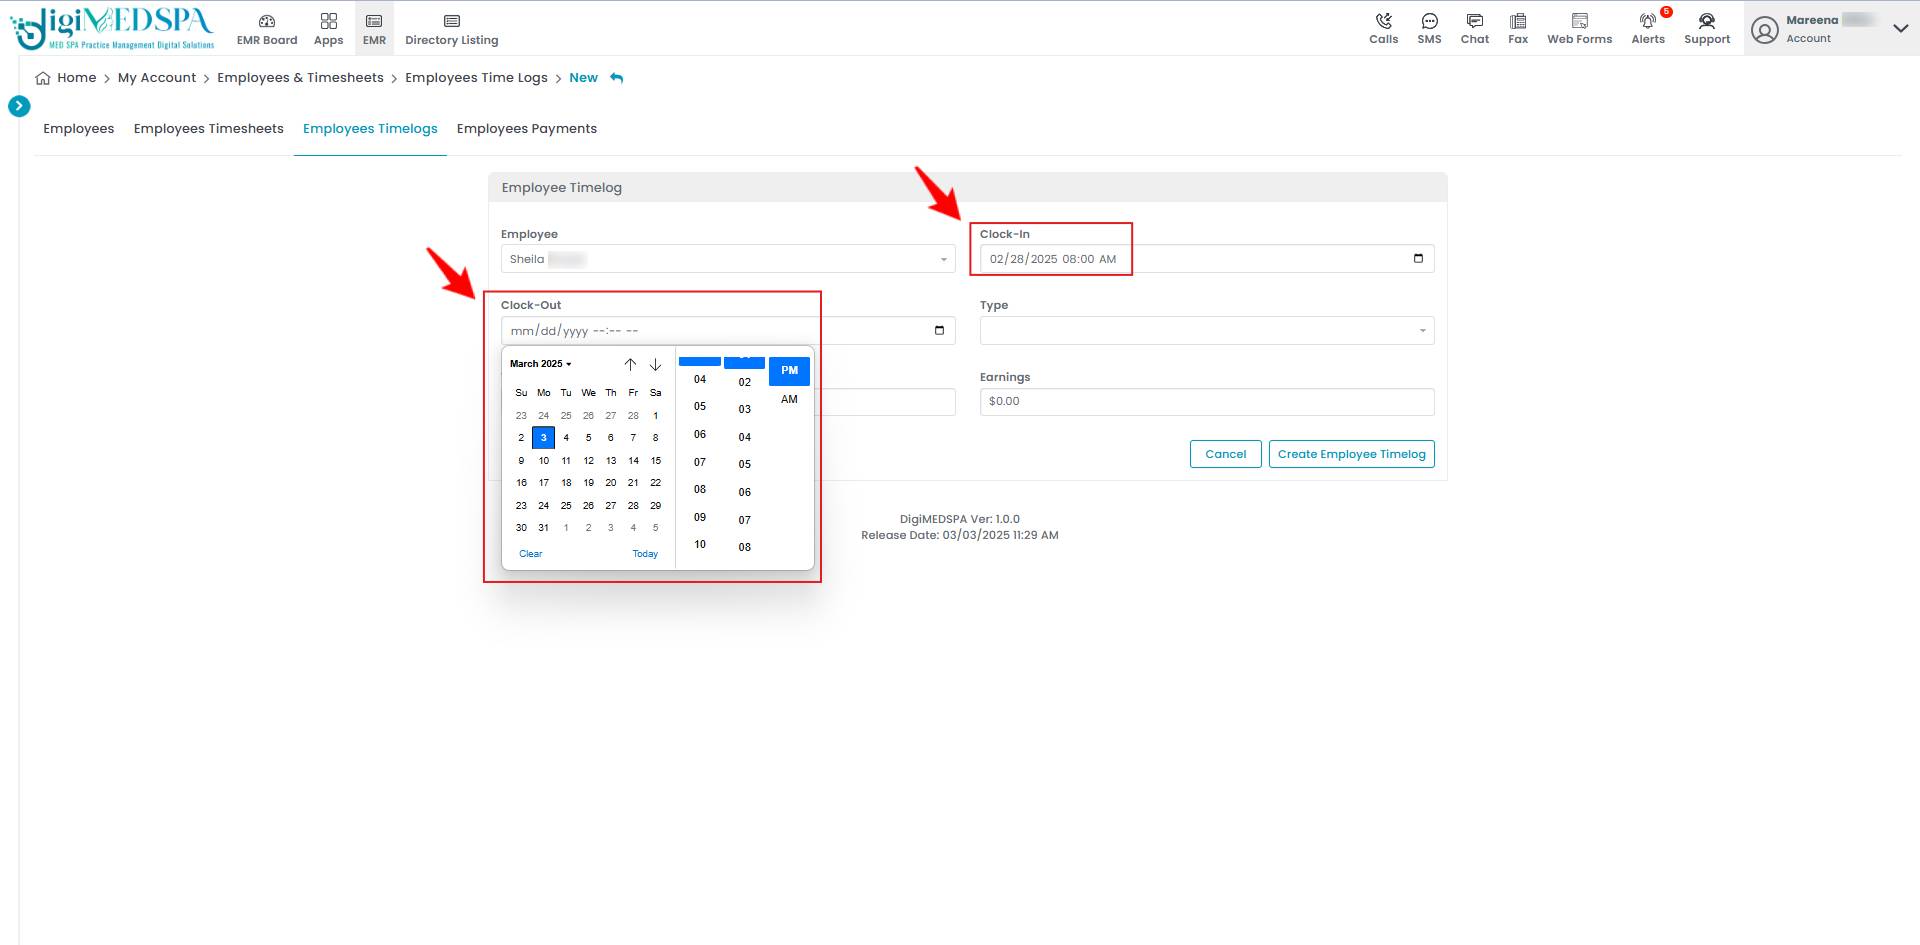 Note: ‘Clock-In’ field records the start time of an employee’s work shift, while ‘Clock-Out’ field records the end time of an employee’s work shift.
 - Choose the “Type” from the dropdown menu, which includes the following options: Break, Work, Opt-out Break, Lunch, and Opt-out Lunch.

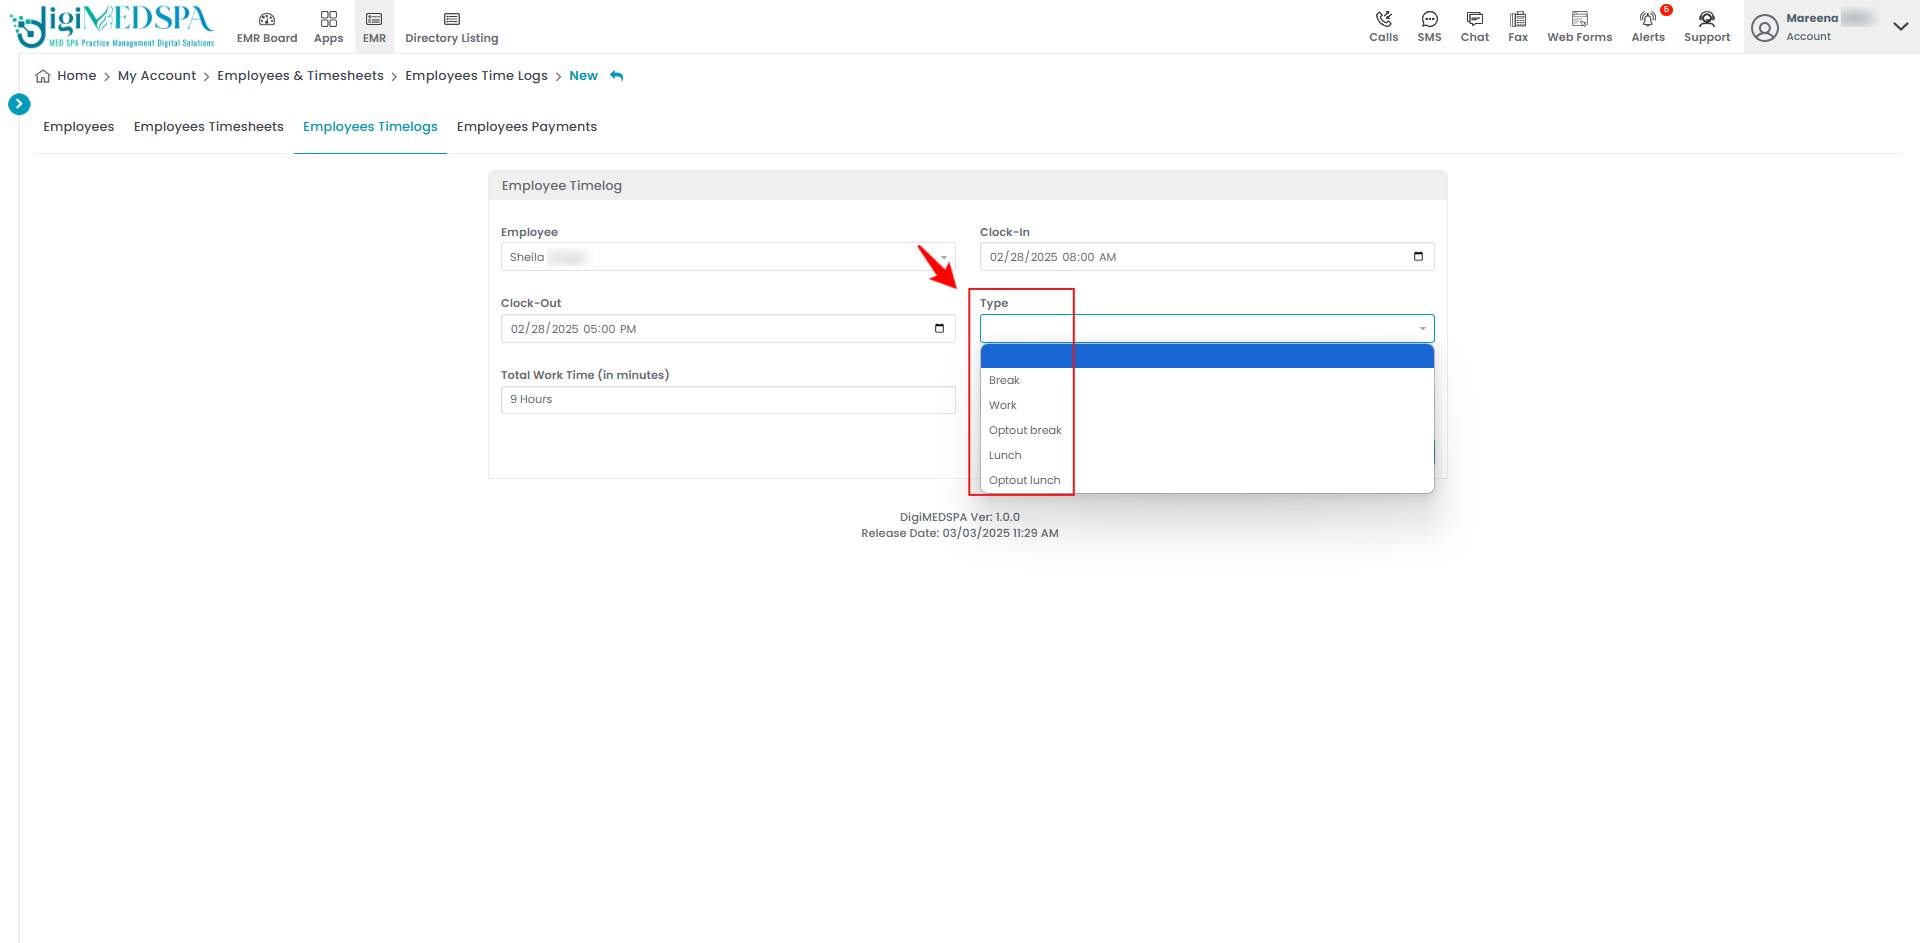 Note: “Break” refers to a scheduled short pause in the employee’s workday, typically for rest or refreshment, separate from lunch. “Work” refers to the actual working hours when the employee is actively performing their duties. “Lunch” logs the designated time for the employee’s meal break, usually longer than a standard break. “Opt-out Break” and “Opt out Lunch” indicate that the employee has chosen not to take their scheduled break or lunch.
 - Enter the “Hours Worked” and “Earnings” for the employee in the timelog. After filling in the required information, click “Create Employee Timelog”.

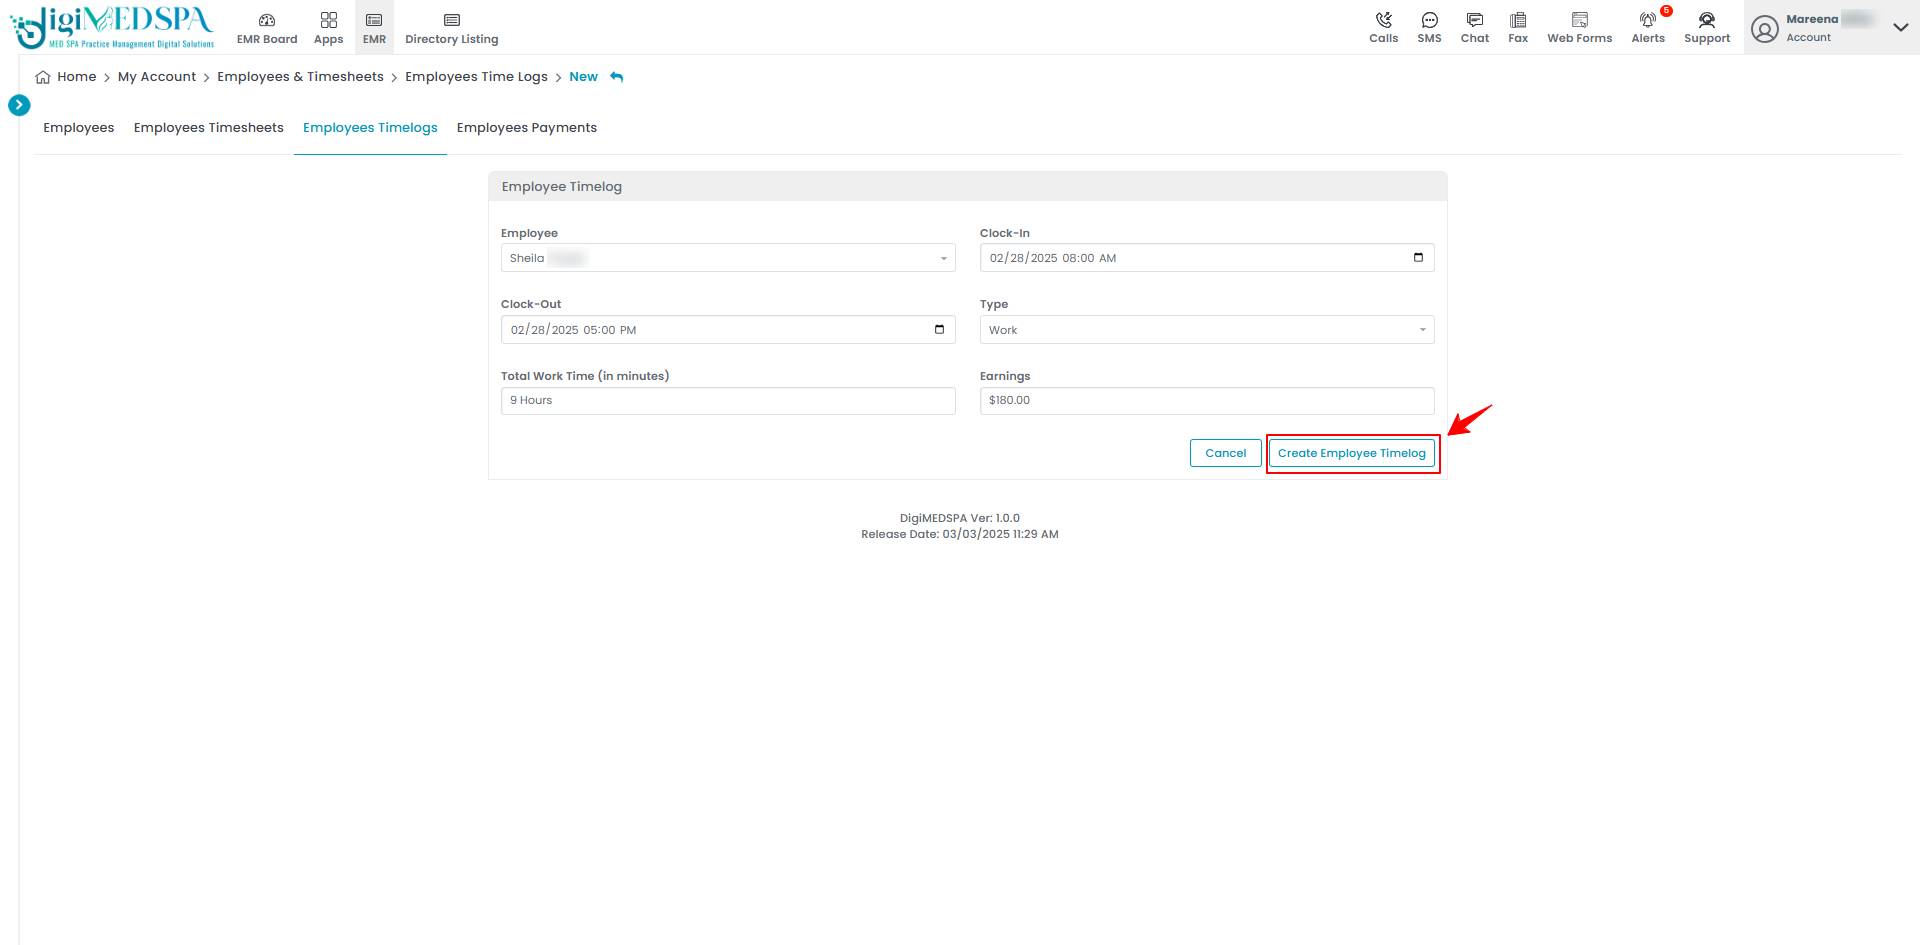 The Employee Time Log has been added successfully! Note: “Hours Worked” and “Earnings” fields in the employee timelog are important to accurately track the amount of time an employee has spent working and calculate their corresponding compensation. By logging these details, the system ensures that employees are paid correctly based on their hours worked.
Edit Employee Timelog
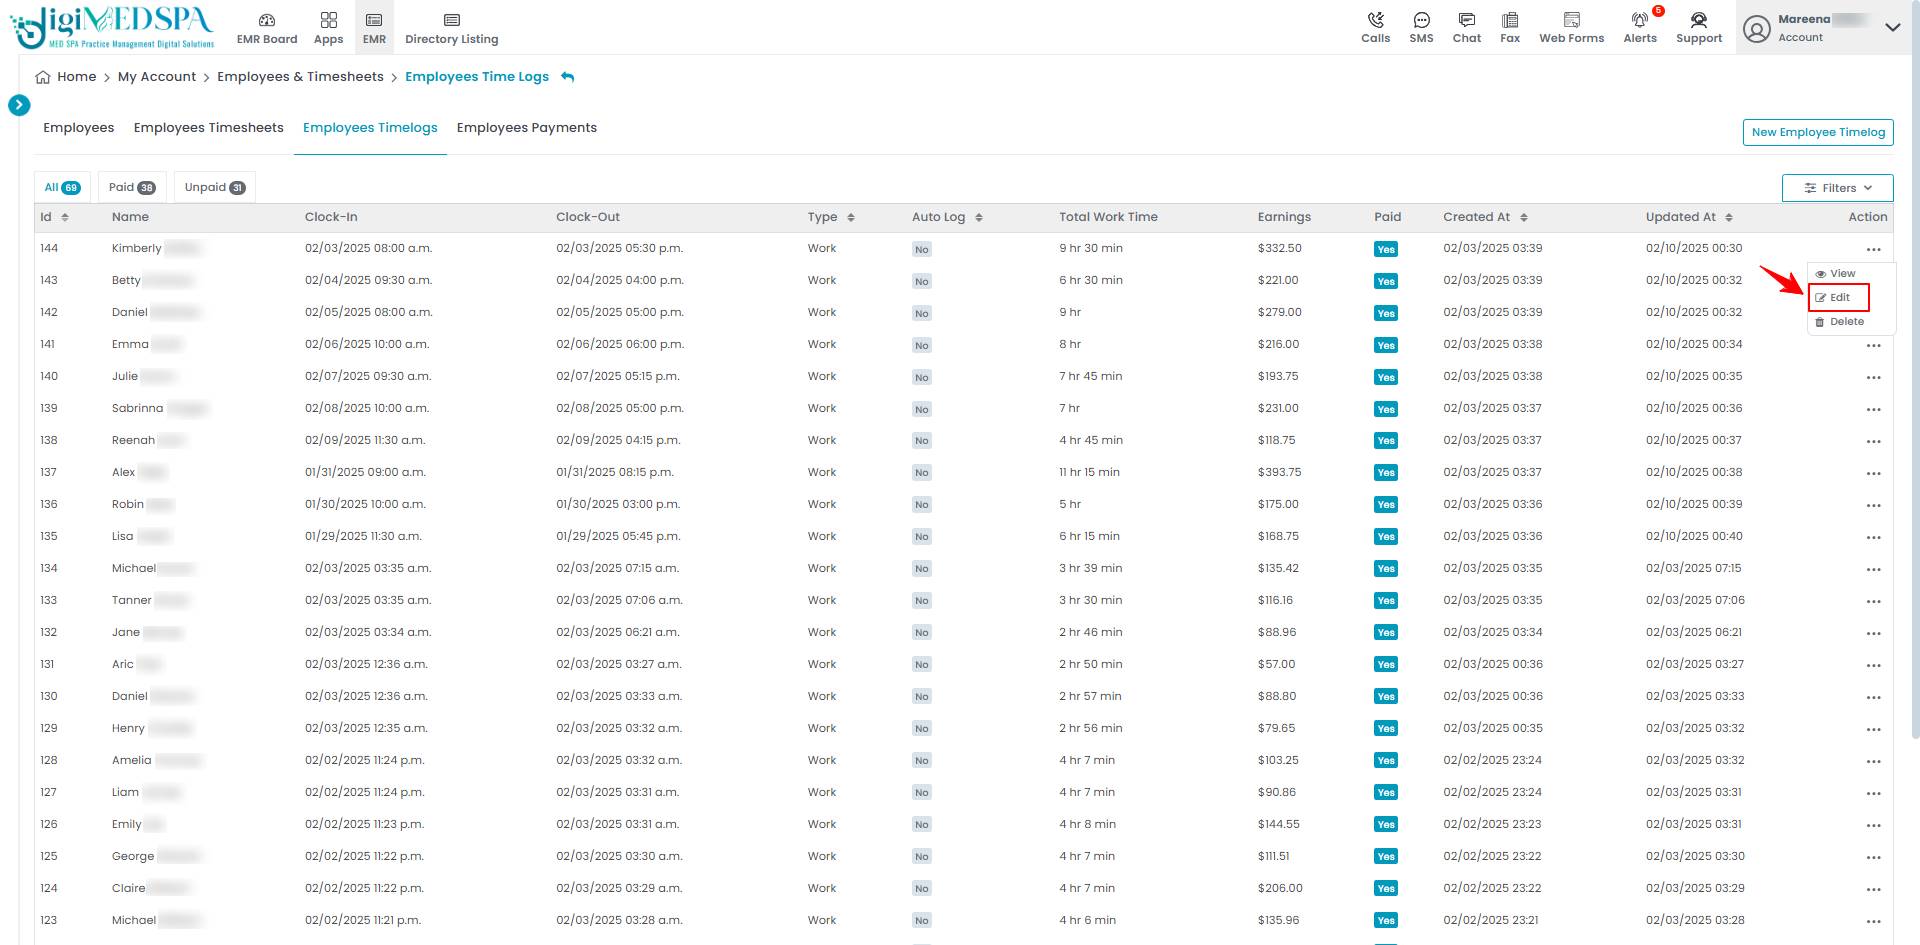
- From the employee timelog list, click on three dots under the action column and select "Edit" for the specific employee timelog.

- Edit the information you would like to change and click “Update Employee Timelog.”

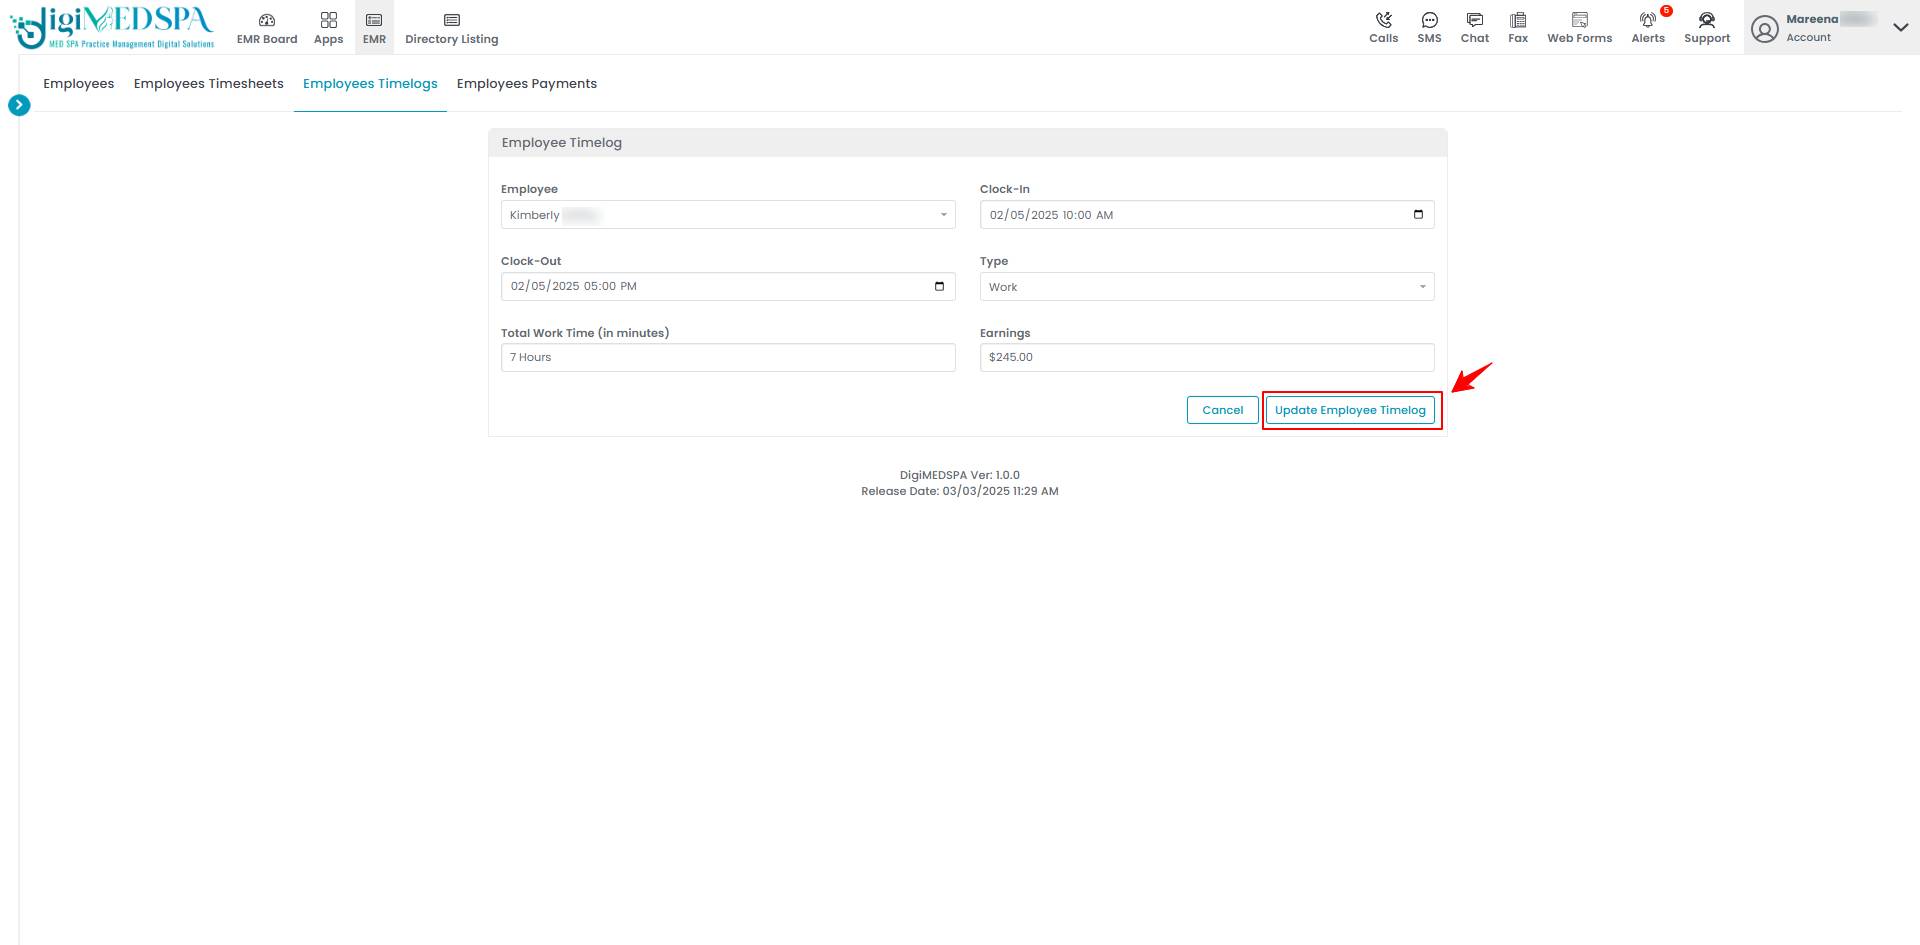 The Employee Timelog has been edited successfully!
Delete Employee Timelog
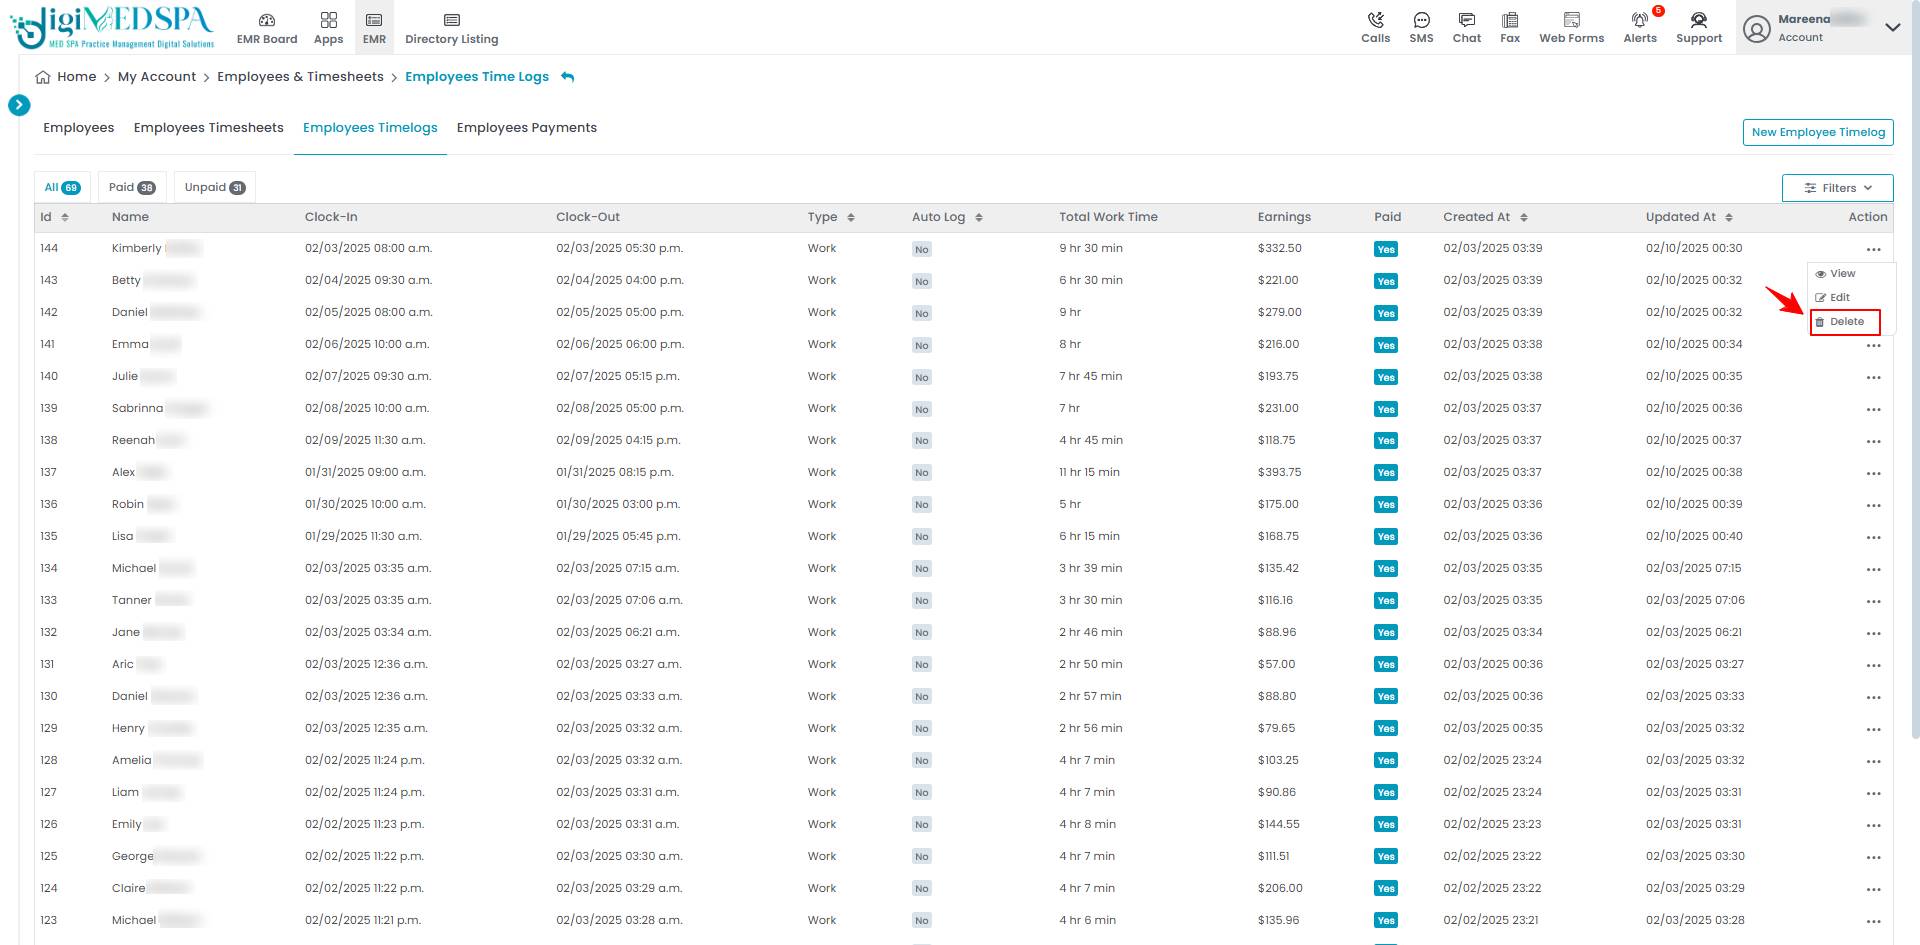
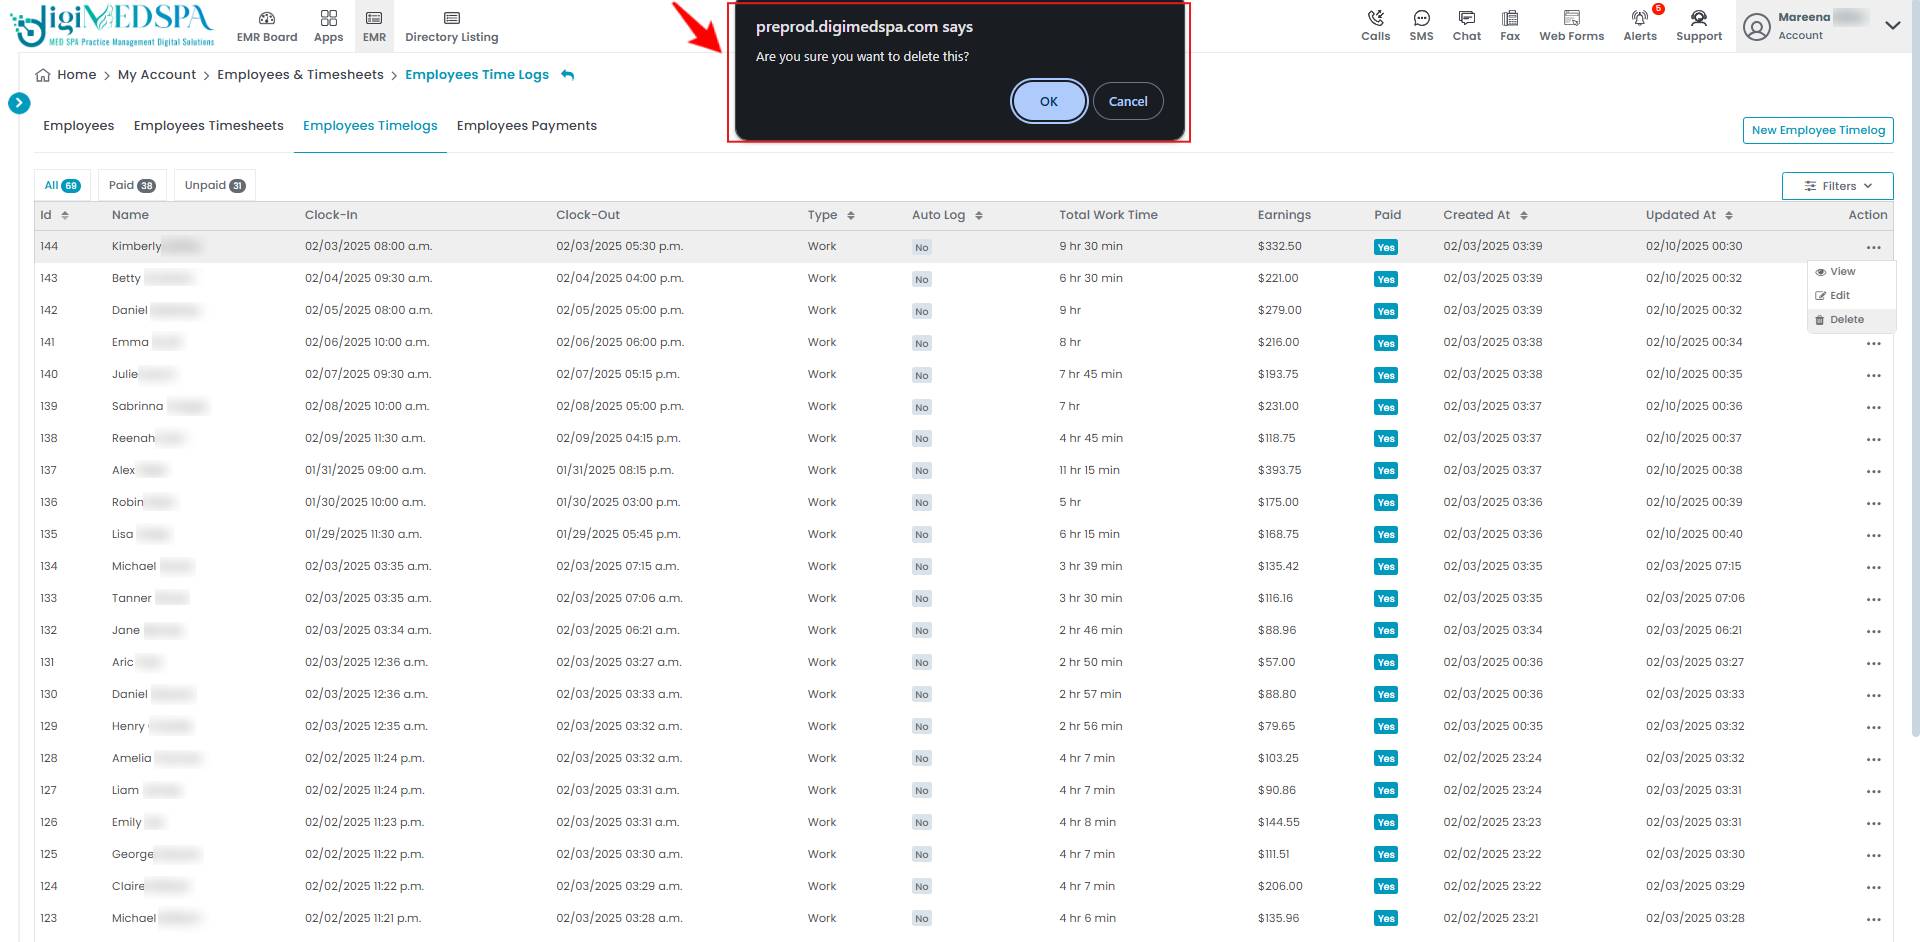
- From the employee timelog list, click on three dots under the action column and select "Delete" for the specific employee timelog.

 Note: Employee Timelog can also be deleted by clicking the "Delete Employee Timelog" button in the top right corner of the View Employee Timelog Page.
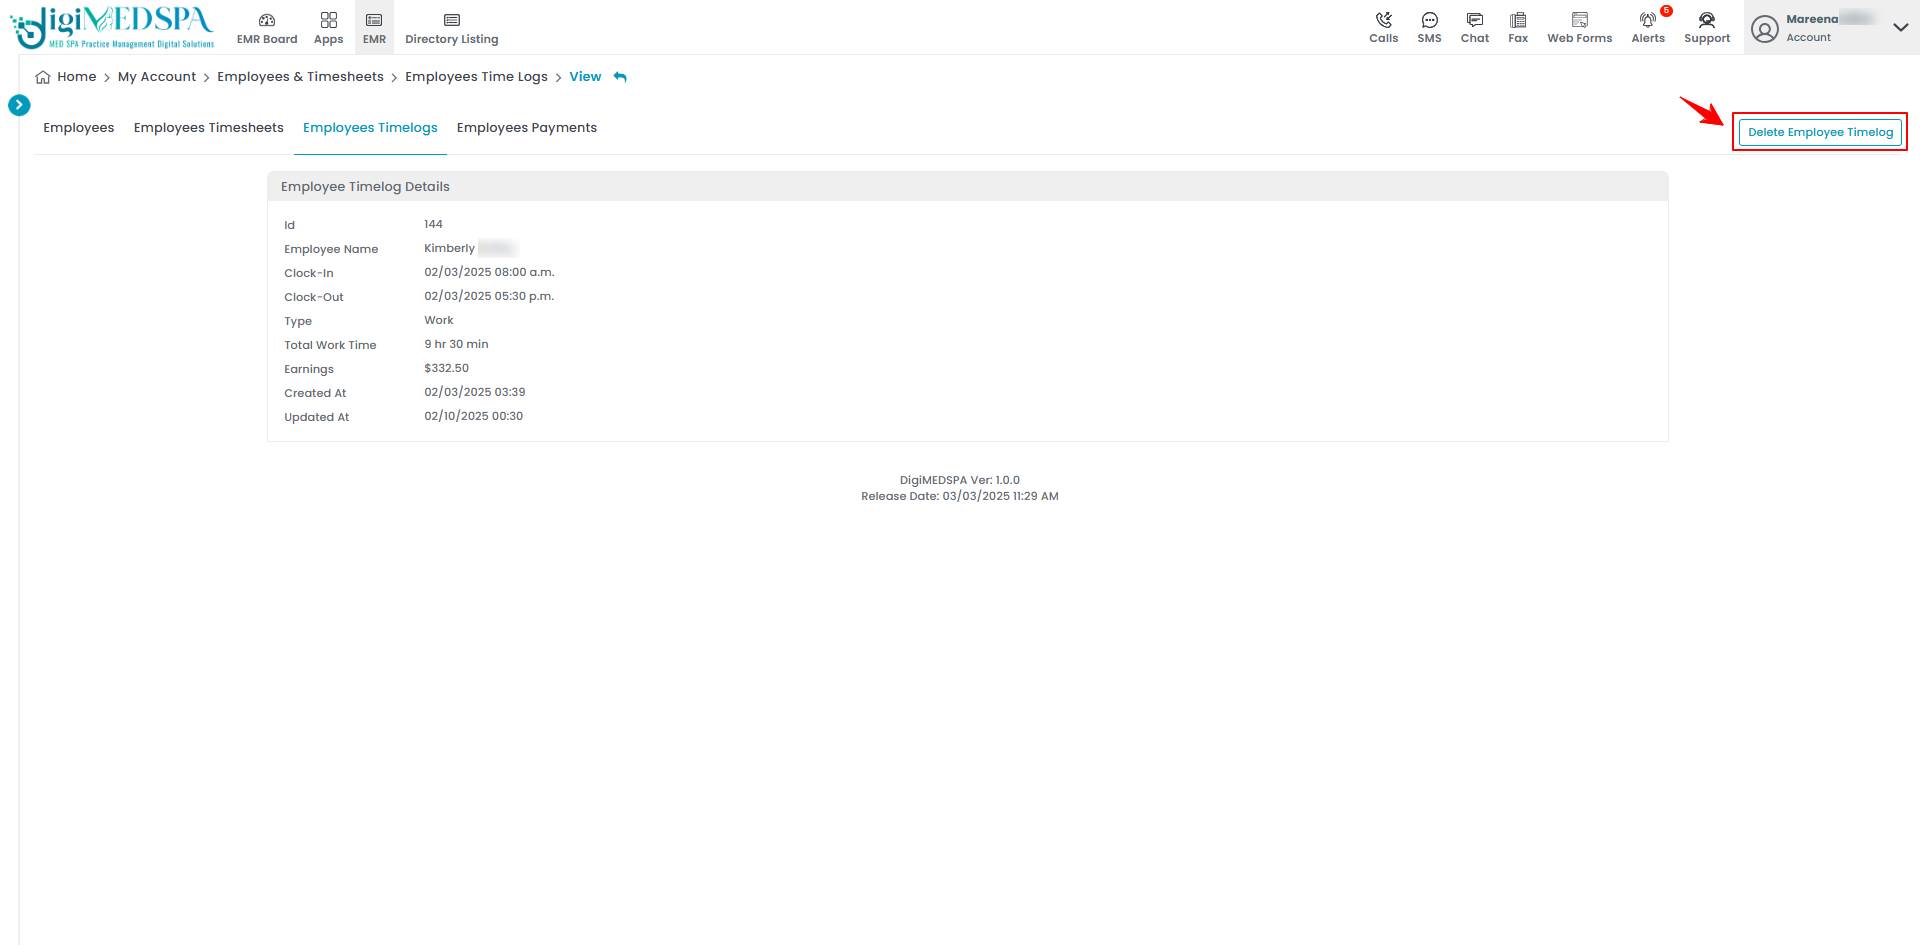
- The "Delete Employee Timelog" option allows users to remove an employee's recorded work hours permanently. When clicked, a confirmation message will appear to ensure you want to proceed. Once confirmed, the timelog entry will be erased and cannot be recovered without a backup or undo feature.

 Note: If the patient has not checked in, they can log in to their patient portal and sign the consent form for cosmetic procedure independently.


