

 DigiMEDSPA EMR
 DigiMEDSPA CONNECT ™
Manage Provider Schedule
This user guide offers clear, step-by-step instructions for efficiently adding and editing provider schedules, and adding provider’s availability details within the DigiMEDSPA Portal. By following these guidelines, the user can ensure timely management of provider availability, helping to prevent scheduling conflicts or periods of unavailability.
Understanding Terminologies
Provider’s Schedule
A provider's schedule is a structured timetable showing when a provider is available for performing procedures, treatments, and consultations. Accurate scheduling ensures smooth clinic operations, preventing overbooking, reducing wait times, and optimizing resources efficiently. This also helps manage the provider's workload, ensuring that each procedure is allocated the appropriate amount of time.
Access this link: https://digimedspa.com/ap2/providers
Add Schedule for a New Provider
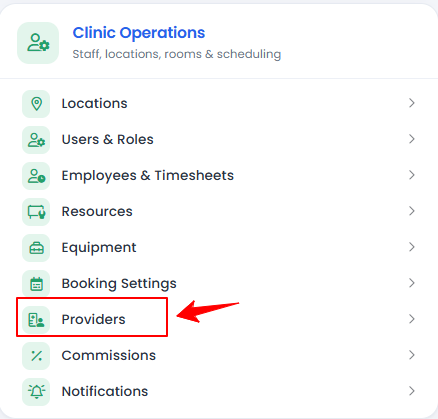
- Provider’s schedule can be added through the Providers List Screen. From the “Admin” dashboard, click on “Providers” under “Clinic Operations,” or search providers in the top search bar.

- To add a new provider, click the ‘’New Provider’’ button in the top right corner of the screen.
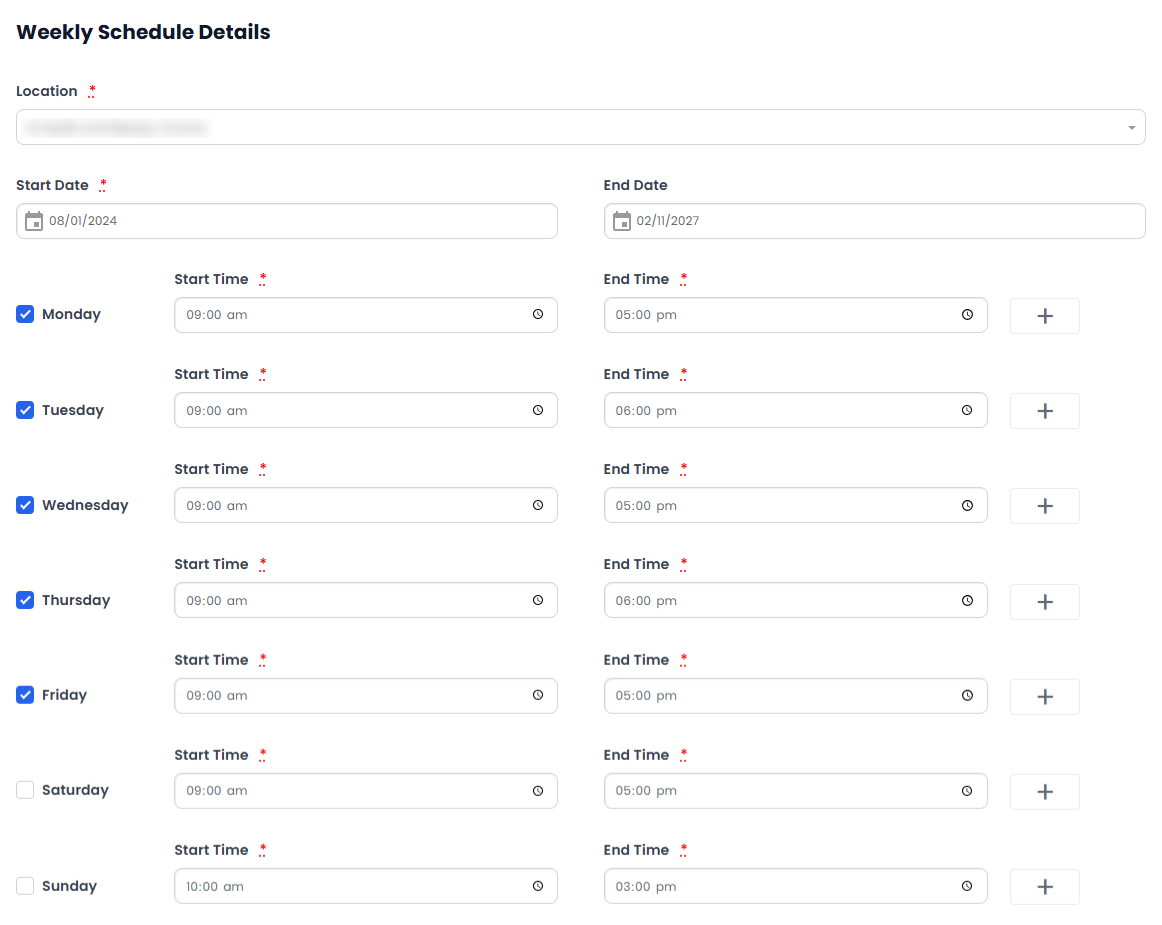
- After completing Step 1 of adding a provider, proceed to Step 2, where the user can set up the provider's schedule. This step includes two sections: Weekly Schedule Details, and Day Schedule Details.
- First, enter the provider’s weekly schedule details for the locations selected in Step 1. Specify the '’Start Date'’ and '’End Date'’ to define the time period this schedule will cover. All weekdays will be displayed, each with fields for '’Start Time'’ and ‘'End Time.'’ Select the days the provider will be available, and enter the start and end times for each day individually.
 Note: For detailed instructions on adding a new provider, refer to our ‘’Add/ View / Edit Provider’’ user guide.
 - If the provider is available in intervals on the same day, you can click the plus sign to add multiple “Start Time” and “End Time” for that day.

- To add a schedule for a specific day that differs from the provider's regular weekly schedule, such as working on holidays or an exceptional day, click on "Add Another Day Schedule."

- From the dropdown menu, select the clinic “Location”. Then, choose the specific “Date” for the day schedule and enter the “Start Time” and “End Time” based on the provider's available hours.Note: Clicking the "Remove" button will delete the selected Day Schedule Details permanently.
The provider's schedule has been successfully added!
- First, enter the provider’s weekly schedule details for the locations selected in Step 1. Specify the '’Start Date'’ and '’End Date'’ to define the time period this schedule will cover. All weekdays will be displayed, each with fields for '’Start Time'’ and ‘'End Time.'’ Select the days the provider will be available, and enter the start and end times for each day individually.
Manage Schedule for an Existing Provider
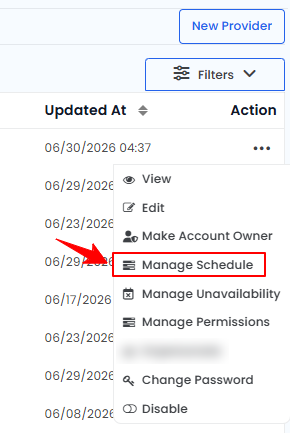
- There are three ways to edit an existing provider’s schedule:
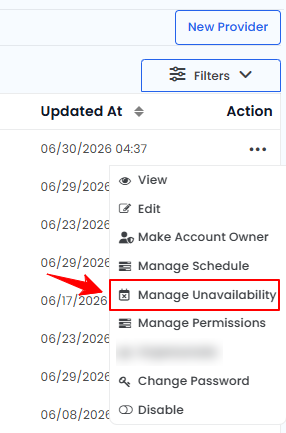
- From the provider list, click on three dots under the action column and select "Manage Schedule" for the specific provider. The provider's schedule will open in edit mode, make the required changes and click “Update Schedule” to save.
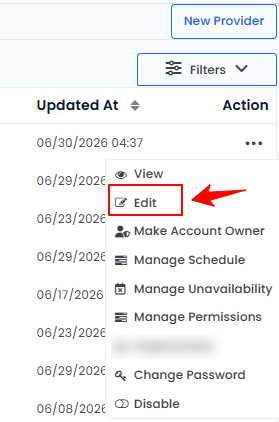
- Alternatively click on "Edit" above “Manage Schedule.” Once the provider's details are opened in edit mode, go to Step 2, which is the schedule section, and make the necessary changes as needed.
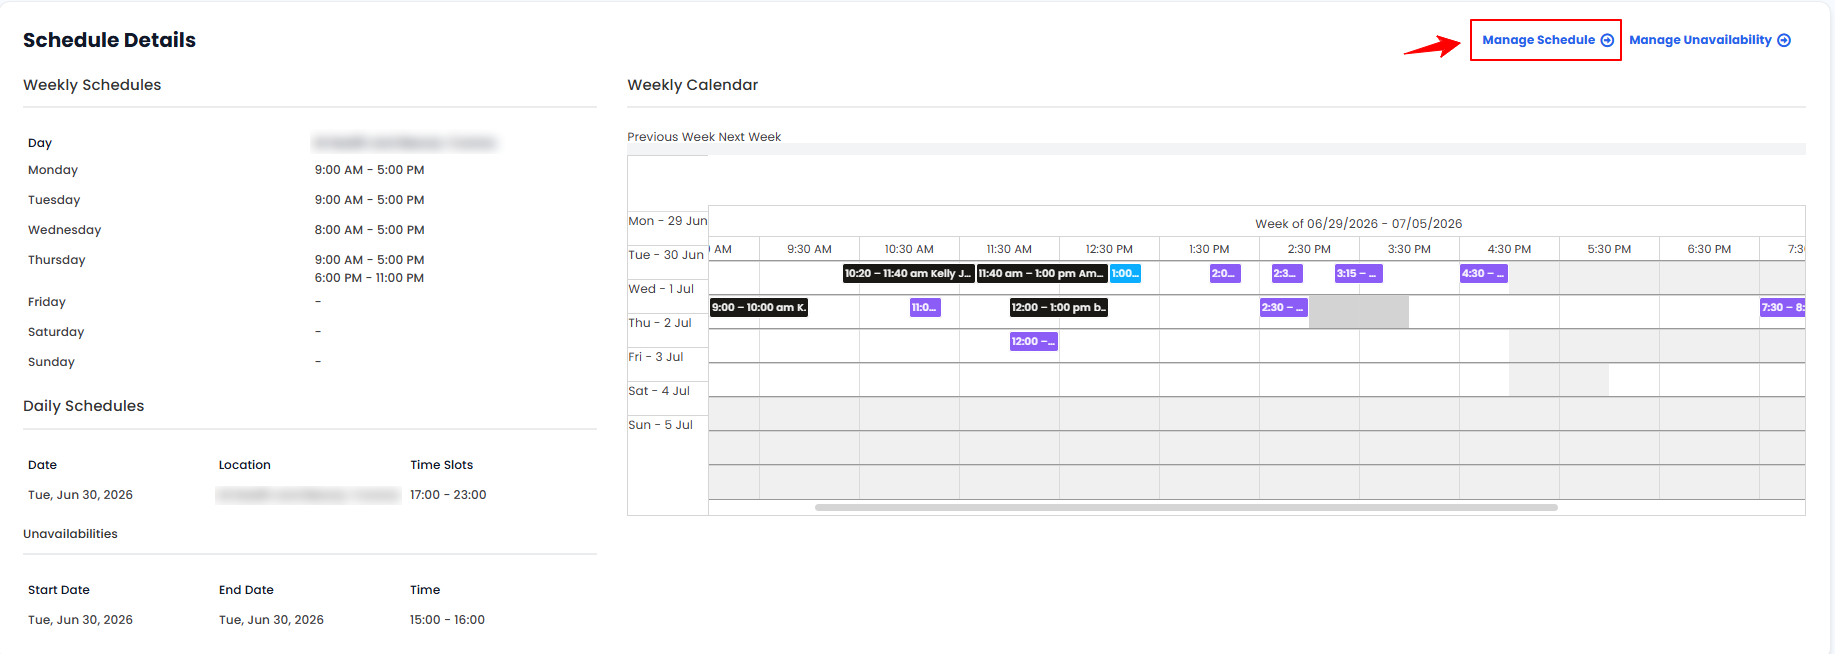
- Another way is through the provider profile. From the provider list, click the three dots under the action column and select “View” (or click directly on the provider’s data). On the Provider Profile View Screen, click “Manage Schedule” in the top-right corner of the Schedule Details section.
The provider’s schedule has been successfully edited!
- From the provider list, click on three dots under the action column and select "Manage Schedule" for the specific provider. The provider's schedule will open in edit mode, make the required changes and click “Update Schedule” to save.
Manage Unavailability for an Existing Provider
- There are two ways to add a period of unavailability for an existing provider.
- From the provider list, click on three dots under the action column and select "Manage Unavailability" for the specific provider.
- Alternatively, click the three dots under the action column and select “View” (or click directly on the provider’s data). On the Provider Profile View Screen, click “Manage Unavailability" in the top-right corner of the Schedule Details section.
- From the provider list, click on three dots under the action column and select "Manage Unavailability" for the specific provider.
- Specify the “Start Date” and “End Date” to define the provider's unavailability period. Then, enter the “Start Time” and “End Time,” and add a note describing the reason for the provider's unavailability.
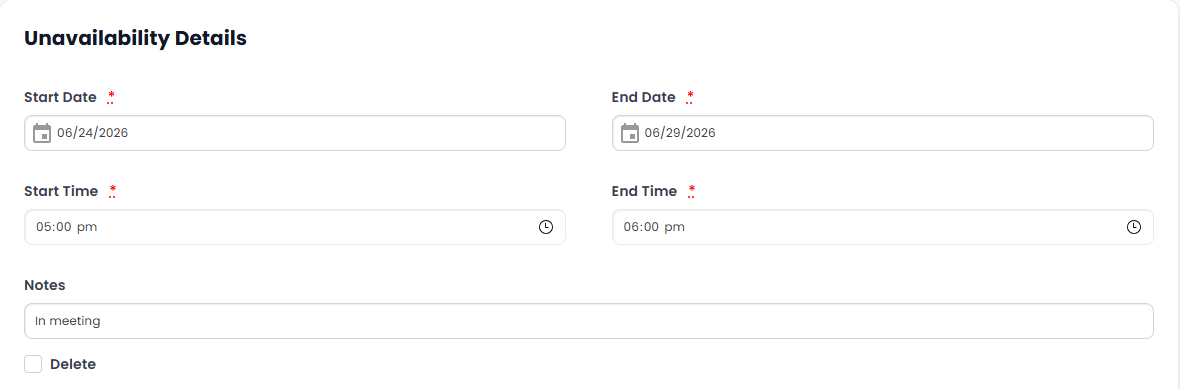 Note: You can remove a previously added unavailability entry by selecting the “Delete” checkbox below the “Notes” field.
 - To add another unavailability period, click “Add Another Unavailability.” Enter the “Start Date,” “End Date,” “Start Time,” and “End Time” for the new period. Once you have entered the required details, click “Update Unavailability” to save the changes.
The provider’s unavailability period has been successfully added!
Manage Provider’s Schedule Through the Calendar
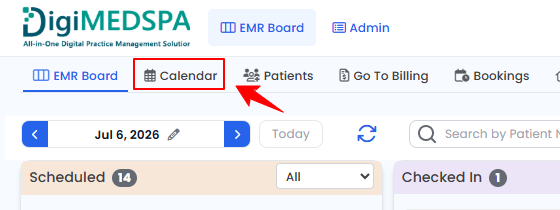
- From the EMR Board Tabs, click “Calendar” to switch to a calendar format.
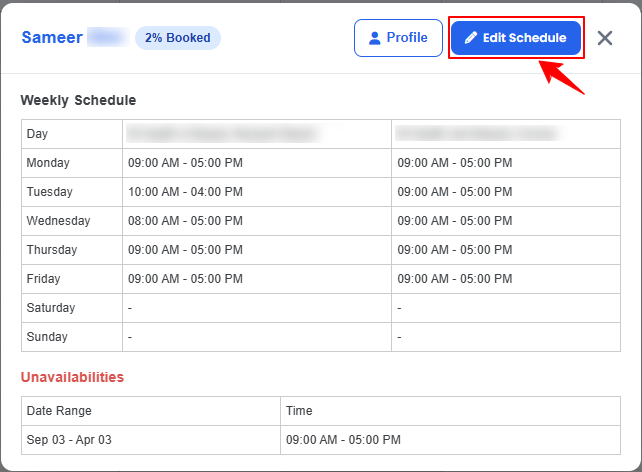
- To view a provider’s weekly schedule, click the provider’s name. The provider’s weekly schedule and unavailabilities will be displayed, along with their booking percentage. From here you can click “Edit Schedule” to update the provider’s schedule.
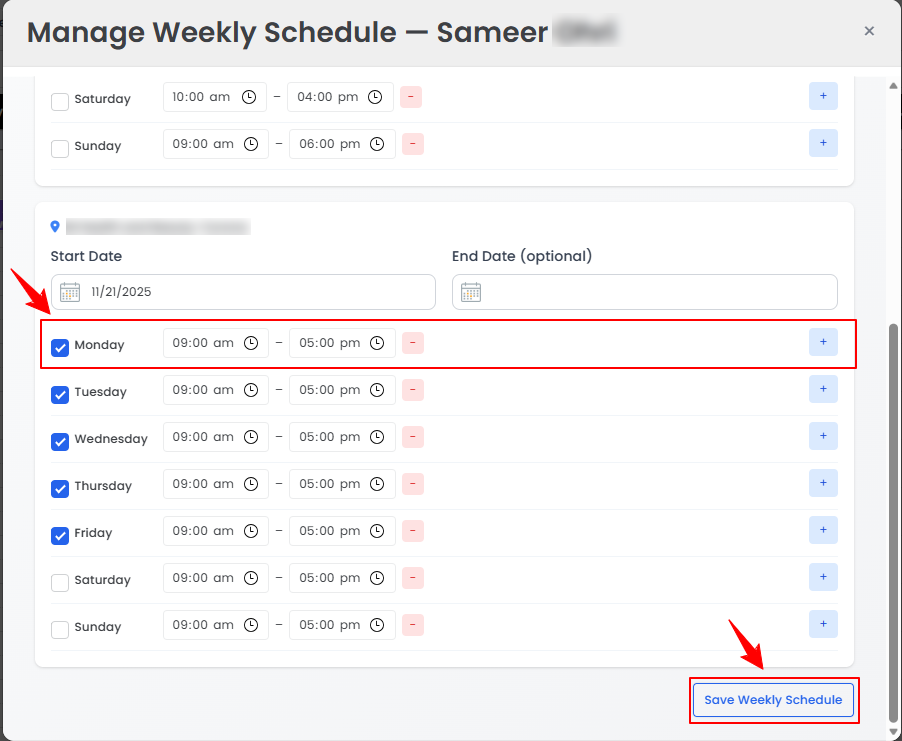
- Select the start and end dates and times, then choose the days the provider will be available. Use the "+" button to add additional availability times or the "–" button to remove them. Once complete, click "Save Weekly Schedule."
The provider schedule has been successfully edited through the calendar!