

This guide explains how to manage pre-treatment instructions in the DigiMEDSPA Portal, including creating, editing, and viewing instructions, assigning them to specific services, attaching instructions to services, and sending pre-treatment instructions to patients via email to ensure they receive accurate, personalized guidance before their procedures.
Understanding Terminologies
- Pre-Treatment Instructions
Pre-treatment instructions are guidelines provided to patients before performing a medical or aesthetic procedure to help them properly prepare and ensure the best possible results. These instructions often include advice on skincare, dietary restrictions, medications to avoid, and steps to take prior to the treatment to minimize risks and optimize outcomes.
Add Pre-Treatment Instructions
-
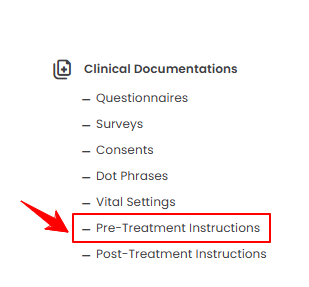
The user can create the pre-treatment instructions by accessing “Pre-Treatment Instructions” through Clinical Documentations from two entry points.
-
From the EMR Admin, click on “Pre-Treatment Instructions” under “Clinical Documentations.”
-
From the Left Navigation, open the “EMR Admin” dropdown, select “Clinical Documentations,” and then choose “Pre-Treatment Instructions” from the subsequent dropdown menu. Alternatively, you can type “Pre-Treatment Instructions” into the search bar in the Left Navigation.
-
-
To add new instructions, click on the ‘’New Pre-Treatment Instructions’’ button in the top right corner of the screen.
-
Select the Default Template from the dropdown menu.
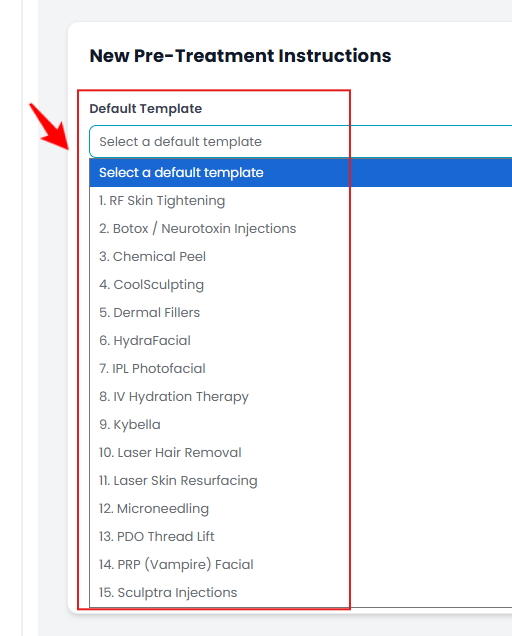 Note: Our portal provides default pre-treatment instructions templates. You can select one from these options for quick editing, or you can create your own custom template by following the instructions in this user guide.
 -
Enter the required details, including the Name and Description for the pre-treatment instructions specific to a service. Once finished, click "Create Pre-Treatment Instructions" to save.
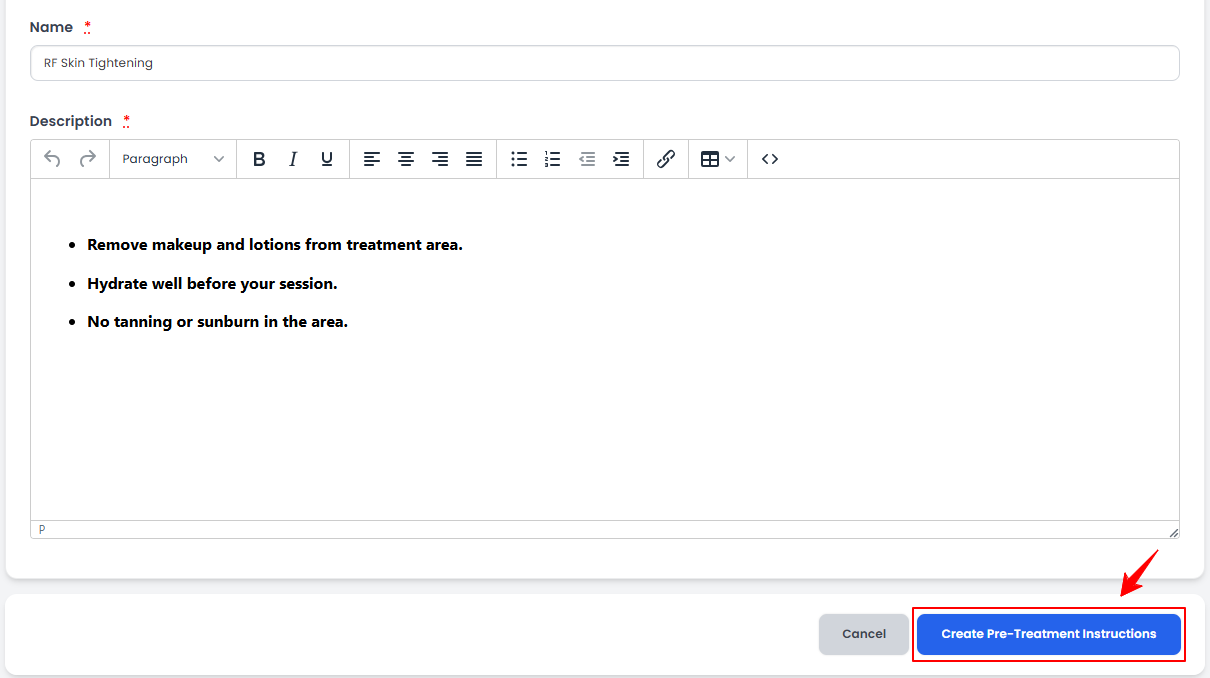 NoteYou can customize the formatting of the instruction text using the options in the description window. Adjust the font style, size, color, and background to create the exact look you want.
The pre-treatment instructions have been successfully added!
View Pre-Treatment Instructions
-
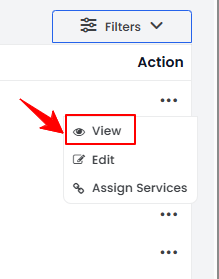
To view the pre-treatment instructions, click the three dots under the action column next to the specific pre-treatment instructions and select “View.”
-
The Pre-Treatment Instructions View Screen will open, showing all the details of the selected pre-treatment instructions.
Edit Pre-Treatment Instructions
-
There are two ways to edit the existing pre-treatment instructions.
-
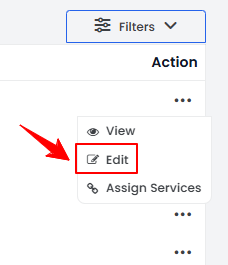
From the added pre-treatment instructions list, click on three dots under the action column and select "Edit" for the specific instructions.
-
On the Pre-Treatment Instructions View Screen, hover over the Actions menu in the top right corner of the screen and click "Edit Pre-Treatment Instructions.”
-
-
Make the desired changes in the instructions. Once done, click "Update Pre-Treatment Instructions."
The pre-treatment instructions have been successfully edited!
Assign Services to Pre-Treatment Instructions
-
There are two ways to assign services to existing pre-treatment instructions.
-
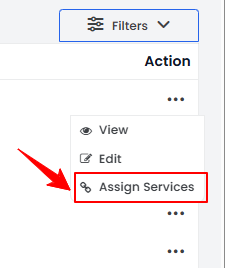
From the list of added pre-treatment instructions, click the three dots under the action column and select “Assign Services” for the specific pre-treatment instructions.
-
On the Pre-Treatment Instructions View Screen, hover over the Actions menu in the top right corner of the screen and click "Assign Services.”
-
-
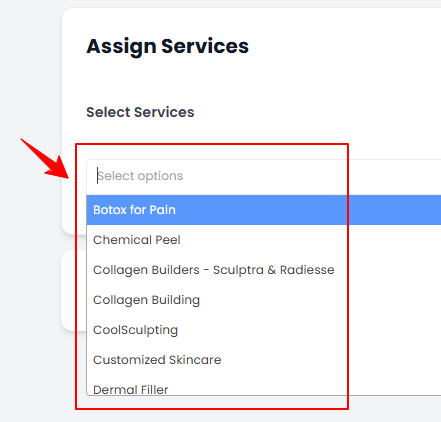
Select the services you want to assign to the pre-treatment instructions from the dropdown menu and click “Assign Services.”
 NoteAssigning services to pre-treatment instructions links those specific services to that pre-treatment instructions.
 -
Alternatively, to assign services, click the “Select Services” button in the top-right corner, choose the desired services, click “Save”, and then click “Assign Services” to complete the process.
The services have been successfully assigned to the pre-treatment instructions!
Attach Pre-Treatment Instructions to a Service
-
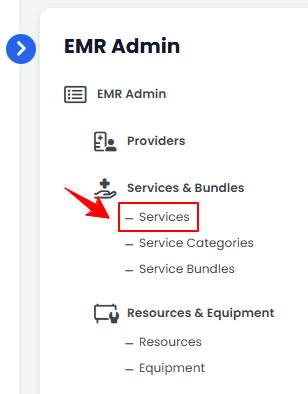
From the EMR Admin, click on “Services” under “Services & Bundles.”
-
Click the "New Service" button to add a service, or select an existing service from the list to edit.
-
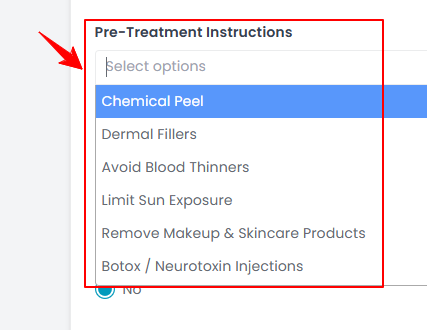
Go to the Step 2 of creating or updating a service, select the appropriate pre-treatment instructions you want to attach to the service from the dropdown menu.NoteMultiple pre-treatment instructions can be attached to a single service.
-
After selecting the relevant pre-treatment instructions for the service, click “Next.” At Step 3, click “Submit” to save the updates.NoteWhen a booking is created for a patient, the pre-treatment instructions linked to the selected service will be automatically emailed to the patient along with the booking details. This ensures that patients receive the necessary pre-treatment guidelines immediately after their booking is confirmed.The pre-treatment instructions have been successfully attached to the service!
Send Pre-Treatment Instructions Through Bookings List Screen
-
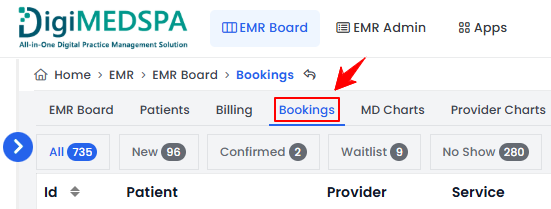
Users can send pre-treatment instructions to patients directly from the Bookings List Screen. To access the Bookings List, click “Bookings” from the EMR Board Tabs.
-
From the bookings list, click on three dots under the action column and select "Send Pre-Treatment Instructions" for the specific booking.
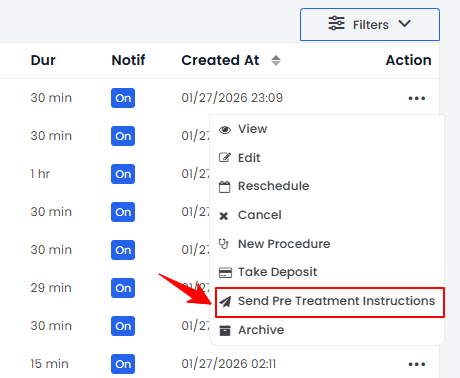 The pre-treatment instructions have been successfully sent to the patient via email!
Send Pre-Treatment Instructions Through Patient Profile
-
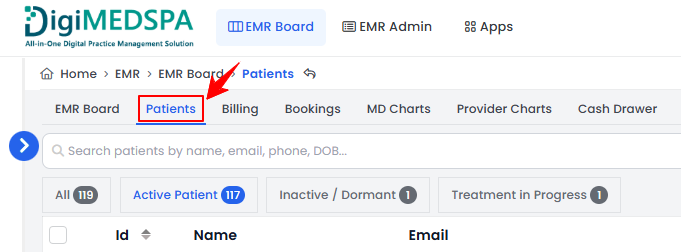
Users can send pre-treatment instructions to patients directly from the patient profile. To access the patient profile, click “Patients” from the EMR Board Tabs.
-
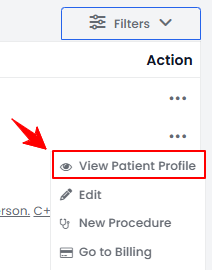
From the patient list, click on three dots under the action column and select "View Patient Profile" for the specific patient, or click anywhere on the patient’s data.
-
On the Patient Information Screen, users can view a detailed summary of the patient's information. Click the "Bookings" tab to view a list of all past and future bookings for that specific patient.

-
In the bookings list, find the desired booking, click the three dots under the Action column, and choose “Send Pre-Treatment Instructions.”NoteYou can also send pre-treatment instructions by opening a booking and selecting “Send Pre-Treatment Instructions” from the Quick Actions menu.The pre-treatment instructions have been successfully sent to the patient via email!
You’re all set
That’s every step of “Manage Pre-Treatment Instructions”. Up next: Manage Post-Treatment Instructions.