

Understanding Terminologies
- Membership Settings
These are subscription-based offerings that provide patients with exclusive benefits such as discounted treatments, priority booking, or special product pricing. These perks encourage patient loyalty and repeat visits, all for a recurring fee. Only one membership program can be active at a time to ensure clarity and simplicity for patients and providers. This approach prevents overlapping benefits or confusion and allows the Med SPA to focus on delivering a streamlined, high-quality experience within a single, cohesive membership structure, including various membership types.
- Membership Agreement
This is a formal contract outlining the terms and conditions of a membership program. It specifies details like membership duration, fees, benefits, cancellation policies, and member responsibilities. Agreements protect both the patient and the Med SPA by setting clear expectations and legal guidelines.
- Membership Types
Membership Types refer to various levels or categories within a membership program, such as Basic, Premium, or VIP. Each type provides a distinct set of benefits, including access to certain services, products, or promotions, included for free within the membership. This structure allows patients to select the membership type that best fits their needs and budget, offering flexibility and value.
Edit Membership Settings
-
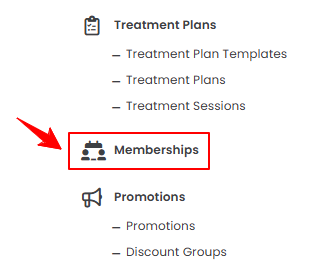
The user can edit a membership setting through “Memberships” accessible via two entry points.
-
From the EMR Admin, click on “Memberships.”
-
From the Left Navigation, open the “EMR Admin” dropdown menu and select “Memberships.” Alternatively, you can type “Memberships” into the search bar in the Left Navigation.
-
-
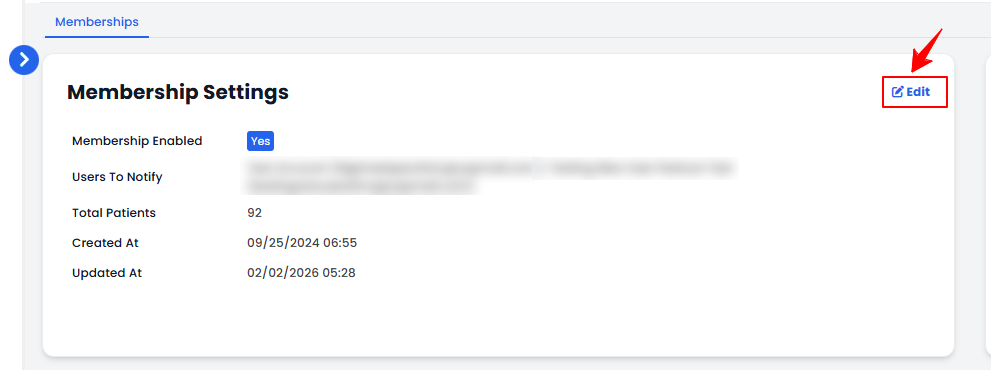
To edit the membership settings, click the “Edit” button in the top right corner of the membership settings section.
-
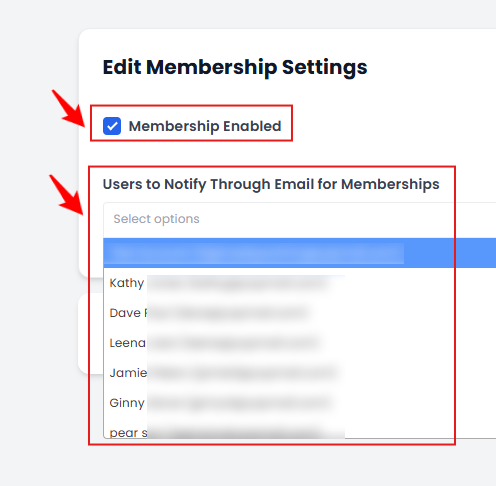
Select “Membership Enabled” to activate the membership settings, then select the users to notify through email for memberships from the dropdown menu.
-
Once done, click “Update Membership Settings” to save your changes.
The membership settings have been updated successfully!
Create New Membership Agreement
-
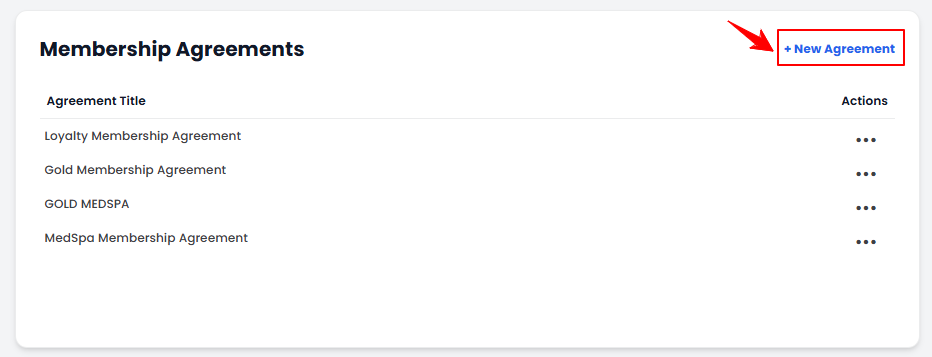
To create a new membership agreement, click on the “+ New Agreement‘’ button in the top right corner of the screen.
-
Enter the Agreement Title and Agreement Content for the membership agreement. Once done, click “Create Membership Agreement.”NoteYou can customize the agreement content using the menu bar to adjust styles, headings, fonts, sizes, and other formatting options.
View Membership Agreement
-
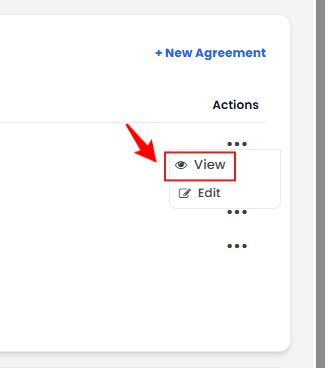
To view the details of a membership agreement, click the three dots under the action column next to the specific agreement and select “View.”
-
The Membership Agreement Details Screen will open, showing all information related to the selected membership agreement.
Edit Membership Agreement
-
There are two ways to edit an existing membership agreement.
-
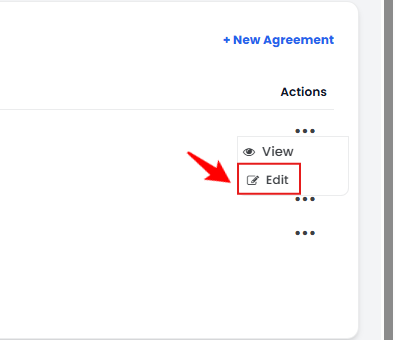
From the membership agreement list, click on three dots under the action column and select "Edit" for the specific agreement.
-
From the Membership Agreement Details Screen, click the "Edit Membership Agreement" button in the top right corner of the screen.
-
-
Make the desired changes in the membership agreement form. Once done, click “Update Membership Agreement.”
Your membership agreement has been successfully edited!
Add Membership Types
-
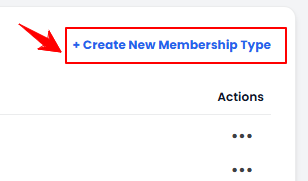
To add a new membership type, click on the “+ Create New Membership Type‘’ button in the top right corner of the screen.
-
Enter the Membership Type Name and select Payment Frequency Option from the dropdown menu, choosing from Monthly, Yearly, or Both.
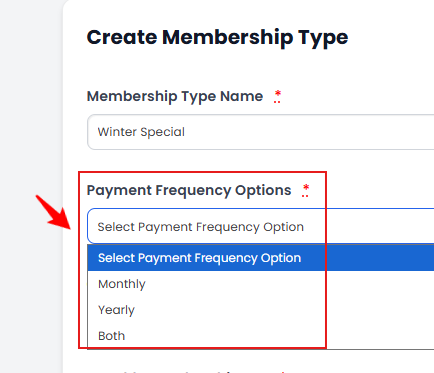 Note“Monthly” allows members to pay on a monthly basis, offering flexibility with a lower, recurring fee. “Yearly” requires an upfront annual payment, typically at a discounted rate compared to monthly payments, which can encourage long-term commitment. “Both” gives members the choice to either pay monthly or yearly, allowing them to select the payment option that best suits their preferences and budget.
 -
Enter the One-Time Setup Fee and the Monthly Membership Fee to define the membership’s cost structure. To apply member-only pricing to products, select the option to enable member pricing.
 Note“One-Time Setup Fee” is a one-time charge applied at the beginning of the membership to cover initial processing, onboarding, or any special welcome benefits. “Monthly Membership Fee” is the recurring monthly fee members pay to maintain their membership, granting them access to ongoing benefits and services.
 -
Select the Membership Agreement from the dropdown to attach the applicable terms and conditions to the membership type.
 NoteAttaching a “Membership Agreement” to a membership type establishes clear terms and conditions for both the Med SPA and the member. The agreement outlines details such as benefits, payment terms, cancellation policies, and member responsibilities.
 -
Choose the Membership Color to visually distinguish the membership type, then select the “Membership Type Active” option to activate it.
-
Select the Billing Type from the dropdown menu. If you choose Specific Day of the Month, an additional field will appear, allowing you to enter the desired billing day.

-
Click “Add Product” to include products you want to offer for free within the membership type.
-
Select the Product Name from the dropdown menu.

-
Enter the Units for the selected product you want to include in the membership.NoteYou can add multiple products to the membership type.
-
-
Click “Add Service” to include services you want to offer for free within the membership type.
-
Select the Service Name from the dropdown menu.

-
Enter the Units for the selected service you want to include in the membership.NoteYou can add multiple services to the membership type.
-
-
Click “Add Promotion” to include promotions you want to offer for free within the membership type.
-
Select the Promotion Name from the dropdown menu.

-
Enter the Units for the selected promotion you want to include in the membership.NoteYou can add multiple promotions to the membership type.
-
-
Enter the Dollar Credit Amount and click “Create Membership Type.”NoteDollar credit is a monetary value added to a patient’s account as part of a rewards or payment system, which can be used for future services or product purchases.
The membership type has been created successfully!
View Membership Type
-
To view the details of a membership type, click the three dots under the action column next to the specific type and select “View.”

-
The Membership Type Details Screen will open, showing all information related to the selected membership type.
Edit Membership Type
-
There are two ways to edit an existing membership type.
-
From the membership type list, click on three dots under the action column and select "Edit" for the specific membership type.

-
From the Membership Type Details Screen, click the "Edit Membership Type" button in the top right corner of the screen.
-
-
Make the desired changes in the membership type form. Once done, click “Update Membership Type.”
Your membership type has been successfully edited!
View Memberships
-
To see all memberships for a specific membership type, click the three dots in the actions column next to that type, then select “View Memberships.”

-
The screen will display a list of all patients who currently have or previously had this membership type, along with their membership details. Use the top Scope Bar to filter the list by “Active,” “Paid,” “Unpaid,” “Cancelled,” or to “Mark as Cancelled.”
 Note“Active” memberships are those that are currently valid and in use by the patient. “Paid” memberships are those for which the patient has completed all required payments. “Unpaid” memberships are those that have pending or overdue payments. “Cancelled” memberships are those that have been terminated or discontinued. “Mark as Cancelled” is an action that allows you to manually set a membership as cancelled in the system.
You’re all set
That’s every step of “Manage Membership Settings, Membership Agreements and Membership Types”.