

 DigiMEDSPA EMR
 DigiMEDSPA CONNECT ™
Manage Dot Phrases
This guide provides instructions on how to create, edit and utilize dot phrases within the DigiMEDSPA Portal, offering a streamlined approach to efficient documentation.
Understanding Terminologies
Dot Phrases
Dot phrases are pre-defined text shortcuts that allow users to quickly insert standardized notes, phrases, or templates into patient records or communications, improving efficiency and consistency.
Access this link: https://digimedspa.com/ap2/dotphrases
Add Dot Phrase
- The user can create a dot phrase by accessing the ‘’Dot Phrases’’ through the Clinical Documentations from two entry points.
- From the EMR Admin, click on ‘’Dot Phrases’’ under “Clinical Documentations.”

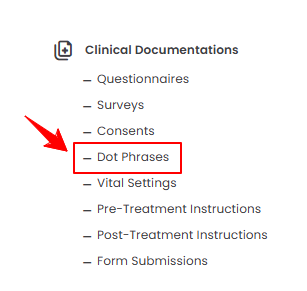
- From the Left Navigation, open the “EMR Admin” dropdown, select “Clinical Documentations,” and then choose “Dot Phrases” from the subsequent dropdown menu. Alternatively, you can type “Dot Phrases” into the search bar in the Left Navigation.
- From the EMR Admin, click on ‘’Dot Phrases’’ under “Clinical Documentations.”
- To create a new dot phrase, click the ‘’New Dot Phrase’’ button in the top right corner of the screen.
- Enter the dot phrase name and title, select the dot phrase scope, choose the variable from the dropdown menu, and click the “Add Variable” button to insert it.
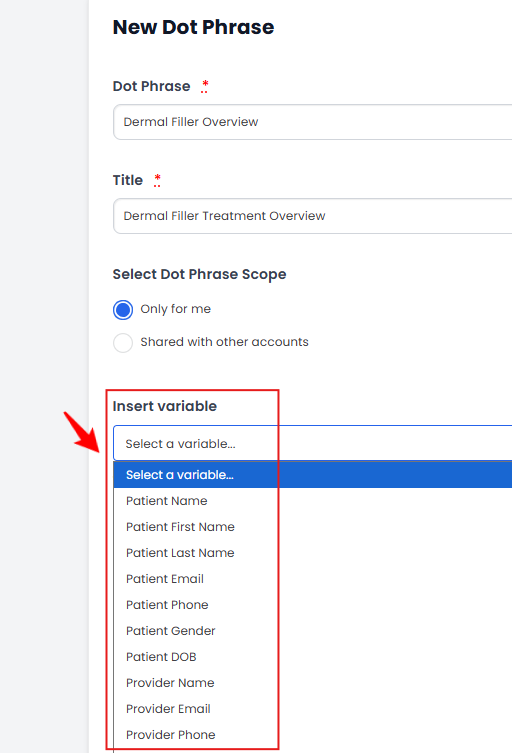 Note: The dot phrase scope determines the accessibility of a dot phrase. It can be set to “Only for me” for personal use or “Shared with other accounts” to make it available to other users. A “variable” is a placeholder that automatically pulls in specific information when content is used.
 - Add a Description and click “Create Dot Phrase” to save it.
The dot phrase has been successfully created!
View Dot Phrase
- To view a specific dot phrase from the list, click the three dots under the action column and select "View," or simply click anywhere on the dot phrase’s data.
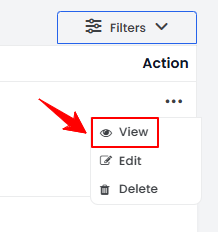
- The Dot Phrase View Screen will display the complete dot phrase details.
Edit Dot Phrase
- There are two ways to edit an existing dot phrase.
- From the list of added dot phrases, click the three dots under the action column and select “Edit” for the specific dot phrase you want to edit.
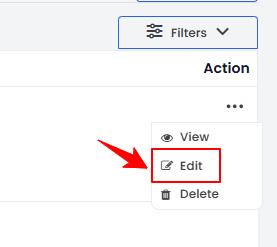
- On the Dot Phrase View Screen, click the "Edit Dot Phrase" button in the top right corner of the screen.
- From the list of added dot phrases, click the three dots under the action column and select “Edit” for the specific dot phrase you want to edit.
- Make the desired changes in the dot phrase. Once done, click “Update Dot Phrase.”
The dot phrase has been successfully edited!
Delete Dot Phrase
- There are two ways to delete an existing dot phrase.
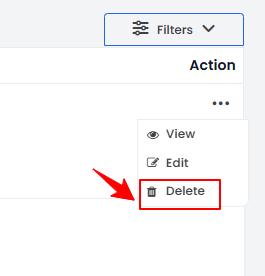
- From the list of added dot phrases, click the three dots under the action column and select “Delete” for the specific dot phrase you want to delete.
- On the Dot Phrase View Screen, click the "Delete Dot Phrase” button in the top right corner of the screen.
- From the list of added dot phrases, click the three dots under the action column and select “Delete” for the specific dot phrase you want to delete.
- A confirmation pop-up will appear, click “OK” to permanently delete the dot phrase.
The dot phrase has been successfully deleted!
Utilize Dot Phrases During Check-In on the EMR Board
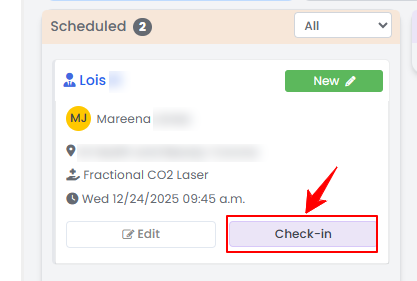
- The user can utilize dot phrases during check-in on the EMR Board. From the EMR Board, select a booking that is in the ‘’Scheduled’’ step then press the ‘’Check-in’’ button to move that booking to the ‘’Check-in’’ phase.
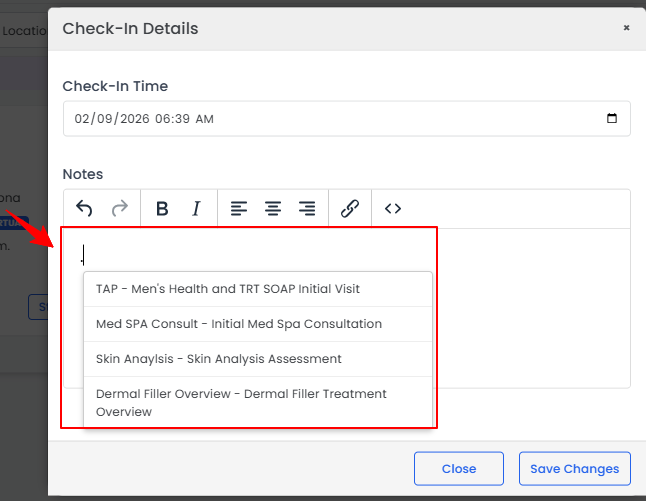
- To use dot phrases, type a dot in the Notes field to quickly insert your pre-saved text. Once done, click “Save Changes” to save.
The dot phrase has been successfully utilized during check-in on the EMR Board!
Utilize Dot Phrases While Creating a Booking
- The user can utilize dot phrases while creating a booking. From the EMR Board, click on ‘’New Booking’’ in the top right corner of the screen.

- To use dot phrases, type a dot in the Booking Notes field to quickly insert your pre-saved text. Once done, click “Create Booking” to save.Note: For detailed instructions on creating a new booking, refer to “Booking an Appointment Through New Booking” user guide.
The dot phrase has been successfully utilized while creating a booking!
Utilize Dot Phrases While Creating a Provider Note
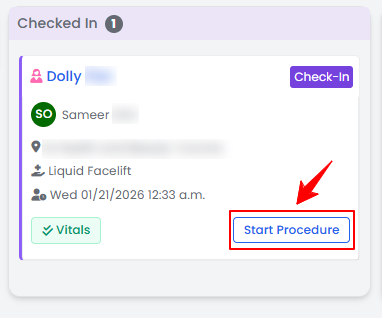
- The user can utilize dot phrases while creating a provider note. From the EMR Board select a booking that is in the ‘’Checked In’’ step then press the ‘’Start Procedure’’ button to move that booking to the ‘’In Procedure’’ phase.
- Choose the Body Area from the dropdown menu and click “Start Procedure.”Note: For services without a selected procedure type, you will be prompted to choose the procedure type at this step.
- You will be directed to the Procedure View Screen in the patient profile, where all procedure sections are displayed.
- On the Procedure View Screen, add a provider note by clicking “Add Provider Note” in the Provider Note section.

- To use dot phrases, type a dot in the Provider Note field to quickly insert your pre-saved text. Once done, click “Save.”Note: For detailed instructions on creating a provider note, refer to “Add / Edit a Provider Note for a Procedure” user guide.
The dot phrase has been successfully utilized while creating a provider note!
Utilize Dot Phrases While Creating a Purchase Order
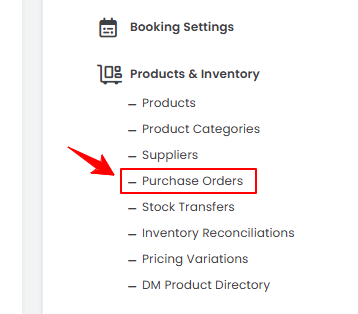
- The user can utilize dot phrases while creating a Purchase Order. From the EMR Admin, click on “Purchase Order” under “Products & Inventory.”
- To add a new purchase order, click "New Purchase Order" in the top right corner of the screen.
- Complete all the required information. To use dot phrases, type a dot in the Note field to quickly insert your pre-saved text. Once done, click “Create Purchase Order” to save. Note: For detailed instructions on creating a purchase order, refer to “Add Purchase Order” user guide.
The dot phrase has been successfully utilized while creating a purchase order!
Utilize Dot Phrases While Creating an Inventory Reconciliation
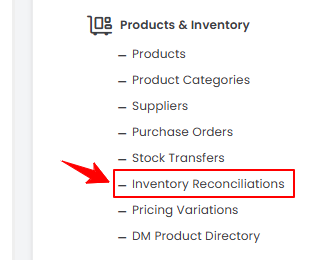
- The user can utilize dot phrases while creating an Inventory Reconciliation. From the EMR Admin, click on “Inventory Reconciliation” under “Products & Inventory.”
- To add a new inventory reconciliation, click on the “New Inventory Reconciliation‘’ button in the top right corner of the screen.
- Complete the Step 1 and in Step 2, use dot phrases, type a dot in the Note field to quickly insert your pre-saved text. Once done, click “Save as Draft” to save.Note: For detailed instructions on creating an inventory reconciliation, refer to “Manage Inventory Reconciliation” user guide.
The dot phrase has been successfully utilized while creating an inventory reconciliation!