

 DigiMEDSPA EMR
 DigiMEDSPA CONNECT ™
Manage Cash Drawer for Different Locations
This guide provides detailed instructions for managing cash drawers at multiple locations. It ensures precise tracking of cash in and cash out for smooth financial operations.
Understanding Terminologies
Cash Drawer
A cash drawer is a secure compartment within the point-of-sale (POS) system used to store cash, coins, checks, and receipts from transactions. It helps track cash in and cash out movements for services, retail product sales, and refunds, ensuring accurate financial management and security.
Create Cash Transaction (Cash In)
- The user can access the cash drawer from two entry points:
- From the EMR Board Tabs, select ‘’Cash Drawer.’’

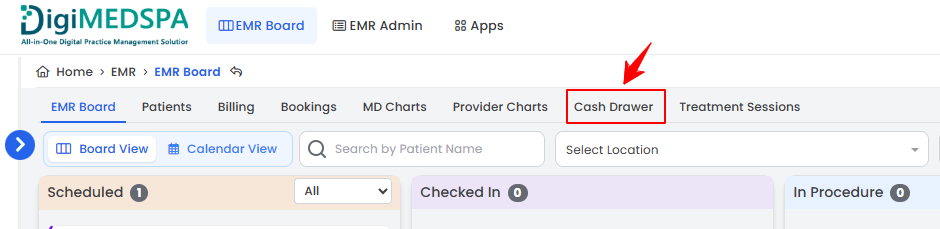
- From the Left Navigation, click on the “EMR Board” dropdown and select “Cash Drawer.’’ Alternatively, you can type “Cash Drawer” into the search bar in the Left Navigation.
- From the EMR Board Tabs, select ‘’Cash Drawer.’’
- Select the Med SPA location from the dropdown menu for which you want to view the cash drawer history and click “Proceed.”
- The cash drawer for the selected Med SPA location will open, displaying Cash Drawer Actions on the left and Today’s Cash Transactions along with Undeposited Checks in Drawer at the bottom. It also shows the Opened At timestamp and the current totals for Cash In, Cash Out, Bank Drop, Check Deposits, and the Current Balance for that location.Note: “Cash Drawer Actions” are the available functions within the system that allow users to manage the cash drawer, including cash in, cash out, reconciliations, and transaction tracking. These actions help maintain accurate cash flow records for a Med SPA location. “Today's Cash Transactions” refers to a log of all cash movements within the cash drawer for the current business day. “Undeposited Checks in Drawer” are checks that have been received but not yet deposited into the bank. “Opened At” refers to when the cash drawer was opened for the business day, helping track when financial activity began. “Cash In” refers to adding money to the cash drawer, including payment for services, product sales, or manual cash deposits. “Cash Out” refers to money removed from the cash drawer, including refunds, petty cash expenses, or withdrawals. A “Bank Drop” transfers excess cash from the drawer to a secure bank deposit to minimize on-hand cash risks. “Check Deposits” are checks that have already been deposited into the bank. The “Current Balance” is the total amount of money available in the cash drawer after accounting for all cash in, cash out, and bank drop transactions.
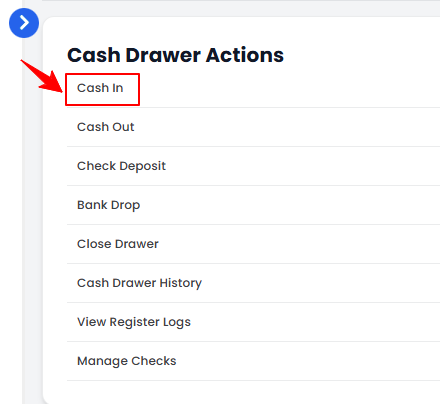
- To create a cash in transaction, click “Cash In” under Cash Drawer Actions on the left side of the screen.
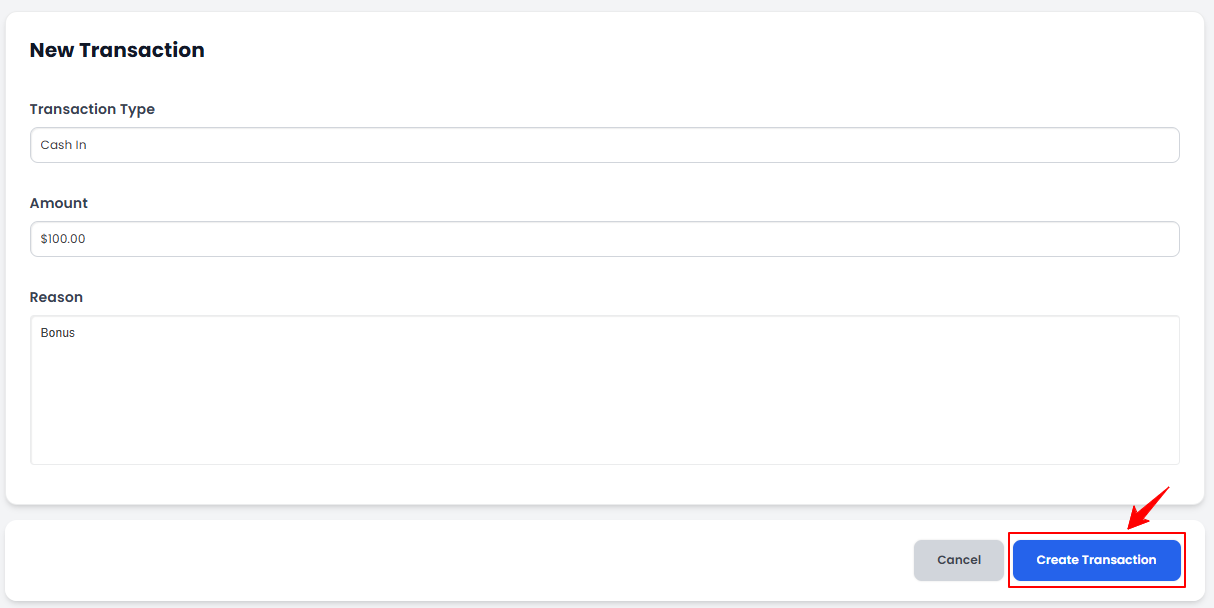
- The Transaction Type will be automatically set to “Cash In.” Enter the Amount and Reason for the transaction, then click “Create Transaction” to save it in the cash drawer.
 Note: “Transaction Type” refers to the category of a financial transaction, such as cash in (adding money) or cash out (removing money). It helps track and classify cash movements within the cash drawer. “Amount” is the specific sum of money involved in a transaction. It represents how much cash is added (cash in) or removed (cash out) from the cash drawer. “Reason” is the explanation or purpose of a transaction, such as a product sale, service payment, refund, or petty cash expense. It ensures transparency and accurate financial tracking.
The cash in transaction has been created successfully!
Create Cash Transaction (Cash Out)
- To create a cash out transaction, click “Cash Out” under Cash Drawer Actions on the left side of the screen.
- The Transaction Type will be automatically set to “Cash Out.” Enter the Amount and Reason for the transaction, then click “Create Transaction” to save it in the cash drawer.
The cash out transaction has been created successfully!
Create Check Deposit
- To create a check, click “Check Deposit” under Cash Drawer Actions on the left side of the screen.
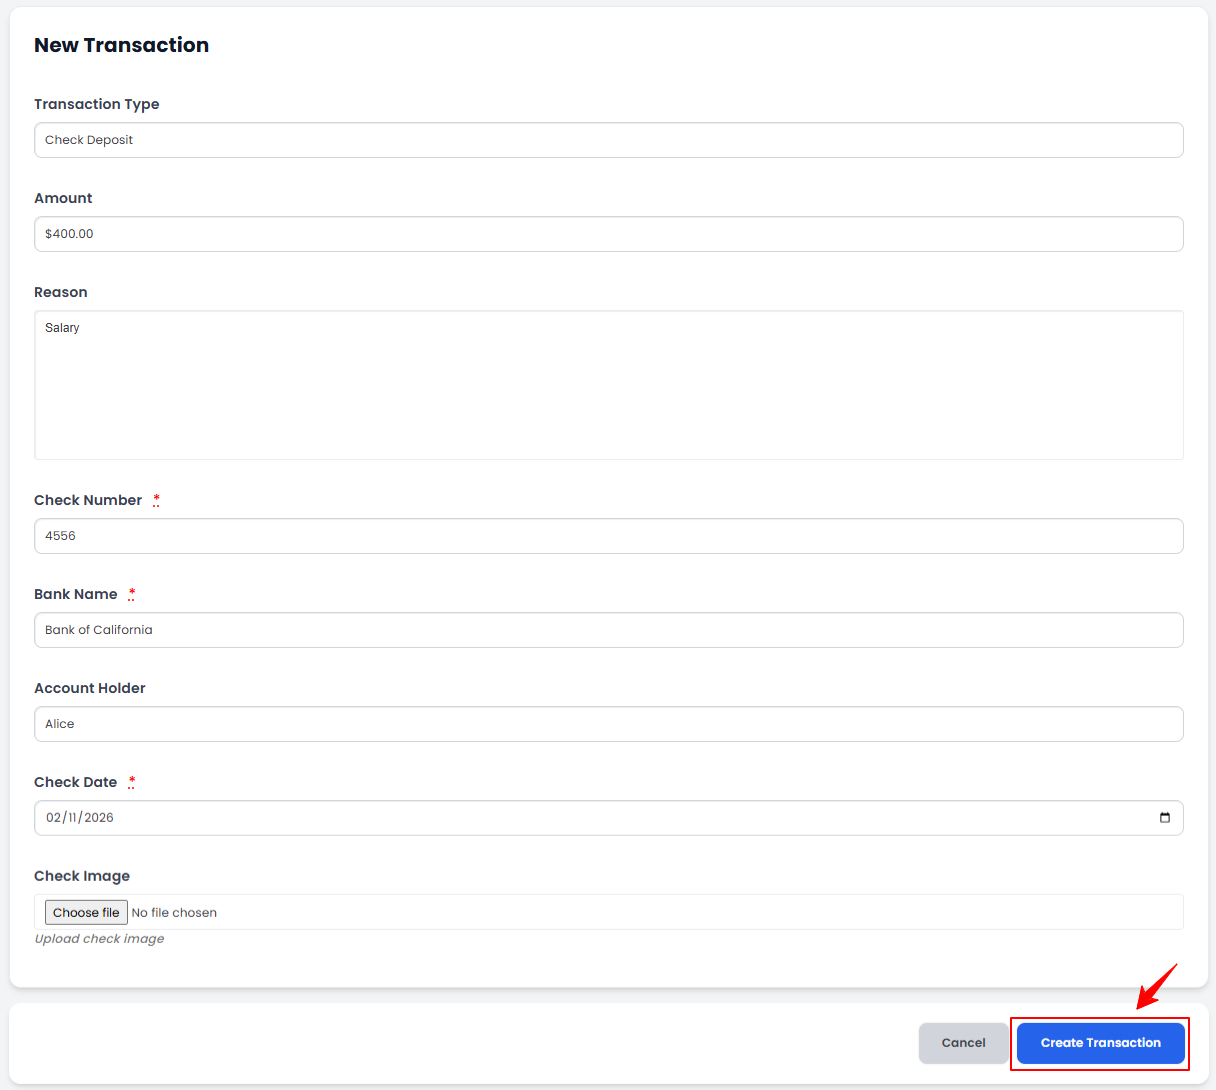
- The Transaction Type will be automatically set to “Check Deposit.” Enter the Amount, Reason, Check Number, Bank Name, Account Holder Name, and Check Date for the transaction. Upload the Check Image and click “Create Transaction” to save it in the cash drawer.
 The check has been successfully deposited!
Create Bank Drop Transaction
- To create a bank drop transaction, click on “Bank Drop” under Cash Drawer Actions on the left side of the screen.
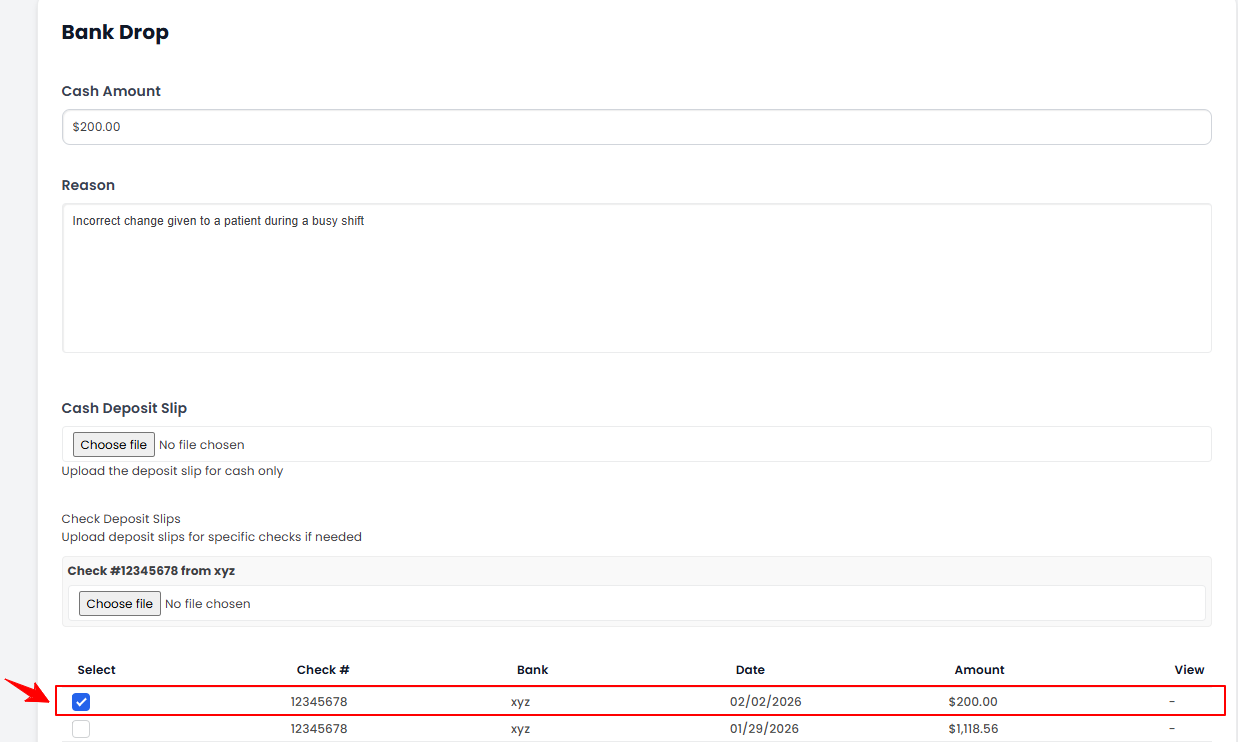
- Enter the Cash Amount and Reason for the bank drop. Upload the Cash Deposit Slip, or select a check from the list below to create a bank drop transaction. Once done, click “Record Bank Drop.”
The bank drop transaction has been created successfully!
Close Cash Drawer
- To close the cash drawer, click on “Close Drawer” under Cash Drawer Actions on the left side of the screen.Note: “Close Cash Drawer” refers to finalizing and locking the cash drawer at the end of a shift or business day. This includes reconciling cash transactions, verifying the current balance, and ensuring all cash in and cash out transactions are accurately recorded before closing.
- Enter the Quantity for each Denomination. The amount will be calculated automatically. The undeposited checks in the drawer appear at the bottom of the screen. When finished, click “Close Drawer” to finalize and save your entries.
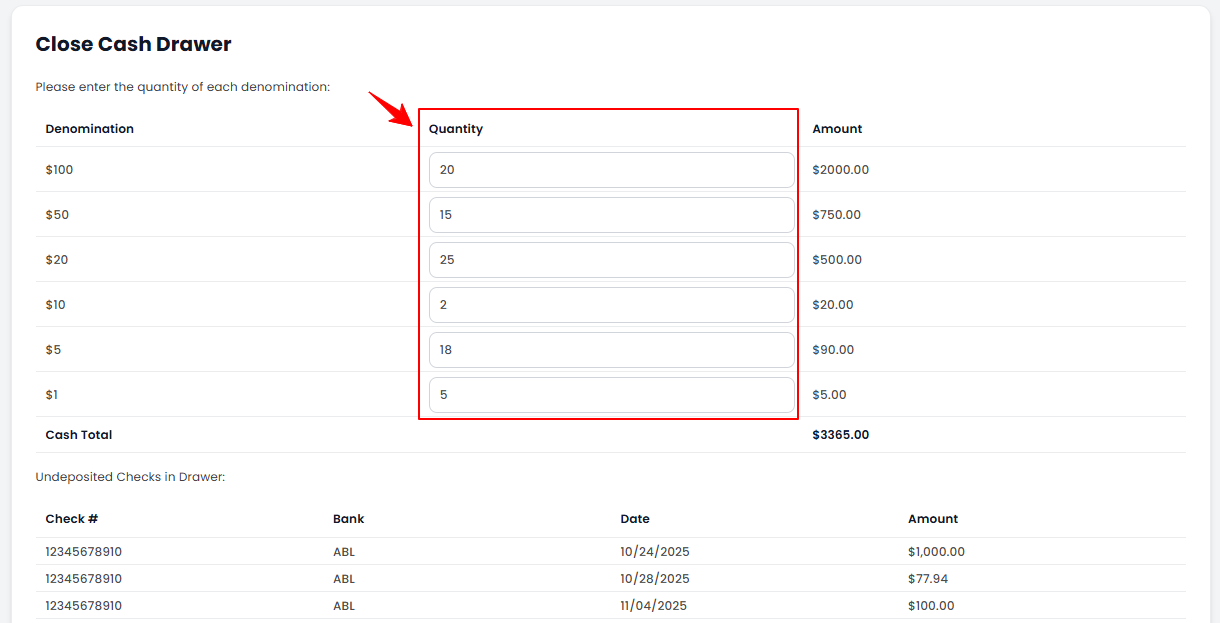 Note: “Denomination” refers to the different values of currency (bills and coins) in the cash drawer. It tracks and counts the exact breakdown of cash during transactions, reconciliation, and cash balancing.
The cash drawer has been closed successfully! - Before reopening the cash drawer, review the Denomination Values from the last closing. Once verified, click “Confirm & Open Drawer” to proceed.
Report Balance Inconsistency
- If a balance inconsistency occurs when closing the drawer, click “Recheck Denomination” to review the quantities or “Create Balance Inconsistency” to report the issue.
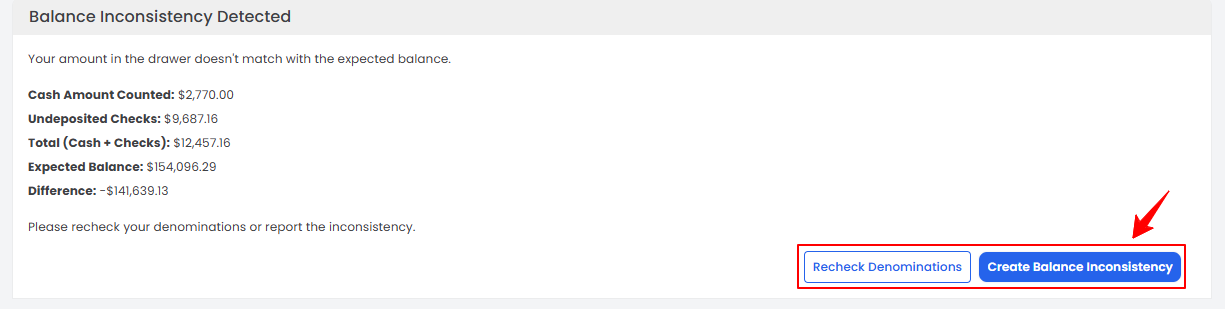 Note: A “Balance Inconsistency” occurs when the cash in the drawer does not match the expected balance recorded in the system. This discrepancy can result from miscalculations, missing or extra cash, or incorrect transaction entries. The user can click “Recheck Denominations” to recalculate and confirm the denominations, helping to prevent any balance discrepancies.
 - The Transaction Type will be automatically set to “Balance Inconsistency.” Enter the Amount and Reason for the transaction, then click “Create Transaction” to report the balance inconsistency.
The balance inconsistency has been reported successfully!
View Cash Drawer History
- To view the cash drawer history, click on “Cash Drawer History” under Cash Drawer Actions on the left side of the screen.Note: “Cash Drawer History” is a record of all past cash drawer activities, including cash in, cash out, bank drops, balance inconsistencies, and closing summaries. For detailed instructions on viewing the cash drawer history, refer to “View Cash Drawer History” user guide.
View Register Logs
- To view the register logs, click on “View Register Logs” under Cash Drawer Actions on the left side of the screen.Note: “Register Logs” are detailed records of all cash-related activities within a cash drawer session, including cash in, cash out, bank drops, and balance inconsistencies. These logs help track financial movements, ensure accuracy, and maintain accountability for each session.
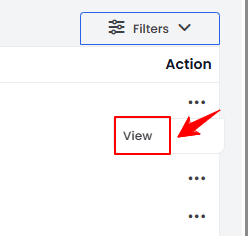
- The Register Logs provide a detailed record of all Cash Drawer Sessions, showing the Transaction Time, Type, Amount, Employee, and Reason for each entry. Click the three dots under the Action column to view the transaction details.
- The Cash Transaction View Screen displays complete details of the transaction.
Manage Checks
- To manage the checks, click on “Manage Checks” under Cash Drawer Actions on the left side of the screen.
- A list of checks will be displayed, including the check number, bank name, account holder, check date, amount, deposit status, deposit location, received date, received by, and the related deposit transaction.Note: For detailed instructions on managing checks, refer to “Manage Checks in the Cash Drawer” user guide.