

 DigiMEDSPA EMR
 DigiMEDSPA CONNECT ™
How to Use Split Payment to Combine Multiple Payment Methods
This user guide provides detailed instructions for using the split payment feature within the DigiMEDSPA Portal ensuring accurate billing and seamless payment management.
Understanding Terminologies
Split Payment
Split payment refers to a payment process that allows users to divide a single transaction into multiple payment methods. This feature enables patients to pay their total bill using a combination of payment types—such as cash, check, credit card, card reader, or other methods —within one seamless transaction.
Access this link: https://digimedspa.com/ap2/bookings
Pay through Split Payment
- The user can access the split payment feature through the Billing Screen accessible via three entry points:
- From the EMR Board Tabs, select “Billing.”

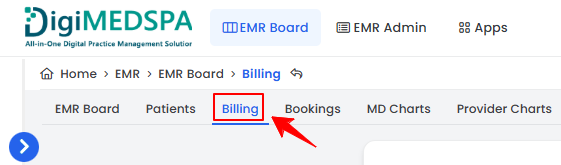
- From the Left Navigation, click on the “EMR Board” dropdown menu and select “Billing.” Alternatively, you can type “Billing” into the search bar in the Left Navigation.
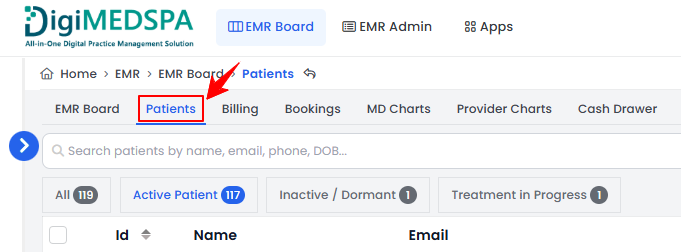
- The user can also access the Billing Screen through the patient profile.
- From the EMR Board Tabs, click on ‘’Patients.’’
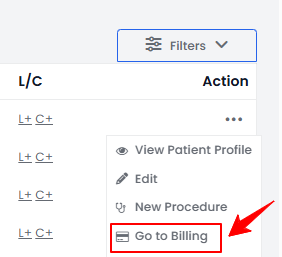
- On the Patient List Screen, click the three dots under the action column and select "Go to Billing."
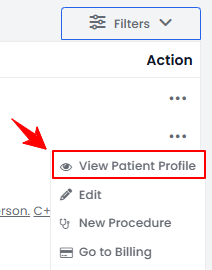
- Alternatively, click the three dots in the Action column and select “View Patient Profile.” You can also click anywhere on the patient’s record to open the profile.
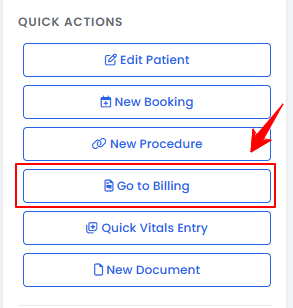
- On the Patient Information Screen, you can access the “Go to Billing” button located under the Quick Actions section at the bottom left of the screen.
 Note: If you access the Billing Screen through the patient profile, you will be directed to that specific patient’s billing information directly and will not need to search for the patient first.
- From the EMR Board Tabs, click on ‘’Patients.’’
- From the EMR Board Tabs, select “Billing.”
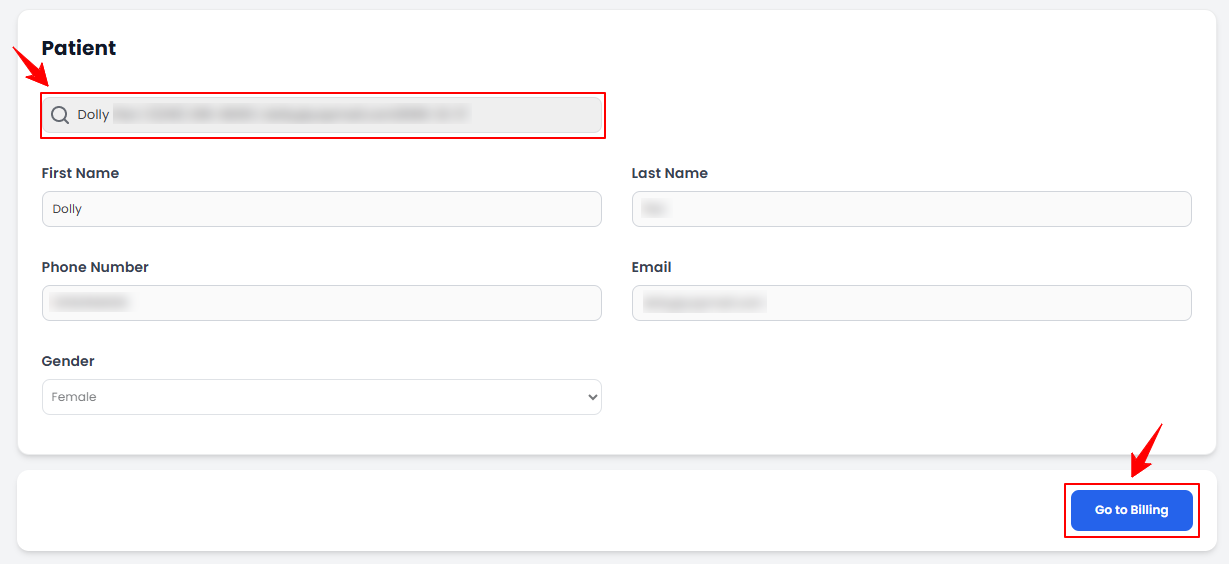
- From the Billing Screen, enter the patient’s name, phone number, or email address in the search bar. The patient’s First and Last Name, Phone Number, Email, and Gender fields will be automatically filled in. Once the details appear, click the “Go to Billing” button to proceed.
 Note: For step-by-step instructions on how to access a patient’s billing information, please refer to the article titled “Go to Patient’s Billing.”
 - If the patient has bookings at multiple clinic locations, a list of those locations will be displayed. Click the “Go to Billing” button next to the location where the patient wishes to make the payment.
Note: The list of locations will not be displayed if the patient has bookings at only one location. - You will see a list of bookings associated with the patient. Click the “Go to Billing” button next to the booking for which the patient wishes to make a payment.
 Note: If a patient or walk-in customer wishes to purchase over-the-counter (OTC) products—such as skincare items or wellness supplements that do not require a prescription—click the “Go to Billing” button located in the Over The Counter section. The remaining steps for completing the billing are the same as those used for services and procedures, explained in this user guide.
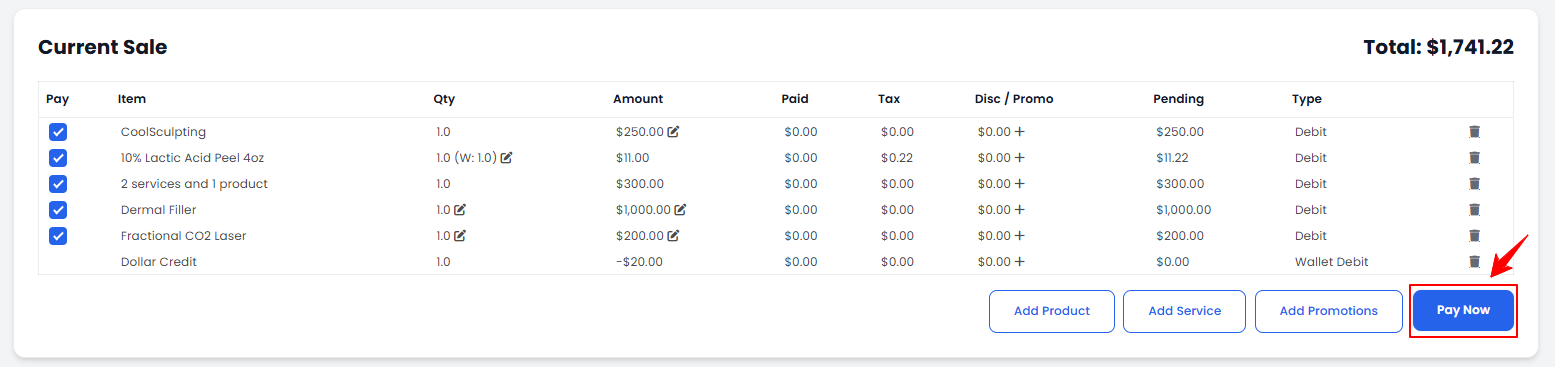
 - A list of all items associated with that booking, along with the pending amount, will be displayed. Click the “Pay Now” button to proceed with the payment.
- You will now see the Invoice Preview, which displays the payment details and the total amount due. To add a tip, click on one of the available tip percentage options or select “Custom” to enter your own tip amount. The tip will automatically be added to the total amount to be paid. Click the “Continue to Payment” button to proceed with the payment.

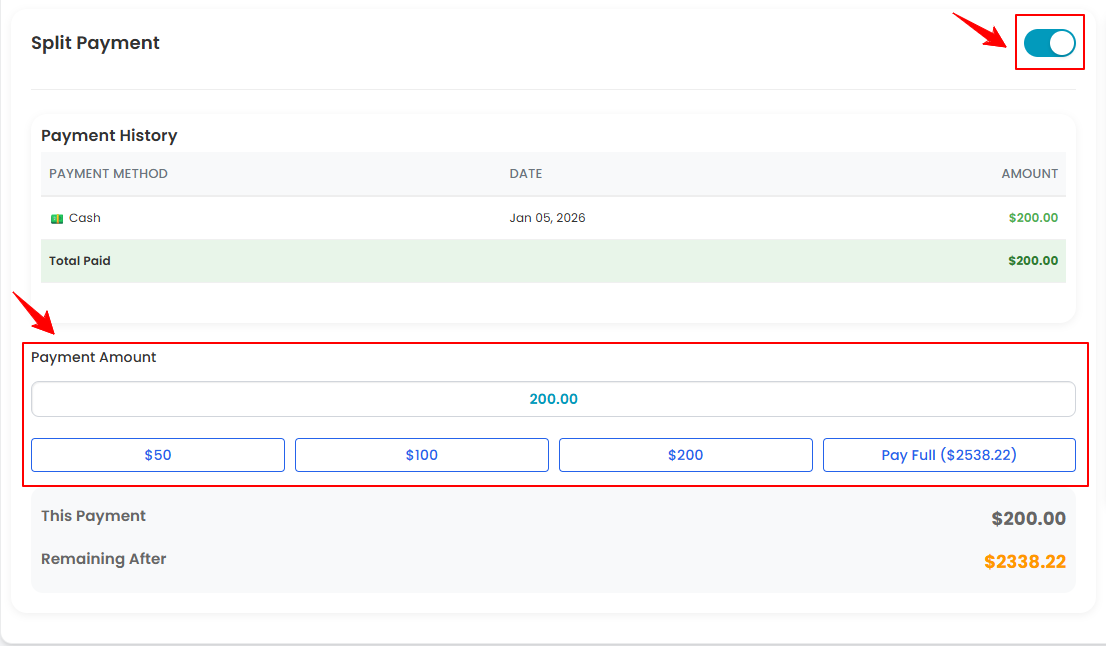
- Turn on the “Split Payment” toggle button and manually enter the amount the patient wishes to pay or you can choose from preset options such as $50, $100, $200, or Pay Full.
- Next, choose the payment method from the options: Cash, Check, Credit Card, Card Reader, or Other.
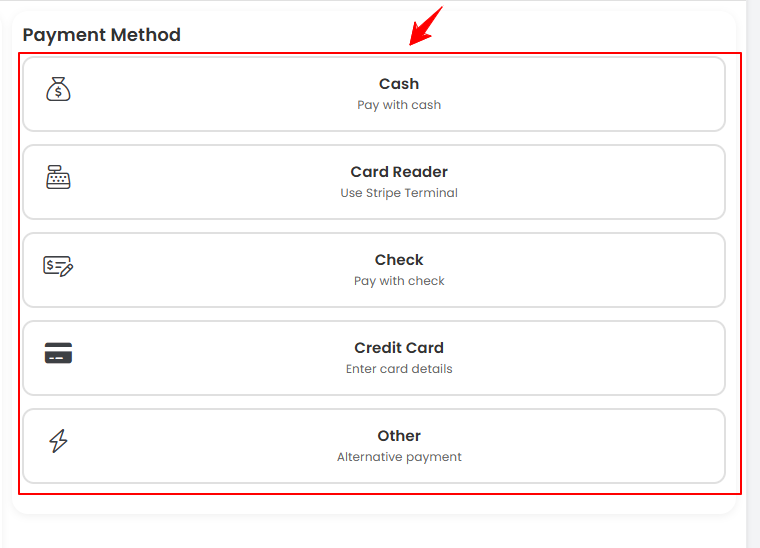
- For Cash, enter the amount received from the patient.
- For Check, enter the check number, bank name, and check date.
- For Credit Card, choose either a New Card or an Existing Card already saved in the portal, and enter the required card details.
- For Card Reader, confirm the payment by clicking “OK” on the pop-up message.
- For Others, add an additional payment type and click “Save Changes.”
- Turn on the “Split Payment” toggle again and repeat the process by selecting the second payment method the patient wishes to use to pay the remaining amount.Note: You can use the split payment feature to apply as many different payment methods as needed for a single transaction, based on how the patient wishes to pay.
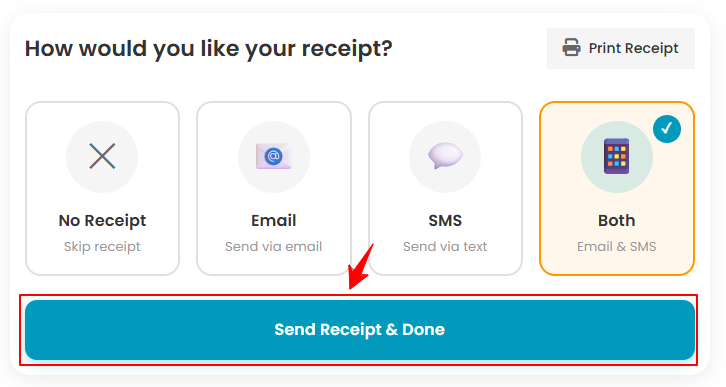
- Next, choose how you would like to send the receipt, via email, SMS, or both. Once selected, click “Send Receipt & Done” to complete the billing process.
Once the full payment has been processed, the complete invoice will be displayed, showing all payment details!