

 DigiMEDSPA EMR
 DigiMEDSPA CONNECT ™
Go to Patient’s Billing
This user guide offers detailed instructions for accessing and navigating the billing section of a patient's profile within the DigiMEDSPA Portal. It ensures users can manage patient invoices, process payments, and review billing history.
Understanding Terminologies
Patient Billing
Patient billing refers to managing and recording financial transactions related to a patient’s medical treatments and services. It includes generating invoices, processing payments, tracking outstanding balances, issuing refunds, and maintaining a detailed history of all charges and payments associated with a patient’s account.
Access this link: https://digimedspa.com/ap2/patients
Go to Patient’s Billing
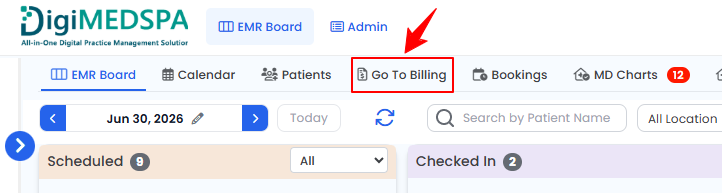
- From the EMR Board Tabs, select “Go to Billing.”

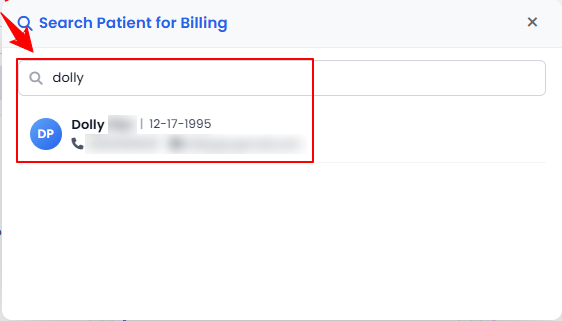
- Search for patients in the Search tab to begin billing.
- If the patient has bookings at multiple clinic locations, a list of those locations will be displayed. Click the “Go to Billing” button next to the location where the patient wishes to make the payment.Note: The list of locations will not be displayed if the patient has bookings at only one location.
- You will see a list of bookings associated with the patient. Click the “Collect Payment” button next to the booking for which the patient wishes to make a payment.
 Note: If a patient or walk-in customer wishes to purchase over-the-counter (OTC) products—such as skincare items or wellness supplements that do not require a prescription—click the “Continue to Billing” button located in the Over The Counter section. The remaining steps for completing the billing are the same as those used for services and procedures, explained in this user guide.
 - A list of all items associated with that booking, along with the pending amount, will be displayed. Click the “Pay Now” button to proceed with the payment.
 Note: At this step, you can add products, services, and promotions to the invoice by clicking Add Product, Add Service, or Add Promotion. You can also send the invoice to the patient and select the Self Checkout option so they can complete the payment themselves.
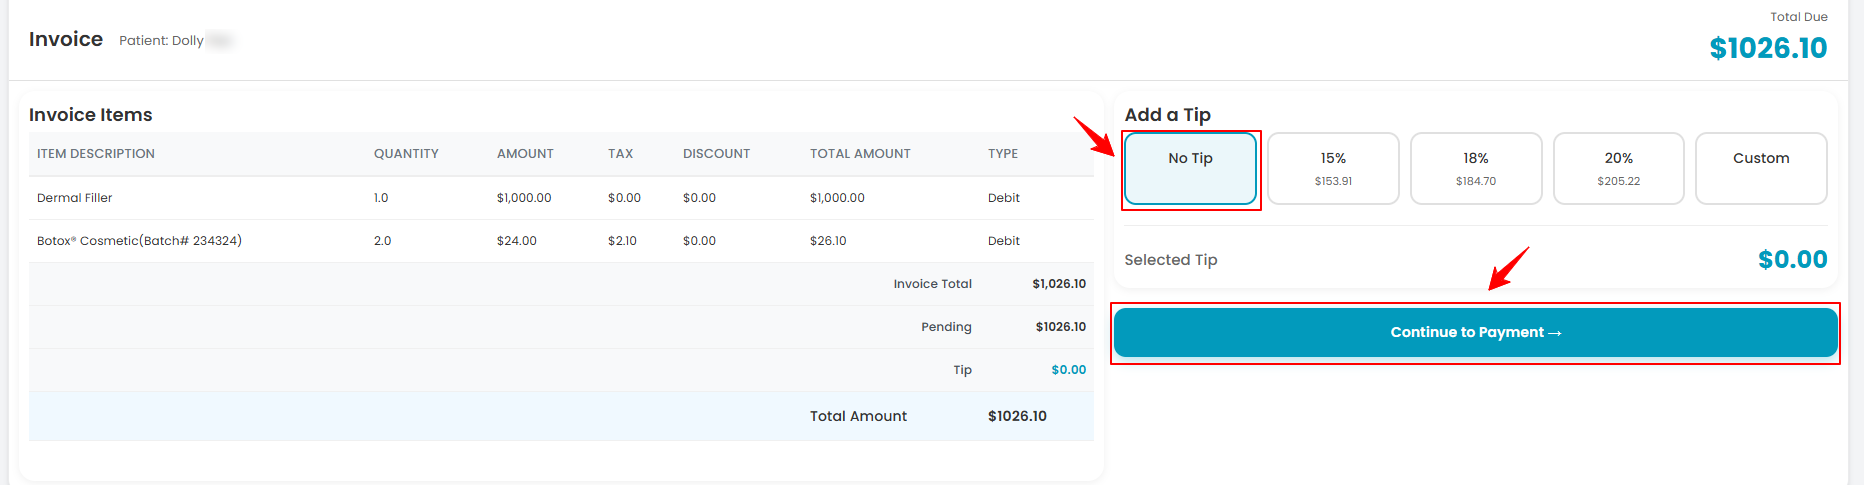
 - You will now see the Invoice Preview, which displays the payment details and the total amount due. To add a tip, click on one of the available tip percentage options or select “Custom” to enter your own tip amount. The tip will automatically be added to the total amount to be paid. Click the “Continue to Payment” button to proceed with the payment.
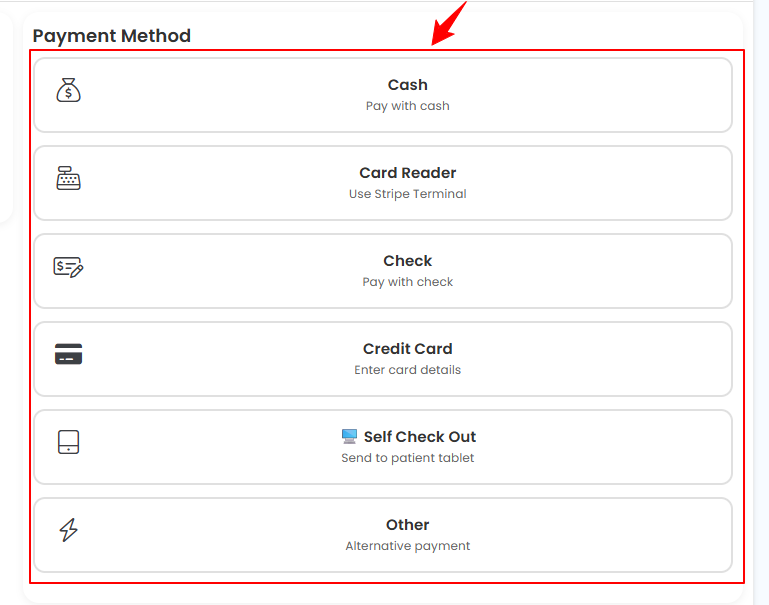
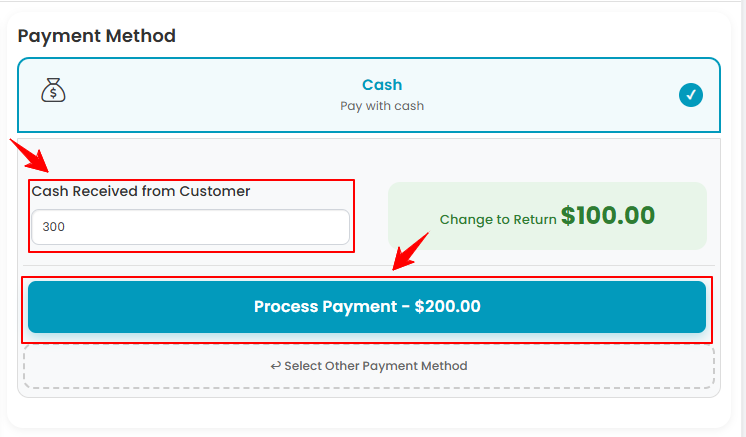
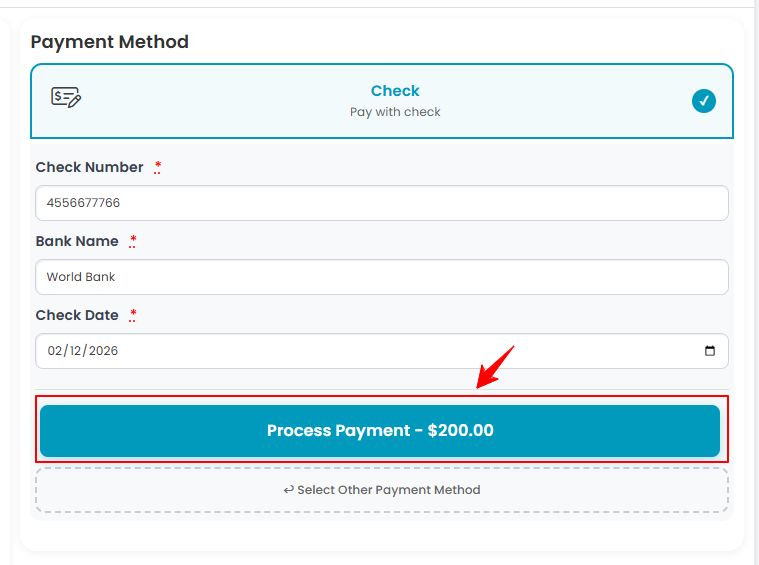
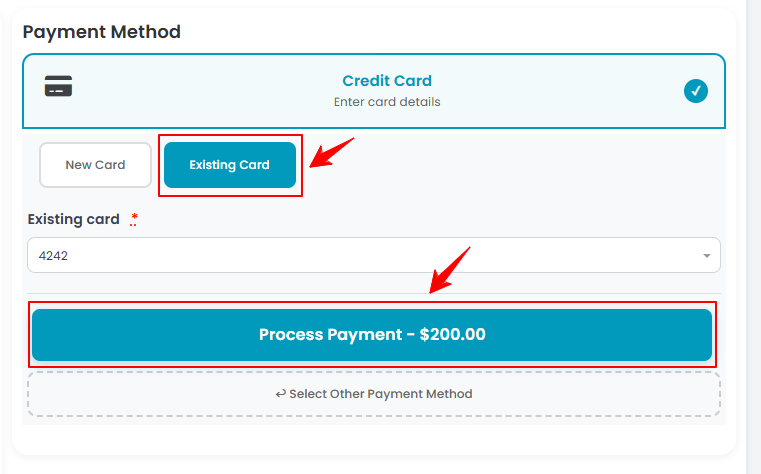
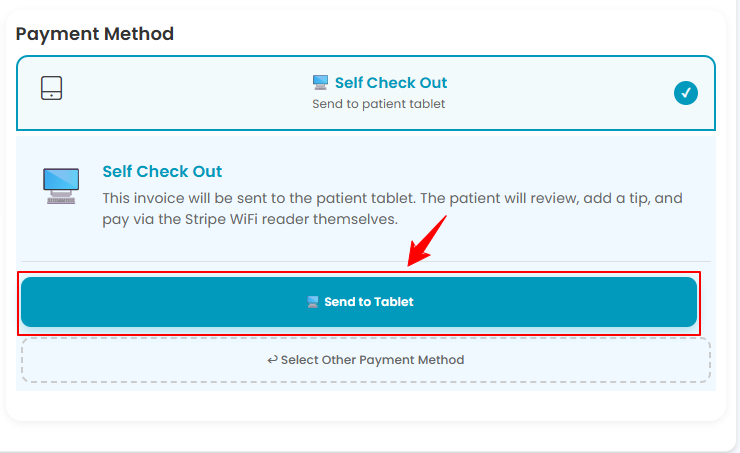
- Select a payment method from the available options: cash, check, credit card, card reader, self check out, or other. Then, enter the required details for the chosen payment method and click the “Process Payment” button to complete the transaction.
- For Cash, enter the amount received from the patient.
- For Check, enter the check number, bank name, and check date.
- For Credit Card, choose either a New Card or an Existing Card already saved in the portal, and enter the required card details.
- For Card Reader, confirm the payment by clicking “OK” on the pop-up message.
- For Self Check Out, click the “Send to Tablet” button to send the invoice to the patient's tablet.
- For Others, add an additional payment type and click “Save Changes.”Note: You can enable the Split Payment option if the patient wishes to use more than one payment method. For detailed instructions, refer to the “How to Use Split Payment to Combine Multiple Payment Methods” user guide.
- For Cash, enter the amount received from the patient.
- Next, choose how you would like to send the receipt, via email, SMS, or both. Once selected, click “Send Receipt & Done” to complete the billing process.
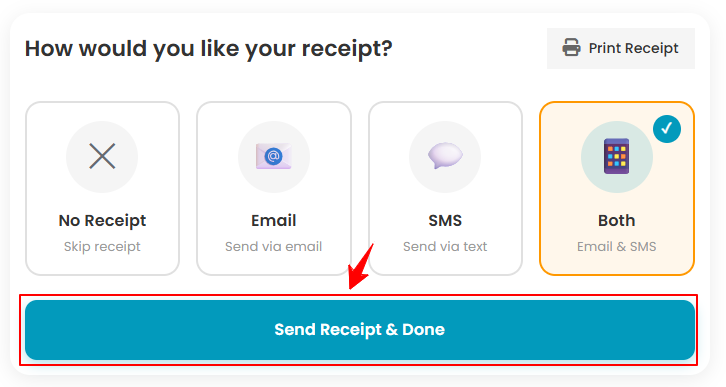
Note: To print the receipt, click the “Print Receipt” button.
Once the full payment has been processed, the complete invoice will be displayed, showing all payment details!
Go to Patient’s Billing Through the Patient Profile
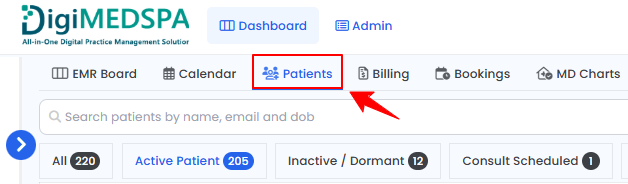
- The user can go to a patient’s billing screen by accessing the Patients List Screen. From the EMR Board Tabs, select “Patients.”
- There are four ways to access the patient’s billing screen from the patient profile:
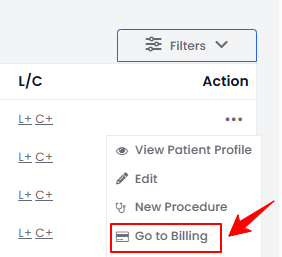
- Click the three dots under the action column and select "Go to Billing."
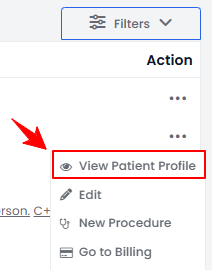
- Alternatively, click the three dots in the Action column and select “View Patient Profile.” You can also click anywhere on the patient’s record to open the profile.
- On the Patient Information Screen, click on the “Go to Billing” button on the top right corner of the screen.
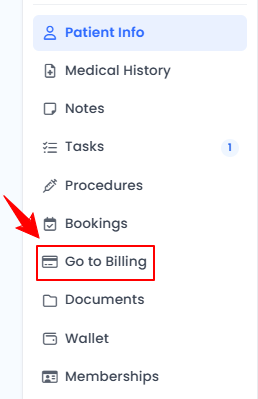
- On the Patient Information Screen, click “Go to Billing” from the side panel.
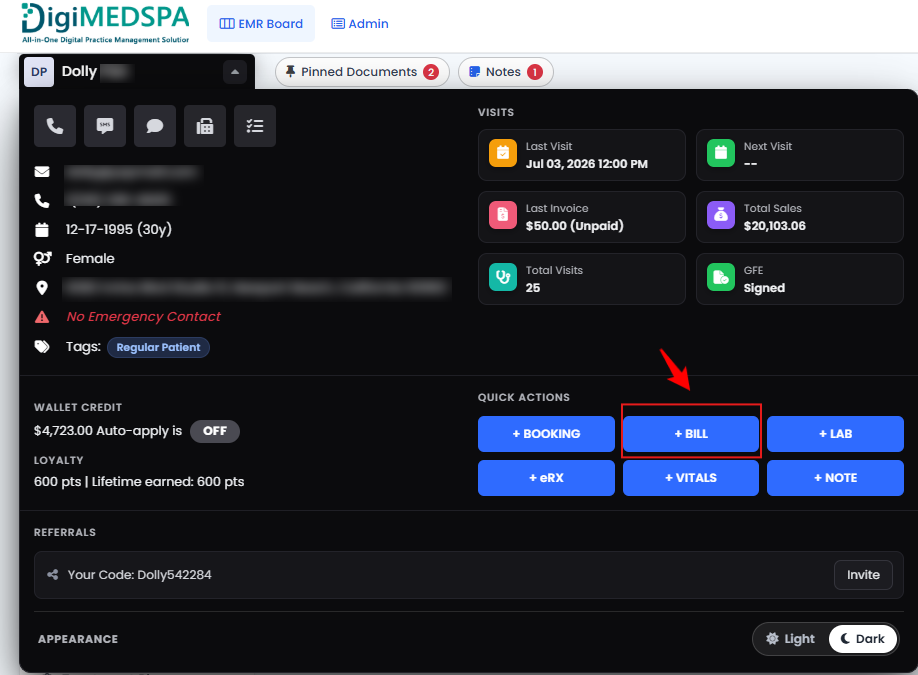
- Hover over the patient’s name to open the Patient Quick View Panel, then click the “+ Bill” button under Quick Actions.
- Click the three dots under the action column and select "Go to Billing."
- If the patient has bookings at multiple clinic locations, a list of those locations will be displayed in the patient profile. Click the “Go to Billing” button next to the location where the patient wishes to make the payment.Note: The list of locations will not be displayed if the patient has bookings at only one location.
- You will see a list of bookings associated with the patient. Click the “Go to Billing” button next to the booking for which the patient wishes to make a payment.Note: If a patient wishes to purchase over-the-counter (OTC) products—such as skincare items or wellness supplements that do not require a prescription—click the “Go to Billing” button located in the Over The Counter section. The remaining steps for completing the billing are the same as those used for services and procedures, explained in this user guide.
- To complete the payment, follow the same steps described in the previous section.