

 DigiMEDSPA EMR
 DigiMEDSPA CONNECT ™
DigiMEDSPA Patient Portal Review
This user guide provides a comprehensive overview of the DigiMEDSPA Patient Portal, covering how to access and navigate the patient profile, communicate with the clinic, manage e-Prescriptions, review patient information, medical history, and stay updated with notifications from the clinic. It is designed to help patients engage effectively with their care and streamline interactions within the portal.
Understanding Terminologies
Patient Portal
A patient portal is a secure online platform that allows patients to access their personal health information and interact with their provider. Through the portal, patients can view medical records, manage appointments, request prescriptions, complete forms, and communicate directly with their clinic, enhancing convenience, transparency, and engagement in their care.
Review Patient Portal
- Once the patient logs in, they are directed to their profile. The Patient Info Screen provides access to comprehensive information, including upcoming appointments, personal Info, Address, Contact Info, Emergency Contact, and Administrative Info.

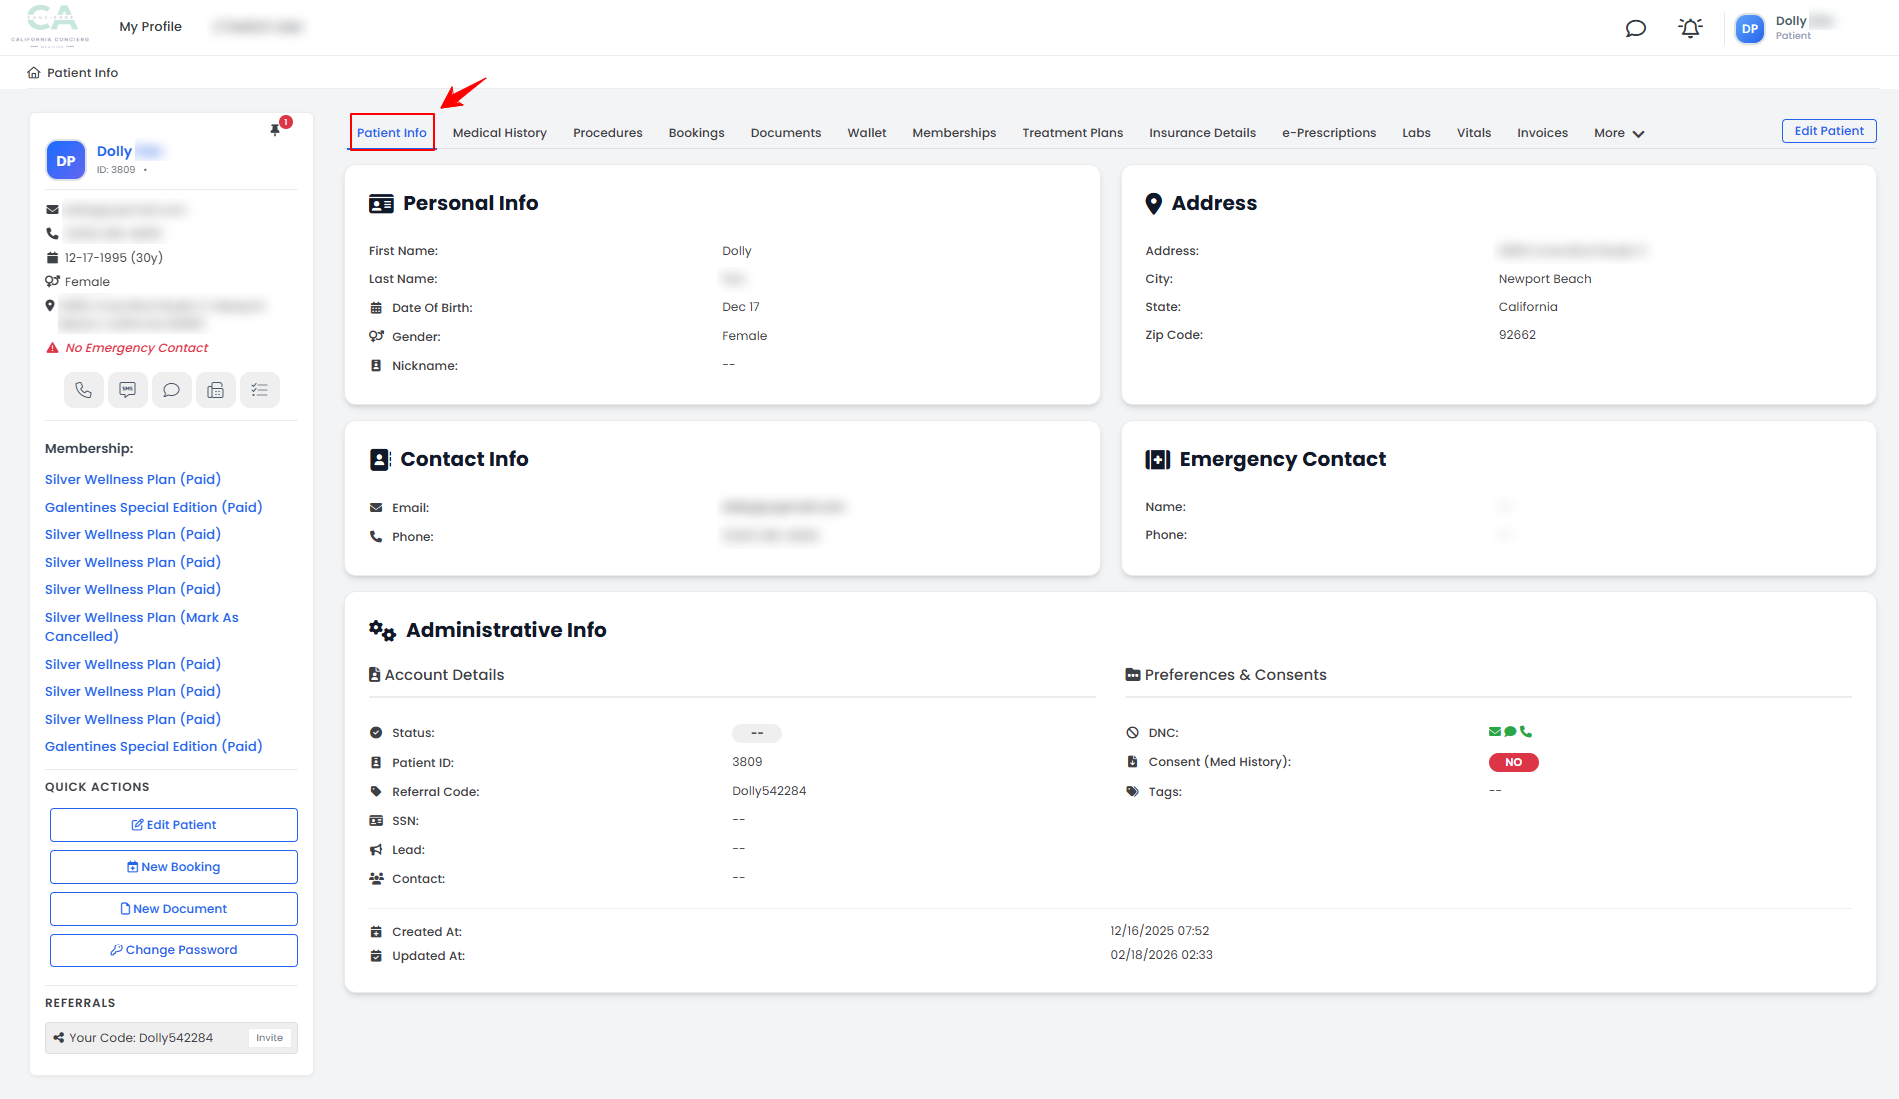
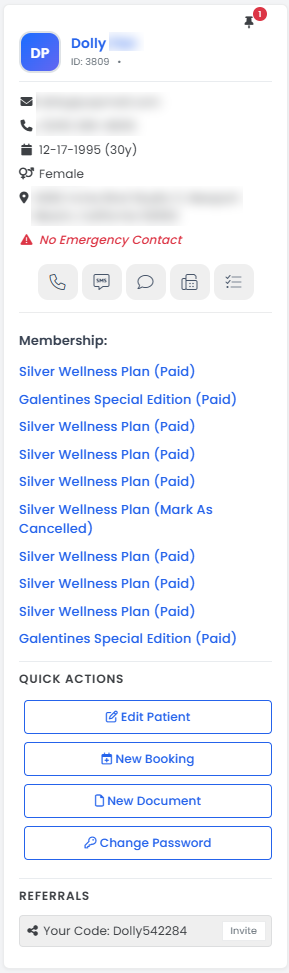
- The left panel in the patient profile provides quick access to essential patient information, communication tools, membership statuses, and quick actions.
- The patient can view personal information for quick reference.
- To communicate with the clinic, use the Call, SMS, Chat, Fax, or Tasks icons available on the left panel.
- Check patient memberships and review their current status, such as Paid, Unpaid, Marked as Cancelled, or Cancelled.
- Use Quick Actions to edit patient information, create a new booking, add a document, or change password.
- Access the Referrals section below Quick Actions to invite others or add a referral code.
- The patient profile contains multiple tabs that organize key information and actions for easy access. By navigating these tabs, you can review personal details, manage memberships, track treatment plans, view medical history, access communications, and perform other important tasks.

- Click the “Medical History” tab to view or add patient medical information. This section includes Social History, Allergies, Medications, Medical Conditions, Family History, Past Medical History, Good Faith Exams, and Patient Vitals. To update any section, click “Edit” next to the one you want to complete.
- Click the “Procedures” tab to access all of the patient’s procedures along with their status, such as In-Process, Pending Provider Signature, or Completed. Click “View Procedure” to see detailed information about a specific procedure.
- Next, click the “Bookings” tab to open the Bookings List Screen, where you can view all bookings along with their current status. From here, you can cancel, reschedule, or edit bookings as needed.
- Click the “Documents” tab to view all patient documents. From here, you can view and add documents, as well as complete forms such as questionnaires, consent forms, and good faith exams associated with the patient profile.
- By clicking the “Wallet” tab, you can review the patient’s balance and wallet items. From here, you can add credits, and items such as products, services, and promotions, and also view the Credit Ledgers, Wallet Ledgers, and Gift Cards.
- To review the patient’s memberships, click the “Memberships” tab. You can add new patient memberships, see the status of each membership—Paid, Unpaid, Cancelled, or Marked as Cancelled—and access details of each plan.
- Click the “Treatment Plans” tab to view all active and past treatment plans. From here, you can track progress, view procedures included, and manage ongoing plans.
- By clicking the “Insurance Details” tab, you can view or update the patient’s insurance information.
- Click the “e-Prescriptions” tab to access all electronic prescriptions issued to the patient. From here, you can review medication details and prescribing provider information.
- Click the “Labs” tab to view all laboratory orders for the patient. From here, you can track the status of each lab, including Pending, Sent, and Resulted.
- To record or view vital signs, click the “Vitals” tab. This section includes measurements such as blood pressure, heart rate, temperature, and other clinical readings.
- Click the “Invoices” tab to review all billing records for the patient, including Paid, Unpaid, and Pending invoices. From here, you can view details, resend invoices, download PDFs, print receipts, process refunds, or add additional charges for each invoice.
- Hover over “More” and click the “Transactions” tab to view all financial transactions related to the patient.
- Hover over “More” and click the “Credit Cards” tab, you can view, add, deactivate, or delete credit cards associated with the patient for payments.
- Hover over “More” and click the “Faxes” tab to view all fax communications sent to or received from the patient. From here, you can review, send, or manage fax records associated with the patient profile.
- Hover over “More” and click the “Referral Logs” tab to track all referrals made by or for the patient.
- To review credit transactions, hover over “More” and select the “Credit Ledger” tab. This section displays all credits applied to the patient, including reward type, amount, previous balance, reason, and other details for each credit.
- Hover over “More” and click the “Wallet Ledger” tab to view detailed wallet activity, including item name, quantity, amount, and line item type for each transaction.
- By hovering over “More” and clicking the “Notification Logs” tab, you can access all notifications sent to the patient by the clinic, including messages, alerts, and reminders.