

 DigiMEDSPA EMR
 DigiMEDSPA CONNECT ™
Add / View / Edit Provider
This user guide offers detailed, step-by-step instructions on how to efficiently add, view and edit a provider’s information within the DigiMEDSPA Portal.
Understanding Terminologies
Provider
A provider is a licensed medical professional, such as a medical director, nurse, esthetician, or other qualified practitioner, who delivers cosmetic or health procedures (e.g. injectables, laser therapy, facials, body contouring etc.) designed to enhance a patient’s appearance and well-being. Providers are responsible for conducting thorough consultations to assess a patient’s medical history, skin type, and treatment goals, enabling them to recommend and perform the most suitable procedures.
Access this link: https://digimedspa.com/ap2/providers
Add a Provider
- The user can add a provider by accessing the Providers List Screen. From the “Admin” dashboard, click on “Providers” under “Clinic Operations,” or search providers in the top search bar.

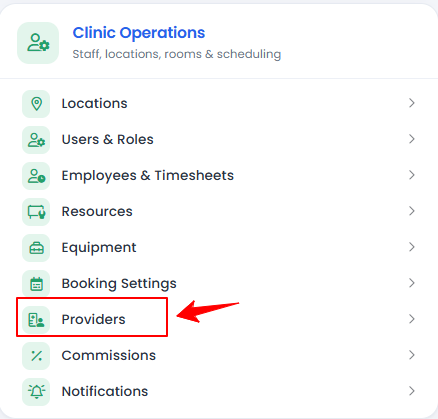
Note: You are now on the Providers List Screen, where a complete list of all providers is displayed. You can select any provider from the list and click the three dots under the action column to access options for viewing, editing, managing account ownership, schedule, unavailability and permissions, and changing password and status for the provider.
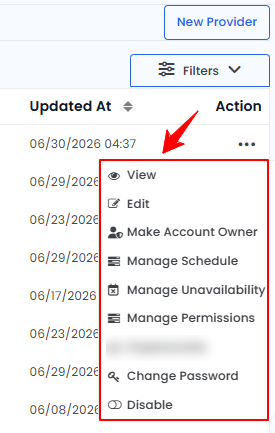
- To add a provider, click on "New Provider" in the top right corner of the screen.
- Step 1: Profile
In Step 1, enter the provider details including First and Last Name, Phone Number, Email address, and a brief Description. Upload the provider's Profile Picture, enter the Provider NPI, select their current Status and Commission status, indicate if MD permission is required, and specify their MD status.Note: ‘’Status’' determines whether a provider is active or inactive currently. When set to '’Enable,'’ the provider is active, visible, and available for appointments. When set to '’Disable,'’ the provider is inactive and cannot be scheduled for appointments. The “Commission Enabled” setting indicates whether commission is applicable to the provider. Selecting “Yes” means the provider is eligible for commission; while selecting “No” indicates that no commission is applied. “Provider NPI” (National Provider Identifier) is a unique 10-digit identification number assigned to healthcare providers and used to identify providers in healthcare records, billing, and other administrative transactions. - Select the provider’s availability from the '’Available For’' dropdown menu.
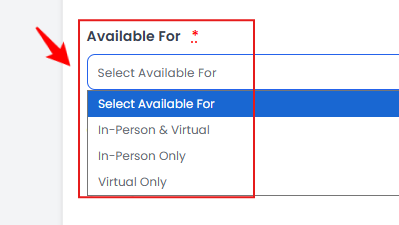 Note: ''In-Person'' refers to appointments where the provider and patient meet physically at the Med SPA location. The service is delivered face-to-face. ''Virtual'' refers to appointments conducted remotely using video conferencing or other online tools. The provider and patient connect digitally without being in a physical location.
 - Select a profile Color for the provider and choose the “Services” they offer from the dropdown menu.Note: ''Color'' refers to the hue chosen for the provider's profile to visually personalize and distinguish their account. This color helps to create a unique look and makes the provider’s profile easier to identify within the system.
- Select the Locations where the provider offers services from the dropdown menu.
- Select a Role for the provider from the dropdown menu.
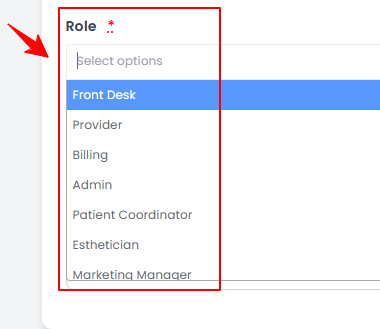 Note: To select a role for a provider, you must first create the role. Only the roles created there will appear in the dropdown menu for selection. Refer to our “Manage Provider Roles” user guide for detailed instructions.
 - Choose whether the provider can view All Providers' Patients or only Specific Providers' Patients. If you select Specific Providers' Patients, choose those specific providers from the dropdown menu. Once done, click ‘’Next’’ to proceed.
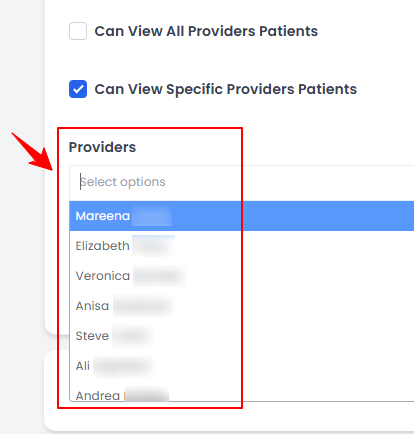 Note: Selecting '’View All Providers' Patients’' allows the provider to see all patient records in the system. Selecting '’Specific Providers' Patients'’ allows the provider only to see records of patients linked to specific providers.
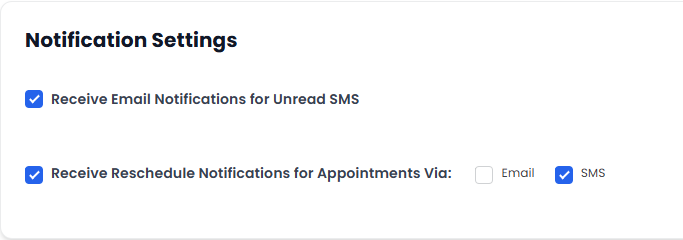
 - Next, configure the provider's notification settings. Select “Receive Email Notifications for Unread SMS” to notify the provider of unread SMS messages via email. To receive appointment rescheduling notifications, select “Receive Reschedule Notifications for Appointments Via:” and then choose your preferred notification method by checking “Email,” “SMS,” or both, as needed.
- Step 2: Schedule
In Step 2, the user can set up the provider's schedule. This step includes two sections: Weekly Schedule Details and Day Schedule Details.- First, enter the provider’s weekly schedule details for the locations selected in Step 1. Specify the '’Start Date'’ and '’End Date'’ to define the time period this schedule will cover. All weekdays will be displayed, each with fields for '’Start Time'’ and ‘'End Time.'’ Select the days the provider will be available, and enter the start and end times for each day individually.
- If the provider is available in intervals on the same day, you can click the plus sign to add multiple “Start Time” and “End Time” for that day.

- To add a schedule for a specific day that differs from the provider's regular weekly schedule, such as working on holidays or an exceptional day, click on "Add Another Day Schedule."

- From the dropdown menu, select the clinic “Location”. Then, choose the specific “Date” for the day schedule and enter the “Start Time” and “End Time” based on the provider's available hours.Note: Clicking the "Remove" button will delete the selected Day Schedule Details permanently.
- Step 3: Booking Settings
In Step 3, fill in the required information, including the minimum time before a patient can book, reschedule, or cancel an appointment, as well as the minimum time for cancellations without a charge. Specify the availability for online booking and the same day booking, whether refunds are allowed, the partial percentage for refunds, cancellation fee type, and the cancellation fee amount. Once all the required information has been entered, click "Submit."
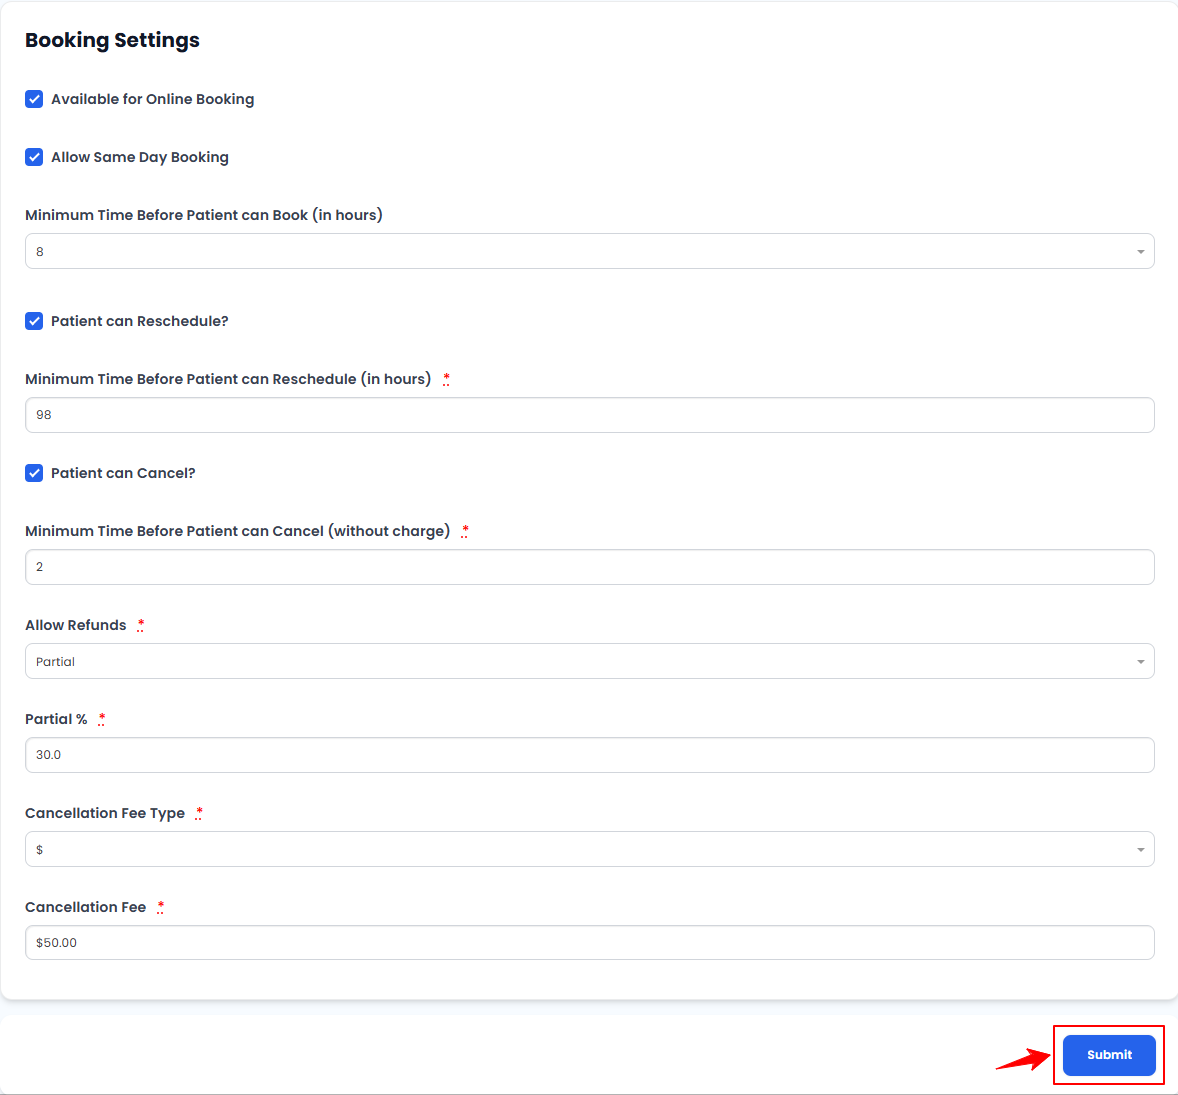 Note: Ensure that the settings are set to “By Provider” in the “Booking Settings” so the user can edit the additional information when adding a provider. If the settings are set to “By Clinic,” the default settings will be applied, and the additional information fields will not be editable for the user here. For detailed instructions, refer to our “Manage Booking Settings” user guide.The provider has been successfully added!
 - Manage Provider Permissions
A list of all portal features will be displayed. The provider will only have access to the features and permissions that are selected. - Each feature includes four core permissions: List, View, New, and Edit. Select the required permissions for each feature, then click “Save” to apply the changes.
- Alternatively, select “All Permissions” to automatically grant all available permissions.Note: For more details on managing provider permissions, refer to our “Manage Provider Permissions” article.
The provider has been successfully added!
View a Provider
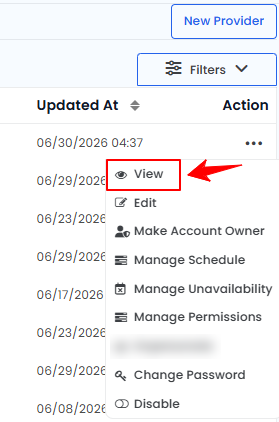
- To view a specific provider from the list, click the three dots in the action column and select "View," or simply click anywhere on the provider’s data.
- The provider profile will open, including all the provider details.
Edit a Provider
- There are two ways to edit an existing provider.
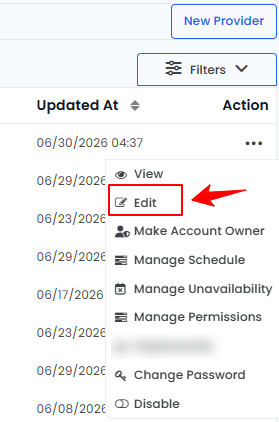
- From the provider list, click on three dots under the action column and select "Edit" for the specific provider.
- From the provider profile, hover over “Actions” and select the ‘’Edit Provider’’ button on the top right corner of the screen.
- From the provider list, click on three dots under the action column and select "Edit" for the specific provider.
- Go to the step you want to edit, make the desired changes, and then click "Submit" on Step 3 to save your changes.