

Understanding Terminologies
- Contacts
Contacts are individuals recorded in the system who have reached out to you through sources such as your website or web forms—typically including Patients and Leads. You can first add them as Contacts in the portal, and then classify them as either new or existing Patients or Leads. Patients are individuals who have received or are scheduled to receive services. Leads are potential patients who have expressed interest but have not yet booked services.
Part 1 of 6
Add Contact
-
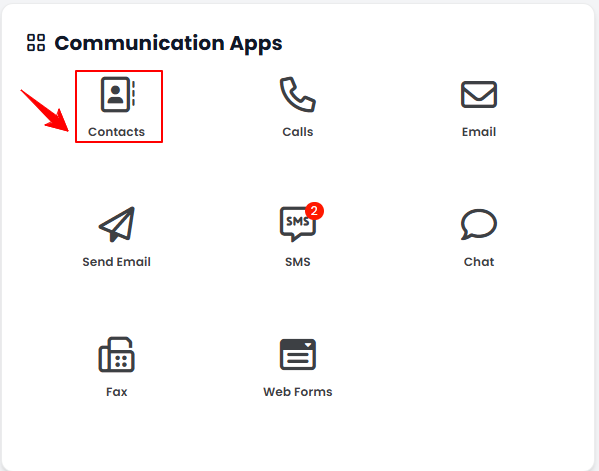
The user can add a contact by accessing “Contacts” in the Communication Apps Panel from two entry points.
-
From the Top Menu Navigation, click on “Apps.”

-
Navigate to the Communication Apps, click on “Contacts.”
-
-
From the Left Navigation, click on the “Communication Apps” dropdown menu, and select “Contacts.’’ Alternatively, you can type “Contacts” into the search bar in the Left Navigation.
-
-
To add a new contact, hover over Actions and click the “New Contact” button located in the top right corner of the screen.NoteFrom here, you can add a new lead or patient by selecting “New Lead” or “New Patient.”
-
Enter the First and Last Name, and Email. To include a phone number, click the “Add Phone Number” button.

-
Enter the Phone Number, then select the Phone Number Type from the dropdown menu.
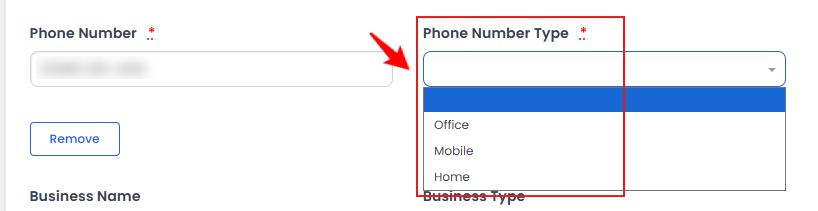 Note“Mobile” is a personal cell number, “Office” is the main business line, and "Home" refers to a telephone number associated with a person’s primary place of residence. Selecting the correct type ensures clear and efficient communication.
 -
Next, enter the Business Name and Type, and fill in the Street Address, City, State, ZIP code, Country, and Tags. Then, select the Source from the dropdown menu. Once done, click “Create Contact” to save.
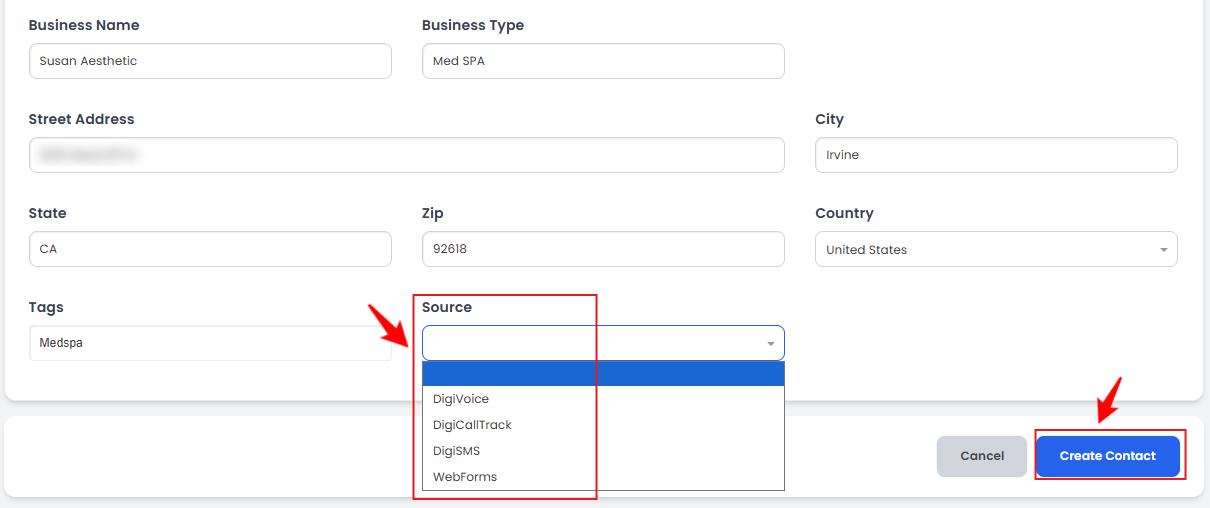 Note“Tags” are custom labels used to categorize and organize contacts based on specific attributes or needs for easy identification in the portal. “Source” refers to the origin of a contact—how the individual or business became connected to the Med SPA. Tracking the source helps the Med SPA determine which methods are most effective for attracting patients and leads.
The new contact has been added successfully!
Part 2 of 6
View Contact
-
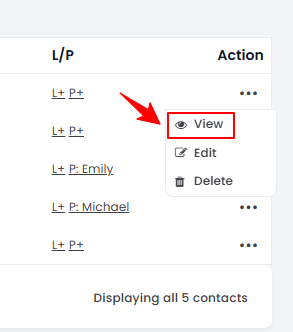
To view a specific contact from the list, click the three dots under the action column and select "View," or simply click anywhere on the contact’s information.
-
The Contact Details View Screen will open, displaying all available information for that contact.
Part 3 of 6
Edit Contact
-
You can edit an existing contact by two ways:
-
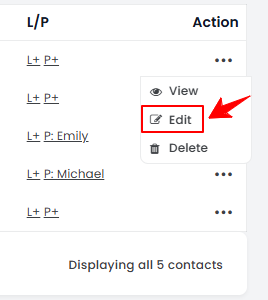
From the contacts list, click on three dots under the action column and select "Edit" for the specific contact.
-
On the Contact Details View Screen, click the “Edit Contact” button in the top-right corner.
-
-
Make the necessary changes and click “Update Contact” to save your updates.
The contact has been edited successfully!
Part 4 of 6
Delete Contact
-
You can delete an existing contact by two ways:
-
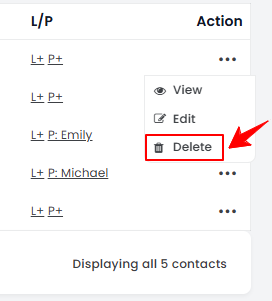
From the contacts list, click on three dots under the action column and select "Delete" for the specific contact.
-
On the Contact Details View Screen, click the “Delete Contact” button in the top-right corner.
-
-
A confirmation pop-up will appear on the screen. Click “OK” to delete the contact.NoteDeleting the contact will remove all contact information from the portal permanently.
-
To delete only a phone number for a saved contact, click the three dots in the action column and select “Edit” for that contact.
-
Select the “Delete” option next to the phone number you want to remove, then click “Update Contact” to save your changes.
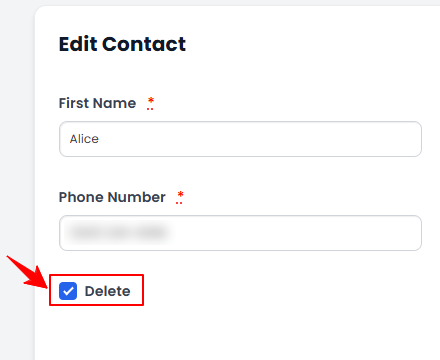 The phone number for the existing contact has been deleted successfully!
Part 5 of 6
Convert Contact to Lead
-
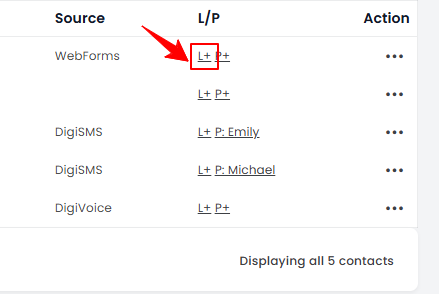
To convert a contact into a new or existing Lead, click the “L+” icon in the Lead/Patient column next to that contact.
-
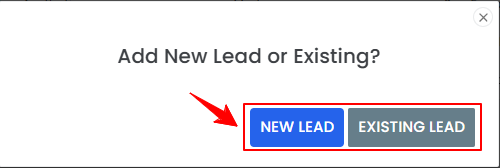
A pop-up message will appear. Select whether you want to add the contact as a New Lead or an Existing Lead.
-
Choosing “New Lead” will open the New Lead form. Fill in the required details, then click “Create Lead” to save.
-
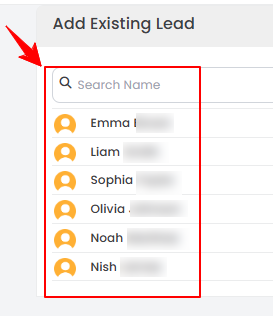
Clicking “Existing Lead” will display a list of existing leads. Select the appropriate name to open that lead’s form. Then, click “Create Lead” to save the contact to the selected lead.
 The contact has been saved as a lead successfully!
Part 6 of 6
Convert Contact to Patient
-
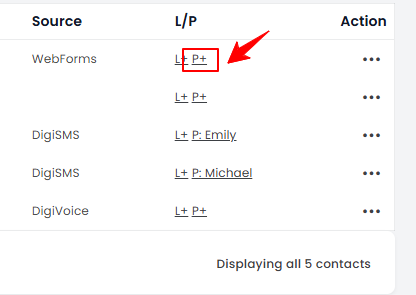
To convert a contact into a new or existing Patient, click the “P+” icon in the Lead/Patient column next to that contact.
-
A pop-up message will appear. Select whether you want to add the contact as a New Patient or an Existing Patient.
-
Choosing “New Patient” will open the New Patient form. Fill in the required details, then click “Create Patient” to save.
-
Clicking “Existing Patient” will display a list of existing patients. Select the appropriate name to open that patient’s form. Then, click “Create Patient” to save the contact to the selected patient.
The contact has been saved as a patient successfully!
You’re all set
That’s every step of “Manage Contacts”.