

Understanding Terminologies
- Roles
Roles are predefined sets of permissions that determine a user's access level and allowed actions within the system, ensuring controlled and efficient management.
Part 1 of 6
Add New Role
-
The user can add a new role by accessing “Users & Roles” from two entry points.
-
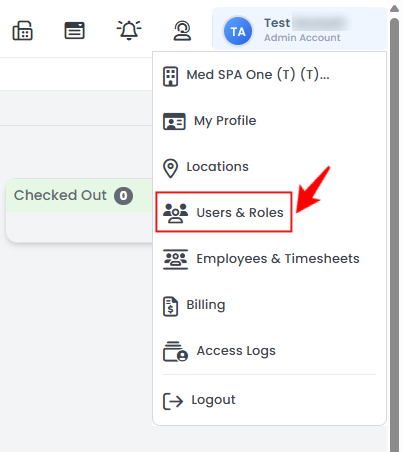
From the Top Right Profile dropdown menu, select “Users & Roles.”
-
From the Left Navigation, click on the “My Account” dropdown menu and select “Users & Roles.” Alternatively, you can type “Users & Roles” into the search bar in the Left Navigation.
-
-
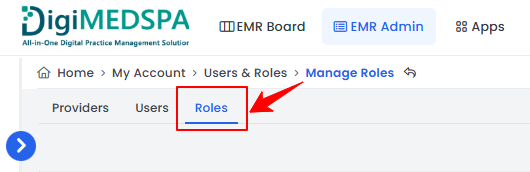
Clicking “Users & Roles” opens the Users List Screen by default. To access Roles, click the “Roles” tab.
-
To create a new role, click the “New Role” button located in the top right corner of the screen.
-
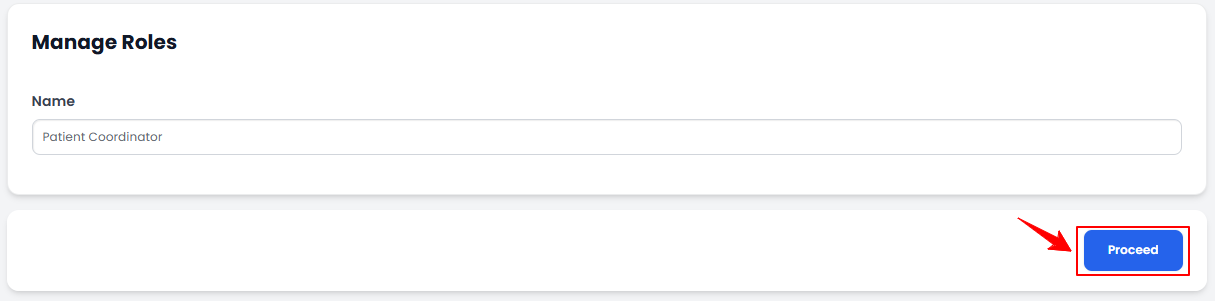
Enter the Name for the role, then click “Proceed” to save it.
-
A list of all portal features will be displayed, and the role you have created will only have access to the features that are ticked (selected). Each category includes four core permissions: "List," "View," "New," and "Edit." Select the necessary permissions, then click "Update Role" to apply the changes.
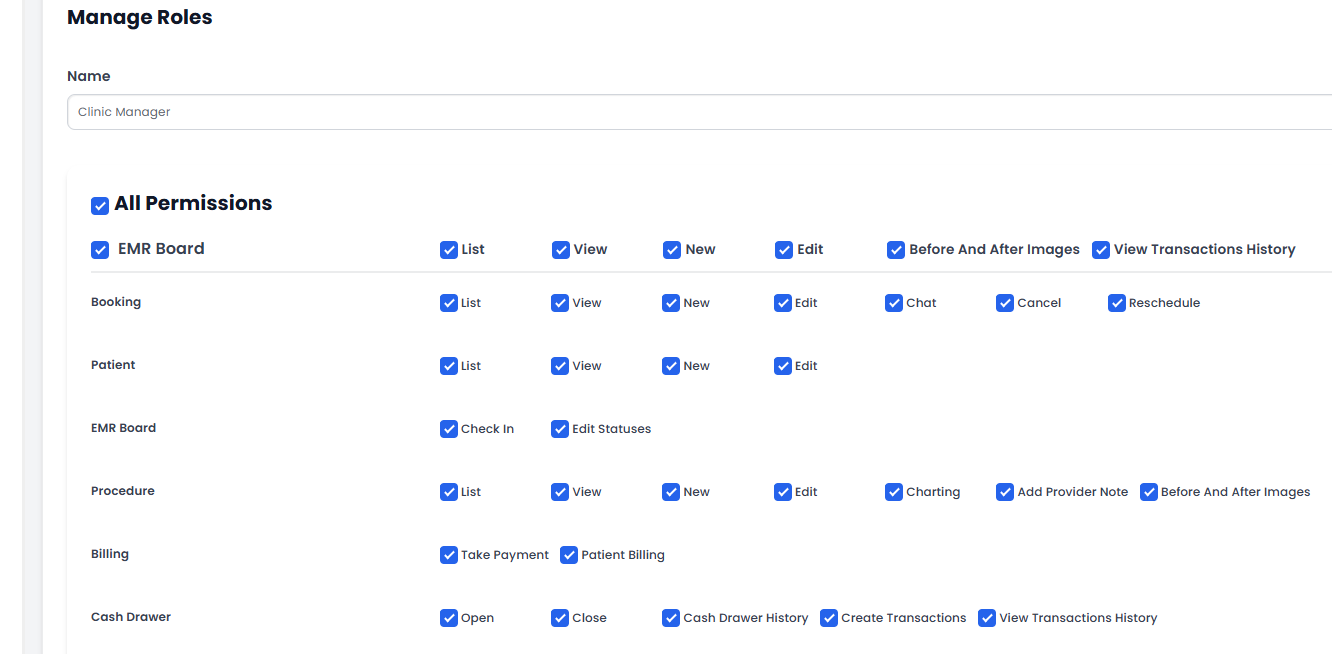 Note“List” gives the user the ability to view lists of records. “View” allows the user to see specific records or data. “New” enables users to create new entries, such as adding patients, appointments, or treatment plans. “Edit” allows the role to modify existing records, including updating patient details, treatment plans, or other system entries. Other permissions are based on the specific portal features.
The new role has been created successfully!
Part 2 of 6
Edit Role
-
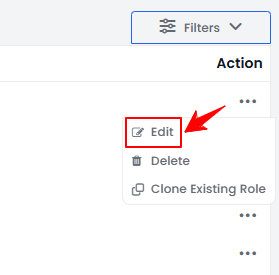
From the Roles List Screen, click on three dots under the action column and select “Edit" for the specific role.
-
Select the desired permissions for the role or modify the role name, then click “Update Role” to apply the changes.
The role has been edited successfully!
Part 3 of 6
Delete Role
-
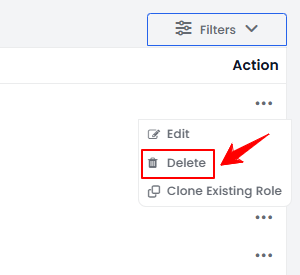
From the Roles List Screen, click on three dots under the action column and select “Delete" for the specific role.
-
A confirmation pop-up will appear on the screen. Click “OK” to confirm and delete the role.
The role has been deleted successfully!
Part 4 of 6
Clone Existing Role
-
From the Roles List Screen, click on three dots under the action column and select “Clone Existing Role" for the specific role.
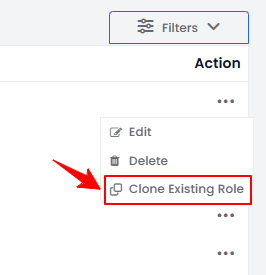 Note“Cloning Existing Role” is the process of duplicating an existing user role with its current permissions, allowing modifications without affecting the original role.
 -
The cloned role is named “Copy” followed by the original role name. You can now modify its permissions and click “Update Role” to save the changes.
The role has been cloned successfully!
Part 5 of 6
Selecting a Role While Creating a New User
-
From the Top Right Profile dropdown menu, select “Users & Roles.”
-
From the Users List Screen, click the “New User” button located in the top right corner of the screen.
-
Select one or more roles from the dropdown menu. Enter the required information and click “Save” to assign the roles.
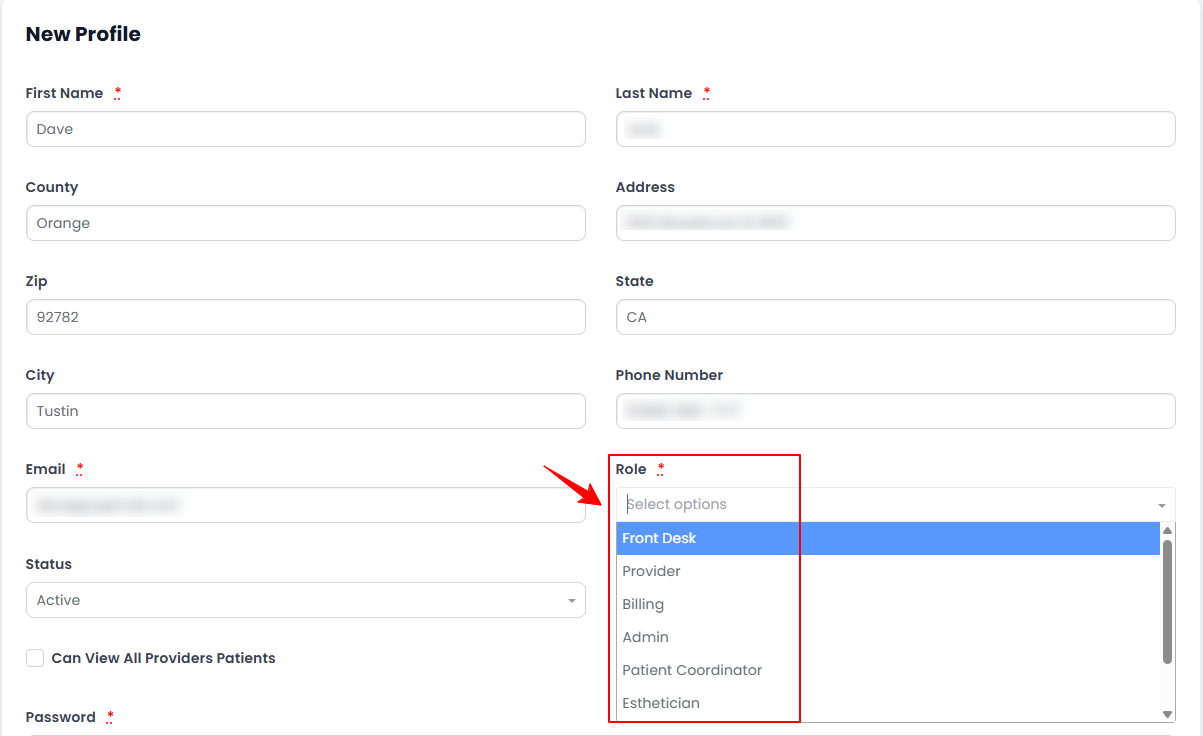 The role has been assigned to the user successfully!NoteFor detailed instructions on creating a new user, refer to our “How to Manage Users” article.
Part 6 of 6
Selecting a Role While Creating a New Provider
-
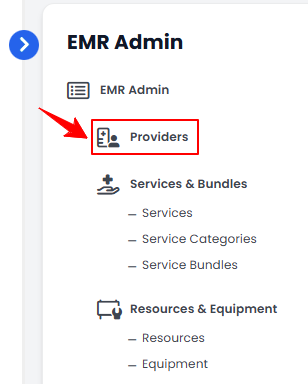
From the EMR Admin, click on “Providers.”
-
From the Providers List Screen, click on the "New Provider" button located in the top right corner of the screen.
-
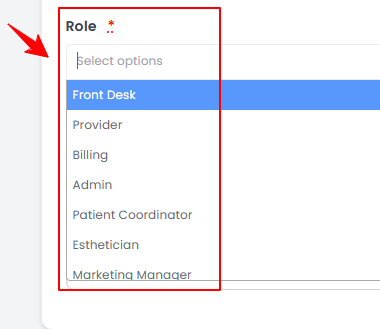
Select one or more roles from the dropdown menu. Enter the required information and click “Next” to proceed.
-
Click "Submit" on Step 3 to save the provider with the assigned roles.
The role has been assigned to the provider successfully!NoteFor detailed instructions on creating a new provider, refer to our “Add / View / Edit Provider” user guide.
You’re all set
That’s every step of “How to Manage Roles”. Up next: Manage Access Logs.