Manage Questionnaires
This user guide provides step-by-step instructions for adding, editing, and attaching a questionnaire to a service or procedure in the DigiMEDSPA Portal.
Understanding Terminologies
Questionnaires
Questionnaires refer to structured sets of questions designed to collect important and relevant medical and personal information from patients before a procedure. These forms may include questions about a patient's medical history, current health status, treatment goals, and any specific concerns or preferences. Questionnaires help providers assess patient suitability for certain treatments, ensure patient safety, and maintain proper documentation for legal and medical purposes.
Create a Questionnaire
- The user can create a questionnaire by navigating to the Clinical Documentation App from two entry points.
- From the EMR Panel of the App Dashboard, click on “Clinical Documentation.”

- From the Left Navigation, click on the “EMR” dropdown and select “Clinical Documentation.”
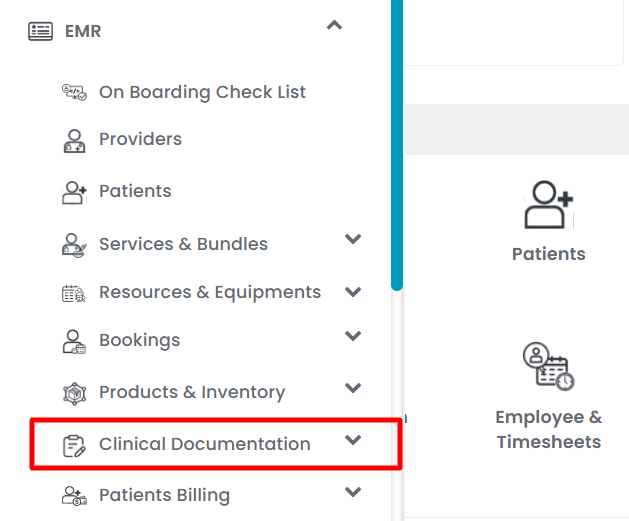 Note: Once you're in the “Clinical Documentation App”, the Questionnaire list will open by default, as it is the first option in the dropdown menu for clinical documentation.
- From the EMR Panel of the App Dashboard, click on “Clinical Documentation.”
- To create a new questionnaire, click on the “New Questionnaire‘’ button in the top right corner of the screen.

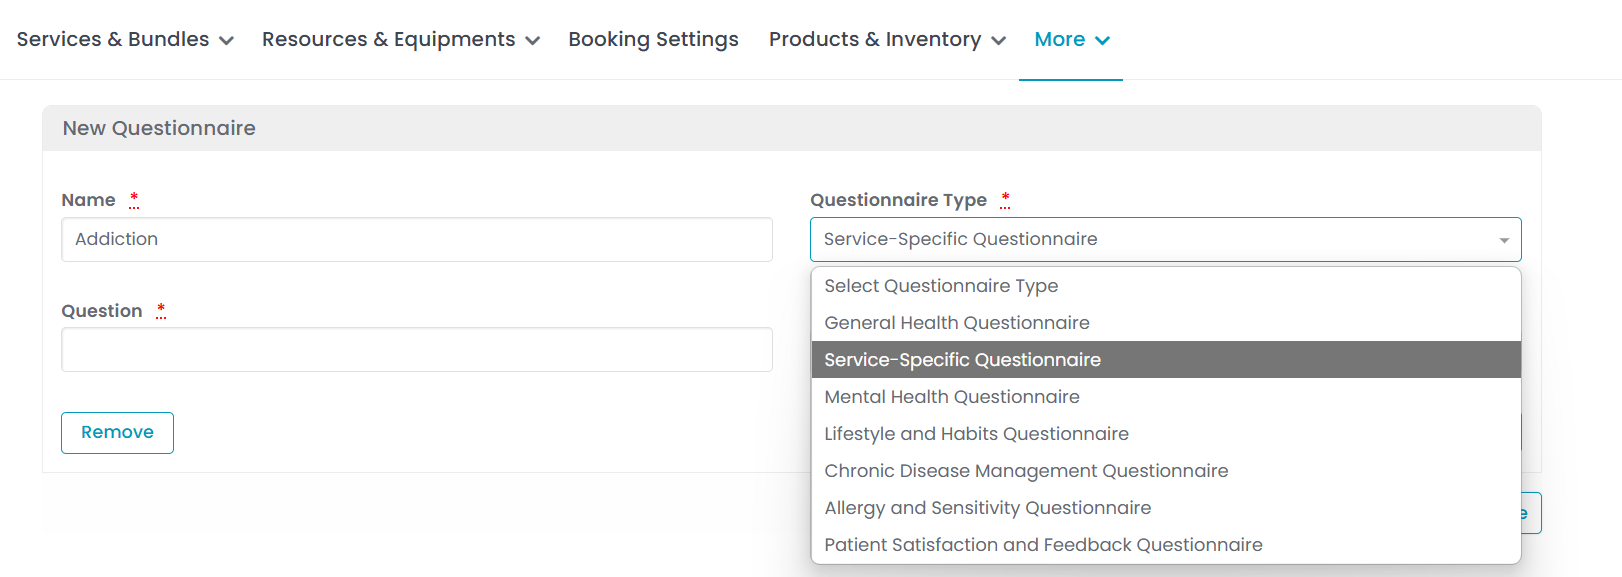
- Fill in the required information, including Name, Questionnaire Type, Question, and Answer Type. Select the appropriate Questionnaire Type from the dropdown menu.
- Select the Answer Type relevant to the question from the dropdown menu.
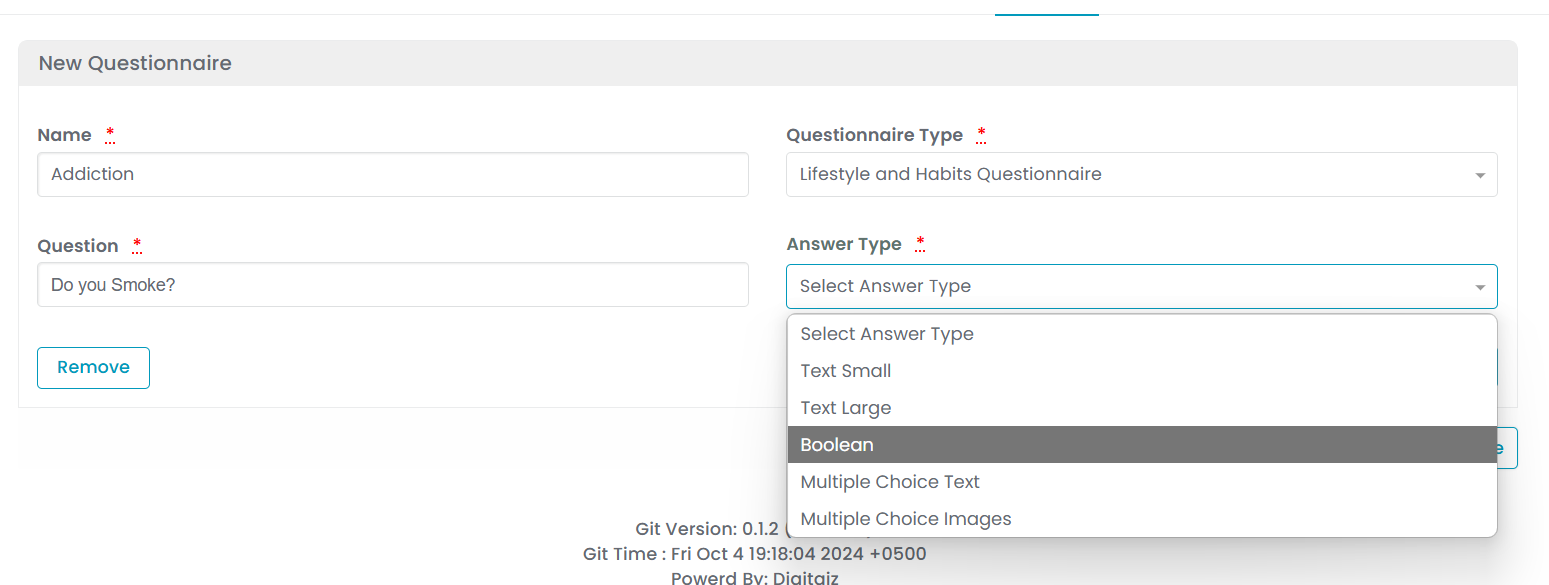 Note: “Text Small” allows short responses, while “Text Large” is used for more detailed answers. “Boolean” offers a simple "Yes/No" choice. “Multiple Choice” Text presents a list of text options from which the patient can select one or more answers. “Multiple Choice Images” provides image options for selection instead of text.
 - To add another question to your questionnaire, click “Add New Question”, then fill in the question and select the appropriate answer type.
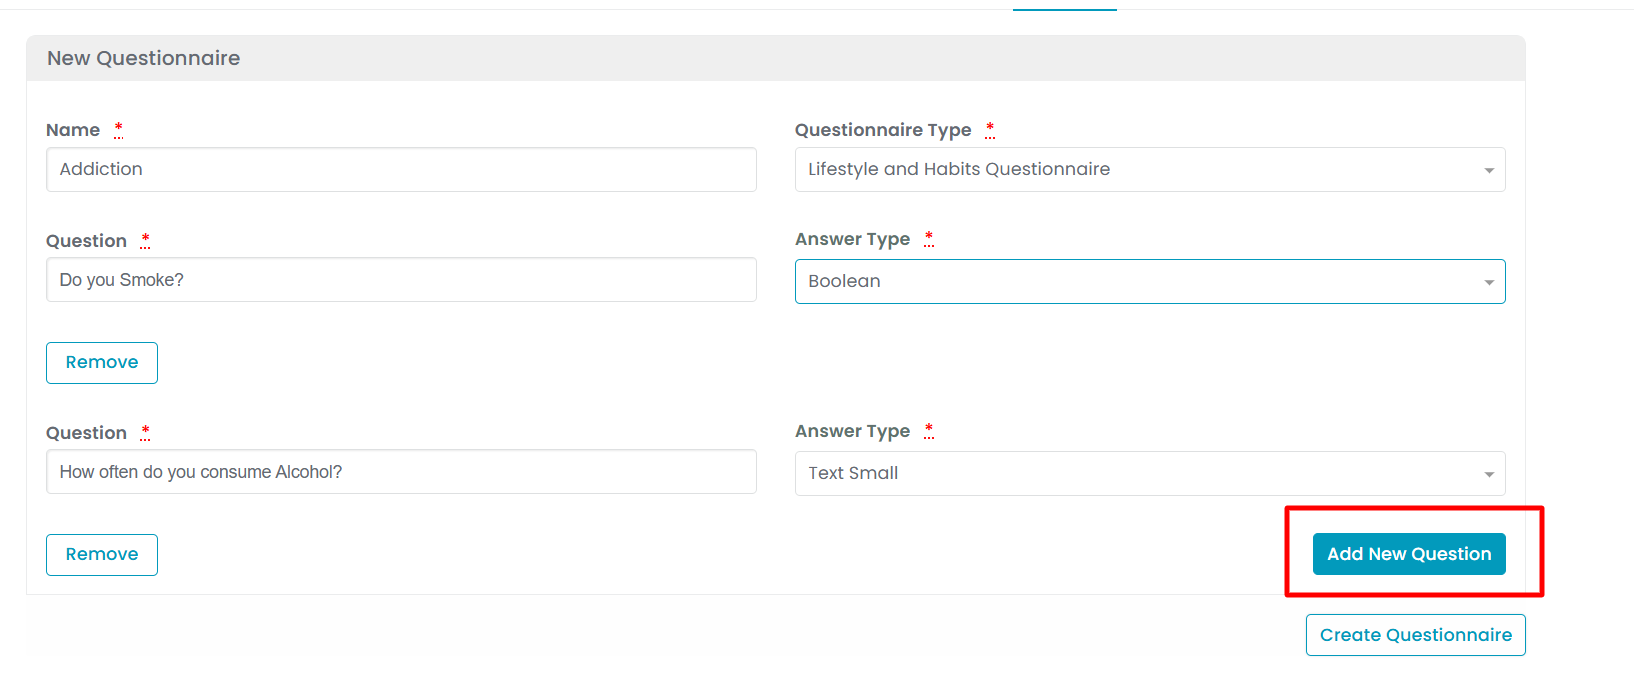 Note: You can add as many questions to your questionnaire as needed.
 - If you select "Multiple Choice Text" or “Multiple Choice Images” as your answer type, click the plus sign to add answer options. You can also allow patients to select multiple answers.
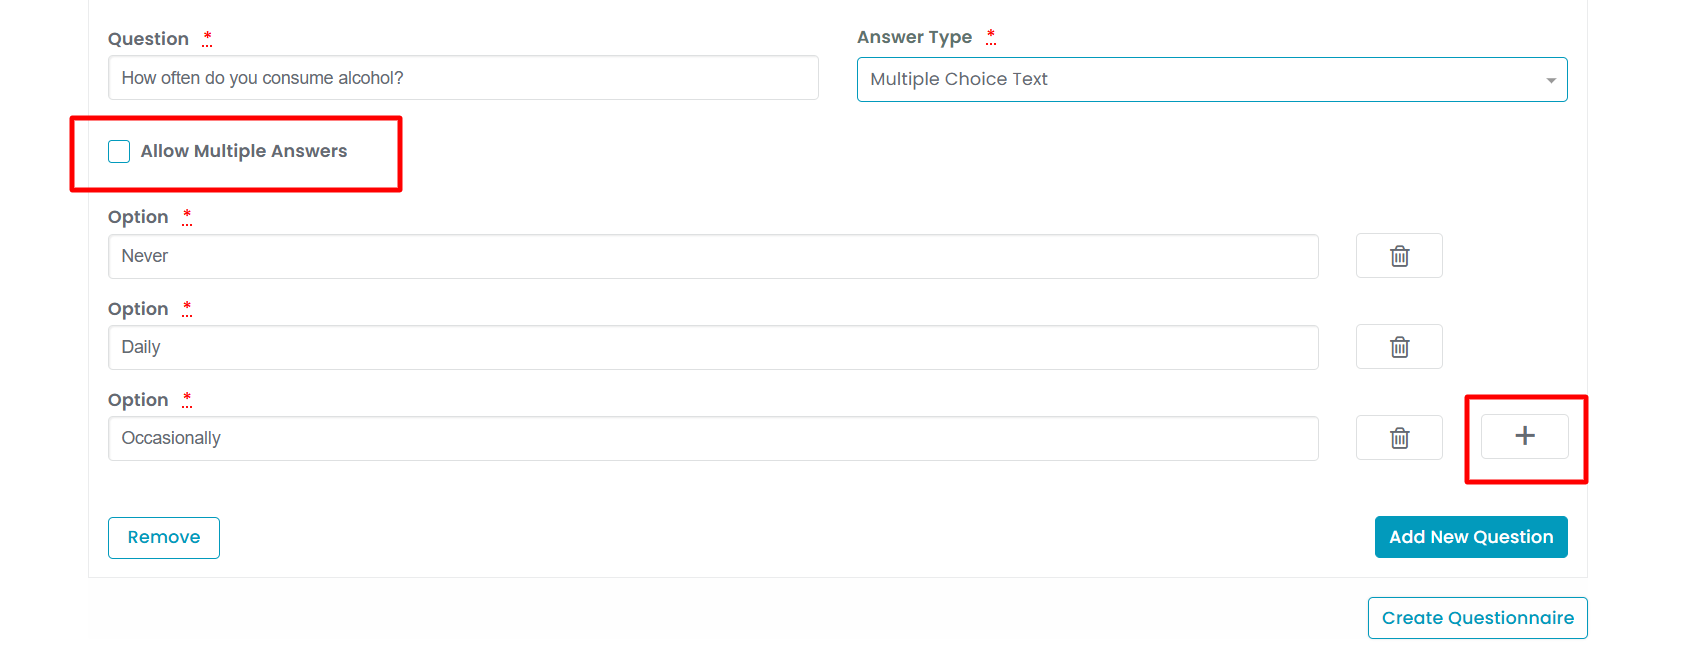
- Once you've finished adding all the questions, click “Create Questionnaire” to save it.
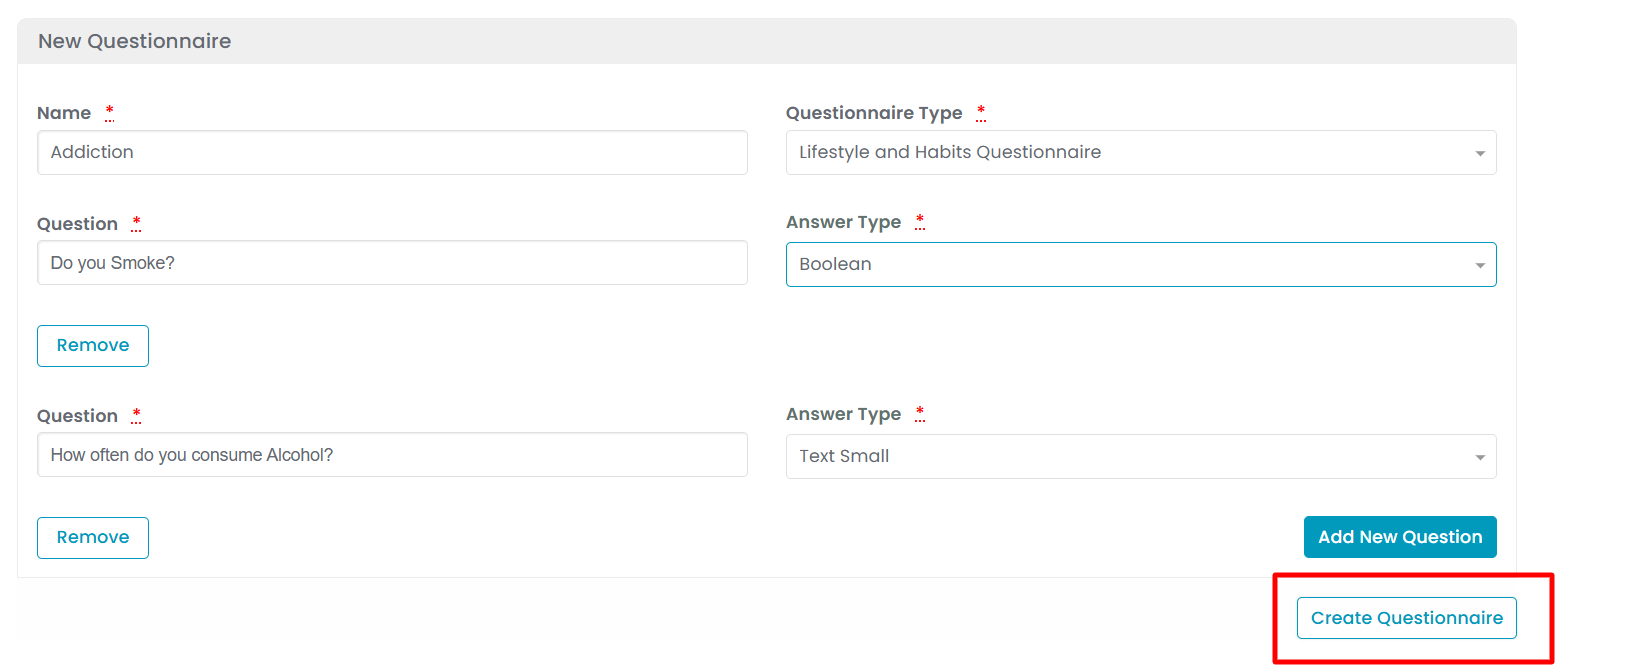 Your Questionnaire has been successfully created!
Edit a Questionnaire
- From the questionnaire list, click on three dots under the action column and select "Edit" for the specific questionnaire.

- Make the desired changes in the questionnaire form. Once done, click “Update Questionnaire”.
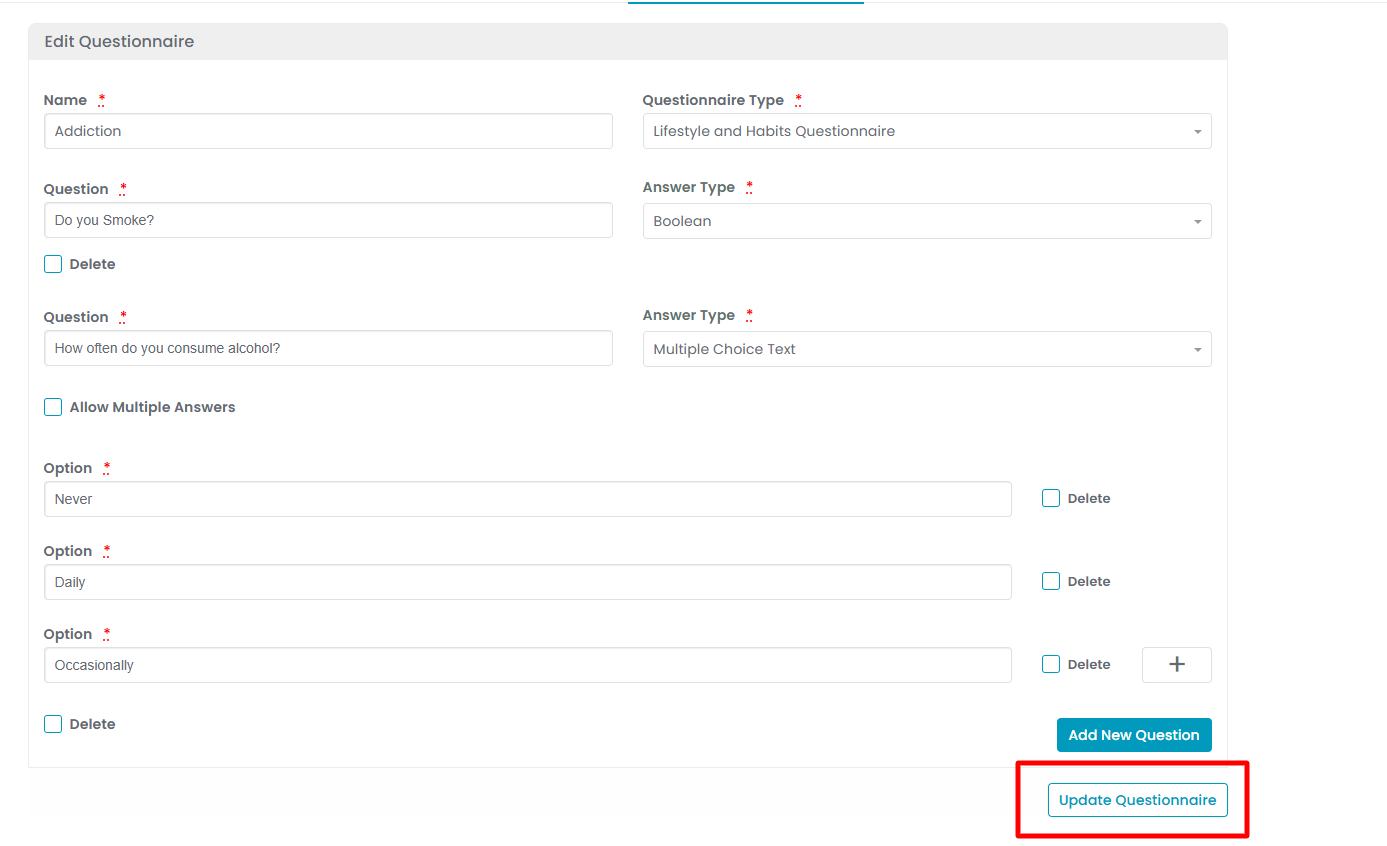 Your Questionnaire has been successfully edited!Note: Questionnaire can also be edited by clicking the "Edit Questionnaire" button in the top right corner of the View Questionnaire Page.
Attach a Questionnaire to a Service
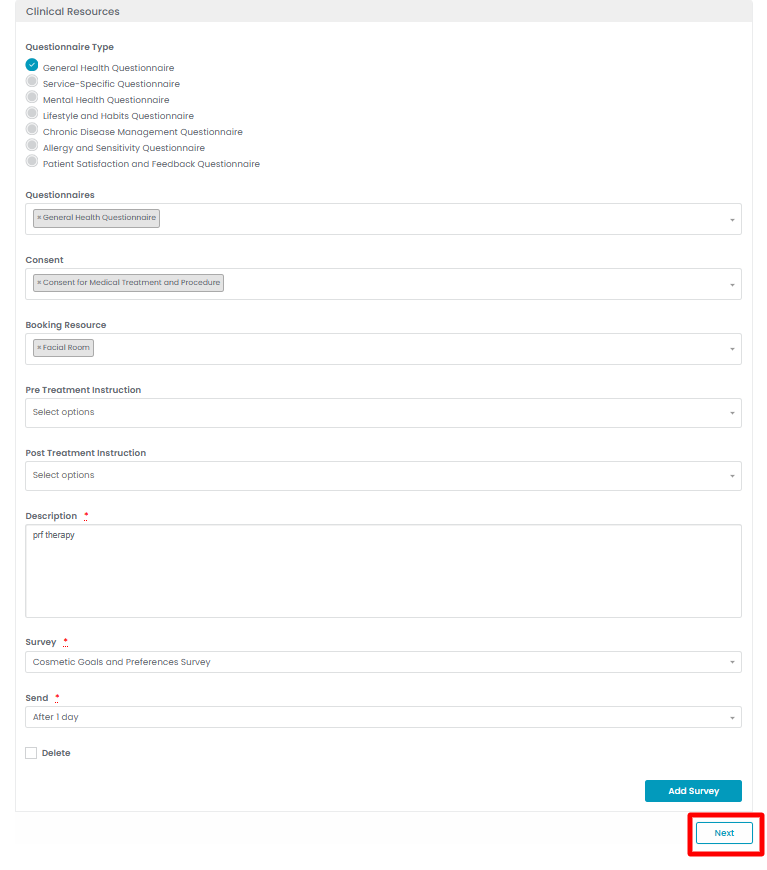
- In Step 2 of creating or updating a service, selecting a questionnaire type will display a dropdown with relevant options. Choose the questionnaire you want to attach to the service.
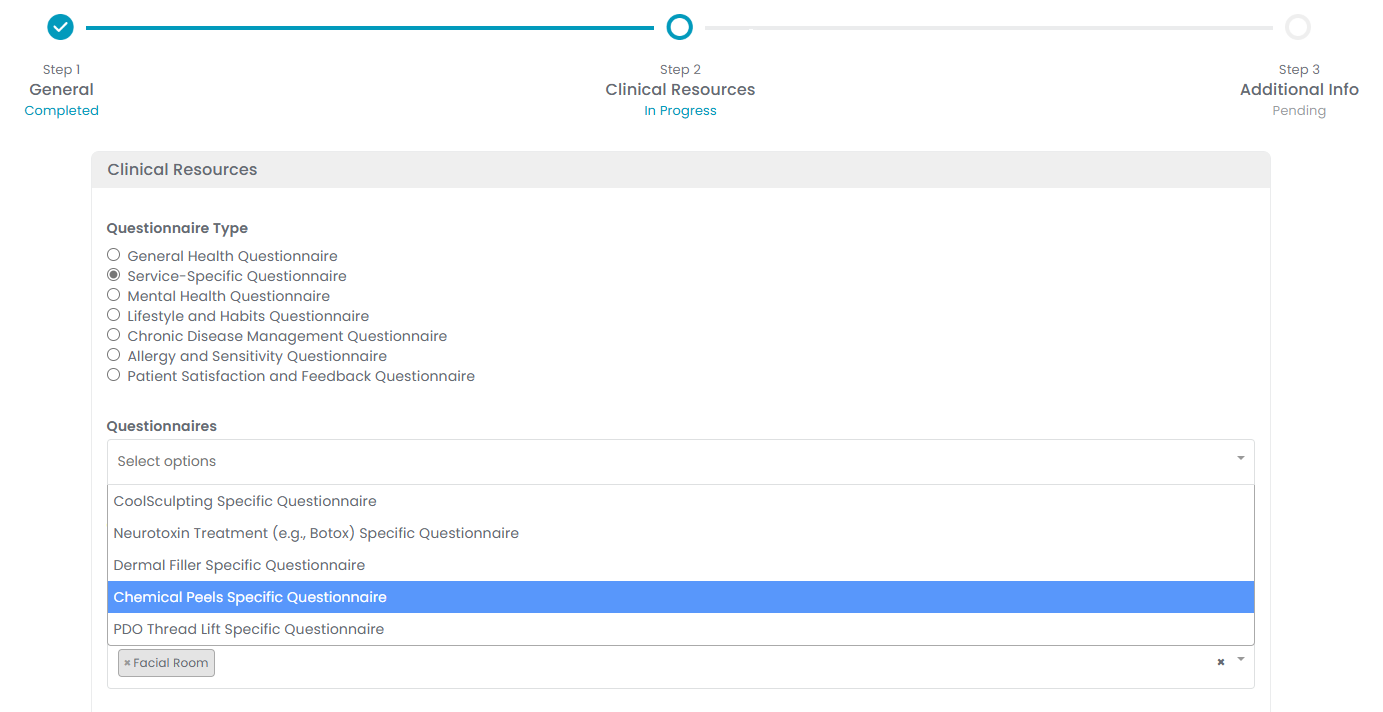
- After selecting the relevant questionnaires for the service, click “Next”. At Step 3, click “Submit” to save the updates.
The questionnaire has been successfully attached to the service!
Attach a Questionnaire to a Procedure
- In Step 5 of creating a procedure, whether health or cosmetic, attach relevant questionnaires to the procedure from the dropdown menu. The patient is required to fill these questionnaires before the procedure takes place. Then click on “Next.”

- After selecting the relevant questionnaires, the user can have the patient fill out the questionnaires by clicking on “Fill Questionnaires” if the patient has already checked in. Alternatively, the patient can log in to their patient portal and fill out the questionnaires before the procedure is performed.

- After adding the questionnaires relevant to the procedure, click “Next”.

The questionnaire has been successfully attached to the procedure!Note: For detailed navigation, refer to our “Add / Edit Service” or “Create a Cosmetic Procedure” articles.


